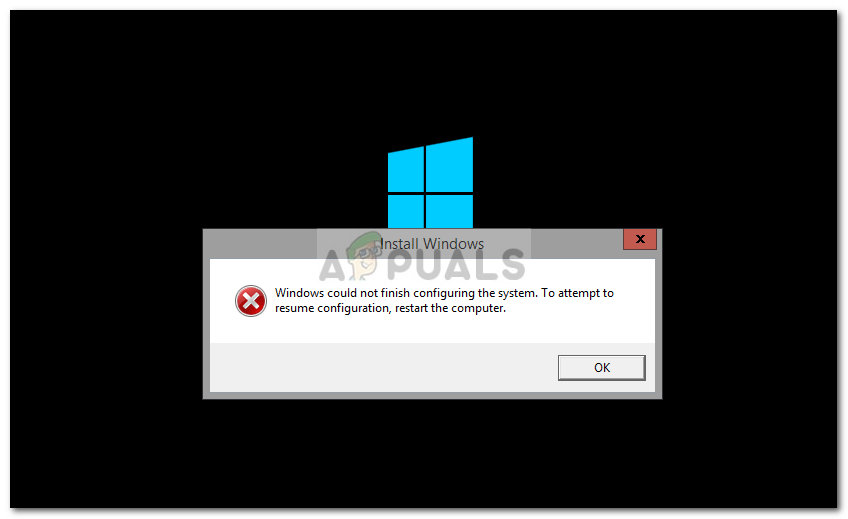
On a Windows 7 Virtual Machine (VM) the following error appears on screen after the first restart during ‘sysprep‘ phase: «Windows could not finish configuring the system. To attempt to resume configuration, restart the computer«. When you press ‘OK’, Windows restart but the same error appears again without any details. After some research on the Internet I found that this error message occurs with Windows 7 and Windows Server 2008 R2 operating systems if the original operating system contains a registry key that is larger than 8 kilobytes (KB). A Hotfix for this problem is available from Microsoft here and must be applied before executing the ‘sysprep’ command. The hotfix is already included on Windows 7 SP1 systems.
I write this article, because – in my case – I had not applied the available hotfix before «syspreping» the VM machine, but also because I discovered that the «Windows could not finish configuring the system» error can also occur in a clean install of Windows 7 OS.

How to resolve the «Windows could not finish configuring the system» error.
When the «Windows could not finish configuring the system» appears on your screen:
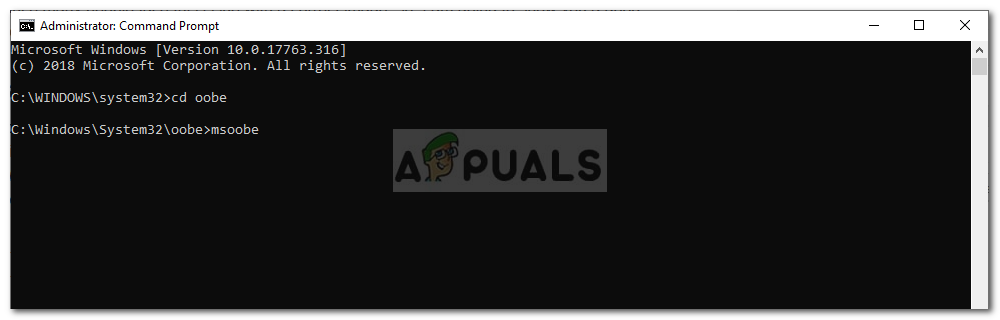
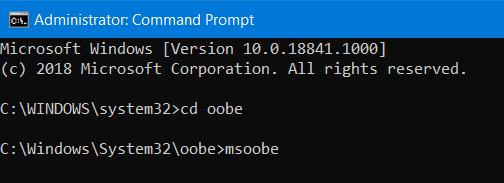
1. Hold down the SHIFT key and press F10 (SHIFT + F10).

2. At command prompt type: cd oobe (& press Enter)

3. Then type: msoobe (& press Enter)

4. At ‘Set Up Windows’ first screen, choose your Country/ Region, Time and currency & Keyboard layout settings & press Next.

5. Type a Username and a Computer Name & press Next.

6. Type a password (if you want) and press Next.

7. Accept the License Terms & Press Next.

8. Select how you want Windows to protect your computer. (e.g. «Use recommended settings»)

9. Set the Time and Date settings & press Next.

10. Now wait until Windows finalizes your settings.

11. Finally Restart your computer. *
* If after pressing Restart nothing happens, then close all open windows or perform a cold Shutdown by pressing the Power key for several seconds.

Now Windows should boot normally.
You ‘re done!
If this article was useful for you, please consider supporting us by making a donation. Even $1 can a make a huge difference for us in our effort to continue to help others while keeping this site free:

If you want to stay constantly protected from malware threats, existing and future ones, we recommend that you install Malwarebytes Anti-Malware PRO by clicking below (we
do earn a commision from sales generated from this link, but at no additional cost to you. We have experience with this software and we recommend it because it is helpful and useful):
Full household PC Protection — Protect up to 3 PCs with NEW Malwarebytes Anti-Malware Premium!
The error ‘Windows could not finish configuring the system‘ comes when you make an updated image of Windows 10 and sysprep it. After that, when you reboot your computer, you will be stuck in a reboot loop and this error will keep popping up on your screen.
Before we begin giving you the solution to this problem, it would be better if making an image of Windows 10 and sysprepping is discussed.
What exactly is sysprepping?
Sysprepping is a way of deploying Microsoft Windows image to other computers using the utility called Sysprep. Sysprep is a tool developed by Microsoft which simplifies the deployment process of Microsoft Windows to many other computers at a time. What it does is that, it removes the computer specific information from a Windows image and after which it can be installed or deployed to other computers easily.
So for sysprepping, you have to make an image of your Windows first on your current system. After that, you need to use the Sysprep tool to make it ready for being installed on other machines.
Now, let’s move to this error which occurs when you sysprep a Windows 10 image and reboot your computer.
What causes the ‘Windows Could not Finish Configuring the System’ Error Message on Windows 10?
The error message is said to cause due to the following factor —
- Missing Image Files: Well, the reason behind it is that the image you made of your Windows had some missing files. So when you Sysprep that image, it’s going to showing you this error. Even though the problem can be caused by not following the right steps to create the image of Windows 10, but if that’s not the case, then it’s likely you have had some missing files on your system on which you were making the image.
Since many people face this issue with a correct image, so I am going to show you a good workaround which is going to do the trick for you.
Solution 1: Using msoobe
You will be surprised to know that the solution to this particular error is a rather easy one. What you will have to do is use a utility by the name msoobe which is basically used for the activation of Windows operating system. You can easily bypass the error message by using the utility. Here’s how to do it:
- When you face the error message, just hold the Shift key and press F10.
- Afterward, in a command prompt, type in the following command which will change your directory:
cd oobe
- Afterward, you will have to execute a file by the name msoobe, to do this, just enter the name of the file:
msoobe

Executing msoobe - This should bring up the Windows Setup. Select all your settings by following the screen.
- Once done, wait for your system to finalize the settings.
- Lastly, what you have to do is restart your system and that’s it. Your problem should be fixed now.
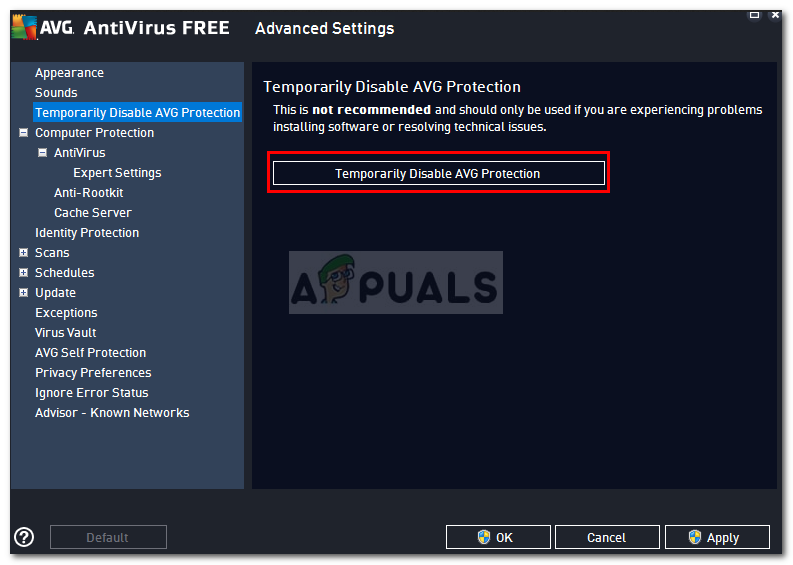
Solution 2: Disable Third-Party Antivirus
Well, if you are still in the midst of the error message even after trying the above workaround, there’s one more thing you can do. If you are deploying the operating system on a Virtual Machine or anything else, what you can do is disable the third-party antivirus and then remake the Sysprep image file.
Re-adding the Windows 10 setup files will probably solve the issue as it is often due to missing files.

Kevin Arrows
Kevin is a dynamic and self-motivated information technology professional, with a Thorough knowledge of all facets pertaining to network infrastructure design, implementation and administration. Superior record of delivering simultaneous large-scale mission critical projects on time and under budget.

UPDATE!
After speaking with someone one of my professors, I found that if you have syspreped the same image several times, it will not work. Although he did not have an exact number of times he stated he stopped after 3 syspreps, and believes the limit is 5. If you have syspreped, installed and then syspreped again several times, this solution will not work, nor will any other. This may be the case for those of you who responded it was not working for you. If this doesn’t work and you have sysprepped more than a few times, try this article.
UPDATE 2: This is also a viable solution for Windows 8(.1) systems.
UPDATE 3 (January 2016): Reported to work on Windows 10 after sysprep.
If the below article does not provide a solution, please browse the comments as there have been several user submitted solutions that may help.
Over the past week I have been re-imaging the 13 computers in our public computer centre at work, and I came across a small problem. In the past, and by past I mean pre-college, I used to use a program called Norton Ghost to create images of my home system so that at a moments notice I could re-image my system and have all my applications installed without the hassle of re-installing everything manually, but those days are gone as Norton Ghost transformed into something entirely different. These days it is said that it is much easier to use Windows Automated Installation Kit (WAIK for short) however it is not without its issues, like most Microsoft products.
The issue arose after I did a sysprep to the original system and tried to reboot the system after I created my .wim image. Upon first boot I got a wonderful message on my screen that read:
Windows could not finish configuring the system. To attempt resume configuration, restart the computer
And after several unsuccessful reboots, the error message still returned, and always when it tried to start the services.
I searched several forums on the issue and tried every “correct answer” response I could find, to no avail.
One such “correct answer” was to remove the system from the domain before running sysprep, but as the systems I am dealing with are in a workgroup, this answer was obviously not correct for my situation. Another possible “correct answer” was to disable Avira Antivirus 32bit, this is close to a possible solution because I am running Avira on these systems, however I am running the 64bit version, and this is reported as having no issue at all on the processes, so again, this correct answer was a false positive (who votes that these are correct anyways?)
After trying several more “correct answers” I finally found the one true CORRECT ANSWER:
Somehow we managed to boot the machine.
Booting in Safe mode caused the same error message, but after it it did not reboot and continue to install drivers etc… The next normal boot was successful.First thing to do now is a backup. We are so lucky.
Daniel AlbrechtIT Management & Coaching
Indeed booting into safe mode first, waiting for the message to appear, and then rebooting normally has fixed the issue, and has done so 10 times thus far.
Here is the forum where I actually found the correct answer, and its not the one listed as the “ACTUAL SOLUTION”, in fact is about a quarter of the way down the page with a bLack check-mark, not Blue one (what ever that means).
So thanks to Daniel, everything has been moving smoothly and I am able to get a system fully up and running in about an hour and a half instead of the usual five to six hours it takes to install all the software and configure the system manually.
Update from a commenter
A commenter, Bobby, found a solution for those running Server 2012 (should work for Windows 8(.1) as well).
If I may just add to help someone else who might be in my position. I syspreped a Server running Windows 2012. It fell in to the exact same problem you’ve described here. Problem is this Server was running in a Hyper-V VM, and wouldn’t give me the chance to apply F8 for Safe Mode on bootup. So when the error message came up, I did the following instead:
* Pressed Shift + F10 to get the command prompt.
* Run the command: ‘bcdedit /set {default} safeboot minimal’.
* Rebooted.
* When error message about safe mode subsequently came up after reboot, pressed Shift + F10 again.
* Ran the command: ‘bcdedit /deletevalue safeboot’.
* Rebooted.
Net result was it was then sorted, exactly as you described. It could well be my ignorance, and there may be a better way to get F8 to the VM, but certainly my attempts via Remote Desktop didn’t work. The above extra bit did the trick!
Post Views: 288
Download PC Repair Tool to quickly find & fix Windows errors automatically
While installing or setting up various editions and versions of Windows operating systems, the computer is prone to be throwing various errors. One such error is Windows could not finish configuring the system error. The full error is-
Windows could not finish configuring the system. To attempt to resume configuration, restart the computer.
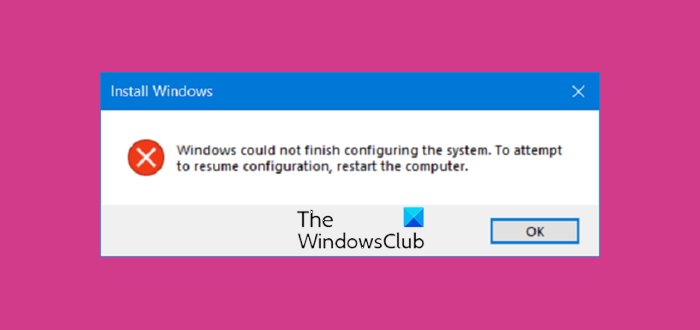
This error occurs on Windows 11/10/8/7 and Windows Server operating systems and pops up during the sysprep phase. It is caused due to the operating system containing a Registry key larger than 8 kilobytes.
To get rid of Windows could not finish configuring the system error, we have only a one fix, and that has been proven to be highly effective.
While running Windows Setup, when the message appears on your screen, press Shift+F10 to open the Command Prompt.
Run Command Prompt as Administrator and execute the following commands one after the other:
cd oobe
msoobe
This will open the oobe directory and then boot into the Windows operating system OOBE or Out-Of-Box-Experience. It will bring you down to the Set up Windows screen.
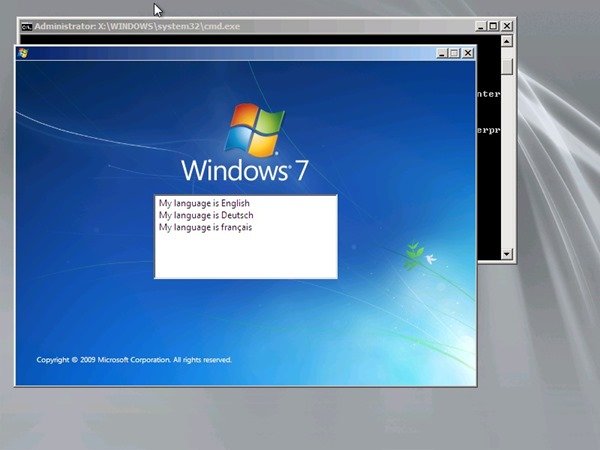
You will have to choose your Country or Region, Time and currency, Keyboard layout.
Once done, select Next.
Now, you will have to go with the flow in setting up your computer by entering your User name, password, acknowledgment to the License terms, set up Windows Updates (older than Windows 10), set up Date and Time, etc.
Finally, when you are done, you need to reboot your computer.
If it does not reboot, you need to Press and hold the Power button on your CPU until it goes off too. This is called as performing a Cold Boot.
Turn on your computer normally now and check if that fixed your issue.
Read: How to find Windows Update Size using PowerShell.

Ayush has been a Windows enthusiast since the day he got his first PC with Windows 98SE. He is an active Windows Insider since Day 1 and has been a Windows Insider MVP.
- Remove From My Forums
-
Question
-
Not sure what happened, but I keep getting the error:
Windows could not finish configuring the system. To attempt to resume configuration, restart the computer.I tried to boot in safe mode and it gave me the same error.
Any thoughts on what to try or is this a lost cause?
I can’t remember all the stats of the computer since it is a backup one, but it does surpass all the requirements.
Answers
-
After formatting the hard drive and re-installing everything I was able
to get past my issue. My guess is that some file was left from the
random files previously on the HD and win7 wasn’t able to format it
correctly.In case anyone else needs…I used GParted to format the drive.
-
Marked as answer by
Tuesday, January 13, 2009 4:13 AM
-
Marked as answer by
Updated January 2023: Stop getting error messages and slow down your system with our optimization tool. Get it now at this link
- Download and install the repair tool here.
- Let it scan your computer.
- The tool will then repair your computer.
If you view a screenshot of a virtual machine using startup diagnostics, the screenshot displays a Windows installation error when services are started during Windows installation. On error, the following message is displayed:

Windows cannot complete system configuration. Restart your computer to proceed with the configuration. Installer starts services
This error occurs when the operating system is unable to complete the Sysprep process. This error occurs when you try to start a generic virtual machine for the first time. If this problem occurs, rebuild the generic image because the image is in an unmountable state and cannot be restored.
What is sysprepping?

Sysprepping allows you to deploy Microsoft Windows images to other computers using the Sysprep utility. Sysprep is a tool developed by Microsoft that simplifies the process of deploying Microsoft Windows to many other computers at the same time. It removes computer-related information from a Windows image, and then can be easily installed or deployed to other computers.
January 2023 Update:
You can now prevent PC problems by using this tool, such as protecting you against file loss and malware. Additionally it is a great way to optimize your computer for maximum performance.
The program fixes common errors that might occur on Windows systems with ease — no need for hours of troubleshooting when you have the perfect solution at your fingertips:
- Step 1 : Download PC Repair & Optimizer Tool (Windows 10, 8, 7, XP, Vista – Microsoft Gold Certified).
- Step 2 : Click “Start Scan” to find Windows registry issues that could be causing PC problems.
- Step 3 : Click “Repair All” to fix all issues.

So, for Sysprepping, you need to first create an image of your Windows on your current system. After that, you need to use the Sysprep tool to prepare it for installation on other computers.
Now, let’s move on to this error that occurs when you sysprepen a Windows 10 image and restart your computer.
Disable Enable protection of data folder
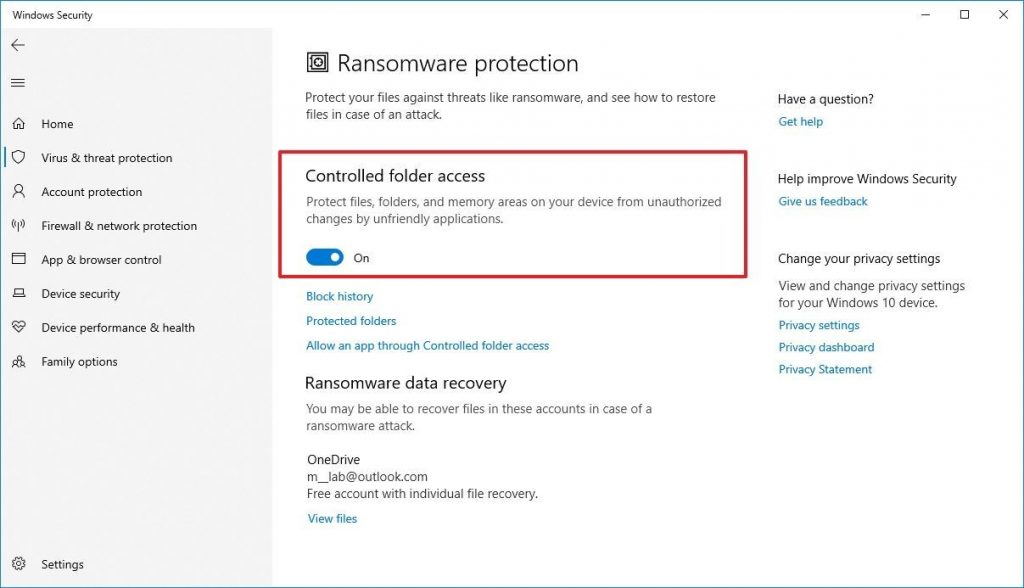
Disable the data folder protection setting in the MAR policy, run Sysprep, and then re-enable the setting when Sysprep finishes.
- Open ePO and go to MAR strategy.
- On the General tab, clear the Activate data folder protection check box.
- Send wake up to the agent on the endpoint.
- The policy change is applied to the endpoint.
- Run Sysprep and wait for it to complete.
- Re-enable data folder protection in the MAR policy and send the agent wake-up on the endpoint.
Use the Microsoft patch
The bug can be fixed with the patch http://support.microsoft.com/kb/981542/. How to get on a laptop?
- If error: Windows cannot complete system configuration. Restart your computer to proceed with the configuration. Press SHIFT-F10. Don’t click OK.
- At this point, you can do almost anything.
- I advise to start services.msc and start all services marked: Automatic.
- Run compmgmt.msc, activate an admin user or create an additional user with admin rights
- Run explorer.exe
- Now you can change user
- Login with administrator and run the fix
Expert Tip: This repair tool scans the repositories and replaces corrupt or missing files if none of these methods have worked. It works well in most cases where the problem is due to system corruption. This tool will also optimize your system to maximize performance. It can be downloaded by Clicking Here

CCNA, Web Developer, PC Troubleshooter
I am a computer enthusiast and a practicing IT Professional. I have years of experience behind me in computer programming, hardware troubleshooting and repair. I specialise in Web Development and Database Design. I also have a CCNA certification for Network Design and Troubleshooting.
Post Views: 180
I’ve been racking my brains over this one for the past couple of days so I thought I’d chalk up my findings here in the hope of saving the headache for somebody else.
I came across this very unexpected error message when my VM rebooted right after the Apply Operating System action while running a task sequence to install a custom Windows 10 image with an answer file:

(I was too busy troubleshooting the problem and didn’t think of taking a screenshot until it was too late. I had to Google the error message to find this image for the purposes of this post.)
Long story short, the clue to resolving this lies in the setuperr.log file in the C:WindowsPantherUnattendGC directory. Since I was using a VM I simply attached the .vhdx disk using Disk Management and browsed to this directory to take a look. This is what the contents of the setuperr.log looked like in my case:

[Shell Unattend] ProductKey: ‘XXXXX-XXXXX-XXXXX-XXXXX-XXXXX’ installation failed (0xc004f050)
I ended up having to remove the entire <ProductKey></ProductKey> entry from the unattend.xml answer file to resolve this problem. Simply removing the product key within the opening and closing brackets didn’t cut it. I had to remove the entire line from the answer file and add the product key to the task sequence instead (in the Apply Windows Settings step).
[windeploy.exe] Failure occured during online installation. Online installation cannot complete at this time.; hr = 0x80004005
The resolution to this one is plain weird. If you have a space in the value within the <RegisteredOrganization> </RegisteredOrganization> and <RegisteredOwner></RegisteredOwner> entries in the unattend.xml file Setup will stop in its tracks when attempting to apply the answer file after the Apply Operating System action. I ended up having to remove “Me, Myself and IT” and settling with “EMENEYE” instead.
[windeploy.exe] Setup.exe failed, returning exit code [0x1f]
This one must’ve been related to one of the above error messages since after having made the above changes to the answer file I had no other problems.
Your mileage may vary but this is the process I went through to resolving this problem. I hope someone somewhere finds this useful.