Symptoms
When you try to install a program in Windows 7 or Windows Vista, you receive the following error message:
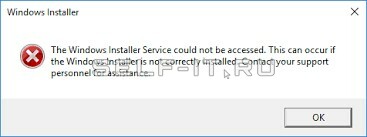
«The Windows Installer Service could not be accessed. This can occur if the Windows Installer is not correctly installed. Contact your support personnel for assistance.»
Resolution
To resolve this issue, use Method 1. If Method 1 does not resolve the issue, use the next method that is listed until you resolve the issue.
Important This section, method, or task contains steps that tell you how to modify the registry. However, serious problems might occur if you modify the registry incorrectly. Therefore, make sure that you follow these steps carefully. For added protection, back up the registry before you modify it. Then, you can restore the registry if a problem occurs. For more information about how to back up and restore the registry, click the following article number to view the article in the Microsoft Knowledge Base: 322756 How to back up and restore the registry in Windows
To reset the Windows Installer Service settings in the registry, create a registry file by using Notepad. Then, run the file to update the registry key.
To do this, follow these steps:
-
Click Start, and then type Notepad in the Search box.
-
Under the Programs heading, click Notepad.exe.
-
Copy the following text, and then paste it into a notepad:
Windows Registry Editor Version 5.00

[HKEY_LOCAL_MACHINESYSTEMCurrentControlSetServicesmsiserver]
"DisplayName"="@%SystemRoot%\system32\msimsg.dll,-27"
"ImagePath"=hex(2):25,00,73,00,79,00,73,00,74,00,65,00,6d,00,72,00,6f,00,6f,00,
  74,00,25,00,5c,00,73,00,79,00,73,00,74,00,65,00,6d,00,33,00,32,00,5c,00,6d,
  00,73,00,69,00,65,00,78,00,65,00,63,00,20,00,2f,00,56,00,00,00
"Description"="@%SystemRoot%\system32\msimsg.dll,-32"
"ObjectName"="LocalSystem"
"ErrorControl"=dword:00000001
"Start"=dword:00000003
"Type"=dword:00000010
"DependOnService"=hex(7):72,00,70,00,63,00,73,00,73,00,00,00,00,00
"ServiceSidType"=dword:00000001
"RequiredPrivileges"=hex(7):53,00,65,00,54,00,63,00,62,00,50,00,72,00,69,00,76,
  00,69,00,6c,00,65,00,67,00,65,00,00,00,53,00,65,00,43,00,72,00,65,00,61,00,
  74,00,65,00,50,00,61,00,67,00,65,00,66,00,69,00,6c,00,65,00,50,00,72,00,69,
  00,76,00,69,00,6c,00,65,00,67,00,65,00,00,00,53,00,65,00,4c,00,6f,00,63,00,
  6b,00,4d,00,65,00,6d,00,6f,00,72,00,79,00,50,00,72,00,69,00,76,00,69,00,6c,
  00,65,00,67,00,65,00,00,00,53,00,65,00,49,00,6e,00,63,00,72,00,65,00,61,00,
  73,00,65,00,42,00,61,00,73,00,65,00,50,00,72,00,69,00,6f,00,72,00,69,00,74,
  00,79,00,50,00,72,00,69,00,76,00,69,00,6c,00,65,00,67,00,65,00,00,00,53,00,
  65,00,43,00,72,00,65,00,61,00,74,00,65,00,50,00,65,00,72,00,6d,00,61,00,6e,
  00,65,00,6e,00,74,00,50,00,72,00,69,00,76,00,69,00,6c,00,65,00,67,00,65,00,
  00,00,53,00,65,00,41,00,75,00,64,00,69,00,74,00,50,00,72,00,69,00,76,00,69,
  00,6c,00,65,00,67,00,65,00,00,00,53,00,65,00,53,00,65,00,63,00,75,00,72,00,
  69,00,74,00,79,00,50,00,72,00,69,00,76,00,69,00,6c,00,65,00,67,00,65,00,00,
  00,53,00,65,00,43,00,68,00,61,00,6e,00,67,00,65,00,4e,00,6f,00,74,00,69,00,
  66,00,79,00,50,00,72,00,69,00,76,00,69,00,6c,00,65,00,67,00,65,00,00,00,53,
  00,65,00,50,00,72,00,6f,00,66,00,69,00,6c,00,65,00,53,00,69,00,6e,00,67,00,
  6c,00,65,00,50,00,72,00,6f,00,63,00,65,00,73,00,73,00,50,00,72,00,69,00,76,
  00,69,00,6c,00,65,00,67,00,65,00,00,00,53,00,65,00,49,00,6d,00,70,00,65,00,
  72,00,73,00,6f,00,6e,00,61,00,74,00,65,00,50,00,72,00,69,00,76,00,69,00,6c,
  00,65,00,67,00,65,00,00,00,53,00,65,00,43,00,72,00,65,00,61,00,74,00,65,00,
  47,00,6c,00,6f,00,62,00,61,00,6c,00,50,00,72,00,69,00,76,00,69,00,6c,00,65,
  00,67,00,65,00,00,00,53,00,65,00,41,00,73,00,73,00,69,00,67,00,6e,00,50,00,
  72,00,69,00,6d,00,61,00,72,00,79,00,54,00,6f,00,6b,00,65,00,6e,00,50,00,72,
  00,69,00,76,00,69,00,6c,00,65,00,67,00,65,00,00,00,53,00,65,00,52,00,65,00,
  73,00,74,00,6f,00,72,00,65,00,50,00,72,00,69,00,76,00,69,00,6c,00,65,00,67,
  00,65,00,00,00,53,00,65,00,49,00,6e,00,63,00,72,00,65,00,61,00,73,00,65,00,
  51,00,75,00,6f,00,74,00,61,00,50,00,72,00,69,00,76,00,69,00,6c,00,65,00,67,
  00,65,00,00,00,53,00,65,00,53,00,68,00,75,00,74,00,64,00,6f,00,77,00,6e,00,
  50,00,72,00,69,00,76,00,69,00,6c,00,65,00,67,00,65,00,00,00,53,00,65,00,54,
  00,61,00,6b,00,65,00,4f,00,77,00,6e,00,65,00,72,00,73,00,68,00,69,00,70,00,
  50,00,72,00,69,00,76,00,69,00,6c,00,65,00,67,00,65,00,00,00,53,00,65,00,4c,
  00,6f,00,61,00,64,00,44,00,72,00,69,00,76,00,65,00,72,00,50,00,72,00,69,00,
  76,00,69,00,6c,00,65,00,67,00,65,00,00,00,00,00
"FailureActions"=hex:84,03,00,00,00,00,00,00,00,00,00,00,03,00,00,00,14,00,00,
  00,01,00,00,00,c0,d4,01,00,01,00,00,00,e0,93,04,00,00,00,00,00,00,00,00,00

[HKEY_LOCAL_MACHINESYSTEMCurrentControlSetServicesmsiserverEnum]
"0"="Root\LEGACY_MSISERVER\0000"
"Count"=dword:00000001
"NextInstance"=dword:00000001
-
Click File, click Save As, and then name the file Msirepair.reg.
-
In the Save as type box, click All Files (*.*).
-
In the Save in box, click Desktop, and then click Save.
-
On the File menu, click Exit to close notepad.
-
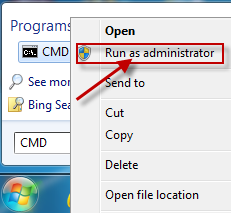
On the Desktop, right-click Msirepair.reg, and then click Run as administrator. If you are prompted to enter an administrator password or provide confirmation, type the password, or click Continue.
-
Click Yes when you are prompted to install the registry keys.
-
Restart the installation process for the program that you want to install.
To start the Windows Installer Service, follow these steps:
-
Click Start, and then type CMD in the Search programs and files dialog box.

-
Right-click cmd.exe, and then click Run as Administrator.
-
Type net start MSIServer, and then press ENTER.
-
Restart the installation process for the program that you want to install.

To check that the Windows Installer Service is running, follow these steps:
-
Click Start, type services.msc in the Search box, and then click Services under the Programs heading.
-
In the Services (Local) list, right-click Windows Installer, and then click Properties.
-
In the Startup type drop-down list, check that the value is set to Manual.
-
The Windows Installer Service is running if the Service status: entryis set to Running.
If an earlier version of the program that you want to install is already installed on the computer, follow these steps:
-
Click Start, click Control Panel, and then click Uninstall a Program under Programs.
-
Select the program in the list that you want to install.
-
Click Uninstall (or Uninstall/Change in Windows Vista), and then follow the instructions or prompts to uninstall the application.
-
Restart the computer.
-
Restart the installation process for the program that you want to install.
This issue occurs when one or more of the following conditions are true:
-
You install or remove a program that uses the Microsoft Installer Service before you try to install the program on your computer.
-
The Windows Installer Service is not running.
-
The Windows Installer registry settings are corrupted or configured incorrectly.
For more information about this issue in Windows XP and Windows Server 2003, click the following number to view the article in the Microsoft Knowledge Base:
315346 Error message when you try to add or remove a program on a computer that is running Windows XP or Windows Server 2003: «The Windows Installer service could not be accessed»
Обновлено 16.12.2016
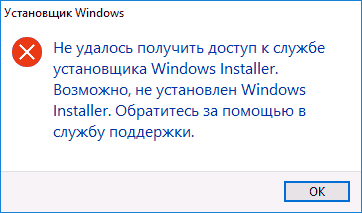
Добрый день уважаемые читатели блога и гости канала, в прошлый раз мы с вами победили ошибку: запуск этого устройства невозможен. (код 10), там у нас были проблемы с установкой оборудования, сегодня же разберем проблему с установкой или удалением программы в десятке. Ситуация такая у вас есть ОС windows 10 или предыдущая редакция, вы пытаетесь установить, например обновление Skype или же удалить какую-то программу с вашего ПК, но в процессе получаете ошибка windows 1719: windows installer service could not be accessed, и в итоге установка или удаление завершается неудачно. Ниже я вам расскажу причину данной проблемы, и мы ее победим на сто процентов.
Что такое Windows installer
Windows installer это специальная служба операционной системы Windows, благодаря которой вы можете устанавливать или удалять приложения в ОС.
Причины ошибки windows 1719
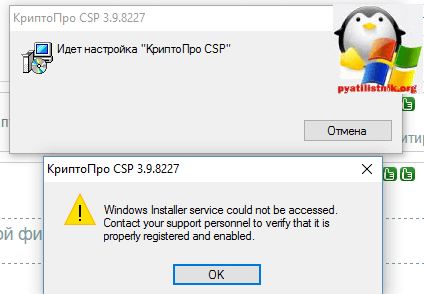
Для начала нужно понять, от чего лечить систему, я вам уже озвучил выше, что windows installer service could not be accessed я получал при установке skype и при удалении программы КриптоПРО, но могу точно вам сказать, что выскочит она везде и при любой попытке инсталляции в Windows 10. Вот как это выглядит.
windows installer service could not be accessed. Contact your support personnel to verify that it is property registered and enabled
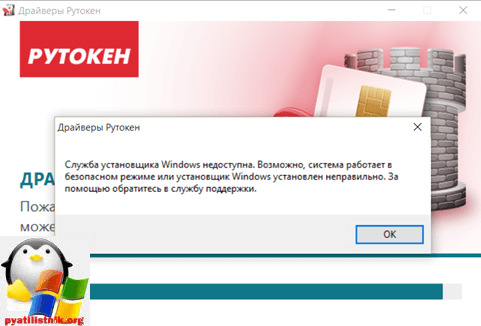
Еще ошибка 1719 может иметь формулировку Служба установщика Windows недоступна в Windows 10, я такое ловил при установке драйверов рутокен. Нечто похожее мы с вами уже видели, когда Служба установщика Windows недоступна в безопасном режиме
В любом случае проблему устранить нужно, так как мы потеряли возможность, что либо ставить или удалять в Windows 10.
Методы решения ошибки windows 1719
И так давайте разбираться как нам с вами устранить windows installer service could not be accessed. Contact your support personnel to verify that it is property registered and enabled и Служба установщика Windows недоступна в Windows 10.
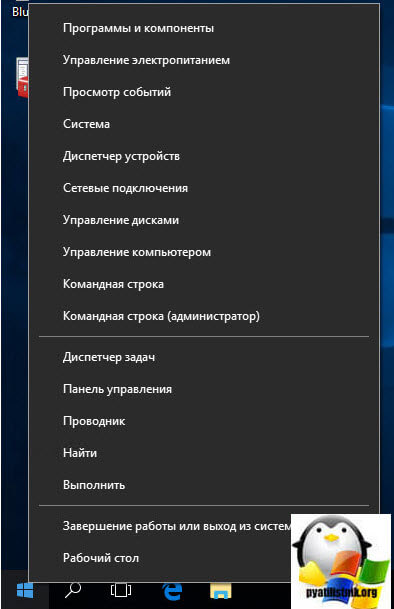
- Включение службы установщика Windows в ручную > да для начала попробуйте удостовериться, что сервис windows installer включен. Сделать это просто нажимаем клавиши WIN+R и вводим services.msc (другие команды меню выполнить читайте по ссылке).
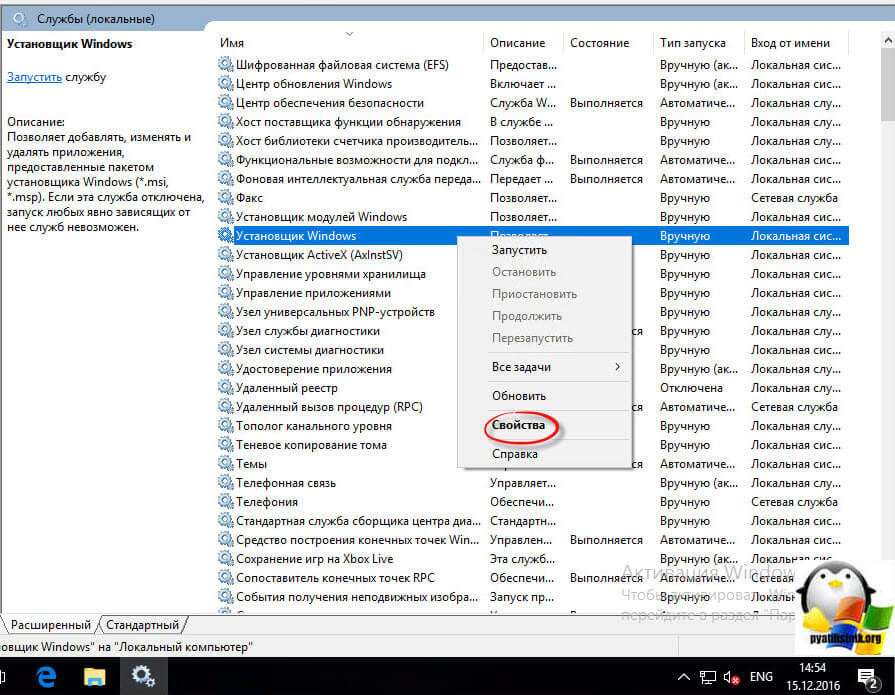
Находим службу Установщик Winows (Windows Installer), щелкаем по ней правым кликом мыши и выбираем из контекстного меню пункт свойства.
Ее принудительный запуск, в некоторых случаях поможет вам избежать ошибку 1719 в windows 10.
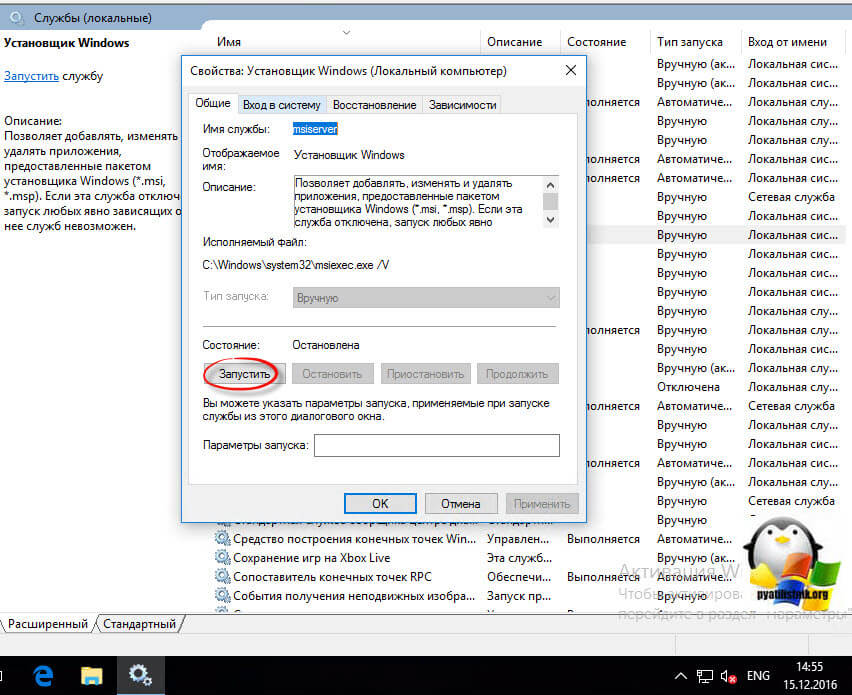
В итоге вы должны получить запущенный сервис, после чего смело закрываем оснастку и пробуем проделать процедуру установки или удаления нужно программы, у меня это КриптоПРО. В моем случае это не помогло, идем дальше.
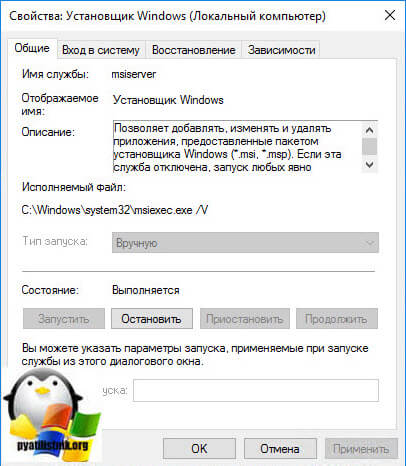
Если вы внимательный пользователь, то можете обратить внимание, что изменить тип запуска у службы у вас не получиться, это еще идет от времен Windows 8.1, а вот в семерке поменять можно, ради эксперимента выставите в ней автоматический тип запуска и перезагрузитесь, проверьте отсутствие ошибки 1719.
- Итак, если первый метод вам не помог и у вас выскакивает Ошибка 1719. «Не удалось получить доступ к службе установщика Windows», то попробуем произвести процедуру восстановления компонентов системы, для этого откройте командную строку от имени администратора
и введите:
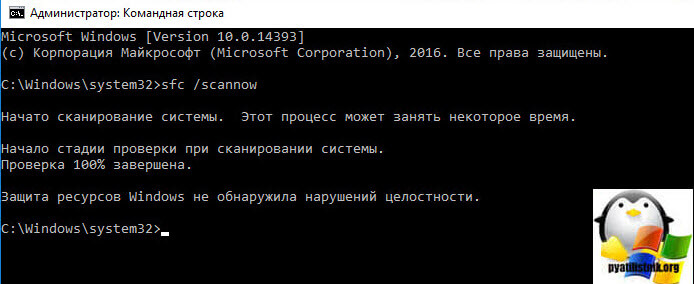
Если вы получите поврежденные компоненты, то ваша система постарается их восстановить автоматически.
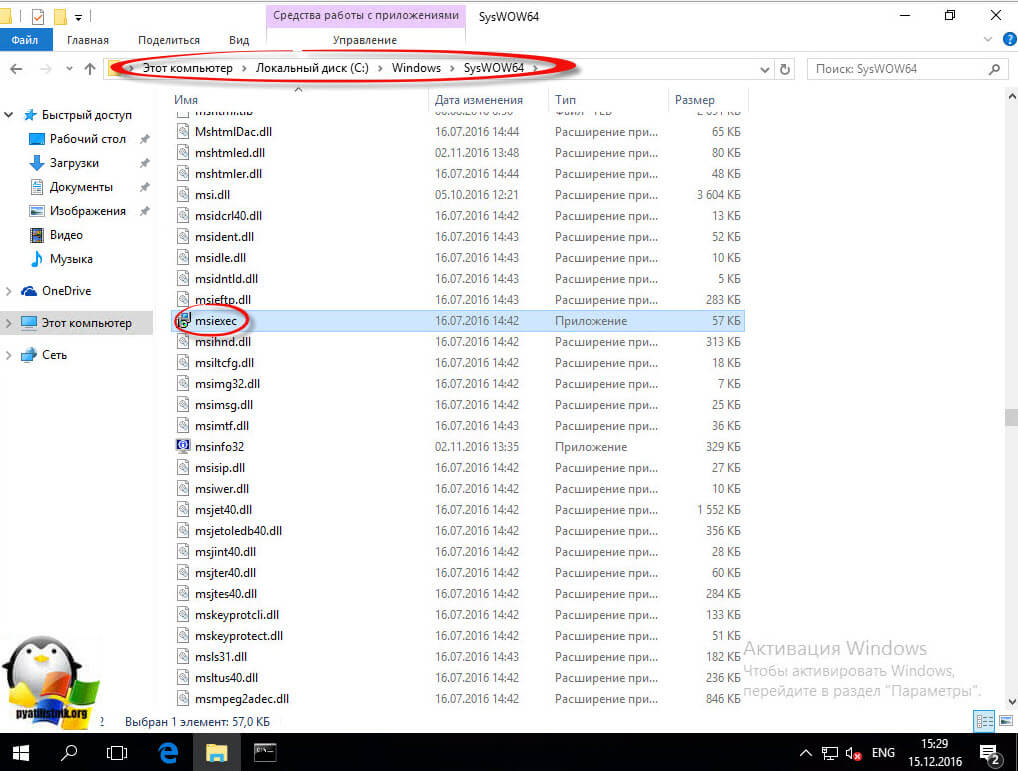
- Если ошибок при сканировании компонентов вы не обнаружили, то проверьте присутствие файла msiexec.exe по путям, описанным ниже, если его там не будет, то вы логично будите постоянно получать: error 1719 windows installer service could not be accessed. Если файла там нет, то скопируйте его с другой системы, либо можете просто переустановить Windows Installer, он спокойно скачивается в интернете.
Для 32-х битных систем > c:WindowsSystem32msiexec.exe, для 64-х битных систем > c:WindowsSysWOW64msiexec.exe
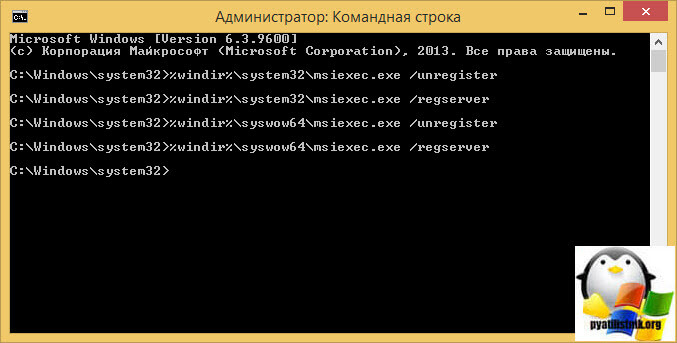
- Иногда бывают случаи, что сам файл msiexec.exe находится в нужно расположении, но все равно получаете ошибку windows installer service could not be accessed, и причина в том, что библиотека не зарегистрирована. Давайте я покажу как это сделать. Снова запускаете командную строку от имени администратора, это обязательно и делаете вот, что:
Для 32-х битных систем:
msiexec /unregister
msiexec /register
Для 64-х битных систем:
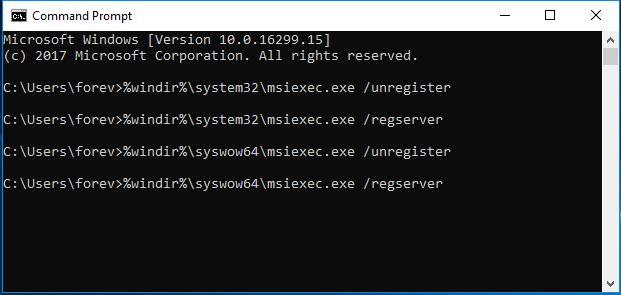
%windir%system32msiexec.exe /unregister
%windir%system32msiexec.exe /regserver
%windir%syswow64msiexec.exe /unregister
%windir%syswow64msiexec.exe /regserver
После ручной регистрации сервиса Windows Installer, можете проверять исправилась ли ошибка: error 1719 windows installer service could not be accessed, мне к сожалению, не помогло, но я не расстроился и стал искать дальше.
- Что еще может помочь если вы получаете, что Служба установщика Windows недоступна или windows installer service could not be accessed, как ни странно, при попытке удалить КриптоПРО, он сам может выступать проблемой как для себя, так и для других программ, ломая службу msiexec.exe. Решением, является правка одного ключа реестра, я покажу, что именно нужно исправить и как обычно по традиции выложу ссылку на готовый ключ, чтобы вам было удобно.
Кстати если кто не в курсе, но КриптоПРО у меня уже вызывал другие ошибки, примером может служить ошибка 8024410, когда не устанавливались обновления
Нажимаем WIN+R и вводим regedit, у вас откроется редактор реестра.
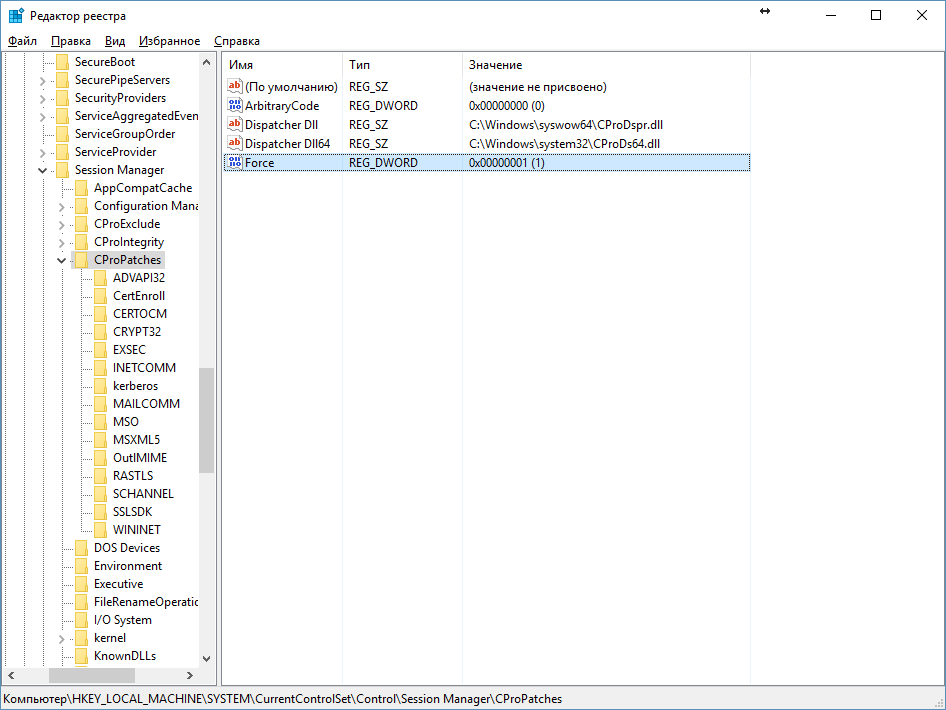
Переходим в раздел реестра и исправляем ключ Force с 0 на 1.
HKEY_LOCAL_MACHINESYSTEMCurrentControlSetControlSession ManagerCProPatchesForce=1
После чего перезагружаемся, и о чудо мне это помогло я больше не увидел ни error 1719 windows installer service could not be accessed, ни Служба установщика Windows недоступна, я спокойно смог удалить программу КриптоПРО и больше этой проблемы у меня не возникало, надеюсь вам помогла данная статья и вы смогли устранить очередной глюк Windows 10.
 При установке программ и компонентов Windows, распространяемых в виде установщика с расширением .MSI вы можете столкнуться с ошибкой «Не удалось получить доступ к службе установщика Windows Installer». С проблемой можно столкнуться в Windows 10, 8 и Windows 7.
В этой инструкции подробно о том, как исправить ошибку «Не удалось получить доступ к службе установщика Windows Installer» — представлено несколько способов, начиная с более простых и часто более эффективных и заканчивая более сложными.
Примечание: прежде чем приступать к следующим шагам, рекомендую проверить, а есть ли на компьютере точки восстановления (панель управления — восстановление системы) и использовать их, если они в наличии. Также, если у вас отключены обновления Windows, включите их и выполните обновление системы, часто это решает проблему.
Проверка работы службы «Установщик Windows», её запуск при необходимости
Первое, что следует проверить — не отключена ли служба «Установщик Windows» по какой-либо причине.
Для этого выполните следующие простые шаги
- Нажмите клавиши Win+R на клавиатуре, введите services.msc в окно «Выполнить» и нажмите Enter.
- Откроется окно со списком служб, найдите в списке «Установщик Windows» и дважды нажмите по этой службе. Если служба отсутствует в списке, посмотрите, есть ли там Windows Installer (это одно и то же). Если же нет и её, то о решении — далее в инструкции.

- По умолчанию, тип запуска для службы должен быть установлен в положение «Вручную», а обычное состояние — «Остановлена» (она запускается только в процессе установки программ).
- Если у вас Windows 7 или 8 (8.1), а тип запуска для службы Установщик Windows установлен в «Отключено», измените на «Вручную» и примените настройки.

- Если у вас Windows 10 и тип запуска установлен «Отключена», вы можете столкнуться с тем, что изменить тип запуска в этом окне нельзя (такое может быть и в 8-ке). В этом случае выполните шаги 6-8.

- Запустите редактор реестра (Win+R, ввести regedit).
- Перейдите к разделу реестра
HKEY_LOCAL_MACHINESystemCurrentControlSetServicesmsiserver
и дважды нажмите по параметру Start в правой панели.

- Установите для него значение 3, нажмите Ок и перезагрузите компьютер.


Также, на всякий случай проверьте тип запуска службы «Удаленный вызов процедур RPC» (от него зависит работа службы установщика Windows) — он должен быть установлен в «Автоматически», а сама служба — работать. Также на работу могут влиять отключенные службы «Модуль запуска процессов DCOM-сервера» и «Сопоставитель конечных точек RPC».
В следующем разделе описывается, как вернуть службу «Установщик Windows», но, помимо этого, предложенные исправления также возвращают и параметры запуска службы по умолчанию, что может помочь в решении проблемы.
Если нет службы «Установщик Windows» или «Windows Installer» в services.msc
Иногда может оказаться, что службы «Установщик Windows» отсутствует в списке служб. В этом случае вы можете попробовать восстановить её, использовав reg-файл.
Скачать такие файлы вы можете со страниц (на странице вы найдете таблицу со списком служб, скачайте файл для Windows Installer, запустите его и подтвердите объединение с реестром, после выполнения слияния, перезагрузите компьютер):
- https://www.tenforums.com/tutorials/57567-restore-default-services-windows-10-a.html (для Windows 10)
- https://www.sevenforums.com/tutorials/236709-services-restore-default-services-windows-7-a.html (для Windows 7).
Проверьте политики службы установщика Windows
Иногда твики системы и изменение политик установщика Windows могут привести к рассматриваемой ошибки.
Если у вас Windows 10, 8 или Windows 7 Профессиональная (или Корпоративная), вы можете проверить, не были ли изменены политики установщика Windows следующим образом:
- Нажмите клавиши Win+R и введите gpedit.msc
- Перейдите к разделу Конфигурация компьютера — Административные шаблоны — Компоненты — Установщик Windows.

- Убедитесь, что для всех политик установлено «Не задана». Если это не так, дважды нажмите по политике с заданным состоянием и установите его в «Не задано».
- Проверьте политики в аналогичном разделе, но в «Конфигурация пользователя».

Если на вашем компьютере установлена домашняя редакция Windows, путь будет следующим:
- Зайдите в редактор реестра (Win+R — regedit).
- Перейдите к разделу
HKEY_LOCAL_MACHINESOFTWAREPoliciesMicrosoftWindows
и проверьте, есть ли в нем подраздел с именем Installer. Если есть — удалите его (правый клик по «папке» Installer — удалить).
- Проверьте наличие аналогичного раздела в
HKEY_CURRENT_USERSOFTWAREPoliciesMicrosoftWindows
Если приведенные способы не помогли, попробуйте восстановить работу службы установщика Windows вручную — 2-й способ в отдельной инструкции Служба установщика Windows недоступна, также обратите внимание и на 3-й вариант, он может сработать.
Ошибка 1719 — Windows installer service could not be accessed
Сегодня мы попробуем разобраться с возникновением проблем при попытке установки или удалении программ из операционных систем начиная от Windows 7 и выше.
Как правило очень часто пользователи сталкиваются с ошибкой Windows installer service could not be accessed. В журнале ошибок Windows данная проблема зачастую имеет номер 1719.
Причины появления ошибки 1719 установщика msiexec.exe
Данный вид ошибки может возникнуть из-за поврежденного системного файла msiexec.exe, который прямым образом отвечает за работоспособность службы – Установщик Windows. Поврежден же он может быть по разным причинам: это и последствия вирусной активности или возможные сбои при установке уже имеющихся программ.
Чтобы побороть данную ошибку для начала необходимо убедиться в отсутствии, казалось бы, на первый взгляд очевидных проблем.
Проверить наличие файла msiexec.exe по пути: C:WindowsSystem32
Попробовать перезапустить службу – Установщик Windows
Запустить командную строку с правами администратора и выполнить команду: sfc /scannow

Данные действия носят скорее всего “проверочный” характер и как правило не всегда помогают исправить ошибку, но, чтобы перейти непосредственно к кардинальным действиям, пользователю необходимо убедиться в отсутствии проблем на данном этапе. Если после проделанных действий сообщение об ошибке по-прежнему имеет место быть, то переходим к работам по её устранению.
Исправляем ошибку Windows Installer — Service could not be accessed в windows 7 и выше
1) Во-первых, нам необходимо попробовать зарегистрировать в системе библиотеку msiexec заново. Для этого в ранее открытой командной строке с правами администратора запускаем поочередно следующие команды:
%windir%system32msiexec.exe /unregister – команда отмены регистрации библиотеки msiexec.exe в системе
%windir%system32msiexec.exe /regserver – команда регистрации библиотеки msiexec.exe в системе заново
Для пользователей 64-х разрядных систем необходимо выполнить ещё две команды:
%windir%syswow64msiexec.exe /unregister – команда отмены регистрации библиотеки msiexec.exe в системе x64
%windir%syswow64msiexec.exe /regserver – команда регистрации библиотеки msiexec.exe в системе x64 заново
Если команды были выполнены успешны, то перезагружаем компьютер и проверяем наличие ошибки.
2) Если же проблема не пропала, то для её решения нам необходимо внести изменения в реестр, открыть который мы сможем через команду: Пуск > Выполнить > regedit
После чего откроем ветку реестра: HKEY_LOCAL_MACHINESYSTEMCurrentControlSetControlSession ManagerCProPatches и найдем ключ Force.

Кликнем по нему двойным щелчком и в свойствах поменяем значение на единицу (1). После чего перезагружаем систему.
Обычно при выполнении выше перечисленных действий ошибка 1719 — Windows installer service could not be accessed пропадает и установка / удаление программ выполняется корректно. Но существуют и “частные” случаи, в которых приходится разбираться более подробно, но как правило в большинстве проблем выходом является решение с изменением реестра.
Не удалось исправить ошибку установщика
Windows 1719?
Мы поможем Вам исправить её!
Перезвоним в течение 15 минут!
Главная » Windows » Windows 10 » Windows installer service could not be accessed – как исправить ошибку в Windows 10
В работе системы всегда возникают неполадки, призванные подпортит нам жизнь, у любой системы есть недостатки, с которыми можно бороться. В данном случае мы поговорим об ошибке 1719, которая расшифровывается следующим образом: Windows installer service could not be accessed. Она связана с установкой и удалением программ, а точнее с конкретной службой, начавшей «тупить» по непонятным причинам.
Мы разобрались с тем, что Windows installer является службой инсталляции программного обеспечения. Получается, что при установке какой-то утилиты, либо её удалении, она дала сбой и появляется ошибка 1719. Но, не решив проблему, удалить что-то не выйдет.
Также скажу одну вещь, причиной может быть что угодно, например, повреждение системных файлов, вирусы, сами программы, которые внесли изменения в систему.
По-другому ошибка 1719 выглядит так: «Служба установщика Windows недоступна…».
Столкнувший с таким: windows installer service could not be accessed надо от этого срочно избавляться, чем сейчас и займёмся. Мы разберём несколько способов, но многие из них могут не помочь.
Включить Windows Installer
Необходимо зайти в консоль оснастку «Службы». Делается двумя способами: нажать на меню Пуск правой кнопкой мышки и перейти в соответствующую опцию, либо нажать Win+R, ввести services.msc.
Ищем строчку «Установщик Windows» (Windows Installer), нажимаем на неё дважды и идём в свойства.
Это интересно: Как принудительно завершить зависшую службу
В свойствах, служба может быть отключена. Включите её, нажав по кнопке «Запустить». Пробуем что-нибудь установить. Если есть возможность, поставьте тип запуска на «Автоматический».

Восстановление целостности системах файлов
Я говорил, что возникновение Windows installer service could not be accessed (код 1719) может быть причиной разных явлений. Повреждение системных файлов не исключение. Вот наши действия:
Запускаем командную строку с повышенными привилегиями и прописываем всем известную и полезную команду: sfc /scannow.

Теперь нужно подождать, пока утилита просканирует Windows на наличие поврежденных файлов и восстановит их, хотя может выйти сообщение, что всё в порядке.
Наличие файла msiexec.exe на законном месте
Два вышеизложенных способа не дали результата? А может файлик msiexec.exe вообще не на месте лежит? Проверить его наличие можно по пути C:WindowsSystem32msiexec.exe. Если он отсутствует, то понятно почему появляется ошибка 1719. В этом случае решить ситуацию можно двумя способами: переустановить систему и скачать из интернета Windows Installer, а потом установить. Скачать его можно с официального сайта Microsoft.

Регистрируем библиотеку msiexec.exe
Если файлик msiexec.exe на месте, но проблема windows installer service could not be accessed все равно имеется, тогда можно попробовать зарегистрировать msiexec.exe в системе (по сути это должно происходить автоматически после установки).
Для данной процедуры ещё раз понадобиться командная строка от имени администратора, где вводим команды следующего типа:
Для Windows 64-х разрядных
- %windir%system32msiexec.exe /unregister
- %windir%system32msiexec.exe /regserver
- %windir%syswow64msiexec.exe /unregister
- %windir%syswow64msiexec.exe /regserver
Для Windows 32-х разрядных
- msiexec /unregister
- msiexec /register
После этого перезапускаем ПК и пробуем установить небольшую программку.
Не нужно отчаиваться, если все методы выше не помогли, есть ещё кое-что.
Работа с реестром для исправления ошибки 1719
Часто бывает, что ломает систему сама программа, которую вы установили, но удалить её не выйдет, так как установщик поврежден, что же тогда делать, чтобы исправить windows installer service could not be accessed?
Запускаем реестр. Это можно сделать так: жмём клавиши «Win+R» и пишем regedit.
Открываем следующие разделы, пока не дойдем до последнего: HKEY_LOCAL_MACHINESYSTEMCurrentControlSetControlSession ManagerCProPatches
Нажав на последний раздел, справа появятся его параметры. Нам нужен параметр Force. Дважды на нём нажмите и поменяйте значение на единицу (1).

Это интересно: Процесс LSASS.exe и почему он грузит процессор
Обязательно перезагружаем компьютер и пробуем установить программку.
Вот такие пироги. Надеюсь вы избавились от всех напастей и у вас не возникает ошибка 1719 windows installer service could not be accessed. Мы поработали под ОС Windows 10, но такая же проблема может возникнуть и в других версиях, правда исправление тоже самое.
( 3 оценки, среднее 3.67 из 5 )
Table of Contents
- Introduction
- How to Find Which Windows Installer Version is Running
- How to Fix
- Windows Installer Service Status
- Re-register Windows Installer Service
- Running System Checker Tool
- See Also:
Introduction
During installing a software, a user may get the following error message:
“The Windows Installer Service could not be accessed. This can occur if the Windows Installer is not correctly installed. Contact your support personnel for assistance.”
Sometimes an error code 1719 is also provided in the error message dialog box.
In this WiKi article how to resolve this problem will be discussed.
How to Find Which Windows Installer Version is Running
In Windows 10, the Windows Installer Version is V 5.0.17134.228. To determine this in Start Search box type msiexec and hit the Enter key.

How to Fix
Windows Installer Service Status
Make sure that the Windows Installer Service is running. To check this go through the following steps:
- In Start Search type Services.msc and hit the Enter key.
- Locate Windows Installer Service.
- Right click on it and select Properties.
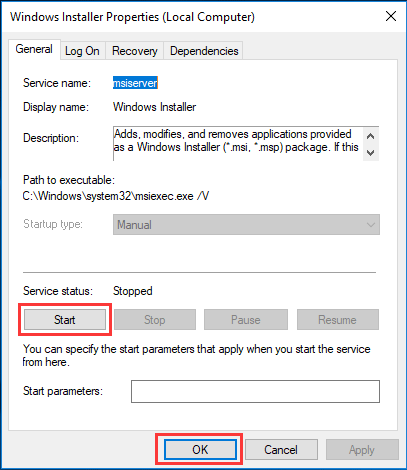
- Make sure Startup type is Automatic and Service status is running. If stopped then click the Start button.
- Click OK or, Apply.

Re-register Windows Installer Service
Press Windows key + X and select Command Prompt (Admin).
Type the command below and press Enter after the command:
msiexec /unregister msiexec /regserver
Restart your computer and check for status.

Running System Checker Tool
First run the inbox Deployment Image Servicing and Management (DISM) tool prior to running the System File Checker.
Type the following command as Administrator, and then press Enter. It may take several minutes for the command operation to be completed.
DISM.exe /Online /Cleanup-image /Restorehealth
Once completed, at the command prompt, type the following command, and then press ENTER:
sfc /scannow
Reboot.
See Also:
- Use the System File Checker tool to repair missing or corrupted system files
- Released Versions of Windows Installer

Fix The Windows Installer service could not be accessed: If you’re trying to install a program which uses MSI file as it’s installer then chances are you may have faced the error message “The Windows Installer service could not be accessed”. This problem also occurs when you try to install Microsoft office, as it also uses Windows Installer. The error message will pop up when you install or uninstall a program that uses Microsoft Installer service, Windows Installer service is not running or the Windows Installer registry settings are corrupted.
The Windows Installer Service could not be accessed. This can occur if the Windows Installer is not correctly installed. Contact your support personnel for assistance.
Now we have only listed a handful of issues which could lead to the above error but it generally depends on users system configuration as to why they are facing the particular error. So without wasting any time let’s see how to Fix The Windows Installer service could not be accessed with the help of below-listed troubleshooting guide.
Contents
- “The Windows Installer service could not be accessed” [SOLVED]
- Method 1: Restart Windows Installer Service
- Method 2: Modify Remote Procedure Call Service
- Method 3: Re-register Windows Installer
- Method 4: Reset the Windows Installer Service
- Method 5: Reinstall Windows Installer
Make sure to create a restore point just in case something goes wrong.
Method 1: Restart Windows Installer Service
1.Press Windows Key + R then type services.msc and hit Enter.

2.Find Windows Installer service then right-click on it and select Properties.

3.Click on Start if the service is not already running.

4.If the service is already running then right-click and select Restart.
5.Again try to install the program which was giving access denied error.
Method 2: Modify Remote Procedure Call Service
1.Press Windows Key + R then type services.msc and hit Enter.
2.Locate Remote Procedure Call (RPC) service then double-click on it to open its properties.

3.Switch to Log On tab and then tick mark “Local System account” and “Allow service to interact with desktop.“

4.Reboot your PC to save changes and see if you’re able to fix the error.
5.If not, then again open RPC properties windows and switch to Log On tab.
6.Checkmark “This account” and click on browse then type “Network Service” and click OK. The password will automatically be filled, so don’t change it.

7.If you can’t find Network service then use the following address:
NT AuthorityNetworkService
8.Restart your PC and see if you’re able to Fix The Windows Installer service could not be accessed error.
Method 3: Re-register Windows Installer
1.Press Windows Key + X then select Command Prompt (Admin).

2.Type the following command into cmd and hit Enter after each one:
%windir%system32msiexec.exe /unregister %windir%system32msiexec.exe /regserver %windir%syswow64msiexec.exe /unregister %windir%syswow64msiexec.exe /regserver

3.Reboot your PC to save changes.
4.If the issue is not resolved then press Windows key + R then type the following and hit Enter:
%windir%system32

5.Locate the Msiexec.exe file then note down the exact address of the file which would be something like this:
C:WINDOWSsystem32Msiexec.exe

6.Press Windows Key + R then type regedit and hit Enter to open Registry Editor.
7.Navigate to the following registry key:
HKEY_LOCAL_MACHINESYSTEMCurrentControlSetServicesMSIServer
8.Select MSIServer then in the right window pane double-click on ImagePath.

9.Now type the location of the Msiexec.exe file which you noted above in the value data field followed by “/V” and the whole thing would look like:
C:WINDOWSsystem32Msiexec.exe /V

10.Boot your PC into safe mode using any of the methods listed here.
11.Press Windows Key + X then select Command Prompt (Admin).
12.Type the following command and hit Enter:
msiexec /regserver
%windir%Syswow64Msiexec /regserver

13.Close everything and boot your PC normally.
Method 4: Reset the Windows Installer Service
1.Open Notepad then copy & paste the following as it is:
Windows Registry Editor Version 5.00

[HKEY_LOCAL_MACHINESYSTEMCurrentControlSetServicesmsiserver]
"DisplayName"="@%SystemRoot%\system32\msimsg.dll,-27"
"ImagePath"=hex(2):25,00,73,00,79,00,73,00,74,00,65,00,6d,00,72,00,6f,00,6f,00,
74,00,25,00,5c,00,73,00,79,00,73,00,74,00,65,00,6d,00,33,00,32,00,5c,00,6d,
00,73,00,69,00,65,00,78,00,65,00,63,00,20,00,2f,00,56,00,00,00
"Description"="@%SystemRoot%\system32\msimsg.dll,-32"
"ObjectName"="LocalSystem"
"ErrorControl"=dword:00000001
"Start"=dword:00000003
"Type"=dword:00000010
"DependOnService"=hex(7):72,00,70,00,63,00,73,00,73,00,00,00,00,00
"ServiceSidType"=dword:00000001
"RequiredPrivileges"=hex(7):53,00,65,00,54,00,63,00,62,00,50,00,72,00,69,00,76,
00,69,00,6c,00,65,00,67,00,65,00,00,00,53,00,65,00,43,00,72,00,65,00,61,00,
74,00,65,00,50,00,61,00,67,00,65,00,66,00,69,00,6c,00,65,00,50,00,72,00,69,
00,76,00,69,00,6c,00,65,00,67,00,65,00,00,00,53,00,65,00,4c,00,6f,00,63,00,
6b,00,4d,00,65,00,6d,00,6f,00,72,00,79,00,50,00,72,00,69,00,76,00,69,00,6c,
00,65,00,67,00,65,00,00,00,53,00,65,00,49,00,6e,00,63,00,72,00,65,00,61,00,
73,00,65,00,42,00,61,00,73,00,65,00,50,00,72,00,69,00,6f,00,72,00,69,00,74,
00,79,00,50,00,72,00,69,00,76,00,69,00,6c,00,65,00,67,00,65,00,00,00,53,00,
65,00,43,00,72,00,65,00,61,00,74,00,65,00,50,00,65,00,72,00,6d,00,61,00,6e,
00,65,00,6e,00,74,00,50,00,72,00,69,00,76,00,69,00,6c,00,65,00,67,00,65,00,
00,00,53,00,65,00,41,00,75,00,64,00,69,00,74,00,50,00,72,00,69,00,76,00,69,
00,6c,00,65,00,67,00,65,00,00,00,53,00,65,00,53,00,65,00,63,00,75,00,72,00,
69,00,74,00,79,00,50,00,72,00,69,00,76,00,69,00,6c,00,65,00,67,00,65,00,00,
00,53,00,65,00,43,00,68,00,61,00,6e,00,67,00,65,00,4e,00,6f,00,74,00,69,00,
66,00,79,00,50,00,72,00,69,00,76,00,69,00,6c,00,65,00,67,00,65,00,00,00,53,
00,65,00,50,00,72,00,6f,00,66,00,69,00,6c,00,65,00,53,00,69,00,6e,00,67,00,
6c,00,65,00,50,00,72,00,6f,00,63,00,65,00,73,00,73,00,50,00,72,00,69,00,76,
00,69,00,6c,00,65,00,67,00,65,00,00,00,53,00,65,00,49,00,6d,00,70,00,65,00,
72,00,73,00,6f,00,6e,00,61,00,74,00,65,00,50,00,72,00,69,00,76,00,69,00,6c,
00,65,00,67,00,65,00,00,00,53,00,65,00,43,00,72,00,65,00,61,00,74,00,65,00,
47,00,6c,00,6f,00,62,00,61,00,6c,00,50,00,72,00,69,00,76,00,69,00,6c,00,65,
00,67,00,65,00,00,00,53,00,65,00,41,00,73,00,73,00,69,00,67,00,6e,00,50,00,
72,00,69,00,6d,00,61,00,72,00,79,00,54,00,6f,00,6b,00,65,00,6e,00,50,00,72,
00,69,00,76,00,69,00,6c,00,65,00,67,00,65,00,00,00,53,00,65,00,52,00,65,00,
73,00,74,00,6f,00,72,00,65,00,50,00,72,00,69,00,76,00,69,00,6c,00,65,00,67,
00,65,00,00,00,53,00,65,00,49,00,6e,00,63,00,72,00,65,00,61,00,73,00,65,00,
51,00,75,00,6f,00,74,00,61,00,50,00,72,00,69,00,76,00,69,00,6c,00,65,00,67,
00,65,00,00,00,53,00,65,00,53,00,68,00,75,00,74,00,64,00,6f,00,77,00,6e,00,
50,00,72,00,69,00,76,00,69,00,6c,00,65,00,67,00,65,00,00,00,53,00,65,00,54,
00,61,00,6b,00,65,00,4f,00,77,00,6e,00,65,00,72,00,73,00,68,00,69,00,70,00,
50,00,72,00,69,00,76,00,69,00,6c,00,65,00,67,00,65,00,00,00,53,00,65,00,4c,
00,6f,00,61,00,64,00,44,00,72,00,69,00,76,00,65,00,72,00,50,00,72,00,69,00,
76,00,69,00,6c,00,65,00,67,00,65,00,00,00,00,00
"FailureActions"=hex:84,03,00,00,00,00,00,00,00,00,00,00,03,00,00,00,14,00,00,
00,01,00,00,00,c0,d4,01,00,01,00,00,00,e0,93,04,00,00,00,00,00,00,00,00,00

[HKEY_LOCAL_MACHINESYSTEMCurrentControlSetServicesmsiserverEnum]
"0"="Root\LEGACY_MSISERVER\0000"
"Count"=dword:00000001
"NextInstance"=dword:00000001
2.Now from Notepad menu click File then click Save As.

3.From the Save as type drop-down select All Files.
4.Name the file as MSIrepair.reg (reg extension is very important).

5.Navigate to desktop or where you want to save the file and then click Save.
6.Now right-click on the MSI repair.reg file and select Run as Administrator.
7.Reboot your PC to save changes and see if you’re able to Fix The Windows Installer service could not be accessed.
Method 5: Reinstall Windows Installer
Note: Only Applied to earlier version of Windows
1.Press Windows Key + X then select Command Prompt (Admin).

2.Type the following command into cmd and hit Enter after each one:
cd %windir%system32
attrib -r -s -h dllcache
ren msi.dll msi.old
ren msiexec.exe msiexec.old
ren msihnd.dll msihnd.old
exit

3.Reboot your PC and then download the Windows Installer 4.5 Redistributable from Microsoft website.
4.Install the Redistributable package and then reboot your PC.
Recommended for you:
- Fix Keyboard Typing Numbers Instead of Letters
- Fix USB Error Code 52 Windows cannot verify the digital signature
- How To Fix Your Computer has a Memory problem
- Fix Windows Update Error 0x80080005
That’s it you have successfully Fix The Windows Installer service could not be accessed error but if you still have any questions regarding this guide then feel free ask them in the comment’s section.
When you are trying to install a new program on Windows 10 you may receive an error message Windows Installer service could not be accessed. But, don’t worry. This post will show you the top 4 ways to solve the Windows Installer not working Windows 10 issue. After fixing this problem, use MiniTool software to create a system image.
Windows Installer Service Could Not Be Accessed
It is annoying that you can’t successfully install a new program on Windows 10/8/7. For example, you may receive an error message that says that Windows Installer service could not be accessed. This can occur if the Windows Installer is not correctly installed. Contact your personnel for assistance, as shown in following picture:

As a matter of fact, many computer users complain that they have met this error message and they don’t know how to fix this Windows Installer error. This error may occur when Windows Installer files are damaged or missing.
However, don’t worry. You have come to the right place. This article will introduce 4 ways to solve the Windows Installer service cannot be accessed issue. You can try to use them one by one.
4 Ways to Fix Windows Installer Service Could Not Be Accessed
Here, in this part, we will show you the 4 ways to solve error 1719 Windows Installer service could not be accessed in detail. Actually, each method is easy to operate.
Solution 1. Remove the Earlier Version of the Software
In order to solve the Windows Installer service could not be accessed issue, it is recommended to remove the previous version of software since the old version of software always gives rise to some unexpected issues. Plus uninstalling the previous program is always an effective way to solve Windows Installer service could not be accessed issue.
Furthermore, this method is pretty easy to operate. If you don’t know how to uninstall a piece of software, you can read the following instructions:
Step 1: Type Control Panel in the search box of Windows 10 and click it to enter its main interface.
Step 2: Click Programs and Features to continue. Then, choose the program you want to remove and right-click it to choose Uninstall from the context menu.
After you have successfully uninstalled the previous version of the software you can reinstall the program to check whether the error 1719 Windows Installer service could not be accessed is solved.
Solution 2. Manually Start Microsoft Installer Service
If the first method is not working, you can go on to the second solution. Try to manually start the Microsoft Installer Service to fix the Windows Installer not working Windows 10 issue. Microsoft Installer is a utility application in the Windows operating system which is used to install, maintain or remove software.
So, when you meet Windows Installer service could not be accessed you can try to check whether the Window Installer has stopped. Here, we will show you how to start the Microsoft Installer Service step by step.
Step 1: Press the Windows key and R key together to launch the Run dialog. Then input services.msc in the Run box and click OK or hit Enter to continue.

Step 2: Then the Service window will pop up. You need to choose Windows Installer to continue.

Step 3: Double-click the Windows Installer service to go to the Windows Installer Properties window. You need to change the Service status from Stopped to Running by clicking the Start button. Then click OK to continue.
After that, you can reboot your computer to check whether the issue Windows Installer service could not be accessed is solved.
Solution 3. Re-register Microsoft Installer Service
Now, you can go to the third method to fix the Windows Installer error if the above two methods have failed. Then, you can try to re-register the Microsoft Installer Service. Then the detailed operations to re-register Microsoft Installer service are as follows:
Step 1: Type cmd in the search box of Windows 10 and choose Command Prompt to continue.
Step 2: In the Command Prompt window you need to input the following commands and hit Enter after each command to continue:
%windir%system32msiexec.exe /unregister
%windir%system32msiexec.exe /regserver
%windir%syswow64msiexec.exe /unregister
%windir%syswow64msiexec.exe /regserver
Step 3: You can type exit command to close the command prompt window.
After you have finished the above steps you can restart your computer and reinstall the program to check whether the issue Windows Installer service cannot be accessed is solved.
Solution 4. Reinstall Windows Installer
Now, we will go to the fourth method. In order to solve the Windows Installer service could not be accessed you can try to reinstall Windows Installer. We will tell you how to reinstall Windows Installer in detail.
Step 1: Press the Windows key and R key together to launch the Run dialog. Then type cmd in the box and click OK or hit Enter to continue.

Step 2: Then you need to type the following command and hit Enter after each command to continue:
cd %windir%system32
ren msi.dll msi.old
ren msiexec.exe msiexec.old
ren msihnd.dll msihnd.old
Step 3: Then, you can exit the command prompt windows by typing exit command. After that, you can reboot your computer and update the Windows Installer to the latest version. In order to update to latest one you need to go to the Microsoft official website to download and install the latest Windows Installer.
Step 4: After the latest Windows Installer in installed you can restart your computer and install the program you need and check whether the issue Windows Installer not working Windows 10 has been solved.
After reading this article, I have successfully solved the issue Windows Installer service could not be accessed. If you have the same Windows Installer error, you can try to use those methods introduced in this article to solve it. Click to Tweet
Top Recommendation
After you have solved the Windows Installer service could not be accessed issue you had better create a system image to avoid a similar error in the coming days. With a system image, you can take advantage of it to restore it to the previous state instead of spending so much time to solve the problem when you come across a similar issue again.
MiniTool ShadowMaker
There are two ways to create a system image. On the one hand, Windows snap-in program can help you to create a system image, but on the other hand, you can use a piece of third-party software to create a system image. Here, we recommend MiniTool ShadowMaker.
MiniTool ShadowMaker, the best backup software for Windows 10, is a good assistant to create a system image. With its various powerful features, it can back up the operating system, files and folders, disks, partitions and so on.
In addition, it also has a Restore feature which plays an essential role in performing recovery solutions. For instance, it can be used to restore computer to an earlier date when some accidents occur. Also, MiniTool ShadowMaker is an automatic tool which can safeguard your computer and data well.
So as to create a system image to protect computer and data, you can download MiniTool ShadowMaker Trial which can be used for 30 days by clicking on the following button or choose to purchase an advanced edition.
Free Download
Now, we will show you how to back up Windows 10 with MiniTool ShadowMaker.
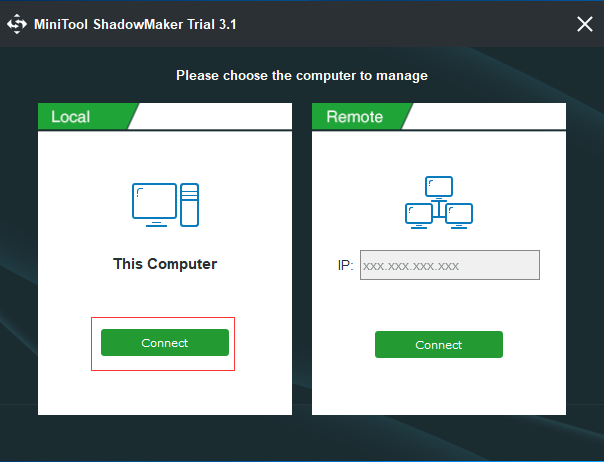
Step 1: Install the backup tool and launch it. Then click Keep Trial. Then click Connect in the Local tab to enter its main interface.
Step 2: MiniTool ShadowMaker will remind you to back up immediately if you haven’t used this software to perform any backup action. Thus, you just need to click SET UP BACKUP to continue. MiniTool ShadowMaker is designed to back up the operating system by default.
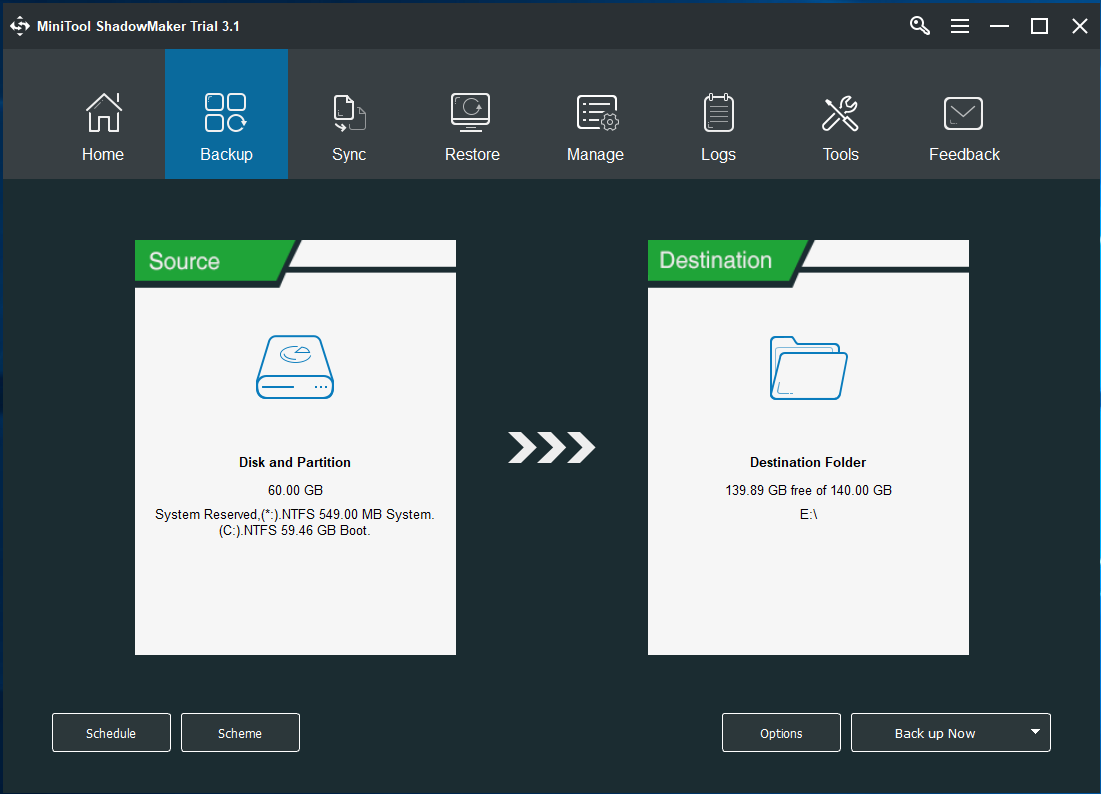
In addition, you can also click the Backup tab to enter the backup interface. Then, you can click the Source and Destination tabs to choose what you want to back up and decide where you want to save the backup image.
Tip: It is recommended to choose an external hard drive as the destination.
Step 3: After that, you can click Back up Now to perform the action immediately. You can also choose Back up Later from the drop-down menu to delay the process.

Note: The Schedule setting can help to set backup matters on a regular basis such as daily/weekly/monthly/on event so as to protect the data and computer well. Scheme can help to manage disk free space by deleting previous backup versions. Options offers some advanced backup parameters. For example, you can set the image compression level.
Read 3 Types of Backup: Full, Incremental, Differential – MiniTool to know more information on backup scheme.
Step 4: After you have created a system image you had better create a bootable mediathat is used to boot your computer into MiniTool Recovery Environment when your computer can’t normally boot from the operating system. Thus, you can go to the Tools tab to choose the Media Builder feature to continue.
As you can see, the operation methods of creating a system image by MiniTool ShadowMaker are pretty easy. Thus, you can download it to create a system image for the sake of protecting your PC and data well.
Click to Tweet
Free Download
Windows Snap-in Program
In the above part, we have introduced how to create a system image with MiniTool ShadowMaker. Now, we will show you another way that is using Windows snap-in tool to create a system image so that you can restore your PC to its previous state. You can see the detailed operations in the following part.
Step 1: Type Control Panel in the search box of Windows 10. Then, choose it to enter its main interface.
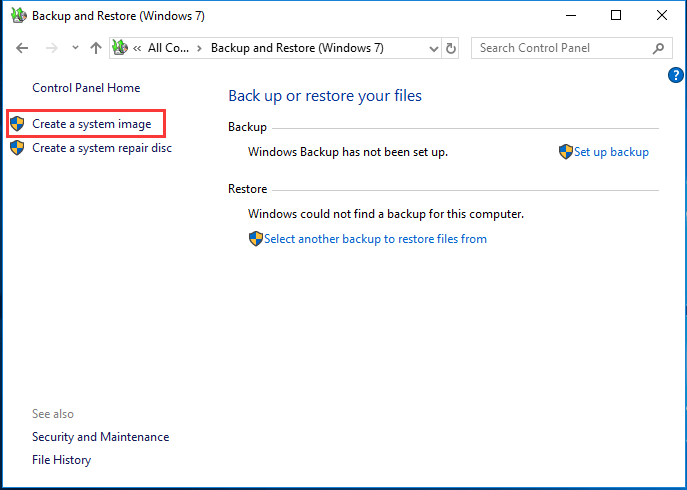
Step 2: Choose Backup and Restore(Windows 7) to continue.
Step 3: Then click Create a system image in the left window to continue.
Step 4: Next, you need to choose a destination to save the system image. Here, you can choose a hard disk, a DVD disk and a network location. Then click Next to continue.
Note: But, please note that you can’t choose a USB drive as a destination. Otherwise, you will receive an error message that says the drive is not a valid backup location.
Step 5: Then you need to choose the source to back up. The System Reserved partition and C drive are checked by default. If you want to back up other partitions, you can check them together. Then, click Next to continue.
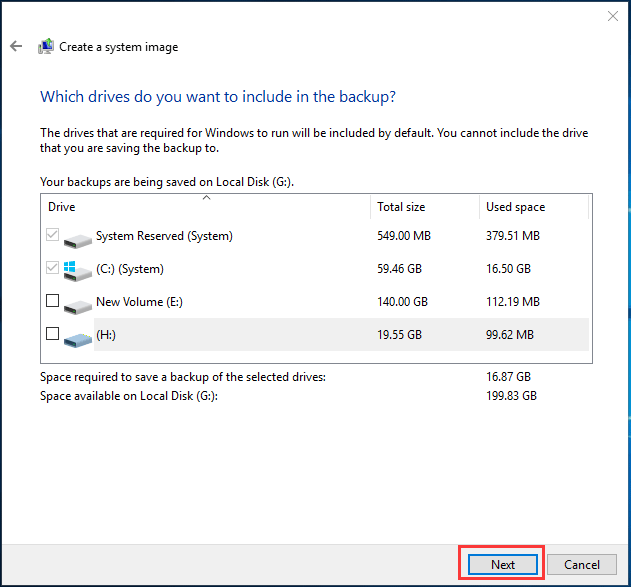
Step 6: Then, you are required to confirm the location and backup source. After that, click Start backup to perform this process immediately.

After that, you need to wait patiently for the process to be completed.
How to Restore Computer to Earlier Date in Windows 10/8/7 (2 Ways)
Bottom Line
In this article, we have introduced 4 solutions for the issue the Windows Installer service could not be accessed. You can choose any one of the solutions to solve the Window Installer not working problem. If you have any better solutions you can share them in the comment zone.
In addition, it is recommended to create a system image so as to perform some recovery solutions when encountering some accidents. There are two ways to create a system image, so you can choose either one.
From comparison, we think MiniTool ShadowMaker is more convenient to create a system image. In addition, if you have any problem with MiniTool ShadowMaker, please don’t hesitate to contact us via the email [email protected].
Windows Installer Not Working FAQ
How do I fix Windows installer error?
- Remove the earlier version of the software.
- Manually start Microsoft installer service.
- Re-register Microsoft installer service.
- Reinstall Windows installer.
How do I stop Windows installer?
- Open Run dialog.
- Type gpedit.msc in the box and click OK to continue.
- Navigate to Local Computer PolicyComputer ConfigurationAdministrative TemplatesWindows ComponentsWindow Installer.
- Double-click Turn off Windows Installer and choose Enabled to continue.
- Click Apply and OK to execute the changes.
How do you find out what Windows Installer is trying to install?
- Open Run dialog.
- Type %systemroot%system32 in the box and click OK.
- Right-click Msi.dll and choose Properties.
- Navigate to the Version tab and note the File version number.
How do I active Windows Installer?
- Open Run dialog.
- Type services.msc in the box and click OK to continue.
- In the Services window, find out Windows installer and right-click it.
- Choose Properties.
- Change the Startup type to Manual.
- Change the Service status to Start.

Служба установщика Windows (она же Windows Installer), является одним из основных компонентов операционной системы, необходимых для установки программного обеспечения. Windows Installer используют все программы, созданные для Windows, соответственно, если в процессе установки программы эта служба не отвечает или не доступна, установка завершится неудачей.
Как правило, в таких случаях на дисплеях пользователей появляется следующее сообщение об ошибке:
Ошибка 1719. Не удалось получить доступ к службе установщика Windows. Возможно, установщик Windows не установлен. Обратитесь за помощью в службу поддержки.
Так эта ошибка выглядит на английском языке:

Один из возможных способов решения этой проблемы заключается в использовании средства сканирования системных файлов. Чтобы его запустить, откройте командную строку с правами администратора, введите команду sfc /scannow, нажмите Enter и дождитесь завершения проверки файлов.

Если sfc /scannow не помог и программы по-прежнему не устанавливаются, можно попробовать несколько других вариантов, которые совокупно должны помочь устранить проблему.
1. Убедитесь, что служба установщика Windows запущена
Нажмите ![]() + R, введите services.msc и нажмите OK.
+ R, введите services.msc и нажмите OK.

В окне «Службы» прокрутите вниз и найдите службу Windows Installer. Вполне возможно, что она просто отключена, отсюда и ошибка 1719.

Двойным щелчком мыши откройте окно свойств службы и измените тип запуска с «Отключена» на «Вручную» или «Автоматически». Затем нажмите «Запустить» и примените изменения.

Закройте окно «Службы» и проверьте состояние проблемы. Если ошибка все еще имеет место быть, приступайте к выполнению следующего шага.
2. Перерегистрация службы установщика Windows
В большинстве случаев достаточно выполнить перечисленные выше шаги, но иногда также может потребоваться повторная регистрация службы установщика Windows.
Итак, нажмите ![]() + R, введите MSIEXEC /UNREGISTER и нажмите OK. Ничего страшного, если после выполнения команды на экране ничего не произойдет.
+ R, введите MSIEXEC /UNREGISTER и нажмите OK. Ничего страшного, если после выполнения команды на экране ничего не произойдет.

Опять-таки, нажмите ![]() + R и введите MSIEXEC /REGSERVER.
+ R и введите MSIEXEC /REGSERVER.

Эта команда завершит перерегистрацию службы установщика, а вместе с этим должна решиться и ваша проблема. Если нет, тогда попробуйте еще кое-что.
3. Пробуем через реестр
Нажмите ![]() + R, введите regedit и нажмите OK.
+ R, введите regedit и нажмите OK.

В окне редактора реестра перейдите в HKEY_LOCAL_MACHINESYSTEMCurrentControlSetServicesmsiserver.
Проверьте значение параметра ImagePath. Должно быть так, как на скриншоте ниже; при необходимости измените путь и запустите службу установщика Windows через services.msc.

В 64-разрядных версиях Windows есть еще один параметр – WOW64, который следует проверить.
Обратите внимание на его значение – если 1, это и является причиной проблемы.
Двойным щелчком мыши откройте свойства параметра WOW64 и поменяйте значение на 0.

Далее просто перезагрузите машину. После этого ошибка 1719 должна исчезнуть.
Отличного Вам дня!