Has anyone got any experience syncing Linux (specifically Red Hat) to a Windows NTP server? Currently our Windows server is syncing to an stratum 1 server on the internet but the Linux boxes refuse to acknowledge it as a good time source.
Having done a bit of research it seems our problem is the Root Dispersion value is possibly too high. Here’s the output from ntpq —
ntpq> peers
     remote           refid      st t when poll reach   delay   offset  jitter
==============================================================================
ntp1.ourdomain   10.10.10.1       4 u   20  128  377    0.376  1397.10  22.800

ntpq> ass

ind assID status  conf reach auth condition  last_event cnt
===========================================================
  1 30939  90b4   yes   yes  none    reject   reachable 11
ntpq> rv 30939
assID=30939 status=90b4 reach, conf, 11 events, event_reach,
srcadr=ntp1.ourdomain.com, srcport=123, dstadr=10.10.10.2,
dstport=123, leap=00, stratum=4, precision=-6, rootdelay=93.750,
rootdispersion=2333.466, refid=10.10.10.1, reach=377, unreach=0, hmode=3,
pmode=4, hpoll=7, ppoll=7, flash=400 peer_dist, keyid=0, ttl=0,
offset=1369.793, delay=0.000, dispersion=21.915, jitter=15.387,
reftime=d7493cd7.fd3528d6  Mon, Jun 16 2014 10:52:23.989,
org=d74944eb.b857f9bc  Mon, Jun 16 2014 11:26:51.720,
rec=d74944ea.5709a581  Mon, Jun 16 2014 11:26:50.339,
xmt=d74944ea.56ea01a7  Mon, Jun 16 2014 11:26:50.339,
filtdelay=     0.48    0.51    0.00    0.43    0.50    0.44    0.40    0.55,
filtoffset= 1380.34 1376.38 1369.79 1362.68 1360.75 1353.16 1349.80 1343.46,
filtdisp=     15.63   17.58   19.48   21.42   23.37   25.30   27.25   29.20
What I’m trying to understand is why this value is so high and is there anything we can configure on the Windows server to change it.
Update
Here’s some information from our Windows NTP server —
c:WindowsSystem32>w32tm /query /status
Leap Indicator: 0(no warning)
Stratum: 2 (secondary reference - syncd by (S)NTP)
Precision: -6 (15.625ms per tick)
Root Delay: 0.0312500s
Root Dispersion: 1.2097655s
ReferenceId: 0x9E2BC042 (source IP:  158.43.192.66)
Last Successful Sync Time: 18/06/2014 04:41:16
Source: ntp2.pipex.net
Poll Interval: 15 (32768s)


c:WindowsSystem32>w32tm /query /peers
#Peers: 2

Peer: ntp1.pipex.net
State: Active
Time Remaining: 6264.1144284s
Mode: 1 (Symmetric Active)
Stratum: 2 (secondary reference - syncd by (S)NTP)
PeerPoll Interval: 15 (32768s)
HostPoll Interval: 15 (32768s)

Peer: ntp2.pipex.net
State: Active
Time Remaining: 6264.1144284s
Mode: 1 (Symmetric Active)
Stratum: 1 (primary reference - syncd by radio clock)
PeerPoll Interval: 15 (32768s)
HostPoll Interval: 15 (32768s)
 Опубликовано: 12.01.2018
Тематические термины: NTP, Linux, Ubuntu.
Следить за актуальностью времени на всех узлах локальной сети удобнее с помощью сервера синхронизации времени NTP. В инструкции рассказано об установке и настройке такого сервера на Linux Ubuntu Server 16.04. Данное руководство можно использовать для настройки ntpd на любом другом Linux (например, Debian или CentOS).
Установка
Настройка
Тестирование
Настройка клиента Linux
ntp
ntpdate
Настройка клиента Windows
Возможные ошибки
Установка сервера
Устанавливаем ntp сервер следующей командой:
apt-get install ntp
Разрешаем автозапуск и стартуем сервис:
systemctl enable ntp || update-rc.d ntp defaults
systemctl start ntp || service ntp start
Настройка NTP
Открываем файл с настройками:
vi /etc/ntp.conf
Настраиваем серверы, с которых наш NTP будет брать эталонное время. Например:
pool ru.pool.ntp.org iburst
server ntp2.vniiftri.ru iburst prefer
pool 0.ubuntu.pool.ntp.org iburst
pool 1.ubuntu.pool.ntp.org iburst
server 127.127.1.0
* iburst — отправлять несколько пакетов (повышает точность); ru.pool.ntp.org / 0.ubuntu.pool.ntp.org / 1.ubuntu.pool.ntp.org — адреса серверов, с которыми наш сервер будет сверять время; server — указывает на выполнение синхронизации с сервером, а не пулом серверов; prefer — указывает на предпочитаемый сервер. server 127.127.1.0 — позволит в случае отказа сети Интернет брать время из своих системных часов.
Настраиваем безопасность:
restrict default kod notrap nomodify nopeer noquery
restrict 192.168.0.0 mask 255.255.255.0 nomodify notrap
restrict 127.0.0.1
restrict ::1
* где:
- restrict default — задает значение по умолчанию для всех рестриктов.
- kod — узлам, которые часто отправляют запросы сначала отправить поцелуй смерти (kiss of death), затем отключить от сервера.
- notrap — не принимать управляющие команды.
- nomodify — запрещает команды, которые могут вносить изменения состояния.
- nopeer — не синхронизироваться с хостом.
- noquery — не принимать запросы.
- restrict 192.168.0.0 mask 255.255.255.0 — разрешить синхронизацию для узлов в сети 192.168.0.0/24.
- IP адреса 127.0.0.1 и ::1 позволяют обмен данные серверу с самим собой.
Настройки по умолчанию могут быть разные для IPv4 и IPv6:
restrict -4 default kod notrap nomodify nopeer noquery
restrict -6 default kod notrap nomodify nopeer noquery
Перезапускаем сервис:
systemctl restart ntp || service restart ntp
Если используется брандмауэр, добавляем правило:
iptables -I INPUT 1 -p udp —dport 123 -j ACCEPT
или с помощью ufw:
ufw allow in on enp2s0 to any port 123 proto udp
* где enp2s0 — сетевой интерфейс, на котором слушает наш сервер.
Дополнительные настройки
Настройка файла хранения логов:
logfile /var/log/ntp.log
Тестирование
Проверить состояние получения эталонного времени можно командой:
ntpq -p
Мы должны увидеть, примерно, следующее:
remote refid st t when poll reach delay offset jitter
==============================================================================
ru.pool.ntp.org .POOL. 16 p — 64 0 0.000 0.000 0.000
ntp.ubuntu.com .POOL. 16 p — 64 0 0.000 0.000 0.000
*91.189.94.4 17.253.34.253 2 u 58 64 377 55.802 3.790 0.412
-91.189.91.157 132.246.11.231 2 u 56 64 377 113.456 -1.746 0.334
+91.189.89.198 192.53.103.108 2 u 1 64 377 54.595 4.229 0.608
+91.189.89.199 17.253.34.253 2 u 61 64 377 54.061 2.637 0.557
* где:
- remote — адрес сервера времени, с которым синхронизируется наш сервер;
- refid — вышестоящий сервер (с которым сервер из графы выше получает время);
- st — уровень сервера (stratum);
- t — пир (unicast или multicast);
- when — когда последний раз сверялось время;
- poll — периодичность синхронизации с этим сервером;
- reach — состояние работоспособности. Если удалось произвести синхронизации восемь раз в подряд становится равным 377;
- delay — время задержки;
- offset — разница между нашим временем и временем на сервере; положительное — наши часы спешат, отрицательное — отстают;
- jitter — смещение времени на удаленном сервере;
- * — с этим сервером синхронизирует время наш ntpd;
- + — сервер можно использовать для сверки часов;
- — — не рекомендован для синхронизации;
- x — не доступен.
Проверить отдачу времени сервером можно введя команду на другом Linux:
ntpdate 192.168.0.15
Правильный ответ имеет следующий вид:
ntpdate[3576]: adjust time server 192.168.0.15 offset 0.017657 sec
* время было рассинхронизировано на 0.017657 секунд.
Отобразить текущее время можно командой:
date
Если после синхронизации время некорректно, настраиваем правильный часовой пояс:
cp /usr/share/zoneinfo/Europe/Moscow /etc/localtime
* московское время (GMT+3).
Настройка клиента Linux
Для клиентов можно выбрать 2 стратегии настройки — с помощью ntp или утилиты ntpdate.
NTP
Устанавливаем ntp:
Ubuntu / Debian:
apt-get install ntp
CentOS / Red Hat:
yum install ntp
В настройка /etc/ntp.conf в качестве сервера оставляем только наш локальный сервер, например:
server 192.168.0.15
Остальные pool и server удаляем или комментируем.
Перезапускаем NTP:
systemctl restart ntp || service restart ntp
ntpdate
Утилита командной строки выполняет разовую синхронизацию. Чтобы автоматизировать процесс, добавляем задание в cron:
crontab -e
0 0 * * * /usr/sbin/ntpdate 192.168.0.15
* в данном примере задание будет выполняться раз в день в 00:00. /usr/sbin/ntpdate — полный путь расположения утилиты, в разных системах может быть разным — проверить стоит командой which ntpdate.
Настройка клиента Windows
В командной строке выполняем:
w32tm /config /manualpeerlist:»192.168.0.15,0×8″ /syncfromflags:manual /update
Некоторые ошибки
1. the NTP socket is in use, exiting
Как правило, данная ошибка возникает при попытке синхронизировать время с помощью ntpdate, когда в системе работает демон ntp.
Причина: NTP сокет в системе уже занят, как правило, ntpd.
Решение: либо не использовать ntpdate, так как ntp умеет сверять время, либо отключить сервис ntpd командой service ntp stop.
2. Connection refused
Возникает при попытке выполнить команду ntpq -p.
Причина: нет разрешения на обращение к серверу.
Решение: проверьте, удастся ли выполнить запрос командой ntpq -pn 127.0.0.1 или ntpq -pn ::1. Также убедитесь, что настройка restrict позволяет серверу подключаться к самому себе по нужному протоколу.
3. no server suitable for synchronization found
Ошибка появляется при попытке синхронизировать время с другим сервером синхронизации.
Причина: сервер синхронизации не доступен по одной из причин: 1) не работает или выключен, 2) установлен restrict, 3) на сервере не запущен ntpd, 4) нет сетевой доступности из-за проблем на сети или брандмауэра.
Решение:
- Убедиться, что сервер доступен по сети.
- Проверить настройки ntp.conf — наличие соответствующего restrict.
- Проверить состояние сервиса командой service ntp status.
- Проверить настройки брандмауэра — убедиться в наличие правила, которое разрешает UDP порт 123.

It’s important for all workstations and servers to agree what time it is. There’s a long list of reasons for this, including log file synchronization, and avoiding the inevitable end-user complaints when their computer’s time does not match their phone’s time. Unfortunately, when I recently set up a LAN with a number of Windows Server 2008 R2 and Ubuntu Server 12.04 VMs, I found that all the servers had their own ideas about what time it was. Making matters worse, the Windows XP Pro and Windows 7 Pro workstations were periodically logging events complaining about not being able to contact a time server, and so they too were all drifting through time like lost sailboats.
The error that is logged on a Windows machine (System log) when it can’t sync to the NTP server is:
Event ID 129, Source: Time-Service
Warning: NtpClient was unable to set a domain peer to use as a time source because of a discovery error. NtpClient will try again in minutes and double the reattempt interval thereafter. The error was: The entry is not found. (0x800706E1)
When I initially noticed this, I was neck-deep in 1000 high-priority issues related to getting the servers up and running smoothly, so I gave up after a short period of troubleshooting, setting it aside for later. Well that time finally came. And the good news for you? I’m not going to run through the long list of things I tried (from various Google searches) that didn’t work. Instead, I’ll list what did ultimately work. And just to clarify, all of these servers are pretty stock/minimal set ups – nothing exotic is going on – I only configured/installed/tweaked what had to be done to get the function accomplished that I was looking for. So if this worked for me, it should work for you, assuming you too have a relatively run-of-the-mill installation. But, of course, YMMV. 😉
I have a file server acting as my PDC & Primary DNS, which I decided to make my NTP server (i.e., the server in charge of telling everybody else what time it is). All the other Windows & Ubuntu servers get their time from this server, as do the workstations. To my surprise, every single server had to be configured in some way to get this all working smoothly – NONE of them just automatically did what one might assume they’d do (i.e., PDC acts as NTP server, member/secondary servers look to the PDC for the time, etc.). The configuration is below:
First, make sure all machines have UDP port 123 open. This is the port used by NTP to sync time, and this actually was open on all the machines I checked, so thankfully, no modifications were necessary for me there.
(Bonus tip: Normally you can test to see if you’re communicating on an open port by Telneting to it, but since this is on a UDP port, this trick doesn’t work. Telnet only works via TCP – this is something that I figured out only after banging my head against the wall, for longer than I care to admit, trying to figure out why this port wasn’t responding!)
To get the PDC to advertise itself as a good time source, enter this command at the administrator-level command prompt:
w32tm /config /manualpeerlist:0.us.pool.ntp.org,0x1 /syncfromflags:manual /reliable:yes /update
Then restart the Windows Time service and type this to confirm it worked:
w32tm /query /status
Or check event log (note – it can take a few seconds to take effect).
The first command above is telling the Windows Time service to acquire time from a a list of internet servers specified in “manualpeerlist.” In this example I’m using my local time server for someone living in the Northeast, USA. (Go to http://ntp.org for more info on finding the best server in your area.) I could’ve specified additional servers by separating them with spaces, so it could’ve been “0.us.pool.ntp.org,0x1 1.us.pool.ntp.org,0x1 2.us.pool.ntp.org,0x1” etc.
The “,0x1” is an important part that I missed in my initial troubleshooting. If I remember correctly, it basically tells the server that it’s in charge and should take what this server says as trustworthy. If you really want the technical explanation, you can do a “w32tm /?” at the prompt or some Google searches. 😉 The other switch that I missed in my initial failed attempts to get this working was “/reliable:yes” – again, this basically tells the server that it’s in charge and is considered a reliable time source.
You then need the “/syncfromflags:manual” switch to tell it to sync from the servers you listed in the manualpeerlist switch. Seems redundant to me, but whatever – that’s Windows for you. Without that switch, I couldn’t get it working.
In addition, you should verify that this registry key is set to “NTP” (it usually is):
HKLMSYSTEMCurrentControlSetservicesW32TimeParametersType
(NOTE: if your Windows server is running as a VM in VMware, then you’ll also want to go into the VMware tools icon running in your server’s systray and verify that the box is unchecked that tells the VM to sync with VMware’s clock. For me this was already unchecked by default, but VMware advises you do this if you’re having sync problems between machines, so better safe than sorry!)
If you do the things listed above, you’ll have configured a server to be the master time keeper in your organization. Now, we need to tell the other machines about it! The good news is, your workstations should catch on to this change automatically within an hour or so of the master server coming online, so there’s nothing to do there. You’ll see their time change SLOWLY though, because if a machine’s time is like 20 minutes off, it could potentially cause problems to jump that far in a single moment, so instead Windows will incrementally shave seconds off every few seconds, bringing the time into sync, over a few minutes. You can actually watch it to this if you double-click on the clock in the systray and watch the second-hand magically skip ahead faster than normal.
To get other servers to act as clients and look to the PDC for their time, first change this key to say: NT5DS
HKLMSYSTEMCurrentControlSetservicesW32TimeParametersType
Then type this at an elevated command prompt:
w32tm /config /manualpeerlist:10.0.1.2,0x8 /syncfromflags:MANUAL /update
Then restart the Windows Time service and type this to confirm it worked:
w32tm /query /status
Or check event log (note – it can take a few seconds to take effect). To force it to resync right now, instead of taking the time it usually takes, type:
w32tm /resync
Again, the manualpeerlist is key here. Replace “10.0.1.2” above with the address of your main NTP server, that you configured earlier. You can also use the FQDN if you don’t feel like using IP address. The “,0x8” part tells it to essentially be a client machine, and get its info from the NTP server.
Ok, so now you’ve got all of your Windows servers and workstations configured, but what if you want to get your Ubuntu servers to sync to that Windows NTP server we configured above too? No problem!
Type “date” on the command line to see the current time & date. It’s probably pretty far off.
Test communication with an NTP server by typing:
sudo ntpdate 10.0.1.2
(you could also replace “10.0.1.2” with “ntp.ubuntu.com” or “0.us.pool.ntp.org”, etc. if you want to sync externally instead of using your internal NTP server.)
Once you decide which NTP server to use, tell Ubuntu to update its time against that server daily by typing:
sudo vi /etc/cron.daily/ntpdate
And insert (press the “i” key) a line that says:
#!/bin/sh

ntpdate 10.0.1.2
And save it (by typing “:wq”)
Now make it executable:
sudo chmod 755 /etc/cron.daily/ntpdate
That’s it! Now everyone agrees what time it is! Now if only we could get the office phones to stay in sync too…
/ photo by Peter Taylor
Using the Network Time Protocol will ensure that precise time syncs exist on your Linux and Windows Server, crucial if you want your Linux machine to connect to a Windows domain.
There are plenty of reasons you should have your Linux and Windows servers set with the correct time. One of the most obvious (and annoying) is, without the correct time, your Linux machine will be unable to connect to a Windows Domain. You can also get into trouble with the configuration of your mail and web servers when the time is not correct (sending email from the future is never a good idea). So how do you avoid this? Do you have to constantly be resetting the time on your machines? No. Instead of using a manual configuration, you should set up all of your servers to use NTP (Network Time Protocol) so that they always have the correct time.
Windows Server settings
There is a very simple way to set your Windows Server OS (2000 and later) to use an external time server. To do this simply click on this Fixit link and the registry entries necessary to be changed will be changed and your server will start updating time from an external source.
If you are more of the DIY Windows admin, you will want to know the registry edits that are made by clicking that Fix It link. Here they are (NOTE: The Windows registry is a tool that not all users are qualified to use. Make sure you do a backup of your registry before you make any changes.):
HKEY_LOCAL_MACHINESYSTEMCurrentControlSetServicesW32TimeParametersType
Right-click Type and select Modify. Change the entry in the Value Data box to NTP and click OK.
HKEY_LOCAL_MACHINESYSTEMCurrentControlSetServicesW32TimeConfigAnnounceFlags
Right-click AnnounceFlags and select Modify. In the Edit D Word change the Value Data to 5 and click OK.
HKEY_LOCAL_MACHINESYSTEMCurrentControlSetServicesW32TimeTimeProvidersNtpServer
In the right pane, right-click Enabled and select Modify. In the Edit D Word change the Value Data to 1 and click OK.
HKEY_LOCAL_MACHINESYSTEMCurrentControlSetServicesW32TimeParameters
In the right pane, right-click NtpServer and select Modify. Change the Value Data to Peers and click OK.
HKEY_LOCAL_MACHINESYSTEMCurrentControlSetServicesW32TimeTimeProvidersNtpClientSpecialPollInterval
In the right pane, right-click SpecialPollInterval and select Modify. Change the Value Data to Seconds (where Seconds is a number representing the amount of seconds between polls; 900 seconds is ideal) and click OK.
HKEY_LOCAL_MACHINESYSTEMCurrentControlSetServicesW32TimeConfigMaxPosPhaseCorrection
In the right pane right-click MaxPosPhaseCorrection and select Modify. Change the Value Data to Seconds (where Seconds is a number representing the amount of seconds used for positive corrections; this is used to correct for time zones and other issues).
HKEY_LOCAL_MACHINESYSTEMCurrentControlSetServicesW32TimeConfigMaxNegPhaseCorrection
In the right pane, right-click MaxNegPhaseCorrection and select Modify. Change the Value Data to Seconds (where Seconds is a number representing the amount of seconds used for negative corrections; this is used to correct for time zones and other issues).
Once you have made the final registry edit, quit the registry editor and then click Start | Run and enter the following command:
net stop w32time && net start w32time
Your Windows machine will now start syncing time to an external server at the set intervals.
On to the Linux server
In order to get NTP up and running you first have to install the ntp daemon on the machine. This is very simple, as ntpd will be located in your default repositories. So, with that in mind, open up a terminal window and issue one of the following commands (dependent upon which distribution you are using). NOTE: If you are using a non-sudo distribution you will need to first su to the root user. Once you have administrative privileges issue one of the following:
- sudo apt-get install ntp (for Debian-based systems).
- yum install ntp (for Red Hat-based systems).
- urpmi ntp (For Mandriva-based systems).
- zypper ntp (For SUSE-based systems)
Upon installation, your NTP system should be pre-configured correctly to use an NTP server for time. But if you want to change the server you use, you would need to edit your /etc/ntp.conf file. In this file you want to add (or edit) a line to reflect your NTP needs. An entry looks like:
SERVER_ADDRESS [OPTIONS]
Where SERVER_ADDRESS is the address of the server you want to use and [OPTIONS] are the available options. Of the available options, there are two that might be of interest to you:
- iburst: Use this option when the configured server is unreachable. This option will send out bursts of eight packets instead of the default one when trying to reconnect to the server.
- dynamic: Use this option if the NTP server is currently unreachable (but will be reachable at some point).
By default, the /etc/ntp.conf file will look similar to this:
server 0.debian.pool.ntp.org iburst dynamicserver 1.debian.pool.ntp.org iburst dynamic
server 2.debian.pool.ntp.org iburst dynamic
server 3.debian.pool.ntp.org iburst dynamic
More than one server is used in order to assure a connection. Should one server not be available, another one will pick up the duty.
When you have everything set up correctly, enter the following command:
sudo /etc/init.d/ntp start (on Debian-based machines) OR /etc/rc.d/init.d/ntp start (on most other machines. NOTE: You will need to first su to the root user for this command to work).
Your machine should now start syncing its time with the NTP server configured.
Final thoughts
It may seem like a task that should be unnecessary, but in certain systems and configurations, the precise time is crucial. Whether you are serving up web pages, mail, or trying to connect to a Windows domain, keeping the correct time will make just about ever task either easier or simply correct.
Network Time Protocol, commonly referred to as NTP, is a protocol that’s responsible for synchronizing system clocks in a network. NTP refers to both the protocol and the client system alongside the server programs residing on the networked systems.
In this guide, we will show you how to install NTP server and client(s) on Ubuntu 18.04.
Testing Environments
This guide aims at accomplishing the following:
- Installing and configuring NTP server on Ubuntu 18.04 server.
- Installing NTP client on Ubuntu 18.04 client machine and ensure that it is synched by the Server.
Let’s get started !
Install & Configure NTP Server on Ubuntu 18.04 Server
Below is a step-by-step procedure of installing the NTP server and making the necessary modifications to achieve the desired time synchronization in the network.
Step 1: Update System Repositories
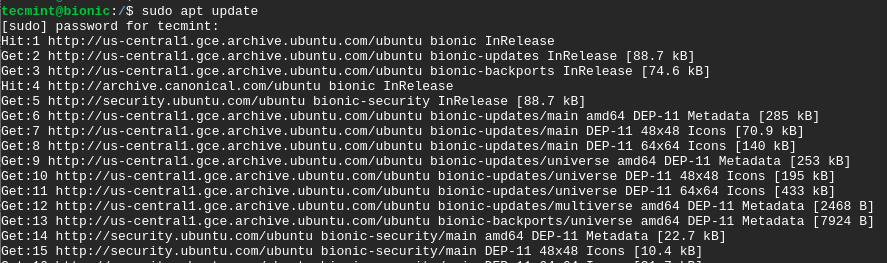
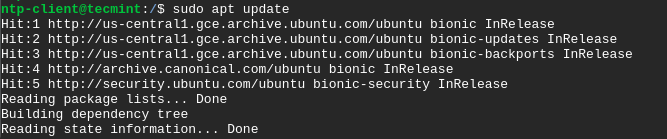
To start off, let’s begin by updating the system packages as shown.
$ sudo apt update -y
Step 2: Install NTP Server on Ubuntu 18.04
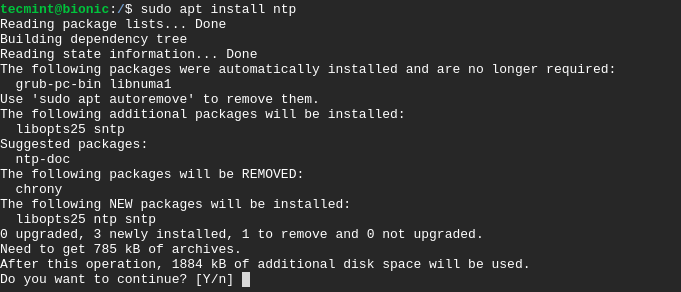
With system packages already installed, install NTP protocol on Ubuntu 18.04 LTS by running.
$ sudo apt install ntp
When prompted, type Y and hit ENTER to complete the installation process.
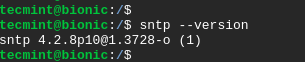
To confirm that NTP protocol has been successfully installed, run the command.
$ sntp --version
Step 3: Configure NTP Server Pools on Ubuntu 18.04
By default, NTP protocol comes with default NTP pool servers already configured in its configuration file as shown below in the /etc/ntp.conf file.
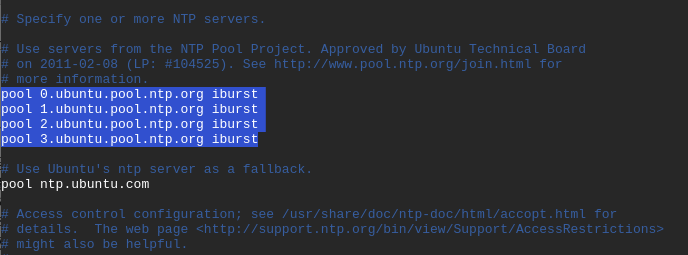
These usually work just as fine. However, you may consider changing to NTP server pools closest to your location. The link below directs you to a page where you can select your most preferred NTP pool list.
https://support.ntp.org/bin/view/Servers/NTPPoolServers
In our example, we will use the NTP pools located in Europe as shown.
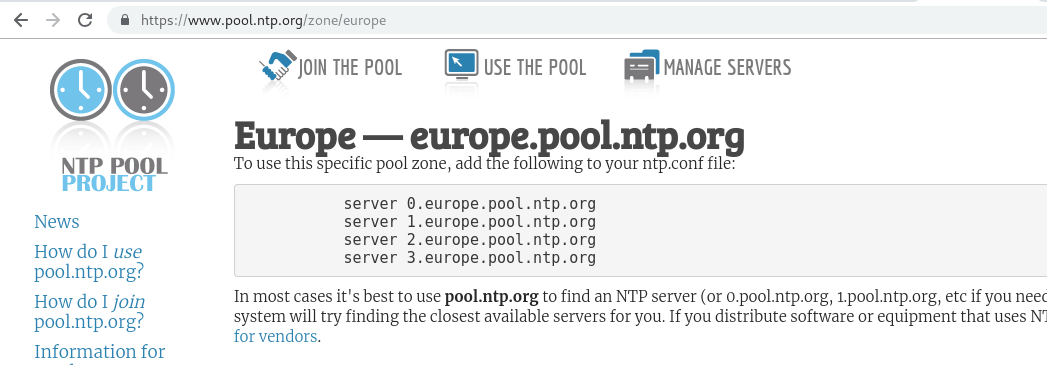
To replace the default NTP pool servers, open the NTP configuration file using your favorite text editor as shown.
$ sudo vim /etc/ntp.conf
Copy and paste the NTP pool list in Europe to the configuration files as shown.
server 0.europe.pool.ntp.org
server 1.europe.pool.ntp.org
server 2.europe.pool.ntp.org
server 3.europe.pool.ntp.org
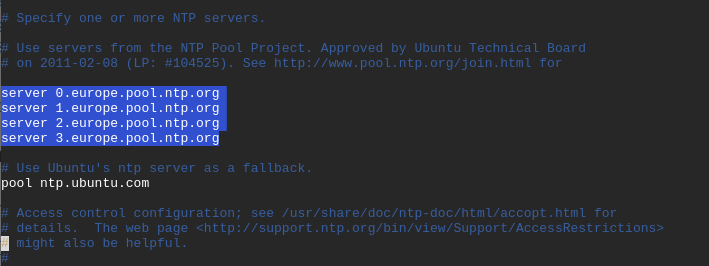
Next, save and quit the text editor.
For the changes to take effect, restart the NTP service and verify its status using the commands.
$ sudo systemctl restart ntp
$ sudo systemctl status ntp
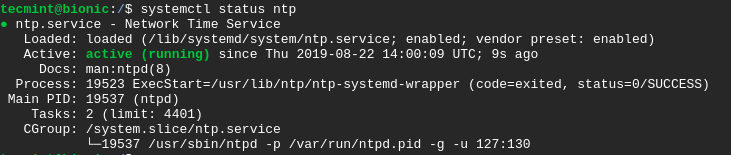
If UFW firewall is enabled, we need to allow NTP service across it so that client machines can access the NTP server.
$ sudo ufw allow ntp
OR
$ sudo ufw allow 123/udp
To implement the changes, reload the firewall as shown.
$ sudo ufw reload
To verify the changes made execute the command.
$ sudo ufw status
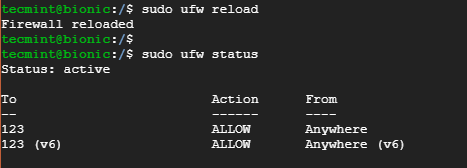
Perfect! we have successfully set up our NTP server on Ubuntu 18.04 LTS system. Let’s now set up NTP on the client system.
Install & Configure NTP Client on Ubuntu 18.04 Client
In this section, we shall install and configure a NTP client on Ubuntu 18.04 client system to be synchronized by the Ubuntu 18.04 NTP Server system.
Step 1: Update System Repositories
To start off, update the system by running.
$ sudo apt update -y
Step 2: Install Ntpdate on Ubuntu 18.04
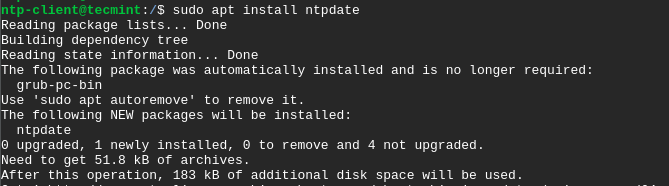
ntpdate is a utility/program that quickly allows a system to synchronize time and date by querying an NTP server.
To install ntpdate run the command.
$ sudo apt install ntpdate
For the client system to resolve the NTP server by hostname, you need to add the NTP server’s IP address and hostname in the /etc/hosts file.
Therefore, Open the file using your favorite text editor.
$ sudo vim /etc/hosts
Append the IP address and hostname as shown.
10.128.0.21 bionic

Step 3: Verify Client Time Sync with NTP Server
To manually check if the client system is in sync with the NTP server’s time, run the command.
$ sudo ntpdate NTP-server-hostname
In our case, the command will be.
$ sudo ntpdate bionic
A time offset between the NTP server and the client system will be displayed as shown.

To synchronize the client time with the NTP server, you need to turn off the timesynchd service on the client system.
$ sudo timedatectl set-ntp off
Step 4: Install NTP Client on Ubuntu 18.04
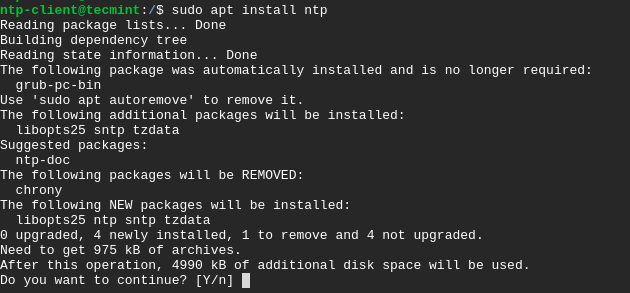
Next, you need to install NTP service on the client system. To achieve this, issue the command.
$ sudo apt install ntp
Press Y when prompted and hit ENTER to proceed with the installation process.
Step 5: Configure NTP Client on Ubuntu 18.04
The objective in this step is to use the NTP server earlier configured to act as our NTP server. For this to happen we need to edit the /etc/ntp.conf file.
$ sudo vim /etc/ntp.conf
Append the line below where bionic is the NTP server’s hostname.
server bionic prefer iburst
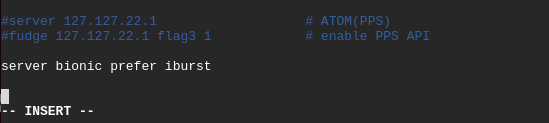
Save and exit the configuration file.
For the changes to come into effect, restart the NTP service as shown.
$ sudo systemctl restart ntp
Step 6: Verify the NTP Time Synchronization Queue
With the client and NTP server insync, you can view the sync details by executing the command.
$ ntpq -p
Sample Output
     remote           refid      st t when poll reach   delay   offset  jitter
==============================================================================
  bionic          71.79.79.71      2 u    6   64  377    0.625   -0.252   0.063
This brings us to the end of this guide. At this point you have successfully configured the NTP server on Ubuntu 18.04 LTS and configured a client system to be synchronized with the NTP server. Feel free to reach out to us with your feedback.
If You Appreciate What We Do Here On TecMint, You Should Consider:
TecMint is the fastest growing and most trusted community site for any kind of Linux Articles, Guides and Books on the web. Millions of people visit TecMint! to search or browse the thousands of published articles available FREELY to all.
If you like what you are reading, please consider buying us a coffee ( or 2 ) as a token of appreciation.

We are thankful for your never ending support.
NTP или Network Time Protocol — это протокол, который используется для синхронизации всех системных часов в сети для использования одного и того же времени. Когда мы используем термин NTP, мы имеем в виду сам протокол, а также клиентские и серверные программы, работающие на компьютерах, объединенных в сеть. NTP входит в традиционный набор протоколов TCP/IP и может быть легко классифицирован как одна из самых старых его частей.
При первоначальной настройке часов требуется шесть обменов в течение 5-10 минут, прежде чем часы будут настроены. Как только часы в сети синхронизированы, клиент(ы) обновляют свои часы с сервером раз в 10 минут. Обычно это делается посредством одного обмена сообщениями (транзакция). Эти транзакции используют порт номер 123 вашей системы.
В этой статье мы опишем пошаговую процедуру, как:
- Установить и настроить NTP-сервер на машине Ubuntu.
- Настроить NTP-клиент для синхронизации времени с сервером.
Содержание
- Установка и настройка NTP-сервера на главном компьютере
- Шаг 1: Обновление индекса репозитория
- Шаг 2: Установите NTP-сервер с помощью apt-get
- Шаг 3: Проверка установки (необязательно)
- Шаг 4: Переключитесь на пул NTP-сервера, ближайший к вашему местоположению
- Шаг 5: Перезапустите сервер NTP
- Шаг 6: Убедитесь, что сервер NTP запущен
- Шаг 7: Настройте брандмауэр так, чтобы клиент(ы) мог(ли) получить доступ к серверу NTP
- Настройка NTP-клиента для синхронизации времени с NTP-сервером
- Шаг 1: Установите ntpdate
- Шаг 2: Укажите IP и имя хоста NTP-сервера в файле hosts
- Шаг 3: Проверьте, синхронизировано ли время клиентской машины с NTP-сервером
- Шаг 4: Отключите службу systemd timesyncd на клиенте (если используется)
- Шаг 5: Установите NTP на вашем клиенте
- Шаг 6: Настройте файл /etc/ntp.conf для добавления вашего NTP сервера в качестве нового сервера времени
- Шаг 7: Перезапустите NTP-сервер
- Шаг 8: Просмотр очереди синхронизации времени
Установка и настройка NTP-сервера на главном компьютере
Выполните следующие шаги, чтобы установить NTP-сервер на хост-компьютере Ubuntu:
Для установки и настройки NTP мы используем командную строку Ubuntu, Терминал. Вы можете открыть приложение Terminal либо через поиск в программе запуска приложений, либо с помощью сочетания клавиш Ctrl+Alt+T.
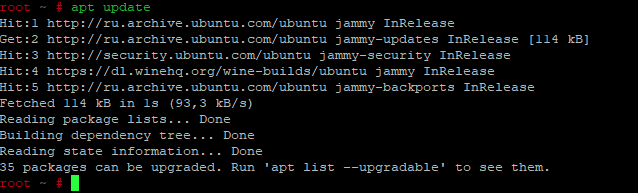
Шаг 1: Обновление индекса репозитория
Для того чтобы установить последнюю доступную версию программного обеспечения из интернет-репозиториев, индекс вашего локального репозитория должен соответствовать им. Выполните следующую команду от имени sudo, чтобы обновить индекс локального репозитория:
Шаг 2: Установите NTP-сервер с помощью apt-get
Для установки демона NTP-сервера из репозиториев APT выполните следующую команду от имени sudo:
Обратите внимание, что только авторизованный пользователь может добавлять, удалять и настраивать программное обеспечение на Ubuntu.
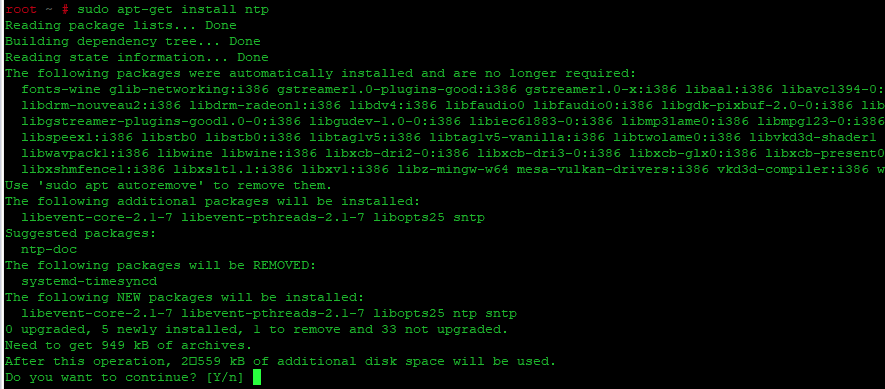
Система может запросить у вас пароль для sudo, а также предложить вам опцию Y/n для продолжения установки. Введите Y и нажмите Enter; после этого NTP-сервер будет установлен в вашей системе. Однако этот процесс может занять некоторое время в зависимости от скорости вашего Интернета.
Шаг 3: Проверка установки (необязательно)
Вы можете проверить установку NTP, а также проверить номер версии, выполнив следующую команду в терминале:
![]()
Шаг 4: Переключитесь на пул NTP-сервера, ближайший к вашему местоположению
Когда вы устанавливаете NTP-сервер, он в основном настроен на получение правильного времени. Однако вы можете переключить пул серверов на ближайший к вашему местоположению. Для этого нужно внести некоторые изменения в файл /etc/ntp.conf.
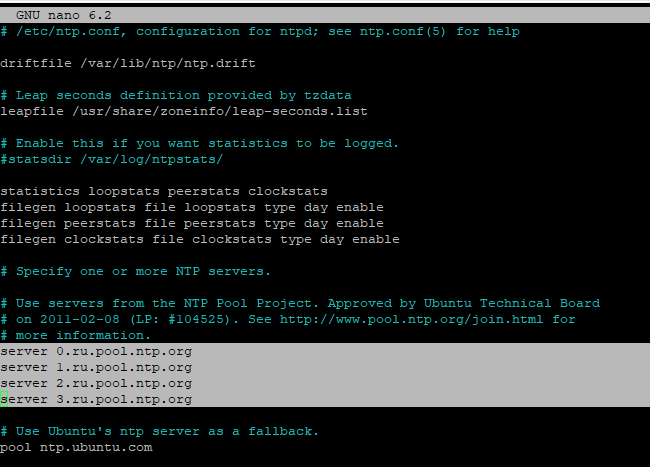
Откройте этот файл в редакторе nano с правами sudo, выполнив следующую команду:
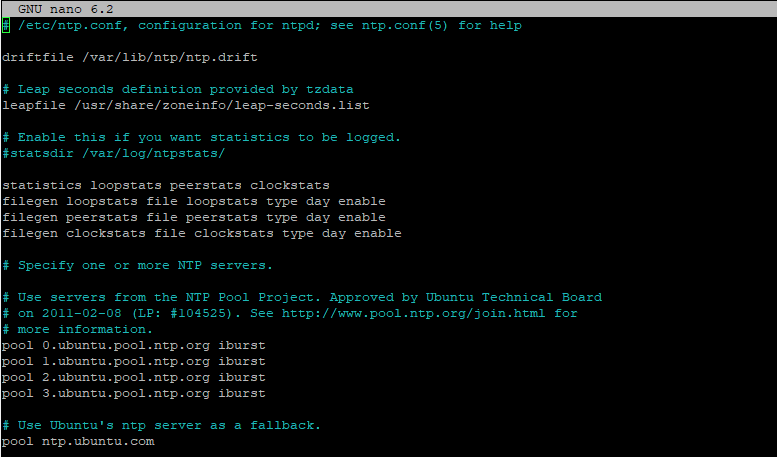
В этом файле вы сможете увидеть список пулов. Мы выделили этот список на изображении выше. Задача состоит в том, чтобы заменить этот список пулов на пул серверов времени, расположенных ближе всего к вашему местоположению. Проект pol.ntp.org предоставляет надежный NTP-сервис от большого кластера серверов времени. Чтобы выбрать список пулов в соответствии с вашим местоположением, посетите следующую страницу:
https://support.ntp.org/bin/view/Servers/NTPPoolServers
Мы искали список пулов для России:
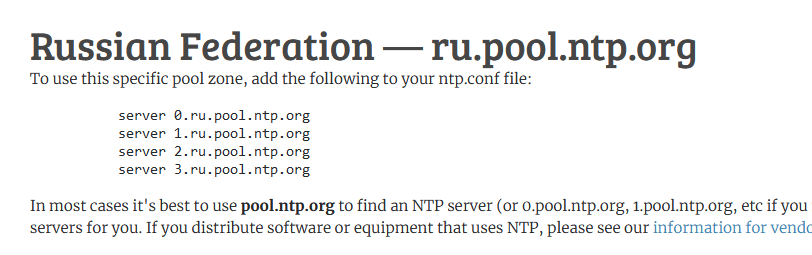
Страница подскажет нам добавить следующие строки в файл ntp.conf:
server 0.ru.pool.ntp.org
server 1.ru.pool.ntp.org
server 2.ru.pool.ntp.org
server 3.ru.pool.ntp.org
файл выглядит после добавления в него вышеуказанных строк:
Выйдите из файла, нажав Ctrl+O, а затем Ctrl+X
Шаг 5: Перезапустите сервер NTP
Для того чтобы вышеуказанные изменения вступили в силу, необходимо перезапустить NTP-сервер. Для этого выполните следующую команду от имени sudo:
Шаг 6: Убедитесь, что сервер NTP запущен
Теперь проверьте состояние службы NTP с помощью следующей команды:
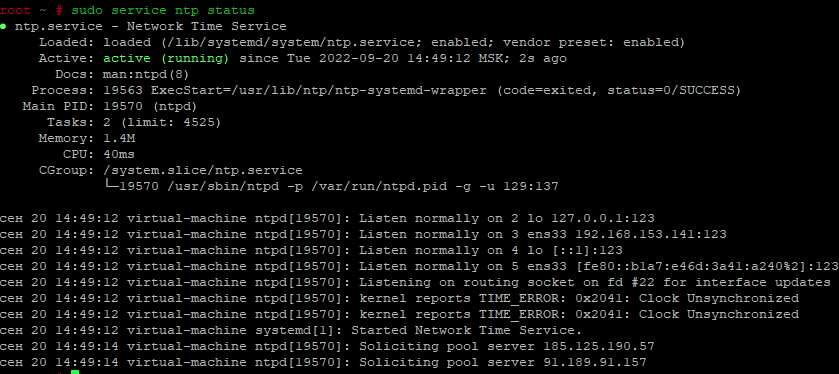
Статус Active подтверждает, что ваш NTP сервер запущен и работает.
Шаг 7: Настройте брандмауэр так, чтобы клиент(ы) мог(ли) получить доступ к серверу NTP
Наконец, пришло время настроить UFW-брандмауэр вашей системы таким образом, чтобы входящие соединения могли получить доступ к NTP-серверу через UDP-порт номер 123.
Выполните следующую команду от имени sudo, чтобы открыть порт 123 для входящего трафика:
sudo ufw allow from any to any port 123 proto udpТеперь ваша хост-машина Ubuntu настроена для использования в качестве NTP-сервера.
Настройка NTP-клиента для синхронизации времени с NTP-сервером
Теперь давайте настроим нашу клиентскую машину Ubuntu на синхронизацию времени с NTP-сервером.
Шаг 1: Установите ntpdate
Команда ntpdate позволит вам вручную проверить конфигурацию соединения с NTP-сервером. Откройте приложение Terminal на клиентской машине и введите следующую команду от имени sudo:
sudo apt-get install ntpdate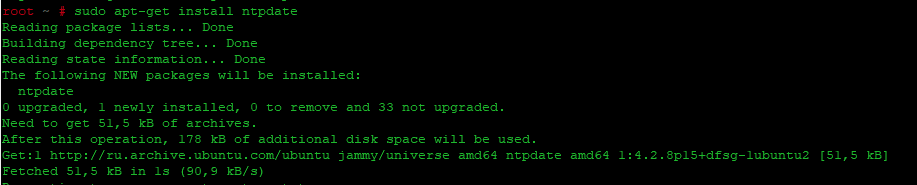
Шаг 2: Укажите IP и имя хоста NTP-сервера в файле hosts
Чтобы ваш NTP-сервер разрешался по имени хоста на вашей клиентской машине, вам необходимо настроить файл /etc/hosts.
Откройте файл hosts от имени sudo в редакторе nano, введя следующую команду:
Теперь добавьте в этот файл IP вашего NTP-сервера и укажите имя хоста следующим образом:
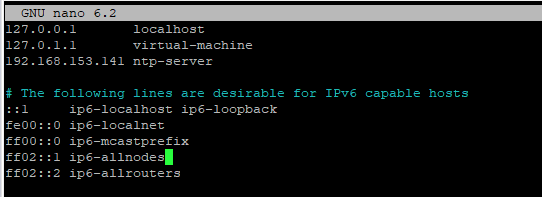
в нашем примере
192.168.153.141 ntp-serverВыйдите из файла, нажав Ctrl+X, а затем сохраните его, введя y.
При наличии DNS сервера в вашей сети, данную настройку можно произвести на нем.
Шаг 3: Проверьте, синхронизировано ли время клиентской машины с NTP-сервером
Следующая команда ntpdate позволит вам вручную проверить, синхронизировано ли время между клиентской и серверной системами:
По идее, результат должен показать смещение времени между двумя системами.
Шаг 4: Отключите службу systemd timesyncd на клиенте (если используется)
Поскольку мы хотим, чтобы наш клиент синхронизировал время с NTP-сервером, давайте отключим службу timesyncd на клиентской машине.
Для этого введите следующую команду:
sudo timedatectl set-ntp offШаг 5: Установите NTP на вашем клиенте
Выполните следующую команду от имени sudo, чтобы установить NTP на клиентской машине:
Шаг 6: Настройте файл /etc/ntp.conf для добавления вашего NTP сервера в качестве нового сервера времени
Теперь мы хотим, чтобы наша клиентская машина использовала наш собственный хост-сервер NTP в качестве сервера времени по умолчанию. Для этого нам нужно отредактировать файл /etc/ntp.conf на клиентской машине.
Выполните следующую команду от имени sudo, чтобы открыть файл в редакторе Nano:
Затем добавьте в файл следующую строку, где NTP-server-host — это имя хоста, которое вы указали для вашего NTP-сервера:
server ntp-servert prefer iburstВот как выглядит мой файл после указания сервера времени:

Нажмите Ctrl+x, чтобы выйти из файла, а затем введите y, чтобы сохранить изменения.
Шаг 7: Перезапустите NTP-сервер
Для того чтобы вышеуказанные изменения вступили в силу, необходимо перезапустить службу NTP. Для этого выполните следующую команду от имени sudo:
Шаг 8: Просмотр очереди синхронизации времени
Теперь клиентские и серверные машины настроены на синхронизацию времени. Вы можете просмотреть очередь синхронизации времени, выполнив следующую команду:
Вы должны увидеть ntp-server в качестве узла/источника синхронизации времени в очереди.
Итак, это все, что вам нужно было знать об установке и настройке NTP для синхронизации времени на ваших сетевых машинах Ubuntu. Процесс может показаться немного громоздким, но если вы тщательно выполните все вышеперечисленные шаги, один за другим, ваши машины будут синхронизированы в кратчайшие сроки.
Карим Буздар