Home
> My Handy References > Location for the host file in windows server 2008 R2
March 23, 2010
ybbest Leave a comment
Go to comments
The location for the host file in windows server 2008 R2 is @ C:WindowsSystem32Driversetchosts
Categories: My Handy References
Comments (1)
Trackbacks (1)
Leave a comment
Trackback
-

Mari Cruz García
January 25, 2013 at 3:56 am
Reply
Thanks, you saved me a lot of work!
-
September 30, 2011 at 9:11 pm
asp.net, c#,javascript
Leave a Reply
Enter your comment here…
Fill in your details below or click an icon to log in:
![]()
Email (required) (Address never made public)
Name (required)
Website
![]()
You are commenting using your WordPress.com account.
( Log Out /
Change )
![]()
You are commenting using your Twitter account.
( Log Out /
Change )
You are commenting using your Facebook account.
( Log Out /
Change )
Cancel
Connecting to %s
Notify me of new comments via email.
Notify me of new posts via email.
What is C# “Lock” equivalent in VB.NET?
Could not find default endpoint element that references contract ‘Your Service’ in the ServiceModel client configuration section.
Summary
This article helps you reset the Hosts file back to the default.
What’s the Hosts file
The Hosts file is used by the operating system to map human-friendly hostnames to numerical Internet Protocol (IP) addresses which identify and locate a host in an IP network. The hosts file is one of several system resources that address network nodes in a computer network and is a common part of an operating system’s IP implementation.
The Hosts file contains lines of text consisting of an IP address in the first text field followed by one or more host names. Each field is separated by white space (Tabs are often preferred for historical reasons, but spaces are also used). Comment lines may be included, and they are indicated by a hash character (#) in the first position of such lines. Entirely blank lines in the file are ignored.
If the Hosts file is changed from default, resetting it can help resolve some connectivity issues.
Resolution
To reset the Hosts file back to the default, follow these steps according to your operating system:
To reset the Hosts file back to the default, follow these steps:
1. Open Notepad. To do this, search for “Notepad”, and then tap or click the Notepad icon.
2. Copy the following text, and then paste the text into the file:
-
# Copyright (c) 1993-2006 Microsoft Corp. # # This is a sample HOSTS file used by Microsoft TCP/IP for Windows. # # This file contains the mappings of IP addresses to host names. Each # entry should be kept on an individual line. The IP address should # be placed in the first column followed by the corresponding host name. # The IP address and the host name should be separated by at least one # space. # # Additionally, comments (such as these) may be inserted on individual # lines or following the machine name denoted by a ‘#’ symbol. # # For example: # # 102.54.94.97 rhino.acme.com # source server # 38.25.63.10 x.acme.com # x client host # localhost name resolution is handle within DNS itself. # 127.0.0.1 localhost # ::1 localhost
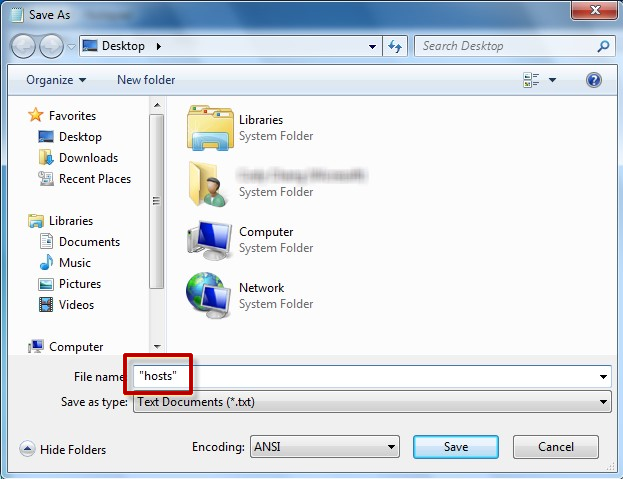
3. On the File menu, select Save as, type «hosts» in the File name box (as displayed in the following image), and then save the file to the desktop.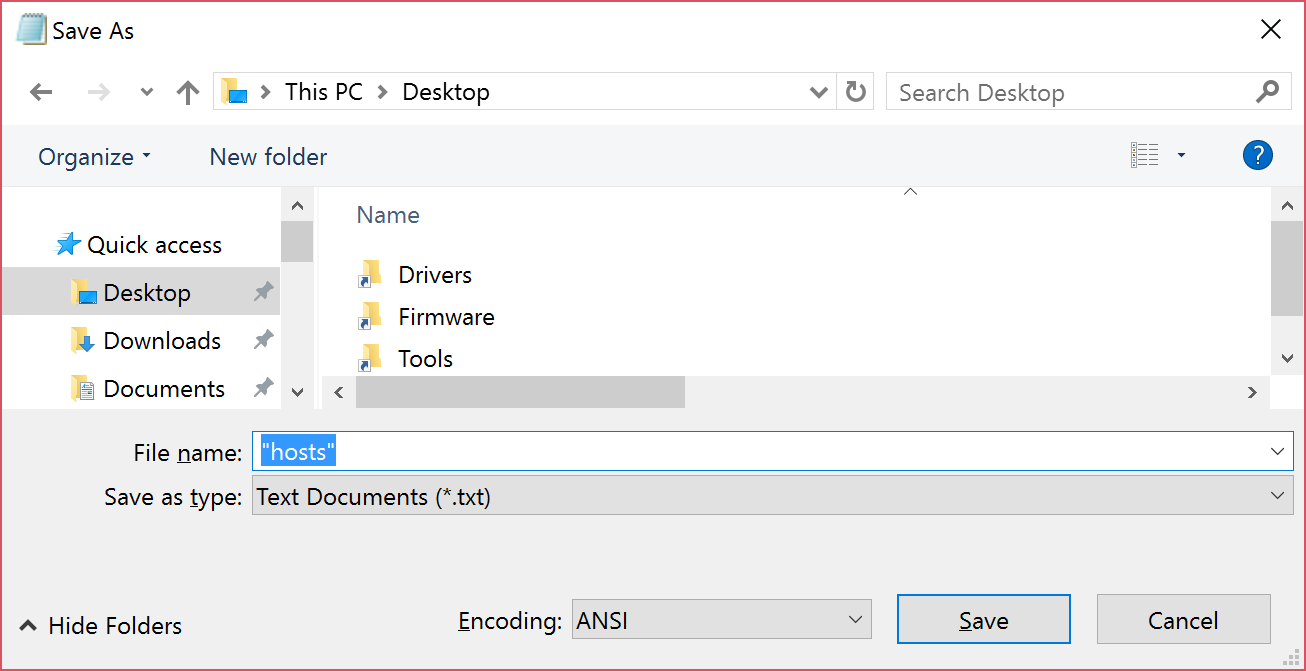
4. Close Notepad.
5. Search for %WinDir%System32DriversEtc, and then select the File folder icon.
6. Tap and hold or right-click the Hosts file, select Rename, and then rename the file as «Hosts.old».
7. Copy or move the Hosts file that you created in step 3 from the desktop to the %WinDir%System32DriversEtc folder. If you are prompted to enter an administrator password, select Continue.
To reset the Hosts file back to the default, follow these steps:
1. Open Notepad. To do this, search for “Notepad” using Cortana, and then tap or click the Notepad icon.
2. Copy the following text, and then paste the text into the file:
-
# Copyright (c) 1993-2006 Microsoft Corp. # # This is a sample HOSTS file used by Microsoft TCP/IP for Windows. # # This file contains the mappings of IP addresses to host names. Each # entry should be kept on an individual line. The IP address should # be placed in the first column followed by the corresponding host name. # The IP address and the host name should be separated by at least one # space. # # Additionally, comments (such as these) may be inserted on individual # lines or following the machine name denoted by a ‘#’ symbol. # # For example: # # 102.54.94.97 rhino.acme.com # source server # 38.25.63.10 x.acme.com # x client host # localhost name resolution is handle within DNS itself. # 127.0.0.1 localhost # ::1 localhost
3. On the File menu, select Save as, type «hosts» in the File name box (as displayed in the following image), and then save the file to the desktop.
4. Close Notepad.
5. Search for %WinDir%System32DriversEtc using Cortana, and then select the File folder icon.
6. Tap and hold or right-click the Hosts file, select Rename, and then rename the file as «Hosts.old».
7. Copy or move the Hosts file that you created in step 3 from the desktop to the %WinDir%System32DriversEtc folder. If you are prompted to enter an administrator password, select Continue.
To reset the Hosts file back to the default, follow these steps:
1. Open Notepad. To do this, swipe in from the right edge of the screen, tap Search, type Notepad, and then tap the Notepad icon. Or, if you are using a mouse, point to the upper-right corner of the screen, move the mouse pointer down, click Search, type Notepad, and then click Notepad.
2. Copy the following text, and then paste the text into the file:
-
# Copyright (c) 1993-2006 Microsoft Corp. # # This is a sample HOSTS file used by Microsoft TCP/IP for Windows. # # This file contains the mappings of IP addresses to host names. Each # entry should be kept on an individual line. The IP address should # be placed in the first column followed by the corresponding host name. # The IP address and the host name should be separated by at least one # space. # # Additionally, comments (such as these) may be inserted on individual # lines or following the machine name denoted by a ‘#’ symbol. # # For example: # # 102.54.94.97 rhino.acme.com # source server # 38.25.63.10 x.acme.com # x client host # localhost name resolution is handle within DNS itself. # 127.0.0.1 localhost # ::1 localhost
3. On the File menu, select Save as, type «hosts» in the File name box (as displayed in the following image), and then save the file to the desktop.

4. Close Notepad.
5. Open the %WinDir%System32DriversEtc folder. To do this, follow these steps:
-
a. Swipe in from the right edge of the screen, tap Search, type run, and then tap the Run icon. Or, if you are using a mouse, point to the upper-right corner of the screen, move the mouse pointer down, select Search, type run, and then select the Run icon.
-
b. Type %WinDir%System32DriversEtc in the Open box, and then select OK.
6. Select the Hosts file, select Rename, and then rename the file as «Hosts.old».
7. Copy or move the Hosts file that you created in step 3 to the %WinDir%System32DriversEtc folder. If you are prompted to enter an administrator password, tap or click Continue.
To reset the Hosts file back to the default yourself, follow these steps:
-
Click Start, click Run, type Notepad, and then click OK.
-
Look for your version of Windows from the list below and then copy the following text for that version of Windows, and then paste it into Notepad:
-
For Windows 7:
- # Copyright (c) 1993-2006 Microsoft Corp. # # This is a sample HOSTS file used by Microsoft TCP/IP for Windows. # # This file contains the mappings of IP addresses to host names. Each # entry should be kept on an individual line. The IP address should # be placed in the first column followed by the corresponding host name. # The IP address and the host name should be separated by at least one # space. # # Additionally, comments (such as these) may be inserted on individual # lines or following the machine name denoted by a ‘#’ symbol. # # For example: # # 102.54.94.97 rhino.acme.com # source server # 38.25.63.10 x.acme.com # x client host # localhost name resolution is handle within DNS itself. # 127.0.0.1 localhost # ::1 localhost
-
For Windows Vista or for Windows Server 2008:
- # Copyright (c) 1993-2006 Microsoft Corp. # # This is a sample HOSTS file used by Microsoft TCP/IP for Windows. # # This file contains the mappings of IP addresses to host names. Each # entry should be kept on an individual line. The IP address should # be placed in the first column followed by the corresponding host name. # The IP address and the host name should be separated by at least one # space. # # Additionally, comments (such as these) may be inserted on individual # lines or following the machine name denoted by a ‘#’ symbol. # # For example: # # 102.54.94.97 rhino.acme.com # source server # 38.25.63.10 x.acme.com # x client host 127.0.0.1 localhost ::1 localhost
-
For Windows XP or for Windows Server 2003:
- # Copyright (c) 1993-1999 Microsoft Corp. # # This is a sample HOSTS file used by Microsoft TCP/IP for Windows. # # This file contains the mappings of IP addresses to host names. Each # entry should be kept on an individual line. The IP address should # be placed in the first column followed by the corresponding host name. # The IP address and the host name should be separated by at least one # space. # # Additionally, comments (such as these) may be inserted on individual # lines or following the machine name denoted by a ‘#’ symbol. # # For example: # # 102.54.94.97 rhino.acme.com # source server # 38.25.63.10 x.acme.com # x client host 127.0.0.1 localhost
3. On the File menu, select Save as, type «hosts» in the File name box, and then save the file to the desktop.
4. Select Start > Run, type %WinDir%System32DriversEtc, and then select OK.
5. Select the Hosts file, and rename it «Hosts.old.»
6. Copy or move the Hosts file that you created in step 3 to the %WinDir%System32DriversEtc folder. If you are prompted to enter an administrator password, select Continue.
More Information
Support for Windows XP has ended
Microsoft ended support for Windows XP on April 8, 2014. This change has affected your software updates and security options. Learn what this means for you and how to stay protected.
Support for Windows Server 2003 ended on July 14, 2015
Microsoft ended support for Windows Server 2003 on July 14, 2015. This change has affected your software updates and security options. Learn what this means for you and how to stay protected.
,
last updated December 8, 2010, in
[A German translation of this article is available at faq-o-matic.net.]
The subtle differences between 32-bit and 64-bit Windows present so many intricacies and pitfalls that even Microsoft employees seem to have trouble getting it right. I just stumbled upon a KB article that describes how to reset the hosts file to its original state. The topic alone is funny enough – it is not as if the default hosts file contained great amounts of data. An entry for localhost (IPv4 and IPv6) is all you need, and on Windows 7 / Server 2008 R2 not even that. But anyhow, there seem to be enough people asking MS support for this or they would not have troubled with creating a package (ResetHOSTSFileBackToDefaults.MSI) that basically empties the hosts file.
Is Hosts 64-bit or 32-bit?
As always, I am more interested in what the package does, and Microsoft is kind enough to explain that in most “Fix it for me” articles. As you probably know, the hosts file was, is and probably will always be located in %systemroot%system32driversetc. Simple enough. But wait: 64-bit systems have two system32 directories: one for 64-bit processes and the other for 32-bit processes. Now, where would the hosts file be located – or are there even two (potentially different) files?
The answer is: no, the hosts file exists only once on x64 Windows. And it is right where it belongs, in the 64-bit system32 directory. But where is that directory located on disk? Is it the one natively called system32, or is it SysWOW64?
Redirection Confusion
This is where confusion kicks in. Many people, including the person writing MS KB article 972034, see the number “64” in the name of the folder SysWOW64 and think: yes, that must be the 64-bit version of system32. Nice thinking, but wrong. It is exactly the other way round. For compatibility reasons, the name of the system32 folder did not change in Windows x64, although on 64-bit platforms the folder does not contain 32-bit but 64-bit executables! That leaves the question of where to put the 32-bit files that 32-bit processes need – and also expect to find in system32? Obviously, the same DLL cannot be present twice in the same folder.
The requirement of two different system32 directories was solved by redirection. Actually there are two independent folders in any x64 installation: system32 and SysWOW64. The latter is shown to 32-bit processes under the name system32. 64-bit processes do not use SysWOW64.
How to Get to and Edit the Hosts File
If you want to edit the hosts file, you first need to locate and open it – on Vista and newer with UAC enabled from an elevated process (with admin rights). The procedure is a little tedious. Here is how to do it with 64-bit Notepad:
- Click on the Start button, type “notepad” and press CTRL+SHIFT+ENTER. Acknowledge the UAC dialog.
- Type CTRL+O. Navigate to
C:WindowsSystem32driversetc. Select “All Files” in the bottom right corner. - Now you see the hosts file. Select and open it. Make your changes and save it.
If you want to access hosts from a 32-bit process, use one of the following paths. Please note that in both cases the full path must be used. Navigating to “etc” from the root does not work (because System32 is redirected and Sysnative is not shown in directory listings).
%Windir%System32driversetc. This works because file system redirection is disabled for the “etc” directory and thus accessing the 64-bit System32 works from a 32-bit process.%Windir%Sysnativedriversetc. Sysnative is an alias that can only be used from 32-bit processes to access the 64-bit System32 directory.
About the Author
Helge Klein (ex CTP, MVP and vExpert) worked as a consultant and developer before founding vast limits, the uberAgent company. Helge applied his extensive knowledge in IT infrastructure projects and architected the user profile management product whose successor is now available as Citrix Profile Management. Helge is the author of the popular tools Delprof2 and SetACL. He has presented at Citrix Synergy, BriForum, E2EVC, Splunk .conf and many other events. Helge is very active in the IT community and has co-founded Virtualization Community NRW (VCNRW).
Read more
Оригинальный файл hosts Windows 10, Windows 8, Windows 7, Windows XP — в целях безопасности используйте только оригинальный файл hosts Windows. Это касается и оригинальных файлов hosts Windows Server 2008 и Windows Server 2003.
Файл hosts — это текстовый файл, который содержит записи доменных имен и используется при их трансляции в сетевые адреса узлов. Запрос к этому файлу имеет приоритет перед обращением к DNS-серверам. В отличие от системы DNS, содержимое файла задаётся администратором компьютера или задано по умолчанию в оригинальном виде.
Файл hosts — это записная адресная книга (база данных) Windows. Работает локально подобно глобальной DNS. В статье про DNS для белорусских провайдеров в начале статьи есть дополнительная информация.
Оригинальный файл hosts Windows 10 и Windows 8
# Copyright (c) 1993-2006 Microsoft Corp.
#
# This is a sample HOSTS file used by Microsoft TCP/IP for Windows.
#
# This file contains the mappings of IP addresses to host names. Each
# entry should be kept on an individual line. The IP address should
# be placed in the first column followed by the corresponding host name.
# The IP address and the host name should be separated by at least one
# space.
#
# Additionally, comments (such as these) may be inserted on individual
# lines or following the machine name denoted by a ‘#’ symbol.
#
# For example:
#
# 102.54.94.97 rhino.acme.com # source server
# 38.25.63.10 x.acme.com # x client host
# localhost name resolution is handle within DNS itself.
# 127.0.0.1 localhost
# ::1 localhost
Оригинальный файл hosts Windows 7
# Copyright (c) 1993-2006 Microsoft Corp.
#
# This is a sample HOSTS file used by Microsoft TCP/IP for Windows.
#
# This file contains the mappings of IP addresses to host names. Each
# entry should be kept on an individual line. The IP address should
# be placed in the first column followed by the corresponding host name.
# The IP address and the host name should be separated by at least one
# space.
#
# Additionally, comments (such as these) may be inserted on individual
# lines or following the machine name denoted by a ‘#’ symbol.
#
# For example:
#
# 102.54.94.97 rhino.acme.com # source server
# 38.25.63.10 x.acme.com # x client host
# localhost name resolution is handle within DNS itself.
# 127.0.0.1 localhost
# ::1 localhost
Оригинальный файл hosts Windows Vista и Windows Server 2008
# Copyright (c) 1993-2006 Microsoft Corp.
#
# This is a sample HOSTS file used by Microsoft TCP/IP for Windows.
#
# This file contains the mappings of IP addresses to host names. Each
# entry should be kept on an individual line. The IP address should
# be placed in the first column followed by the corresponding host name.
# The IP address and the host name should be separated by at least one
# space.
#
# Additionally, comments (such as these) may be inserted on individual
# lines or following the machine name denoted by a ‘#’ symbol.
#
# For example:
#
# 102.54.94.97 rhino.acme.com # source server
# 38.25.63.10 x.acme.com # x client host
127.0.0.1 localhost
::1 localhost
Оригинальный файл hosts Windows XP и Windows Server 2003
# Copyright (c) 1993-1999 Microsoft Corp.
#
# This is a sample HOSTS file used by Microsoft TCP/IP for Windows.
#
# This file contains the mappings of IP addresses to host names. Each
# entry should be kept on an individual line. The IP address should
# be placed in the first column followed by the corresponding host name.
# The IP address and the host name should be separated by at least one
# space.
#
# Additionally, comments (such as these) may be inserted on individual
# lines or following the machine name denoted by a ‘#’ symbol.
#
# For example:
#
# 102.54.94.97 rhino.acme.com # source server
# 38.25.63.10 x.acme.com # x client host
127.0.0.1 localhost
- Строки с решёткой (#) в начале строки в hosts файле не учитываются системой. Не несут никакой смысловой нагрузки для программы-интерпретатора и написаны в виде комментариев для пояснений и примеров.
- В некоторых случаях файл hosts может отличатся от эталонного. Например, это характерно для компьютеров с установленными локальными серверами.
Где находится файл hosts Windows?
Путь к файлу hosts почти всегда такой: C:WindowsSystem32driversetchosts.
Но технически более правильно путь указывается так:
%SystemRoot%system32driversetchosts.
Расположение файла hosts в разных версиях Windows может несколько отличаться:
- Windows 95/98/ME: WINDOWShosts;
- Windows NT/2000: WINNTsystem32driversetchosts;
- Windows XP / 2003 / Vista / 7 / 8.1 / 10: WINDOWSsystem32driversetchosts.
Файл hosts располагается в определённой директории (папке) Windows на компьютере.
Содержимое файла hosts Windows
Инструкции файла hosts не критичны для работы сети. Их может и не быть вовсе. Но все имеющиеся инструкции (при их наличии) являются приоритетными — исполняются системой в первую очередь.
При попытке доступа любой программы к сетевому ресурсу в первую очередь проверяется наличие инструкций в файле hosts. В тоже время операционная система может вполне обходиться без этого файла.
Самая важная запись в файле hosts
127.0.0.1 localhost — это единственная рабочая инструкция в оригинальном файле hosts.
Как расшифровывается эта запись-инструкция? 127.0.0.1 — это адрес локальной машины localhost. Это IP адрес вашего компьютера с позиции вашей операционной системы. Данный IP не является внешним по которому можно вычислить).
Принцип работы hosts
Работает hosts подобно глобальной DNS, но в локальных масштабах одной машины. Служит для локального преобразования символьных значений адресов сайтов в цифровые IP адреса.
Процесс работы связки hosts+DNS выглядит так: в процессе работы в сети интернет, пользователь набирает адрес в строке браузера буквами и нажимает Enter. Запрос из браузера, сверяется с записями hosts, а затем отправляется на один из глобальных dns серверов, тот в свою очередь, снабдив ответ на запрос уже цифровым IP-адресом, передаёт его браузеру пользователя, тем самым направляет на интересующую страничку в интернете.
Как отредактировать файл hosts Windows?
Открыть и модифицировать файл hosts можно в блокноте или через контекстное меню, если зайти в папку с файлом.
Или с помощью команды, выполненной с правами администратора:
notepad %systemroot%System32driversetchosts.
Что случиться, если файл hosts был модифицирован
Сопоставление любого сетевого адреса с localhost (127.0.0.1) будет приводить к блокировке его открытия.
Модификация файла hosts может привести к подмене реального адреса сервиса или сайта на желаемый злоумышленником. Например, с целью навредить пользователю или с целью кражи данных.
Интернет браузер на компьютере с модифицированным файлом hosts может:
- не открывать сайты (адреса) — блокировка IP;
- открывать не те сайты (адреса) — подмена IP;
- открывать не все сайты (адреса) сети — фильтрация IP.
Как найти файл hosts в папке driver/ets
Как найти путь к файлу hosts. Что делать, если в папке по умолчанию (driver/ets) файл Hosts не найден.
Решение проблемы:
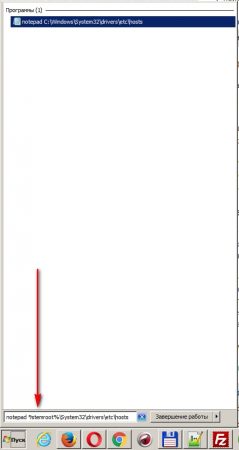
- Копируем строку:
notepad %systemroot%System32driversetchosts - Вставляем её в «Найти программы и файлы». Меню Пуск -> Найти файлы и папки.

- Жмём Ввод (Enter). Должен открыться файл хостс в блокноте.
- Редактируем, сохраняем.
Примеры распространённых модификаций файла hosts Windows.
- 127.0.0.1 kaspersky.com
- 127.0.0.1 updates1.kaspersky-labs.com
- 127.0.0.1 http://www.avsoft.ru/avast/
- 127.0.0.1 www.drweb.com
- 127.0.0.1 liveupdate.symantec.com
- 127.0.0.1 update.symantec.com
Указанные адреса антивирусных программ, идущие после цифр будут заблокированы. Антивирусы не смогут обновиться, проверить версию, проверить лицензию.
Принцип работы hosts Windows. Эксперимент с файлом hosts
Для лучшего понимания принципа работы файла hosts предлагаю забавный эксперимент. Временно изменим содержимое hosts файла на компьютере. Пробуем на собственном компьютере — подмена DNS выглядит забавно!
Создадим подмену IP. При наборе в адресной строке браузера адреса tut.by будет открываться rambler.ru.
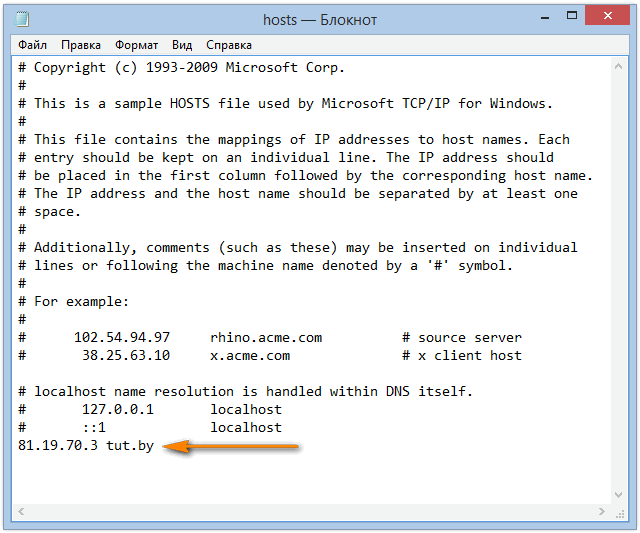
- Открываем hosts с помощью Notepad++.
- Модифицируем hosts. Добавляем строку выделенную желтым в конец файла hosts:
81.19.70.3 tut.by
- Сохраняем изменения.
- Проверяем. Набираем в браузере адрес tut.by. Должен открыться Tut.by, но открывается Rambler.ru.
- Чтобы отменить изменения, удаляем лишнюю строку. Т.е. возвращаем исходное содержимое файла.
Файл hosts — текстовый документ, который содержит в себе информацию о домене и IP-адресе, который ему соответствует. Файл hosts появился во времена зарождения Интернета (ARPANET) и служил неким маршрутизатором, пока на замену ему не пришла служба DNS. Но до сих пор он не утратил важности и по-прежнему используется как инструмент, который обладает приоритетом перед обращением к DNS-серверам.
Зачем нужен файл hosts
Предположим: вы зарегистрировали домен и привязали его к Hosting Linux. Но чтобы увидеть сайт, вам нужно дождаться делегирования домена на DNS-серверы. В файле hosts вы можете указать ваш домен и IP-адрес хостинга, а затем открыть браузер и зайти на ваш сайт, не дожидаясь делегирования домена. Также с его помощью вы можете заблокировать на локальном компьютере доступ к определённому сайту, указав соответствующую запись.
Где находится файл hosts
Путь к папке, где лежит файл hosts, зависит от операционной системы, которая установлена на вашем компьютере:
- Windows XP, 2003, Vista, 7, 8, 10 — c:windowssystem32driversetchosts
- Linux, Ubuntu, Unix, BSD — /etc/hosts
- macOS — /private/etc/hosts
Редактировать файл etc hosts нужно от имени администратора, иначе вы не сможете сохранить внесённые изменения.
Как внести изменения в файл hosts
Ниже мы рассмотрим, как редактировать и как сохранить изменения в файле hosts. Важно открыть файл с правами администратора, иначе система не даст вам его сохранить. Выберите вашу операционную систему и следуйте инструкции или посмотрите видеоинструкцию:
Редактирование файла hosts в Windows 7
-
1.
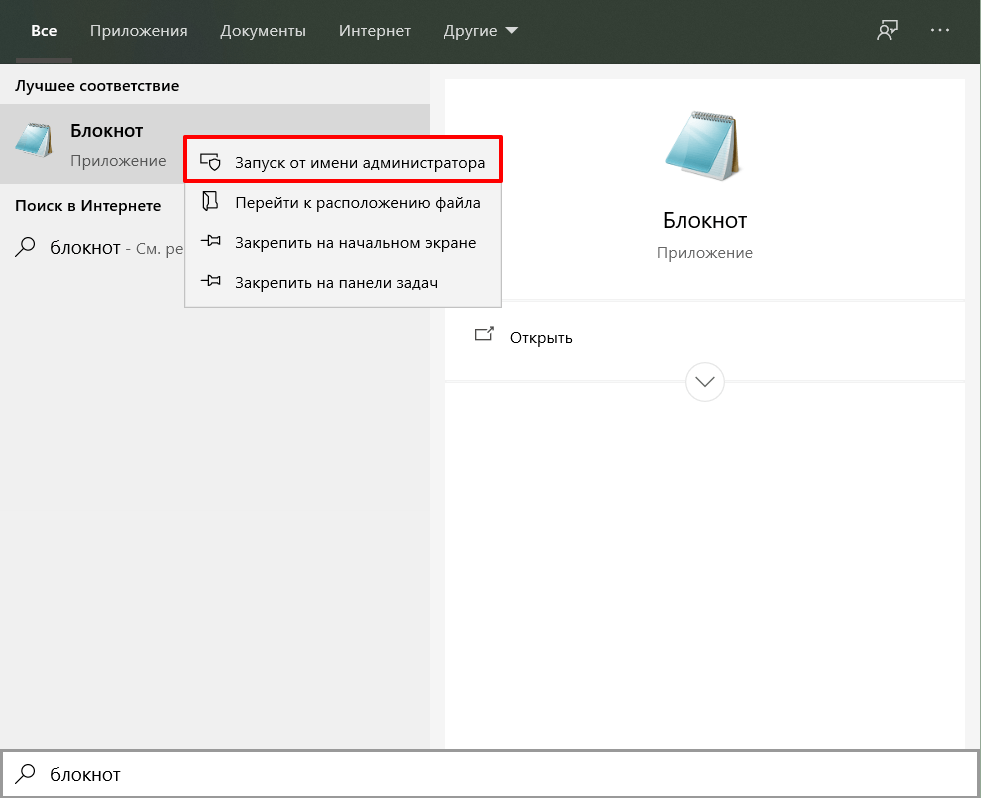
Запустите Блокнот или любой другой редактор от имени администратора. Откройте Пуск, найдите нужный редактор, нажмите по нему правой кнопкой мыши и выберите Запуск от имени администратора:
Как отредактировать файл hosts
-
2.
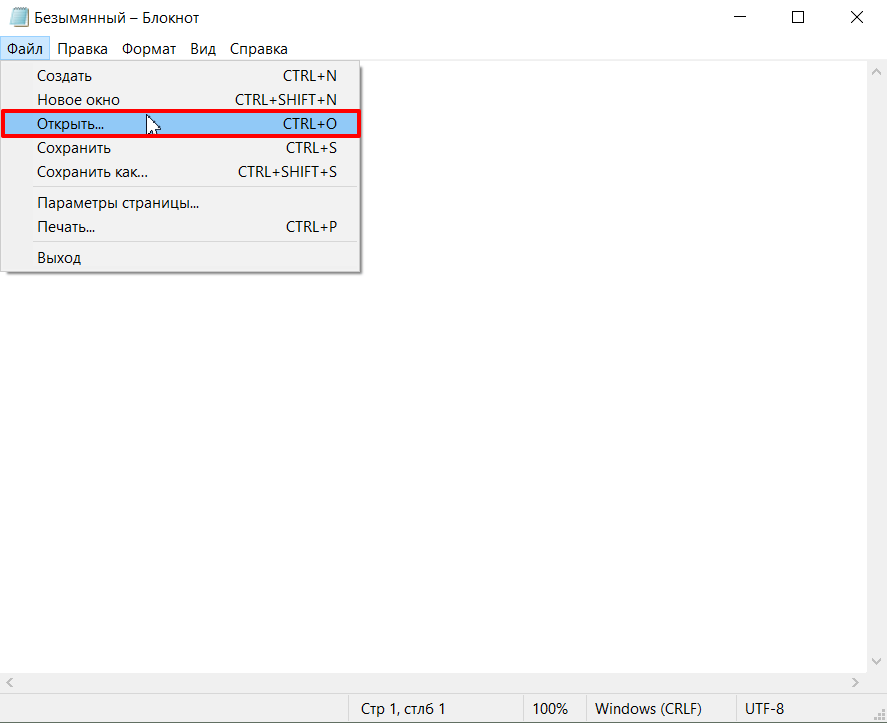
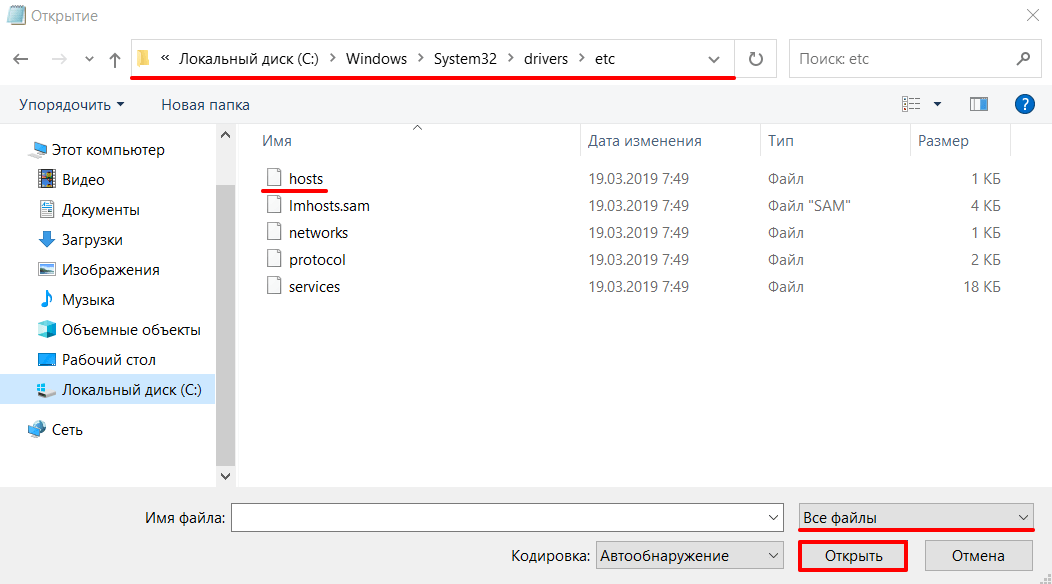
В меню «Файл» нажмите Открыть и перейдите в каталог, в котором расположен файл hosts. Измените тип файла на «Все файлы»:
-
3.
Выберите файл hosts и откройте его.
-
4.
Добавьте в конце файла необходимую запись в формате:
123.123.123.123 faq-reg.ru www.faq-reg.ruГде:
- 123.123.123.123 — IP-адрес вашего сервера или хостинга,
- faq-reg.ru — имя вашего домена.
-
5.
Сохраните изменения в файле.
Теперь вы можете открыть ваш сайт в браузере, не дожидаясь обновления DNS-серверов.
Редактирование файла hosts в Windows 8, 10
Чтобы изменить файл hosts в виндовс 10 (8), выполните следующие действия:
-
1.
Запустите Блокнот или любой другой редактор от имени администратора. Для этого найдите его в Пуске, нажмите по нему правой кнопкой мыши и выберите Запуск от имени администратора:
-
2.
В меню «Файл» нажмите Открыть и перейдите в каталог, где находится файл hosts . Измените тип файла на «Все файлы»:
-
3.
Выберите файл hosts и откройте его.
-
4.
Добавьте в конце файла необходимую запись в формате:
123.123.123.123 faq-reg.ru www.faq-reg.ruГде:
-
123.123.123.123 — IP-адрес вашего сервера или хостинга,
-
faq-reg.ru — имя вашего домена.
-
-
5.
Сохраните изменения в файле.
Теперь вы можете открыть ваш сайт в браузере, не дожидаясь обновления DNS-серверов.
Редактирование файла hosts в Linux, Unix
В Linux файл hosts находится в папке etc. Чтобы отредактировать его:
-
1.
Введите в терминал linux команду hosts:
-
2.
Добавьте в конце файла необходимую запись в формате:
123.123.123.123 faq-reg.ru www.faq-reg.ruГде:
-
123.123.123.123 — IP-адрес вашего сервера или хостинга,
-
faq-reg.ru — имя вашего домена.
-
-
3.
Сохраните изменения в файле.
Теперь вы можете открыть ваш сайт в браузере, не дожидаясь обновления DNS-серверов.
Файл hosts в Ubuntu редактируется так же, как и во всех Unix-системах.
Редактирование файла hosts в MacOS
Файл hosts в Mac OS расположен в каталоге: /private/etc/hosts. Чтобы изменить его:
-
1.
Запустите терминал с помощью горячих клавиш: Command (⌘) + T или через Spotlight.
-
2.
Введите команду:
Нажмите Enter:
-
3.
Добавьте в конце файла необходимую запись в формате:
123.123.123.123 faq-reg.ru www.faq-reg.ruГде:
-
123.123.123.123 — IP-адрес вашего сервера или хостинга,
-
faq-reg.ru — имя вашего домена.
-
-
4.
Сохраните изменения в файле.
Теперь вы можете открыть ваш сайт в браузере, не дожидаясь обновления DNS-серверов.
Видеосправка. Как изменить файл hosts
Также вы можете заблокировать определенный сайт через файл hosts, воспользовавшись инструкцией ниже:
Блокировка доступа к сайту через файл hosts
Доступ к сайту также можно ограничить для локального компьютера. Для этого укажите адрес страницы (домен) в файле hosts. Заблокировать IP нежелательного сайта не требуется. Блокировка осуществляется по локальному хосту с фиксированным IP (127.0.0.1):
-
1.
Откройте файл hosts от имени администратора на своём ПК.
-
2.
В указанной на скриншоте строке укажите IP-адрес 127.0.0.1 и через пробел адрес нежелательного сайта. Чтобы заблокировать несколько сайтов, повторите действие в следующей строке. В примере ниже в файле hosts отказано в доступе (заблокирован доступ) к сайтам «vk.com» и «youtube.com»:
-
3.
Сохраните изменения.
Готово! Доступ к сайтам будет ограничен на определенном ПК.
Оригинальный файл hosts и как его восстановить
Скачать содержимое файла hosts можно на разных ресурсах. Но мы не рекомендуем делать это, так как файл может быть заражен.
Файл hosts по умолчанию есть в каждой операционной системе, но он может быть скрыт для просмотра. Следуя инструкциям выше, вы сможете его открыть и отредактировать. Если вы удалили его, то просто создайте текстовый файл без расширения в нужной папке.
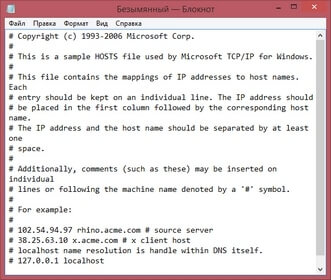
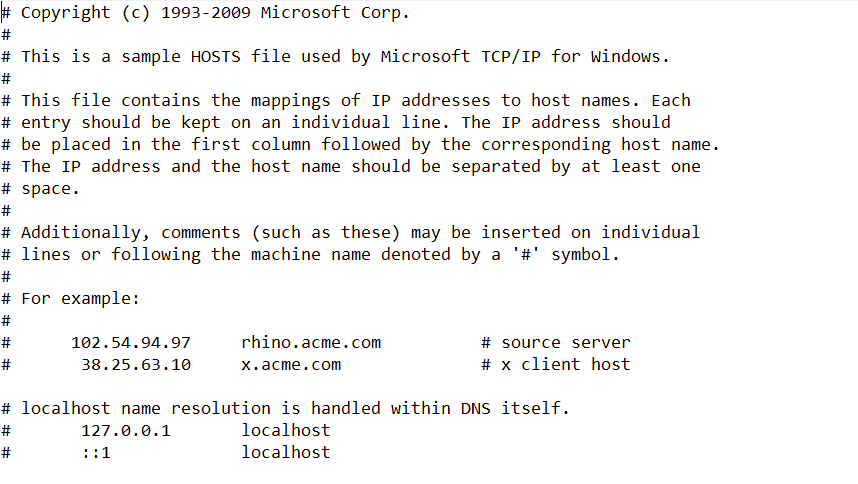
По умолчанию файл hosts выглядит следующим образом:
Для Windows
# Copyright (c) 1993-2006 Microsoft Corp.

#

# This is a sample HOSTS file used by Microsoft TCP/IP for Windows.
#
# This file contains the mappings of IP addresses to host names. Each
# entry should be kept on an individual line. The IP address should
# be placed in the first column followed by the corresponding host name.
# The IP address and the host name should be separated by at least one
# space.
#
# Additionally, comments (such as these) may be inserted on individual
# lines or following the machine name denoted by a '#' symbol.
#
# For example:
#
#      102.54.94.97     rhino.acme.com          # source server
#       38.25.63.10     x.acme.com              # x client host
# localhost name resolution is handle within DNS itself.
#       127.0.0.1       localhost
#       ::1             localhost
Для Linux
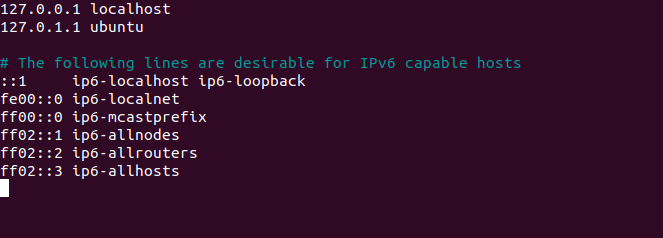
127.0.0.1       localhost

127.0.1.1      user

# The following lines are desirable for IPv6 capable hosts
::1     ip6-localhost ip6-loopback
fe00::0 ip6-localnet
ff00::0 ip6-mcastprefix
ff02::1 ip6-allnodes
ff02::2 ip6-allrouters
где user (во второй строке) — это имя вашего компьютера.
Для MacOS
##

# Host Database

#

# localhost is used to configure the loopback interface
# when the system is booting.  Do not change this entry.
##
127.0.0.1  localhost
255.255.255.255  broadcasthost
::1             localhost
Удалите текущее содержимое из файла hosts, вставьте текст по умолчанию и сохраните изменения.
Теперь вы знаете, как должен выглядеть файл hosts и как с ним работать.
- Что такое hosts
- Где находится файл hosts
- Как открыть hosts
- Как изменить файл hosts
Что такое hosts
Файл hosts — это текстовый файл. Он содержит список доменных имён и IP-адресов, которые им соответствуют. В 1984 году на смену файлу hosts пришла система доменных имён — DNS (Domain Name System): Что такое ДНС (DNS)? Эта система тоже преобразует домен в IP-адрес и наоборот. Тем не менее, файл hosts до сих пор есть на каждом компьютере. При этом, в отличие от DNS, содержимое хостс можно менять.
Когда вы набираете адрес сайта в строке браузера (например, 2domains.ru), браузер сначала обращается к файлу hosts за IP-адресом, а затем к DNS-серверам. Файл hosts имеет приоритет. Что это значит? Если в файле hosts вы пропишете для домена IP-адрес другого сайта, откроется именно он, потому что запроса к DNS не поступит. Если вы пропишите домен и IP, вы ускорите доступ к сайту — пойдёте в обход DNS. Также вы можете открыть свой сайт до того, как делегируете домен на DNS-серверы (Что значит: домен делегирован / не делегирован?).
Где находится файл hosts
Путь к файлу hosts зависит от операционной системы.
Windows — C:WindowsSystem32driversetchosts
Linux, Mac OS — /etc/hosts
Как открыть hosts
Windows
Открыть файл hosts в Windows можно с помощью текстового редактора, например Блокнота.
-
Запустите Блокнот от имени администратора:
-
Нажмите Файл — Открыть:
-
Перейдите в каталог, где находится файл hosts (C:WindowsSystem32driversetchosts). Измените тип файла на Все файлы. Откройте файл hosts:
Готово, вы открыли файл hosts. Как должен выглядеть файл:
Linux
Открыть файл hosts в Linux можно с помощью текстового редактора, например nano.
-
Откройте терминал.
-
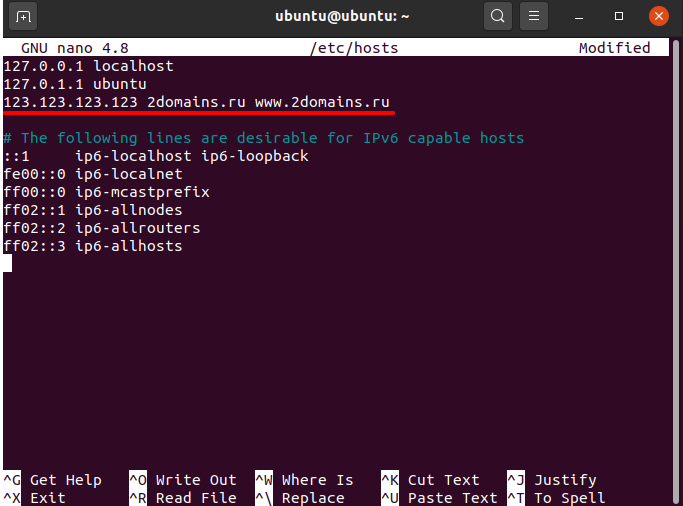
Введите в терминале команду sudo nano /etc/hosts:
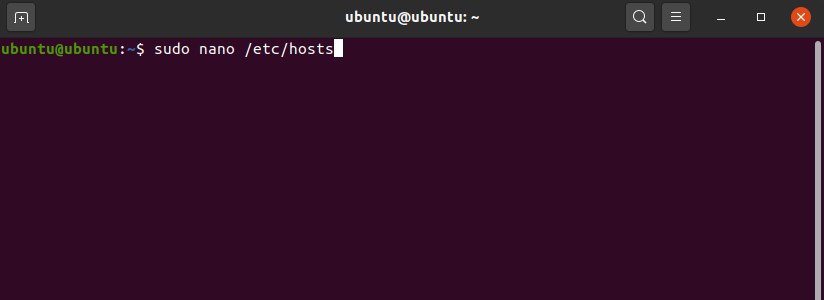
Готово, вы открыли файл hosts. Как должен выглядеть файл:
Как изменить файл hosts
Во всех операционных системах в файл hosts добавляются записи с таким синтаксисом:
123.123.123.123 2domains.ru www.2domains.ru
Где:
123.123.123.123 — IP-адрес сайта, который будет открываться по доменному имени,
2domains.ru — доменное имя,
www.2domains.ru — доменное имя с WWW.
Перед тем как добавить в файл hosts строку, откройте файл по инструкции выше.
Windows
-
Добавьте строку в файл:
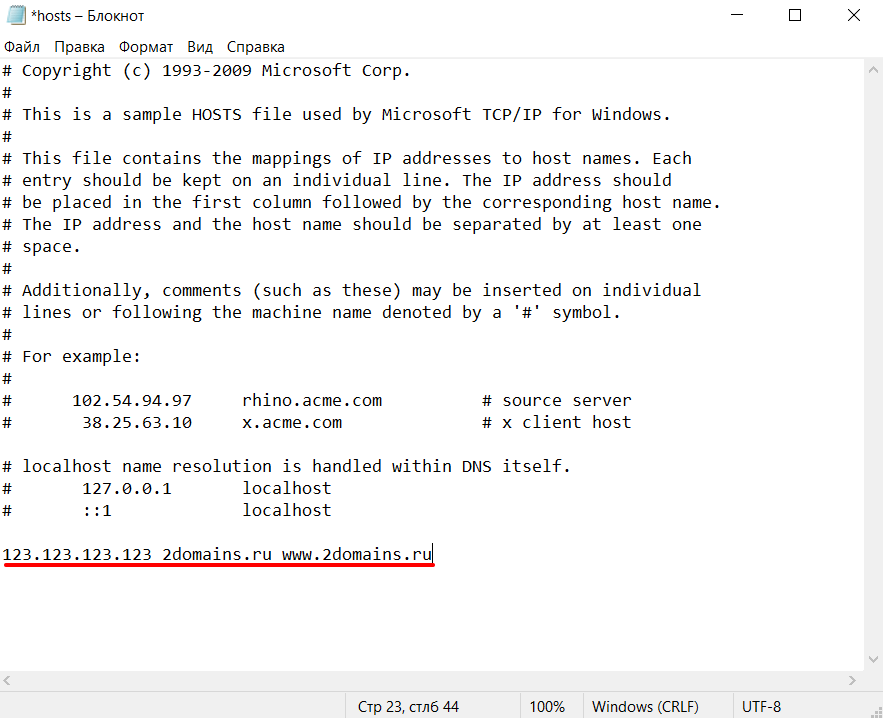
-
Сохраните и закройте файл.
Готово, вы изменили файл hosts.
Linux
-
Добавьте строку в файл:
-
Сохраните и закройте файл.
Готово, вы изменили файл hosts.