Прочитано:
7 225
Задача: Нужны шаги и реально работающие действия чтобы включить тестовый режим на Windows Server 2012 R2 Standard
Авторизуюсь в системе с правами вхожей в группу «Administrators” (Администраторы)
- Login: Administrator
- Pass: 712mbddr@
Запускаю консоль командной строки с правами Администратора
Win + X → Command Prompt (Admin)
Включаю тестовый режим:
C:Windowssystem32>BCDEDIT /Set LoadOptions DDISABLE_INTEGRITY_CHECKS
The operation completed successfully.
C:Windowssystem32>Bcdedit.exe /set TESTSIGNING ON
The operation completed successfully.
C:Windowssystem32>Bcdedit.exe /set nointegritychecks ON
The operation completed successfully.
Отключаю проверку установки неподписанных драйверов:
gpedit.msc – User Configuration – Administrative Templates – System – Driver Installion:
- Code signing for device drivers: Enable: Ignore
после нажимаю Apply — OK
[stextbox id=’alert’]На заметку: Важно чтобы система (Windows Server 2012 R2) была активирована[/stextbox]
После следует перезагрузить систему:
C:Windowssystem32>shutdown /r /t 3
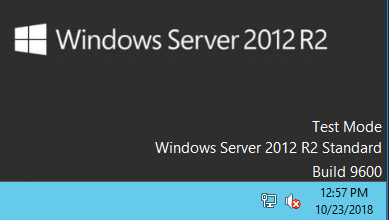
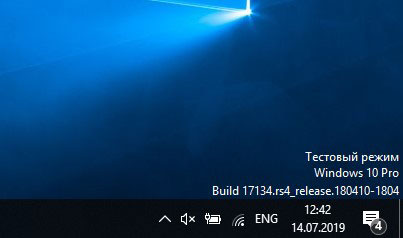
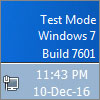
И следует убедиться, что в правом нижнем углу на экране красуется надпись
Работает.
Чтобы возвратить настройки до внесения изменений, как если бы система была только что установлена, следует, запустить консоль командной строки с правами Администратора и выполнить:
Win + X → Command Prompt (Admin)
C:Windowssystem32>bcdedit.exe /set nointegritychecks off
The operation completed successfully.
C:Windowssystem32>bcdedit.exe /set testsigning off
The operation completed successfully.
На этом у меня все, с уважением автор блога Олло Александр aka ekzorchik.
To install unsigned drivers on Windows Server 2012, you have to disable the Digital Signature Driver Verification.
In previous versions (before 2008 R2 or something like that), you could simply disable the check through group policies in gpedit.msc (User Configuration-> Administrative Templates-> System-> Driver Installation, Code Signing for Device Drivers). Now the rigid concept of security is replaced by the brutal arbitrariness of Microsoft. Fortunately, they still left a loophole.
Run the command line with elevated privileges and execute the following commands in sequence:
Bcdedit.exe /set nointegritychecks ON
Bcdedit.exe /set TESTSIGNING ON
After each command, a success message should appear: Instead of the first of these commands, you can do:
bcdedit.exe /set loadoptions DDISABLE_INTEGRITY_CHECKS
Return to normal:
Bcdedit.exe /set nointegritychecks OFF
bcdedit.exe /set TESTSIGNING OFF
Or instead of the first:
bcdedit -set loadoptions ENABLE_INTEGRITY_CHECKS
After you run these commands, you must restart the server.
Now in the lower right corner there will be an inscription stating that Windows Server 2012 is running in test mode. You can get rid of the inscription, but it makes no sense. So immediately you can see that everything turned out and the test mode is enabled.
Remarks:
1. On the account of the first lines I am not sure, but «bcdedit.exe / set TESTSIGNING ON» is mandatory.
2. Instead of these manipulations, you can boot into F8 in a special mode, ignoring unsigned drivers and installing an unsigned driver, but after rebooting the server, this driver will not work.
- Remove From My Forums
![]()
Тестовый режим
-
Вопрос
-
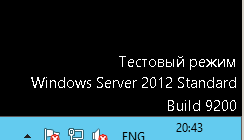
Купили Стандартный Server2012 на нем подняли роль Hyper-V установили две виртуалки. На одной из виртуалок с терминальными службами появилась надпись:
Тестовый режим
Windows Server 2012 Standard
Build 9200
Что это значит и как с этим бороться?
И самый главный вопрос. не получится ли так , что однажды терминальный сервер запускать перестанет. мол активируйте меня заново , а то запускать службы не буду?
Ответы
-
Это всего-лишь показывает, что сервер не проверяет подписи драйверов.
Изменить можно командой bcdedit.exe /set TESTSIGNING ON
Отключить обратно, соответственно, bcdedit.exe /set TESTSIGNING OFF
-
Предложено в качестве ответа
10 декабря 2013 г. 18:16
-
Отменено предложение в качестве ответа
ILuxa_DobriFey
11 декабря 2013 г. 9:20 -
Помечено в качестве ответа
ILuxa_DobriFey
11 декабря 2013 г. 9:20
-
Предложено в качестве ответа
Как включить тестовый режим в Windows Server 2012 R2 Standard
Задача: Нужны шаги и реально работающие действия чтобы включить тестовый режим на Windows Server 2012 R2 Standard
Авторизуюсь в системе с правами вхожей в группу «Administrators” (Администраторы)
- Login: Administrator
- Pass: 712mbddr@
Запускаю консоль командной строки с правами Администратора
Win + X → Command Prompt (Admin)
Включаю тестовый режим:
C:Windowssystem32>BCDEDIT /Set LoadOptions DDISABLE_INTEGRITY_CHECKS
The operation completed successfully.
C:Windowssystem32>Bcdedit.exe /set TESTSIGNING ON
The operation completed successfully.
C:Windowssystem32>Bcdedit.exe /set nointegritychecks ON
The operation completed successfully.
Отключаю проверку установки неподписанных драйверов:
gpedit.msc – User Configuration – Administrative Templates – System – Driver Installion:
- Code signing for device drivers: Enable: Ignore
после нажимаю Apply — OK
[stextbox style=»color: #ff00ff;»>На заметку: Важно чтобы система (Windows Server 2012 R2) была активирована [/stextbox]
После следует перезагрузить систему:
C:Windowssystem32>shutdown /r /t 3
И следует убедиться, что в правом нижнем углу на экране красуется надпись

Чтобы возвратить настройки до внесения изменений , как если бы система была только что установлена, следует, запустить консоль командной строки с правами Администратора и выполнить:
Win + X → Command Prompt (Admin)
C:Windowssystem32>bcdedit.exe /set nointegritychecks off
The operation completed successfully.
C:Windowssystem32>bcdedit.exe /set testsigning off
The operation completed successfully.
На этом у меня все, с уважением автор блога Олло Александр aka ekzorchik.
Используйте прокси ((заблокировано роскомнадзором, используйте vpn или proxy)) при использовании Telegram клиента:
Поблагодари автора и новые статьи
будут появляться чаще 🙂
Карта МКБ: 4432-7300-2472-8059
Yandex-деньги: 41001520055047
Большое спасибо тем кто благодарит автора за практические заметки небольшими пожертвованиями. С уважением, Олло Александр aka ekzorchik.
Источник
Решено: Включение и отключение тестового режима в Windows
Windows 7, 8 и 10 можно запустить в тестовом режиме, в основном он предназначен для разработчиков, но может быть полезен и обычному пользователю. В тестовом режиме можно устанавливать и использовать не подписанные и старые драйвера, это бывает нужно чтоб заставить работать старые устройства в новой операционной системе. Еще тестовый режим может пригодиться для прошивки смартфона, официально самостоятельная прошивка часто не поддерживается и приходится использовать обходные способы, которые включают остановку не подписанных драйверов.
Если в правом нижнем углу Вы видите надпись как на изображении ниже:
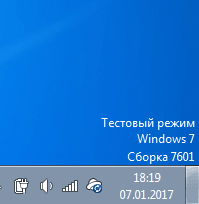 Значит Ваша версия Windows работает в тестовом режиме, для того чтоб отключить тестовый режим надо запустить командную строку от имени администратора и выполнить команду:
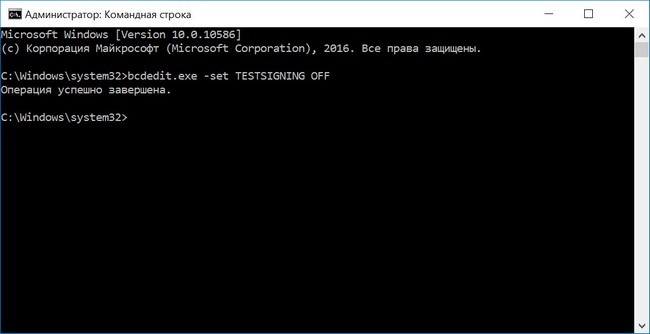
bcdedit -set TESTSIGNING OFF
Для того чтоб включить тестовый режим выполните:
bcdedit -set TESTSIGNING ON
Затем перезагрузите операционную систему и тестовый режим будет выключен или наоборот включен.
Также для включения и отключения тестового режима можно использовать утилиту Driver Signature Enforcement Overrider (DSEO), скачиваем, распаковываем архив и запускаем DSEO от имени администратора, жмем Next, затем Yes: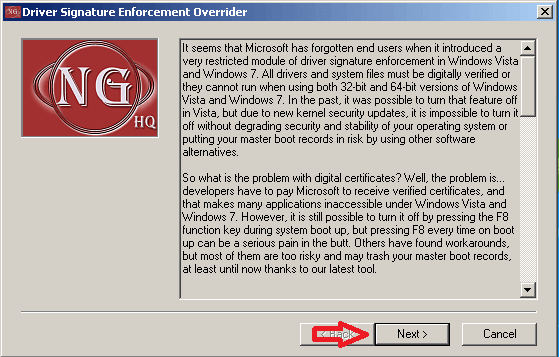
После запуска, Вы увидите вот такое окошко:

Тут выбираем нужный пункт и жмем Next, в меню можно включить (Enable Test Mode) или выключить (Disable Test Mode) тестовый режим, можно подписать драйвер, обратите внимание на пункт Remove Watermarks — при его выборе утилита удалит сообщение о том что Windows работает в тестовом режиме, но сам режим не отключит.
Источник
Тестовый режим windows server 2012 r2
Задача: Нужны шаги и реально работающие действия чтобы включить тестовый режим на Windows Server 2012 R2 Standard
Авторизуюсь в системе с правами вхожей в группу «Administrators” (Администраторы)
- Login: Administrator
- Pass: 712mbddr@
Запускаю консоль командной строки с правами Администратора
Win + X → Command Prompt (Admin)
Включаю тестовый режим:
C:Windowssystem32>BCDEDIT /Set LoadOptions DDISABLE_INTEGRITY_CHECKS
The operation completed successfully.
C:Windowssystem32>Bcdedit.exe /set TESTSIGNING ON
The operation completed successfully.
C:Windowssystem32>Bcdedit.exe /set nointegritychecks ON
The operation completed successfully.
Отключаю проверку установки неподписанных драйверов:
gpedit.msc – User Configuration – Administrative Templates – System – Driver Installion:
- Code signing for device drivers: Enable: Ignore
после нажимаю Apply — OK
[stextbox >На заметку: Важно чтобы система (Windows Server 2012 R2) была активирована [/stextbox]
После следует перезагрузить систему:
C:Windowssystem32>shutdown /r /t 3
И следует убедиться, что в правом нижнем углу на экране красуется надпись
Чтобы возвратить настройки до внесения изменений , как если бы система была только что установлена, следует, запустить консоль командной строки с правами Администратора и выполнить:
Win + X → Command Prompt (Admin)
C:Windowssystem32>bcdedit.exe /set nointegritychecks off
The operation completed successfully.
C:Windowssystem32>bcdedit.exe /set testsigning off
The operation completed successfully.
На этом у меня все, с уважением автор блога Олло Александр aka ekzorchik.
Используйте прокси ((заблокировано роскомнадзором, используйте vpn или proxy)) при использовании Telegram клиента:
Поблагодари автора и новые статьи
будут появляться чаще 🙂
Карта МКБ: 4432-7300-2472-8059
Yandex-деньги: 41001520055047
Большое спасибо тем кто благодарит автора за практические заметки небольшими пожертвованиями. С уважением, Олло Александр aka ekzorchik.
Для установки неподписанных драйверов на Windows Server 2012 необходимо отключить проверку цифровой подписи драйверов.
В предыдущих версиях (до 2008 R2 или что-то типа того) можно было просто отключить проверку через групповые политики в gpedit.msc (User Configuration->Administrative Templates-> System->Driver Installation, параметр Code Signing for Device Drivers). Теперь же жесткая концепция безопасности заменена на жестокий произвол Майкрософта. К счастью, лазейку они все-таки оставили.
Запускаем командную строку с повышенными привилегиями и последовательно выполняем команды:
После каждой команды должно появиться сообщение об успешном выполнении: Вместо первой из этих команд можно сделать:
Возврат в нормальное состояние:
либо вместо первой:
После выполнения этих команд Нужно перезагрузить сервер.
Теперь в правом нижнем углу будет надпись о том, что Windows Server 2012 работает в тестовом режиме. От надписи можно избавиться, но смысла нет. Так сразу видно, что все получилось и тестовый режим включен.
1. На счет первых строк не уверен, но «bcdedit.exe /set TESTSIGNING ON» — обязательно.
2. Вместо этих манипуляций можно загрузиться по F8 в специальном режиме с игнорированием неподписанности драйверов и установить неподписанный драйвер, но после перезагрузки сервера, этот драйвер работать не будет.

Способ 1
Появилась необходимость отключить проверку цифровой подписи драйвера в Windows Server 2012 R2, которая вертелась в качестве гостевой системы на Hyper-V.
В сети много мануалов, как это сделать с помощью команд в cmd или PowerShell.
У меня при вводе команд:
Решение до слез смешное – нужно снять галку Включить безопасную загрузку в настройках виртуальной машины: 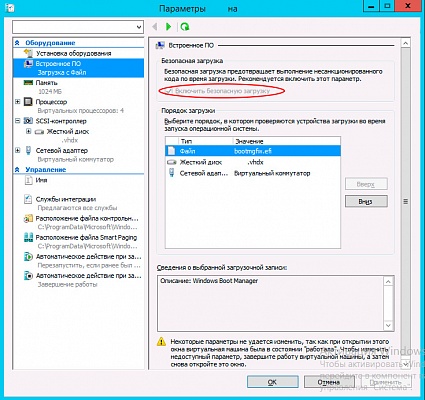
После этой простой манипуляции, команды применились ОС и режим включился.
Способ 2
Если вы полностью хотите отключить проверку подписывания драйверов в Windows, сделать это можно с помощью групповой политики.
Откройте редактор локальной групповой политики, набрав gpedit.msc
В меню политик перейдите в раздел User Configuration->Administrative Templates-> System->Driver Installation.
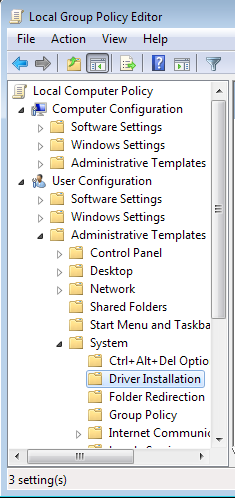
В правой панели найдите пункт ‘Code Signing for Device Drivers’ и дважды щелкните по нему.

В появившемся окне выберите ‘Enabled’, а в нижнем меню – ‘Ignore’. Нажмите Ок и перезагрузите компьютер. После перезагрузи и применения политика, в своей Windows 7 / Windows Server 2012 R2 вы полностью отключите подписывание драйверов, и сможете установить любые, в том числе, неподписанные драйвера.
Источник
- 29.05.2020
Тестовый режим в Windows — это режим, позволяющий установить драйверы без цифровой подписи, обычно это требуется для работы различного специфического оборудования. Данный режим может работать как на обычных версиях Windows, так и на серверных Windows Server. Бывает, что в правом нижем углу появляется надпись «Тестовый режим», или «Test mode», рассмотрим как эту надпись можно убрать, или наоборот включить, если Вам нужен тестовый режим для установки драйверов без цифровой подписи.
Отключить тестовый режим: (Данная инструкция подходит для всех версий Windows и Windows Server)
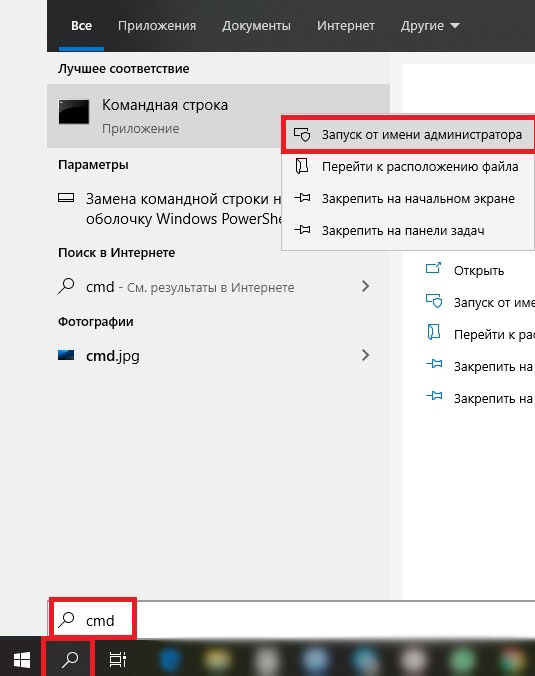
— Заходим в командную строну от имени администратора. Сделать это можно путем ввода в поиск cmd = > Запуск от имени администратора
— Вводим в окне консоли: bcdedit.exe -set TESTSIGNING OFF
— Нажимаем Enter и перезагружаемся. После перезагрузки надпись «Тестовый режим» должен отключиться.
Если же, по каким-то причинам этот способ не помог, то делаем следующее:
— Так же заходим к командную строку от имени администратора и вводит по очереди следующие команды. (после каждой строки нажимаем Enter)
— bcdedit.exe -set loadoptions ENABLE_INTEGRITY_CHECKS
— Второй строкой вводим: bcdedit.exe -set TESTSIGNING OFF
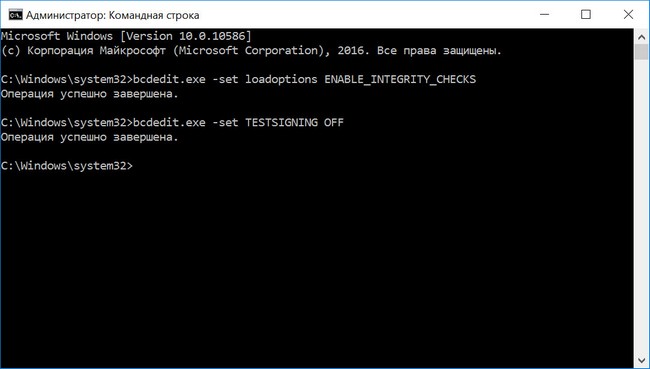
Жмем Enter и перезагружаем ПК. Теперь надпись «Тестовый режим» точно должна уйти.
Включить тестовый режим:
Здесь все так же предельно просто. Открываем командную строку от имени администратора и вводим: bcdedit.exe -set TESTSIGNING ON
Перезагружаем ПК и тестовый режим будет включен.
пробую
Bcdedit.exe /set nointegritychecks ON
bcdedit.exe /set TESTSIGNING ON
bcdedit.exe /set loadoptions DDISABLE_INTEGRITY_CHECKS
но в правой части так и не появляться надпись «тестовый режим»
подскажите в чем может быть проблемма
-
Вопрос заданболее трёх лет назад
-
5805 просмотров
Пригласить эксперта
все заработало). что самое интересное пока не активировал до конца сервер не хотел запускать безопасный режим
-
Показать ещё
Загружается…
05 февр. 2023, в 12:13
20000 руб./за проект
05 февр. 2023, в 11:48
5000 руб./за проект
05 февр. 2023, в 11:27
15000 руб./за проект
Минуточку внимания
Требование обязательного наличия цифровой подписи драйвера в Windows 8 (Device Driver Signing) –это требование системы безопасности Windows, которая разрешает установку только драйверов, имеющих цифровую подпись производителя. Система сертификации и подписывания драйверов нужна Microsft для того, чтобы максимально обезопасить систему от установки некорректного или опасного ПО, способного дестабилизировать систему.
При попытке установки в Windows 8 драйвера, не имеющего цифровой подписи появляется окно с предупреждением:
“Windows encountered a problem installing the driver software for your device. Windows found driver software for your device but encoutered an error while attempting to install it. The hash for the file is not present in the specified catalog file. The file is likely corrupt or the victim of tampering.”
(Хэш этого файла отсутствует в заданном файле каталога. Возможно файл поврежден или подделан)

В этой статье мы предлагаем познакомиться с процедурой установки неподписанного драйвера устройства в Windows 8 путем отключения проверки цифровой подписи драйвера системой. Немаловажно отметить тот факт, что неподписанные версии драйверов Вы устанавливаете на свой страх и риск, и четко понимаете, что своими действиями вы рискуете стабильностью и безопасность своей ОС.
Напомним, что требование обязательного подписывания драйверов, выполняемых в режиме ядра, появилось впервые в 64 битной Windows Vista. Однако, если в Windows 7 (ранее мы уже описывали как в Windows 7 можно отключить проверку цифровой подписи драйвера) и Vista, система еще предлагала возможность установки неподписанного драйвера (что не всегда получалось), то в Windows 8, установка драйвера без цифровой подписи просто завершается с соответствующим предупреждением.
Отключаем проверку цифровой подписи драйвера в параметрах загрузки Windows 8
Отключать проверку подписи можно из меню параметров загрузки Windows 8. Чтобы попасть в него, нужно в системе нажать комбинацию клавиш Win+I, выбрать пункт Change PC Settings , затем на вкладке General выбрать опцию Restart Now (перезагрузится сейчас). В результате компьютер перезагрузится и автоматически попадет в режим расширенных параметров загрузки.
Тот же самый эффект (попасть в режим настройки параметров загрузки системы) можно, перезагрузив компьютер из командной строки (запускать с правами администратора):
shutdown.exe /r /o /f /t 00

Далее нужно выбрать пункт Troubleshoot.

Затем выберите опцию Advanced Startup

Далее выбираем Startup Settings

И, наконец, нажмите кнопку Restart

Компьютер опять перезагрузится и перед вами появится меню выбора опций загрузки. Нас интересует пункт Disable driver signature enforcement (отключить проверку драйвера), выберите его нажав на клавиатуре клавишу F7 или 7

В результате Windows 8 загрузится в режиме, в котором возможна установка подписанных драйверов. Теперь при установке такого драйвера (через диспетчер устройств или с помощью мастера) в Windows 8 появится окно с предупреждением системы безопасности Windows:
Windows can’t verify the publisher of this driver software

Выберите пункт: Install this driver software anyway, после чего драйвер должен установится. Осталось перезагрузиться в обычном режиме и проверить работоспособность установленного драйвера и устройства.
Установка неподписанного драйвера в Тестовом режиме Windows 8
В том случае если вышеприведенная методика у вас не сработала, существует еще один способ установки неподписанных драйверов. В Windows 8 и Windows Server 2012 существует так называемый «тестовый режим работы» (Test Mode), в котором возможна установка любых (в т.ч. и неподписанных драйверов).
Чем грозит работа системы в «тестовом режиме»? Технически вы работаете с той же самой полноценной ОС, но есть несколько нюансов. Во-первых, формально такая конфигурация не поддерживается вендором (Microsoft). Во-вторых, переведя систему в отладочный режим работы, вы существенно снижаете ее безопасность и стабильность работы ОС, так что риск появления различных ошибок, BSOD-ов и заражения ее существенно увеличивается.
Итак, на 64 битной ОС нужно запустить командную строку с правами администратора и последовательно выполнить команды:
bcdedit.exe /set nointegritychecks ON

bcdedit.exe /set TESTSIGNING ON
Первую команду можно заменить на
bcdedit.exe /set loadoptions DDISABLE_INTEGRITY_CHECKS
После каждой команды должно появляется сообщение об ее успешном выполнении.
Затем перезагрузите систему и попробуйте установить неподписанный драйвер.
Факт работы Windows 8 в тестовом (отладочном) режиме проявляется в наличии в правом нижнем углу рабочего стола надписи: Тестовый режим (Test Mode), версии ОС и номера сборки Windows.

Чтобы отключить Test Mode, необходимо с правами админа выполнить команды:
bcdedit.exe /set nointegritychecks OFF

bcdedit.exe /set TESTSIGNING OFF
Вместо первой команды можно использовать:
bcdedit /set loadoptions ENABLE_INTEGRITY_CHECKS
Итак, мы рассмотрели способы отключения проверки цифровой подписи в 64-битной версии Windows 8.
Стоит отметить, что подобная проблема наиболее часто возникает у владельцев всевозможных старых устройств (драйвера на которые также существенно устарели). Этим «счастливчикам» нужно быть готовым к тому, что старые драйвера без цифровой подписи производителя, установленные по данной статье в обход системы безопасности Windows, не всегда будут работать корректно. Поэтому в первую очередь рекомендуется проверить наличие свежей подписанной версии драйвера для Windows 8 (Windows 7) на сайте производителя.
![]()
Download Article
![]()
Download Article
Windows Server 2012 R2 operating system has features that support domain enterprise networks of varying sizes, but to realize the benefits of these features, you must first install, configure, and test it.
-

1
Create the operating system media.
- Create the operating system media, if you do not already have a DVD with Windows Server 2012 R2; however, if you download it, be sure to copy the product key, because you will need it for the installation.
- Download Windows Server 2012 R2 from Microsoft and save it onto your hard drive.
- Make a backup copy of the .iso file by copying it onto a DVD from the hard disk.
-
2
Start operating system installation.
- Place the Windows Server 2012 R2 DVD in the CD/DVD drive.
- Power on the machine to boot the operating system from the DVD.
- Watch the screen as the system boots from the Windows Server 2012 R2 DVD. After booting begins, you will see the display Loading files… followed by the Windows Server 2012 R2 Setup screen.
- Expand the drop down and review optional preferences; they include the language you can select for the installation.
- Click Next to display the options, Install now or Repair your computer.
Advertisement
-
3
Install or Upgrade.
- Observe that with these Windows Setup options, you choose either first time install or repair an existing operating system.
- Click Install now to display the product key request.
-
4
Type OS installation key.
- Take note that if you are using a DVD from a textbook, you may not need a key.
- Type the installation key.
- Click Next so you can choose the operating system version to install.
-
5
Select the OS version to install.
- Notice that depending on the DVD you are using, you may see a slightly different set of options. However, regardless of which DVD, Windows Server 2012 R2 Server Cores is the default.
- Select Windows Server 2012 R2 Standard (GUI installation), with the arrow key or mouse.
- Click Next to display the license agreement.
-
6
Select license terms.
- Review the Microsoft license agreement.
- Click the checkbox next to I accept the license terms.
- Click Next to display options, upgrade or custom install.
-
7
Configure upgrade or custom install.
- Review the notes for these options because they are very different; upgrade lets you upgrade a qualified Windows OS. Whereas with custom, you can install the OS on a newly created space.
- Click Custom to manage disk space and display the disk configuration.
- Highlight where you would like to install the operating system; you can use the arrow key, or mouse.
- Click Next to display Installing Windows screen followed by password Settings.
-
8
Create password.
- Create Administrator password at Windows Setup Settings prompt..
- Type the password, such as Passworda10.
- Click Finish to display the Sign in screen.
-
9
Log on to the server.
- Note that this action, display the password prompt, will depend on the installed environment, real or virtual.
- Click Ctrl+Alt+Delete to display the password prompt.
- Observe that this is the password you created earlier.
- Type the password for Administrator.
- Click the arrow to display Networks so you can tell setup how to configure network parameters.
-
10
Configure Network Settings.
- Configure network visibility is needed even if you plan to isolate the server; your intentions must be know to network settings.
- Click Yes so your computer is visible to other network devices.
-
11
Verify Installation complete.
- Verify the display of Server Manager indicating the installation is complete.
- Continue to learn more.


Advertisement
- These steps demonstrate how to configure TCP/IP settings, which are needed to verify network connectivity with another machine, such as Windows 7.
-
1
Minimize Server Manager.
- Click Minimize to minimize Server Manager, which is displayed when the OS completes booting.
-
2
Display menu items.
- Notice that when Server Manager is minimized, you will see the Recycle Bin and Taskbar; there are also menu items, such as Start, that are visible when the mouse is located at the bottom right.
- Move your mouse along the taskbar to the right and hover it to the right of the time and date; this action displays a number of icons, and to see their names, such as Search, Start, and Settings move the mouse straight up. If the icons are not shown, slightly move the mouse in any direction to display them.
- Click Start to display its contents.
-
3
Display Control Panel contents.
- Notice that Start shows a number of icons, such as Control Panel.
- Click Control Panel to display its contents.
-
4
Display Network and Internet links.
- Notice that items are shown in categories, but you can change how they are displayed.
- Click Network and Internet to display the screen containing their links.
-
5
Display Network and Sharing links.
- Notice there are two options, but only the first lets you configure the network adapter.
- Click Network and Sharing Center to display its options.
-
6
Display Network Connections (Ethernet) Properties.
- Notice there are several options in the left pane, but your main interest is on the adapter settings.
- Click Change adapter settings to display Network Connections.
- Notice that this computer has one NIC.
- Right click Ethernet and click Properties to display its properties.
-
7
Display TCP/IP Properties.
- Notice there are a number of protocol options for configuring network settings.
- Highlight Internet Protocol Version 4 (TCP/IPv4).
- Click Properties to display TCP/IP Properties.
- Notice that the default TCP/IPv4 configuration for network interface is DHCP client.
- Click Use the following IP address.
- Notice that the boxes are no longer grayed.
-
8
Configure TCP/IP settings.
- Notice there are a number of textboxes, but to test connectivity, only the IP address and subnet mask are needed.
- Type 172.16.150.10 in IP address field.
- Change the entry in Subnet mask to 255.255.255.0.
- Click OK.
- Click Close.
- Click close (X) to close both Network Connections and Network and Sharing Center.


Advertisement
- After the OS is installed and network parameters configured, it is time to test both activities; an important test is to verify the server can communicate with another machine, such as a Windows 7 client, and the client can communicate with the server; you can do this using the Command Prompt, and after testing is complete, you can shutdown the server.
-
1
Verify Connectivity.
- Display Start.
- Click the down arrow to display several Apps.
- Scroll right.
- Click the Command Prompt.
- Ping the second machine.
- From the second machine, ping the server.
-
2
Shutdown server.
- Display Start.
- Click Settings to display its contents.
- Click Power.
- Click Shutdown.
- Follow the displayed instructions to complete the shutdown.


Advertisement
Ask a Question
200 characters left
Include your email address to get a message when this question is answered.
Submit
Advertisement
-
Installation: Since it is unlikely you are dual booting a virtual machine, the following bullets apply only if you are installing the server on a physical machine.
- If an OS is already installed on the machine, you may see Press any key to boot from CD/DVD; this is your opportunity to boot from the CD/DVD drive.
- If an OS is already installed on the machine, and you do not see Press any key to boot from CD/DVD, you will have to reconfigure the boot process to boot form the CD/DVD drive.
- If an OS it not on the machine, the boot process goes directly to the CD/DVD drive and begins booting.
- If you are installing from a DVD that came with a textbook, you may not need a product key.
- Depending on the DVD you are using, such as one that came with a textbook, or one from Microsoft, you may see a slightly different selection menu; be sure not to select Server Core but GUI instead.
-
If you have an existing operating system that you want to upgrade, when prompted, you would select Upgrade, but in this case select Custom so you can customize the disk for installation.
-
The configuration shown will depend on the partition and unallocated space on your disk(s). Notice that you are given a number of disk options, but they are not always enabled; it depends on whether a partition or unallocated space is highlighted; if a partition is highlighted all except New are enabled, and if an unallocated space is highlighted, all are grayed, except New.
Show More Tips
Thanks for submitting a tip for review!
Advertisement
-
When partitioning the disks, Next does not depend on a selection; this means whichever space is highlighted, partition or unallocated, and you click Next, setup formats the space, copy the necessary operating system files, and install the operating system. Everything on that partition will be lost.
-
When partitioning the disks, if you select Delete, setup will delete the highlighted partition and label it unallocated; you will then have to use New to create a partition for the install, or click Next to install. Also, note that if you click Next, setup uses the entire highlighted space for the install, but if you do not want to use the entire space, to install the operating system, use New to create the partition size from the unallocated space.
Advertisement
Things You’ll Need
- DVD you created with the .iso for Windows Server 2012 R2.
- DVD with a Windows client, such as Windows 7.
- One physical machine on which you can install and configure two virtual machines: one server and one client.
- Virtual machine software, such as VirtualBox.
References
- Microsoft. (2013, June 24). System Requirements and Installation Information for Windows Server 2012 R2. Retrieved from TechNet: http://technet.microsoft.com/en-us/library/dn303418.aspx
- Microsoft. (2013, June 24). Windows Server Installation Options. Retrieved from TechNet: http://technet.microsoft.com/en-us/library/hh831786.aspx
About This Article
Thanks to all authors for creating a page that has been read 56,127 times.
Is this article up to date?
22 Feb 2017 5:26pm at September 25, 2022 in Articles •
Some modified drivers lack a valid driver signature and this prevents them from being installed on a 64-bit Windows OS. To bypass this restriction and be able to install those drivers you need to run Windows in Test Mode or boot Windows with «Disable driver signature enforcement» option. These methods are only needed for x64 versions of Windows Vista, Windows 7, Windows 8, Windows 8.1, Windows 10, Windows 11, Windows Server 2008, Windows Server 2012, Windows Server 2016 and Windows Server 2019.
Contents
- Test Mode method
- Disable Driver Signature Enforcement method
- Comparison between «Test Mode» and «Disable driver signature enforcement» methods
Page updates and announcements:
- 05 Apr 2020: Updated Test Mode batch files to v2.0, now they don’t require to be launched with «Run as administrator» right click option and their window will show if errors occurred.
1. Test Mode method
How to enable Test Mode
Download and run enable_testmode_v2.0.bat file. Restart PC.
[or]
Press Start->Search->type cmd then right-click on the result and click Run as administrator. In the CMD window type or copy-paste bcdedit /set testsigning on and press enter. Restart PC.
Windows 8/8.1, Windows 10, Windows Server 2012/2016/2019: If you get the «The value is protected by Secure Boot policy» error, you need to disable Secure Boot in BIOS before running the command.
How to hide/remove the Test Mode watermark from desktop when Test Mode is enabled
If test mode is enabled you will have a text watermark on the desktop. To hide it:
- For Windows Vista/7 download this tool and check this guide (archive) on how to remove the TestMode watermark from the desktop.
- For Windows 8/8.1/10 download this tool.
How to disable Test Mode
Note: If you disable test mode while you have drivers installed that need test mode(unsigned drivers) those drivers will stop functioning.
Download and run disable_testmode_v2.0.bat file. Restart PC.
[or]
Press Start->Search->type cmd then right-click on it and click Run as administrator. In the CMD window type or copy-paste bcdedit /set testsigning off and press enter. Restart PC.
2. Disable Driver Signature Enforcement method
You could try this method if you don’t want Windows to always run in Test Mode. Compared to always running Windows in Test Mode, the «Disable driver signature enforcement» method needs to be applied each time you install a new driver that is unsigned.
How to disable driver signature enforcement on Windows Vista, Windows 7, Windows Server 2008
- Restart PC
- Press F8 repeatedly just after UEFI/BIOS initialization and before Windows would load
- Select «Disable driver signature enforcement» option.
- Install drivers. After you restart your system again you won’t be able to install unsigned drivers until you repeat the steps 1-3.
How to disable driver signature enforcement on Windows 8/8.1, Windows 10, Windows 11, Windows Server 2012/2016/2019
- In Windows go to PC settings (you can search for it in Start).
- Click on «Update & recovery» on the left side.
- Click on «Recovery» on the left side.
- Click «Restart Now» button under Advanced startup.
- Select Troubleshoot ->Advanced setup -> Startup Settings and press Restart
- Press 7 number key corresponding to «Disable driver signature enforcement» entry.
- Install drivers. After you restart your system again you won’t be able to install unsigned drivers until you repeat the steps 1-6.
Notes about «Disable driver signature enforcement»
There is a small chance that drivers installed using this method might stop working after some time, requiring another install. Causes for this are unknown.
Drivers previously installed with this method can be reinstalled without booting with «Disable driver signature enforcement» if they are not uninstalled prior to the reinstallation.
On Windows 7, there might be cases where this method will not allow those drivers to load once Windows is booted normally. If you have this problem, let me know in the comments.
3. Comparison between «Test Mode» and «Disable driver signature enforcement» methods
| Test mode | Disable driver signature enforcement | |
| installation | [+] set it and forget it | [—] redo it each time you want to install a unsigned driver |
| security | [—] always allows installation of other unsigned drivers, this allowance could be used to install malicious drivers that would be unsigned, this is a very rare possibility and should not be a problem for a system running an antivirus or if the user is cautious | [+] does not permanently allow the installation of unsigned drivers |
| additional setup | [—] watermark on desktop that requires additional steps in order to hide it | [+] no watermark on desktop [—] drivers may stop functioning, requiring that you reinstall them |
| compatibility |
[—] there are some applications, such as Battleye anticheat [1], that will not work while Windows is in Test Mode |
Tags: disable driver signature enforcement Windows 10, how to enable test mode windows 10, windows 10 enable test mode, windows 10 test mode, Windows 7 Test Mode, Windows 11 Test Mode