| title | description | keywords | ms.date | ms.topic | adobe-target |
|---|---|---|---|---|---|
|
Manual installation steps for older versions of WSL |
Step by step instructions to manually install WSL on older versions of Windows, rather than using the wsl install command. |
wsl, install, BashOnWindows, bash, windows subsystem for linux, install ubuntu on windows, enable WSL2, linux on windows |
11/12/2021 |
article |
true |
Manual installation steps for older versions of WSL
For simplicity, we generally recommend using the wsl --install to install Windows Subsystem for Linux, but if you’re running an older build of Windows, that may not be supported. We have included the manual installation steps below. If you run into an issue during the install process, check the installation section of the troubleshooting guide.
Step 1 — Enable the Windows Subsystem for Linux
You must first enable the «Windows Subsystem for Linux» optional feature before installing any Linux distributions on Windows.
Open PowerShell as Administrator (Start menu > PowerShell > right-click > Run as Administrator) and enter this command:
dism.exe /online /enable-feature /featurename:Microsoft-Windows-Subsystem-Linux /all /norestart
We recommend now moving on to step #2, updating to WSL 2, but if you wish to only install WSL 1, you can now restart your machine and move on to Step 6 — Install your Linux distribution of choice. To update to WSL 2, wait to restart your machine and move on to the next step.
Step 2 — Check requirements for running WSL 2
To update to WSL 2, you must be running Windows 10…
- For x64 systems: Version 1903 or later, with Build 18362 or later.
- For ARM64 systems: Version 2004 or later, with Build 19041 or later.
or Windows 11.
[!NOTE]
Builds lower than 18362 do not support WSL 2. Use the Windows Update Assistant to update your version of Windows.
To check your version and build number, select Windows logo key + R, type winver, select OK. Update to the latest Windows version in the Settings menu.
[!NOTE]
If you are running Windows 10 version 1903 or 1909, open «Settings» from your Windows menu, navigate to «Update & Security» and select «Check for Updates». Your Build number must be 18362.1049+ or 18363.1049+, with the minor build # over .1049. Read more: WSL 2 Support is coming to Windows 10 Versions 1903 and 1909.
Step 3 — Enable Virtual Machine feature
Before installing WSL 2, you must enable the Virtual Machine Platform optional feature. Your machine will require virtualization capabilities to use this feature.
Open PowerShell as Administrator and run:
dism.exe /online /enable-feature /featurename:VirtualMachinePlatform /all /norestart
Restart your machine to complete the WSL install and update to WSL 2.
Step 4 — Download the Linux kernel update package
-
Download the latest package:
- WSL2 Linux kernel update package for x64 machines
[!NOTE]
If you’re using an ARM64 machine, please download the ARM64 package instead. If you’re not sure what kind of machine you have, open Command Prompt or PowerShell and enter:systeminfo | find "System Type". Caveat: On non-English Windows versions, you might have to modify the search text, translating the «System Type» string. You may also need to escape the quotations for the find command. For example, in Germansysteminfo | find '"Systemtyp"'. -
Run the update package downloaded in the previous step. (Double-click to run — you will be prompted for elevated permissions, select ‘yes’ to approve this installation.)
Once the installation is complete, move on to the next step — setting WSL 2 as your default version when installing new Linux distributions. (Skip this step if you want your new Linux installs to be set to WSL 1).
[!NOTE]
For more information, read the article changes to updating the WSL2 Linux kernel, available on the Windows Command Line Blog.
Step 5 — Set WSL 2 as your default version
Open PowerShell and run this command to set WSL 2 as the default version when installing a new Linux distribution:
wsl --set-default-version 2
Step 6 — Install your Linux distribution of choice
-
Open the Microsoft Store and select your favorite Linux distribution.

The following links will open the Microsoft store page for each distribution:
- Ubuntu 18.04 LTS
- Ubuntu 20.04 LTS
- Ubuntu 22.04 LTS
- openSUSE Leap 15.1
- SUSE Linux Enterprise Server 12 SP5
- SUSE Linux Enterprise Server 15 SP1
- Kali Linux
- Debian GNU/Linux
- Fedora Remix for WSL
- Pengwin
- Pengwin Enterprise
- Alpine WSL
- Raft(Free Trial)
-
From the distribution’s page, select «Get».


The first time you launch a newly installed Linux distribution, a console window will open and you’ll be asked to wait for a minute or two for files to de-compress and be stored on your PC. All future launches should take less than a second.
You will then need to create a user account and password for your new Linux distribution.

CONGRATULATIONS! You’ve successfully installed and set up a Linux distribution that is completely integrated with your Windows operating system!
Troubleshooting installation
If you run into an issue during the install process, check the installation section of the troubleshooting guide.
Downloading distributions
There are some scenarios in which you may not be able (or want) to, install WSL Linux distributions using the Microsoft Store. You may be running a Windows Server or Long-Term Servicing (LTSC) desktop OS SKU that doesn’t support Microsoft Store, or your corporate network policies and/or admins do not permit Microsoft Store usage in your environment. In these cases, while WSL itself is available, you may need to download Linux distributions directly.
If the Microsoft Store app is not available, you can download and manually install Linux distributions using these links:
- Ubuntu
- Ubuntu 22.04 LTS
- Ubuntu 20.04
- Ubuntu 20.04 ARM
- Ubuntu 18.04
- Ubuntu 18.04 ARM
- Ubuntu 16.04
- Debian GNU/Linux
- Kali Linux
- SUSE Linux Enterprise Server 12
- SUSE Linux Enterprise Server 15 SP2
- SUSE Linux Enterprise Server 15 SP3
- openSUSE Tumbleweed
- openSUSE Leap 15.3
- openSUSE Leap 15.2
- Oracle Linux 8.5
- Oracle Linux 7.9
- Fedora Remix for WSL
This will cause the <distro>.appx packages to download to a folder of your choosing.
If you prefer, you can also download your preferred distribution(s) via the command line, you can use PowerShell with the Invoke-WebRequest cmdlet. For example, to download Ubuntu 20.04:
Invoke-WebRequest -Uri https://aka.ms/wslubuntu2004 -OutFile Ubuntu.appx -UseBasicParsing
[!TIP]
If the download is taking a long time, turn off the progress bar by setting$ProgressPreference = 'SilentlyContinue'
You also have the option to use the curl command-line utility for downloading. To download Ubuntu 20.04 with curl:
curl.exe -L -o ubuntu-2004.appx https://aka.ms/wslubuntu2004
In this example, curl.exe is executed (not just curl) to ensure that, in PowerShell, the real curl executable is invoked, not the PowerShell curl alias for Invoke-WebRequest.
Once the distribution has been downloaded, navigate to the folder containing the download and run the following command in that directory, where app-name is the name of the Linux distribution .appx file.
Add-AppxPackage .app_name.appx
Once the Appx package has finished downloading, you can start running the new distribution by double-clicking the appx file. (The command wsl -l will not show that the distribution is installed until this step is complete).
If you are using Windows server, or run into problems running the command above you can find the alternate install instructions on the Windows Server documentation page to install the .appx file by changing it to a zip file.
Once your distribution is installed, follow the instructions to create a user account and password for your new Linux distribution.
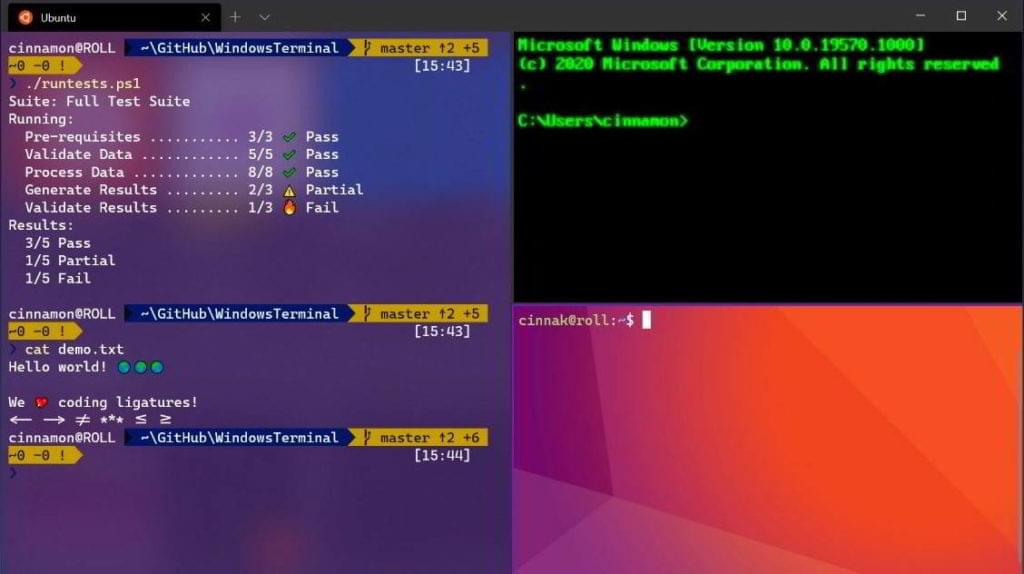
Install Windows Terminal (optional)
Using Windows Terminal enables you to open multiple tabs or window panes to display and quickly switch between multiple Linux distributions or other command lines (PowerShell, Command Prompt, Azure CLI, etc). You can fully customize your terminal with unique color schemes, font styles, sizes, background images, and custom keyboard shortcuts. Learn more.
Install Windows Terminal.

Раньше моей рабочей машиной был ноутбук, созданный Apple. Я мог делать на нём практически всё что угодно: разрабатывать программы, писать тексты, сочинять музыку, да и много чего ещё. Но мне не давали покоя мысли о том, что я привязан к экосистеме Apple, о том, что я зависим от прихотей этой компании. Поэтому я приступил к поискам чего-то нового.
Я начал собирать рабочую станцию под задачи машинного обучения. Поставил в неё, кроме прочего, отличный процессор, много памяти, достойную видеокарту. Практически все мои задачи я решал в Ubuntu. Правда, для работы с текстами мне нужен был Microsoft Office. Онлайновый Office тогда ещё не появился, и, давайте называть вещи своими именами, LibreOffice — это просто ужас какой-то. Для меня решением стала двойная загрузка в конфигурации Ubuntu — Windows 10. Мне невероятно понравилось то ощущение свободы, которое испытываешь, переходя с ОС от Apple на Ubuntu. А возможности, которые открываются перед тем, кто сам собирает свой компьютер, практически бесконечны.
Двойная загрузка в течение долгого времени полностью меня устраивала. А когда я миллион раз ей воспользовался, появилась технология WSL (Windows Subsystem for Linux, подсистема Windows для Linux). Когда это случилось, я начал решать некоторые свои Linux-задачи в Windows. Правда, даже так, многого для полноценной работы мне ещё не хватало. Но теперь, с выходом WSL 2, у меня возникает такое ощущение, что новая версия WSL способна кардинальным образом изменить ситуацию. Сегодня я предлагаю поговорить о том, как, с помощью WSL 2, перенести задачи по разработке программ из Linux в Windows 10. Я расскажу о новых возможностях WSL 2, и о том, что можно ожидать от этой подсистемы в будущем.
Обзор WSL 2
WSL 2 — это новая версия подсистемы Windows для Linux. В этой версии имеются некоторые изменения, определяющие то, как Linux-дистрибутивы взаимодействуют с Windows.

Microsoft любит Linux
В этом релизе WSL в распоряжении пользователя оказывается улучшенная производительность файловой системы и полная совместимость с системными вызовами. Конечно, у нас есть возможность запускать Linux либо на WSL 1, либо на WSL 2, и, более того, переключаться между разными версиями WSL можно в любое время. WSL 2 — это результат серьёзного усовершенствования базовой архитектуры системы, её новые возможности основаны на технологии виртуализации и на функционале ядра Linux. При этом Microsoft берёт на себя заботу о мелких деталях, поэтому пользователь WSL может просто заниматься своими делами, ни на что не отвлекаясь.
Установка
Microsoft обещает, что в ближайшем будущем установка WSL 2 будет выполняться очень просто, и что Linux можно будет обновлять с использованием механизма обновлений Windows. Пока же процесс установки WSL 2 требует некоторых усилий, но, на самом деле, ничего страшного тут нет.
В этом примере мы установим на Windows 10 Ubuntu 20.04. Надо отметить, что процесс установки будет одним и тем же для всех дистрибутивов Linux, доступных в Microsoft Store. Для начала нужно включить компонент Windows Subsystem for Linux. Для этого надо открыть PowerShell от имени администратора и выполнить следующую команду:
dism.exe /online /enable-feature /featurename:Microsoft-Windows-Subsystem-Linux /all /norestart
Далее, нужно обновить WSL до WSL 2. Для этого Windows 10 должна быть обновлена до версии 2004. В BIOS должна быть включена технология виртуализации Intel. Снова воспользуемся PowerShell с административными привилегиями и выполним такую команду:
dism.exe /online /enable-feature /featurename:VirtualMachinePlatform /all /norestart
Для завершения установки WSL и обновления до WSL 2 перезагрузите компьютер. Затем нужно установить WSL 2 в качестве версии WSL, используемой по умолчанию при установке новых дистрибутивов Linux. Для этого, всё так же, пользуясь PowerShell с правами администратора, выполним эту команду:
wsl --set-default-version 2
После того, как вы выполните эту команду, может появиться такое сообщение:
WSL 2 requires an update to its kernel component. For information please visit https://aka.ms/wsl2kernel

Сообщение, выдаваемое при попытке установки WSL 2 как подсистемы Windows для Linux, используемой по умолчанию
Перейдите по указанной ссылке и установите соответствующий MSI-файл, благодаря которому на вашу машину будет установлено ядро Linux для WSL 2. После того, как ядро будет установлено, выполните вышеприведённую команду снова. Теперь она должна завершиться успешно, не выдавая подобного сообщения.
Теперь осталось лишь установить нужный дистрибутив Linux. Для этого надо открыть Microsoft Store и поискать там Ubuntu 20.04 LTS. После установки дистрибутива в меню Пуск должен появиться ярлык для запуска Ubuntu. Запустите систему и следуйте инструкциям для завершения установки (в целом, завершение установки заключается в создании нового пользователя).
Для того чтобы проверить, действительно ли дистрибутив установлен на WSL 2, выполните такую команду:
wsl --list --verbose
Если оказалось, что используется WSL 1, то переключиться на WSL 2 можно, воспользовавшись командой такого вида:
wsl --set-version <distribution name> <versionNumber>
Вот и всё. Теперь в вашем распоряжении имеется полноценный дистрибутив Ubuntu, работающий в Windows 10.
Настройка рабочей среды для программиста
Теперь, когда в вашем распоряжении оказалась рабочая Ubuntu, вы можете устанавливать всё, что вам может понадобиться. Например, если вы — дата-сайентист, вы можете установить самый свежий дистрибутив Anaconda. Если вы — фронтенд-разработчик, то вас, например, могут заинтересовать Angular, npm и многое другое. Здесь же мне хотелось бы сосредоточиться на двух инструментах. Это — Visual Studio Code и связка Docker + Kubernetes.
▍Visual Studio Code
VS Code — это редактор кода, которому отдаёт предпочтение множество разработчиков. Одна из сильных сторон этого редактора заключается в поддержке бесконечного множества расширений. А теперь, когда мы включили WSL 2, совершенно необходимым расширением для VS Code можно назвать Remote Development.
Это расширение позволяет удалённо работать над кодом, который имеется в среде, создаваемой средствами WSL 2, в контейнере, или даже на удалённой виртуальной машине, доступ к которой осуществляется по SSH. Данное расширение позволяет, например, создать проект в ОС Linux, работающей в WSL 2, и использовать для работы над этим проектом редактор VS Code, установленный в Windows 10.
Собственно говоря, VS Code отличается огромными возможностями. Это и интеллектуальная система IntelliSense, и интеграция с git, и отладчик, и терминал, и очень много чего ещё. Полагаю, с настройкой VS Code вы справитесь и очень скоро сможете сделать из этого редактора именно то, что нужно вам.
▍Docker + Kubernetes
Docker для Windows сделан на «хорошо», но не на «отлично». На самом деле, именно Docker заставлял меня постоянно «прыгать» между Windows и Ubuntu. Например, мне приходилось делать это тогда, когда нужно было создать новый образ Docker. А вот WSL 2 отличается полной поддержкой Docker. Это, полагаю, такая возможность новой подсистемы, которая делает работу с Docker даже удобнее, чем в Linux.
Для того чтобы включить эту возможность, нужно перейти в настройки Docker Desktop и включить опцию Use the WSL 2 based engine.

Включение поддержки Docker для WSL 2
Более того, перейдя в раздел настроек Kubernetes, можно включить возможность запуска локального кластера Kubernetes, просто установив соответствующий флажок.

Включение Kubernetes
Теперь можно перезапустить Ubuntu в WSL 2 и выполнить следующие команды:
docker version
kubectl version
Результаты выполнения подобных команд покажут, что в вашем распоряжении теперь есть Docker и Kubernetes.
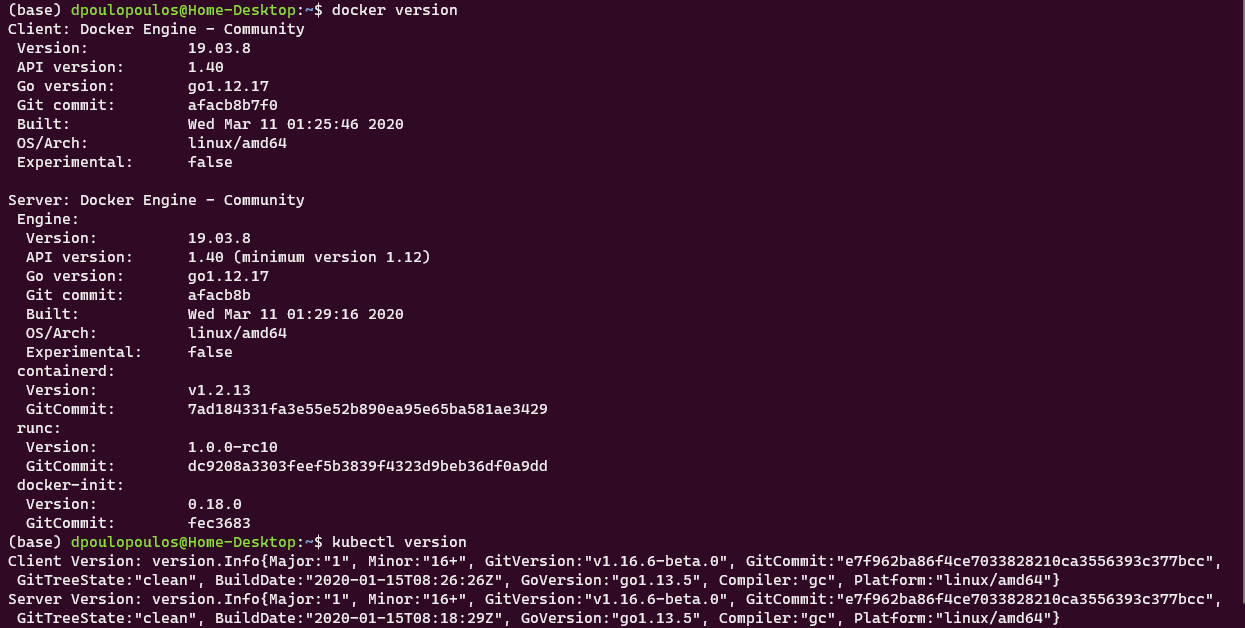
Docker и Kubernetes работают в среде WSL 2
Бонус: новый терминал Windows
В качестве дополнительной полезной программы вы можете установить из Microsoft Store новый терминал Windows. В описании к нему сказано, что перед нами новое современное приложение — быстрое, эффективное и мощное. Оно предназначено для пользователей, работающих с инструментами командной строки и с соответствующими средами, наподобие PowerShell. Среди его главных возможностей можно отметить следующие: поддержка вкладок и панелей, поддержка Unicode и UTF-8, ускорение вывода текста средствами GPU, поддержка пользовательских тем, стилей и настроек.
Вот видео про новый терминал Windows.
Более того, новый терминал очень хорошо выглядит, а его внешний вид поддаётся настройке. Настройки можно выполнять, пользуясь особым JSON-файлом. Здесь можно найти темы для терминала. Вот материал, в котором можно почитать подробности о терминале.
Планы развития WSL
В WSL 2 ещё недостаёт некоторых возможностей, но подсистема Windows для Linux развивается в правильном направлении. В ближайшее время установить WSL можно будет с помощью одной команды. Для этого достаточно будет открыть терминал Windows и выполнить в нём следующее:
wsl.exe --install
Кроме того, WSL 2 будет той версией подсистемы, которая, при первой установке WSL, устанавливается по умолчанию.
Надо отметить, что разработчики очень ждут от WSL следующих возможностей: поддержка видеокарт и поддержка приложений с графическим интерфейсом.
С момента выхода WSL 1 команду разработчиков этой подсистемы чаще всего просили о внедрении в WSL поддержки CUDA или GPU Compute. В последний код команды разработчиков WSL, систем виртуализации, DirectX, Windows Driver работают над этой возможностью. Поэтому — следите за новостями.
Обучение модели, использующей технологии глубокого обучения, в WSL 2 (с использованием CUDA)
Более того, на подходе и поддержка графических приложений для Linux. Например, в Linux-системах, установленных на WSL, можно будет пользоваться текстовыми редакторами или IDE. На Windows-машине можно будет даже разрабатывать GUI-приложения для Linux!
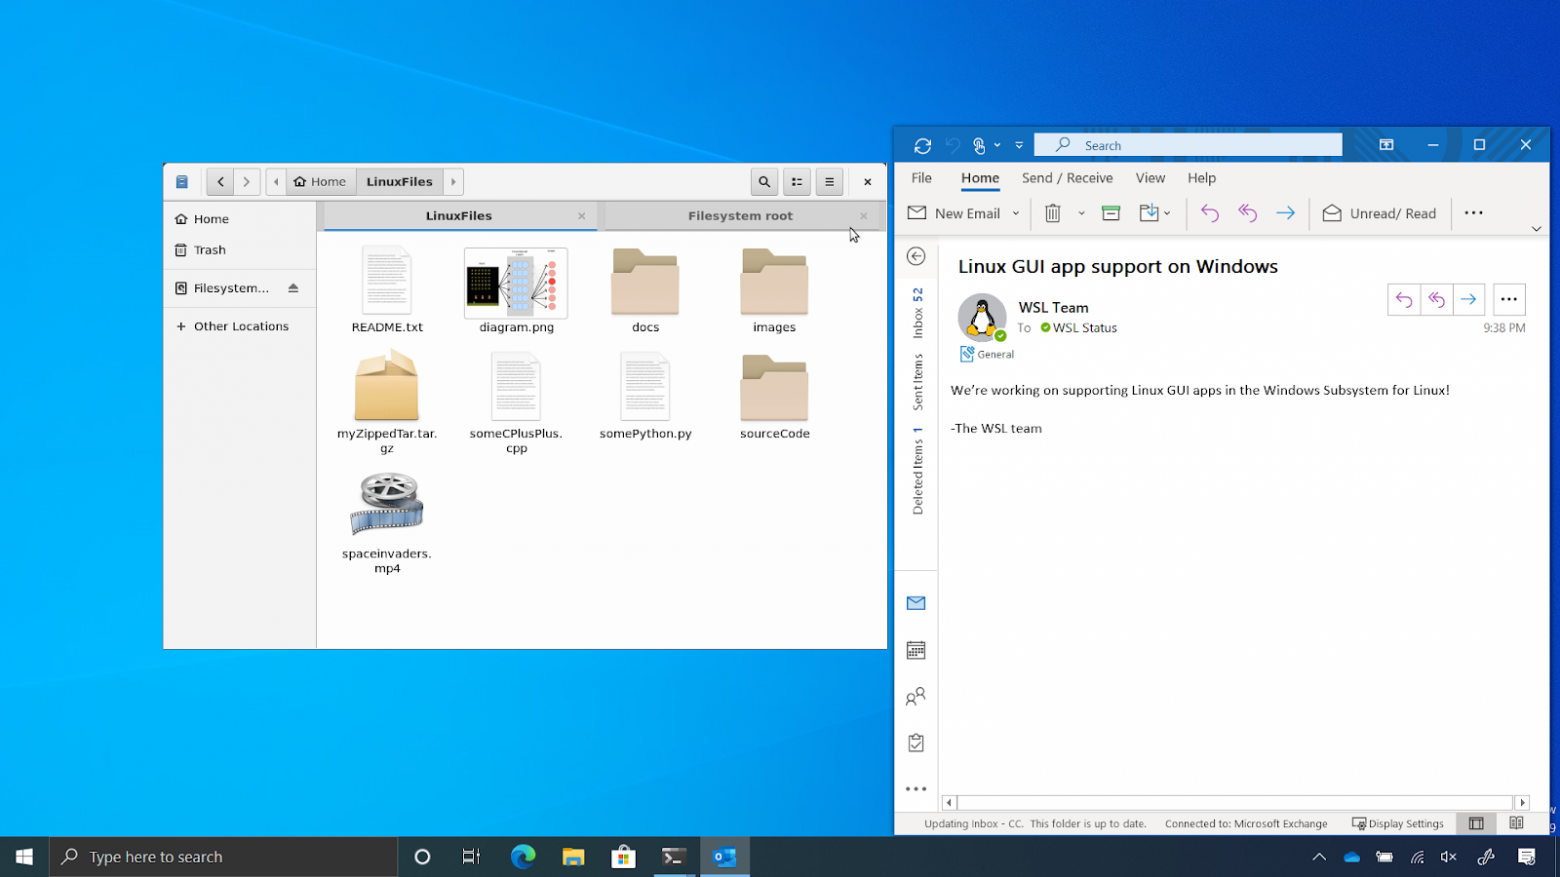
Поддержка графического интерфейса Linux в WSL 2
Итоги
Сегодня мы поговорили о том, как, пользуясь WSL 2 можно превратить Windows-компьютер в рабочую станцию программиста, пользующегося Linux. В распоряжении такого программиста оказывается высокая производительность и множество полезных возможностей, набор которых, со временем, пополнится. Поэтому я и могу говорить о том, что двойная загрузка умерла.
А вы пользуетесь WSL 2?


Contents
-
What is WSL?
- What is WSL 1?
- What is WSL 2?
-
Enabling WSL in Windows 10
- Using the GUI for enabling Windows features
- Using PowerShell
- Additional Installation Resources
-
Ubuntu on WSL
- Installing Ubuntu on WSL via the Microsoft Store (Recommended)
- Installing Ubuntu on WSL via rootfs
- Installing Ubuntu on WSL by sideloading the .appx
-
Running Ubuntu on WSL
- Starting Ubuntu on WSL
- Installing Packages on Ubuntu
- Keeping Ubuntu Updated in WSL
- Hello World
-
Advanced Topics
- Performance
- Running Graphical Applications
- Enabling Sound
-
Getting Help
- Common Issues
- Reporting Windows Subsystem for Linux-specific Issues
- Reporting Issues in Ubuntu
- Reporting Issues in the Ubuntu WSL Apps
- Additional Resources
What is WSL?
Windows Subsystem for Linux (WSL) allows users to run a Linux terminal environment, install packages from the Ubuntu archive, and run Linux applications and workflows on Windows 10.
What is WSL 1?
The original WSL is now known as WSL1. WSL1 is a compatibility layer for running Linux binary executables (ELF) natively on Windows 10. No re-compilation or ‘porting’ of applications is required. WSL1 provides a Linux-compatible kernel interface developed by Microsoft that allows a user to choose a Linux distribution to install from the Microsoft Store. WSL1 executes unmodified Linux ELF64 binaries by operating a Linux kernel interface on top of the Windows kernel in Windows 10. The WSL1 interface translates Linux system calls from the binaries into Windows system calls and then executes them at native speed. Linux applications run within the Linux distribution which provides the application’s dependencies and package management in a container-like environment. WSL provides an interface to mount drives within WSL.
What is WSL 2?
WSL2 was announced at Microsoft Build 2019. WSL2 features a Linux kernel running inside Windows 10 and is built on the core technology of Hyper-V to provide better Linux application support and improved file performance. Transitioning to WSL2 is seamless. To update to WSL 2 you need Windows 10 version 1903 or higher, with Build 18362 or higher.
-
Announcing WSL2 — Microsoft blog announcing WSL2
-
The new Windows subsystem for Linux architecture: a deep dive — WSL2 presentation at Microsoft Build 2019
-
WSL2-Linux-Kernel — The source for the Linux kernel used in Windows Subsystem for Linux 2.
Enabling WSL in Windows 10
Before you can install Ubuntu on WSL, WSL has to be enabled in one of the following ways:
Using the GUI for enabling Windows features
-
Open the Start Menu and search Turn Windows features on or off
-
Select Windows Subsystem for Linux
-
Click OK
- Restart your computer when prompted
Using PowerShell
-
Open PowerShell as Administrator and run:
1 Enable-WindowsOptionalFeature -Online -FeatureName Microsoft-Windows-Subsystem-Linux - Restart your computer when prompted
Additional Installation Resources
-
WSL Installation Guide from Microsoft
-
Windows Server Installation Guide from Microsoft
Ubuntu on WSL
Installing Ubuntu on WSL via the Microsoft Store (Recommended)
The recommended way to install Ubuntu on WSL is through the Microsoft Store.
The following Ubuntu releases are available as apps on the Microsoft Store:
-
Ubuntu 16.04 LTS (Xenial) is the first release available for WSL. It supports the x64 architecture only. (offline installer: x64)
-
Ubuntu 18.04 LTS (Bionic) is the second LTS release and the first one supporting ARM64 systems, too. (offline installers: x64, ARM64)
-
Ubuntu 20.04 LTS (Focal) is the current LTS release, supporting both x64 and ARM64 architecture.
-
Ubuntu (without the release version) always follows the recommended release, switching over to the next one when it gets the first point release. Right now it installs Ubuntu 20.04 LTS.
Each app creates a separate root file system in which Ubuntu shells are opened but app updates don’t change the root file system afterwards. Installing a different app in parallel creates a different root file system allowing you to have both Ubuntu LTS releases installed and running in case you need it for keeping compatibility with other external systems. You can also upgrade your Ubuntu 16.04 to 18.04 by running ‘do-release-upgrade’ and have three different systems running in parallel, separating production and sandboxes for experiments.
Installing Ubuntu on WSL via rootfs
Ubuntu WSL distribution rootfs daily builds are available for download:
-
Ubuntu 16.04 LTS (Xenial)
-
Ubuntu 18.04 LTS (Bionic)
-
Ubuntu 19.10 (Eoan)
-
Ubuntu 20.04 LTS (Focal)
They can be installed using the wsl command:
-
1 wsl --import <DistributionName> <InstallLocation> <FileName>
Installing Ubuntu on WSL by sideloading the .appx
Ubuntu WSL distribution .appx builds are available for download:
-
Ubuntu 20.04 LTS (Focal)
-
Ubuntu 20.04 LTS arm64
-
Ubuntu 18.04 LTS (Bionic)
-
Ubuntu 18.04 LTS arm64
-
Ubuntu 16.04 LTS (Xenial)
They can be installed by enabling sideloading in Windows 10 and double-clicking the .appx and clicking Install or with PowerShell:
1 Add-AppxPackage .CanonicalGroupLimited.Ubuntu18.04onWindows_1804.2018.817.0_x64__79rhkp1fndgsc.Appx
Running Ubuntu on WSL
Starting Ubuntu on WSL
The Ubuntu on WSL terminal can be started via:
- The app tile in the Windows Start menu (or pinned to your taskbar)
-
WSL — Remote extension for Visual Studio Code.
-
The wsl command on the Windows command prompt or PowerShell
-
By running ubuntu1804.exe, etc. on the Windows command prompt or PowerShell
Installing Packages on Ubuntu
Package management on Ubuntu on WSL works the same as on desktop Ubuntu, using the apt package manager. apt will download and install packages from the Ubuntu archive.
First we check for updates:
We use sudo because installing packages is an administrator task and requires elevated privileges. Enter the UNIX password you created when you installed Ubuntu on WSL. This will not be your Windows password.
Next we can install a package:
For more information on managing packages with apt, see the following additional resources:
-
apt — Official Ubuntu documentation
-
InstallingSoftware
Keeping Ubuntu Updated in WSL
WSL runs its own specialized init system instead of SystemD and does not run standard Ubuntu services. Due to the services not running software updates are not applied automatically. Please keep your WSL installation using APT maintenance commands regularly. This can be accomplished with an occasional:
   1 sudo apt update
   2 sudo apt upgrade -y
Hello World
Lets write and compile a very simple Linux application on WSL. It will announce ‘Hello World!’ and then count to 10.
First, we will update apt and then install the necessary tools, often called dependencies:
   1 sudo apt update
   2 sudo apt install nim
Next, we will create and open a file named helloworld.nim:
Copy and paste the following code snippet (click ‘Toggle Line Numbers’ to hide line numbers). You can paste into the Ubuntu on WSL terminal by right-clicking with the mouse or Shift+Ctrl+’V’:
   1 echo "Hello World!"
   2 for i in countup(1, 10):
   3   echo i
Exit nano with Control+’X’ then press ‘Y’ and Enter.
Next we will compile our application back at our shell prompt:
1 nim compile helloworld.nim
This compiles our Nim code snippet to C and then into a Linux binary named helloworld.
Then we can run our Linux binary:
You should see:
   1 Hello World
   2 1
   3 2
   4 3
   5 4
   6 5
   7 6
   8 7
   9 8
  10 9
  11 10
But we are not just on Linux, we are on WSL.
We can build and test on both Linux and Windows at the same time, including compiling our Hello World application for Windows.
To do this we need to add a dependency, mingw-w64:
1 sudo apt install mingw-w64
Let’s compile our application again, this time creating a Windows binary:
1 nim compile --gcc.exe:x86_64-w64-mingw32-gcc --gcc.linkerexe:x86_64-w64-mingw32-gcc --cpu:amd64 --os:windows --out:helloworld.exe helloworld.nim
Then move our binary to Windows and run it from within WSL (your path by vary based on your Windows username):
   1 mv helloworld.exe /mnt/c/Users/Hayden/OneDrive/Desktop/
   2 cmd.exe /c "C:UsersHaydenOneDriveDesktophelloworld.exe"
Learn more about Nim.
Advanced Topics
Performance
Ubuntu’s performance in WSL1 can be close to bare metal Ubuntu installations in mostly CPU-intensive tasks but file operations are much slower in WSL (see tests on Windows 10 April 2018 Update and on Windows builds from 2019). In WSL 2, CPU intensive tasks are measured to be slightly slower and file operations are generally faster than on WSL1.
Intra-WSL filesystem I/O will always be faster than WSL<->Windows filesystem I/O. It is recommended to move large files and git repos over to WSL to work with them on WSL. To improve performance of the file operations some sites suggest disabling anti-virus software. This puts your system at risk and we highly recommend against doing so.
Running Graphical Applications
The X Window System Architecture allows running the X server and the X clients on separate systems and in WSL’s case the X server can be a native Windows server providing even OpenGL acceleration and the clients can be the graphical Linux applications running in the WSL environment.
Install one from several X servers available for Windows and start it before entering the WSL environment:
-
X410
-
VcXsrv
-
MobaXTerm
-
Cygwin/C
If graphical applications can’t connect to the running X server automatically paste the following commands to the terminal before starting the applications or set them on every login by adding them to ~/.bashrc:
-
   1  export DISPLAY=:0
   2  export DISPLAY=$(awk '/nameserver / {print $2; exit}' /etc/resolv.conf 2>/dev/null):0
   3  export LIBGL_ALWAYS_INDIRECT=1
Alternatively one can start the XServer (e.g., vcxsrv.exe using a saved config.xlaunch) and start a XWindows session from a Windows DOS batch file. Using this method, one can use DOS ipconfig to determine the virtual ethernet WSL2 IP and set the DISPLAY environment variable before starting the session. This is useful because the virtual ethernet IP will CHANGE with each Windows reboot (thus the need for the use of awk in the export DISPLAY above). Name the batch file whatever seems best for the purpose (note comments in this batch file code) and execute from same directory where the config.xlaunch file is (in this script c:bin):
-
   1 @echo off
   2
   3 rem Works ONLY if Ethernet adapter vEthernet (WSL): is the LAST "adapter" in
   4 rem the ipconfig output; that is, this for loop assigns the IPs from first to
   5 rem last from the ipconfig printed output, so the WSL virtual adapter must be the
   6 rem last one in the ipconfig output for this to work correctly.
   7 rem If you have excellent DOS batch file skills, you may find a better
   8 rem way of doing this.
   9
  10 for /f "tokens=1-2 delims=:" %%a in ('ipconfig^|find "IPv4"') do set ip==%%b
  11 set ipAddress=%ip:~1%
  12
  13 rem Trim whitespace
  14
  15 call :TRIM %ipAddress% ipAddress
  16
  17 rem Use this for testing
  18
  19 rem echo IP Address: %ipAddress%
  20
  21 rem Start up the xServer using saved xlaunch configuration
  22 rem This configuration creates a single large window
  23
  24 start /B config_one_window.xlaunch
  25
  26 rem Start up PulseAudio server, will accept audio from external
  27 rem source, i.e., from the X server
  28
  29 start "" /B "C:binpulseaudio-5.0-rev18pulsepulseaudio.exe"
  30
  31 rem Call ubuntu.exe, have it run what is essentially a startup
  32 rem script that sets two ENV variables using the ipAddress variable
  33 rem created above, which is the virtual IP to which services
  34 rem INSIDE the running X server can connect; these are the
  35 rem link between WSL2 and Windows 10
  36 rem Initiate an xfce4 session with dbus-launch
  37 rem when the X server is killed, do cleanup by
  38 rem killing pulseadio and vcxsrv
  39
  40 <PATH_TO_UBUNTU_EXE>ubuntu.exe run "export DISPLAY="%ipAddress%:0.0"; export PULSE_SERVER="%ipAddress%"; if [ -z "$(pidof xfce4-session)" ]; then  dbus-launch --exit-with-session ~/.xsession; pkill '(gpg|ssh)-agent'; taskkill.exe /IM pulseaudio.exe /F; taskkill.exe /IM vcxsrv.exe; fi;"
  41
  42 rem Function to trim white space or the export VARIABLE will fail
  43
  44 :TRIM
  45 SET %2=%1
  46 GOTO :EOF
Enabling Sound
The WSL environment does not support audio, but it can be enabled by installing the PulseAudio server on Windows following this guide. With the latest wslu package installed the starting Ubuntu app detects the running PulseAudio server and enables audio.
Getting Help
Common Issues
-
‘WSL 2 requires an update to its kernel component.’ Solution
-
Error codes, e.g. ‘Error: 0x80070002’ Solution
Reporting Windows Subsystem for Linux-specific Issues
Please report general WSL issues on GitHub.
Reporting Issues in Ubuntu
Please use the standard Ubuntu channels described in ReportingBugs.
Reporting Issues in the Ubuntu WSL Apps
Please report issues related to WSL-specific features in Ubuntu on WSL here.
Additional Resources
-
Official Microsoft Documentation for WSL
-
wsl.exe command line reference
-
Awesome-WSL
- ##windows-wsl on Freenode
Windows Subsystem for Linux (WSL) — подсистема ОС Windows 10, позволяющая разработчикам, тестировщикам запускать нативные приложения Linux, писать скрипты, выполнять команды непосредственно из Windows. В обновлённой Windows 10 (2004) появилась 2я версия WSL, в которой используется полноценное ядро Linux с возможностью запуска приложений и контейнеров Docker, реализована высокая скорость загрузки, небольшой объем потребляемых ресурсов, управление в фоновом режиме, обновление ядра. Таким образом вы сможете запускать ELF64 программы, которые могут получать доступ к файловой системе Windows без использования сторонних порто (таких как Cygwin).
Образ ядра Linux (версия ядра 4.19) в Windows 10 представляет собой легкую виртуальную машину, для запуска которой не нужно ставить полноценную роль Hyper-V. Системные вызовы Linux транслируются на лету в вызовы Windows без использования эмулятора (в отличии от WSL1).
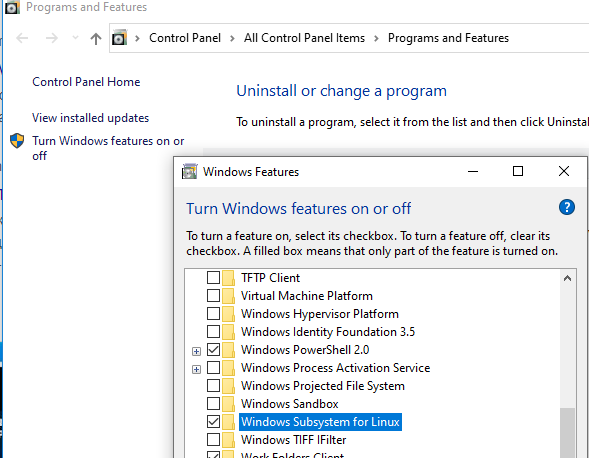
Изначально компонент WSL отключен. Чтобы его включить, вам необходимо зайти в Пуск -> Панель управления -> Программы и компоненты -> Включение и отключение компонентов Windows (Control PanelAll Control Panel ItemsPrograms and FeaturesTurn Windows features on or off), активировать галочку Подсистема Windows для Linux (Windows Subsystem for Linux), нажать кнопку ОК, и перезагрузить компьютер.
Вы можете включить компоненты WSL в Windows 10 с помощью dism:
dism.exe /online /enable-feature /featurename:VirtualMachinePlatform /all /norestart
dism.exe /online /enable-feature /featurename:Microsoft-Windows-Subsystem-Linux /all /norestart
или PowerShell
Enable-WindowsOptionalFeature -Online -FeatureName Microsoft-Windows-Subsystem-Linux
Enable-WindowsOptionalFeature -Online -FeatureName VirtualMachinePlatform
В Windows Server 2004 Semi-Annual Channel (SAC) для установки компонента WSL используется командлет Install-WindowsFeature:
Install-WindowsFeature -Name Microsoft-Windows-Subsystem-Linux
После этого также необходимо перезагрузить компьютер.
В настройка BIOS/UEFI компьютера должна быть включена поддержка аппаратной виртуализации: Intel VT (Intel Virtualization Technology) или AMD-V.
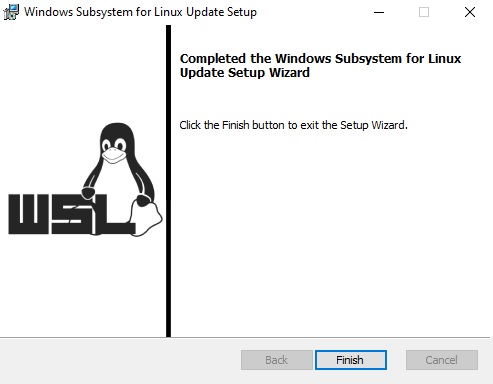
Теперь вам нужно выполнить обновление WSL до версии 2. Для этого требуется зайти на сайт https://docs.microsoft.com/ru-ru/windows/wsl/wsl2-kernel, скачать файл wsl_update_x64.msi, установить его. По завершении увидите картинку
Чтобы сделать WSL2 архитектурой по умолчанию для новых дистрибутивов, в PowerShell выполните команду:
wsl --set-default-version 2
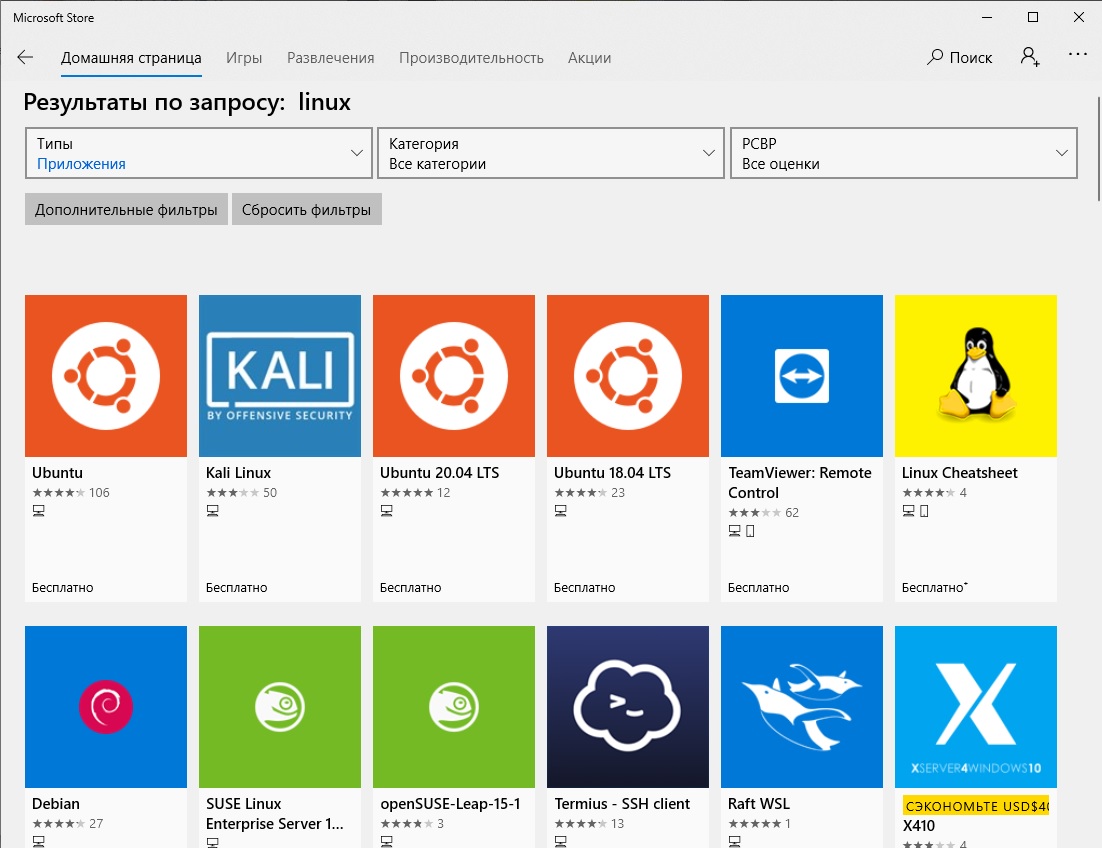
Далее вам необходимо открыть Microsoft Store, в поиске ввести слово “Linux”. В появившемся списке выберите нужный дистрибутив. Доступные Ubuntu, Debian, Kali Linux, Linux Cheatsheet, SUSE Linux Enterprise Server15, openSUSE Leap 15-1, Pengwin Enterprise, Fedora Remix for WSL или другие. В нашем примере мы будем использовать Ubuntu 20.04 LTS, нажмите кнопку Получить.
Если у вас отключен Windows Store или вы хотите установить дистрибутив WSL в Core редакции Windows Server, вы можете скачать дистрибутив Ubuntu с помощью PowerShell командлета Invoke-WebRequest:
Invoke-WebRequest https://aka.ms/wslubuntu2004 -OutFile ubuntu-2004.zip –UseBasicParsing
Распакуйте архив:
Expand-Archive -Path .ubuntu-2004.zip
Запустите установку образа Linux с помощью файла Ubuntu.exe.
Также вы можете скачать образ в виде appx файла и установить его с помощью командлета Add-AppxPackage.
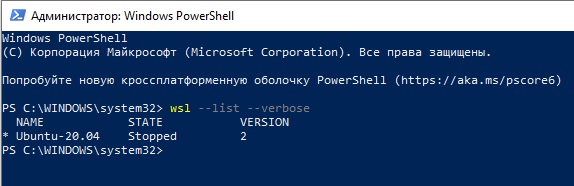
После установки можно проверить используемую версию WSL с помощью команды
wsl --list –-verbose
Если у вашей среды Linux указана версия 1, нужно изменить ее на WSL2 командой:
wsl --set-version Ubuntu-20.04 2
Файл жёсткого диска с образом виртуальной машины ОС Linux Ubuntu 20.04 будет располагаться в профиле пользователя: C:Users234AppDataLocalPackagesCanonicalGroupLimited.Ubuntu20.04onWindows_79rhkp1fndgscLocalState.
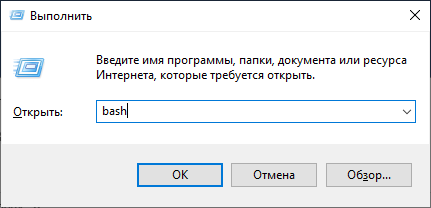
После установки дистрибутива в стартовом меню появляется ярлык на него. Для запуска Ubuntu зайдите в меню Пуск, нажмите на соответствующем ярлыке и получите в отдельном окне полноценную командную оболочку Bash. Запускать WSL можно и с помощью команды wsl. При первом запуске образа в командной строке Bash вам будет предложено создать пользователя и пароль (которые не должны совпадать с учётной записью Windows). Чтобы выполнять команды с правами root, необходимо использовать дополнительный ключ (префикс) sudo. В WSL есть общие команды для Bash и CMD, и тут нужно не забывать, что система Linux чувствительна к регистру.
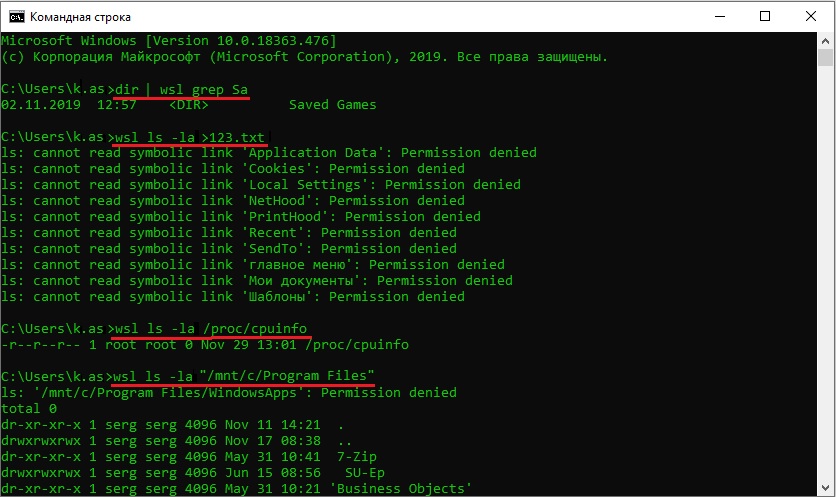
Вы можете выполнить Linux-команды из CMD. Для этого необходимо вначале указать “WSL”. Например, для просмотра списка файлов и папок в каталоге Windows, выполните:
wsl
ls /mnt
ls/mnt/c
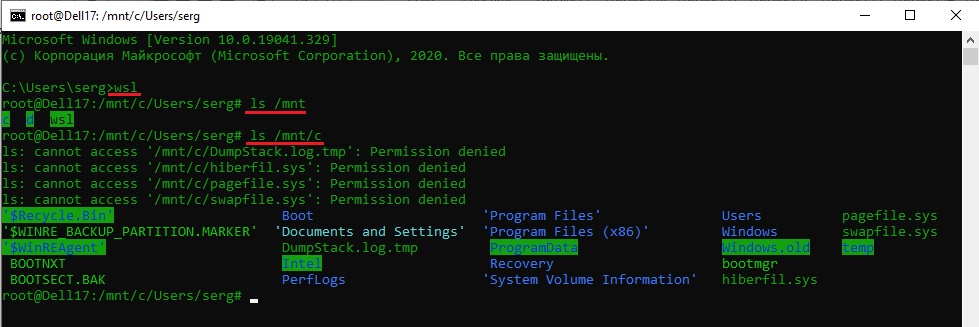
dir | wsl grep Sa
wsl ls ‑la > 123.txt
wsl ls ‑la /proc/cpuinfo
wsl ls ‑la “/mnt/c/Program Files”
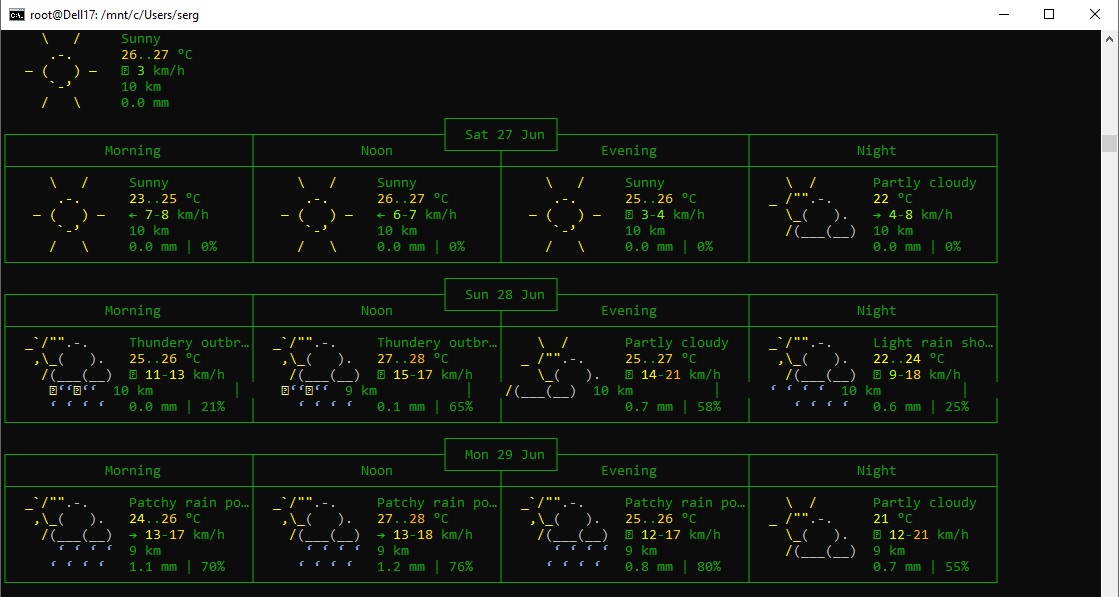
Также вы можете открыть проводник командой explorer.exe, калькулятор – calc.exe, блокнот – notepad.exe, paint – mspaint.exe, календарь – cal, погоду – curl wttr.in
Ещё один пример взаимосвязи 2х систем – вы можете открыть в Windows файл из WSL-дистрибутива по сетевому пути. Для этого в CMD наберите путь к файлу:
notepad \wsl$Ubuntu-20.04home1122.txt
Из окна консоли вы можете обновить список пакетов в Ubuntu с помощью команд:
sudo apt-get update
sudo apt-get upgrade
После обновления Ubuntu папка …/LocalState будет занимать 1.5 Гб.
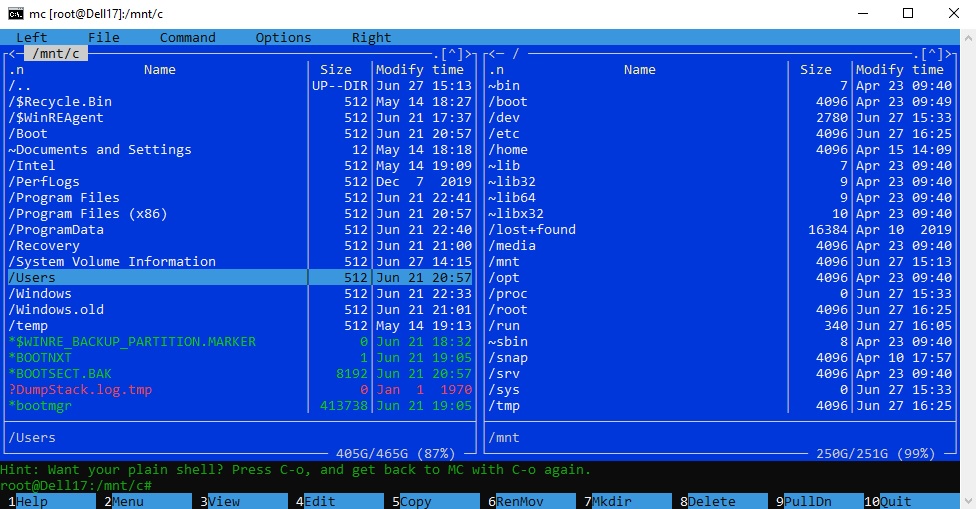
Из командной строки Linux можно не только просмотреть Windows-файлы и каталоги, но и получить к ним доступ. Чтобы удобнее копировать файлы, просматривать директории и их содержимое, установите файловый менеджер Midnight Commander с помощью команды
sudo apt-get install mc
Вы можете запустить Midnight Commander как в командной оболочке Bash, так и внутри CMD. На скриншоте ниже показано, что в двух панелях MC показывается список файлов с обеих ОС.
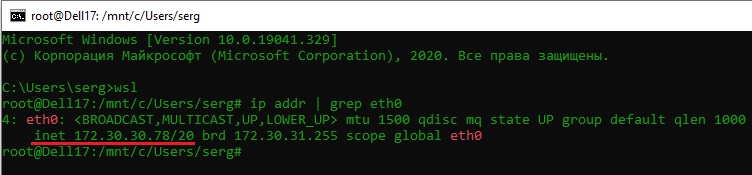
Можно отобрахить сетевые настройки (IP адрес) IP-адрес Linux-системы:
ip addr | grep eth0
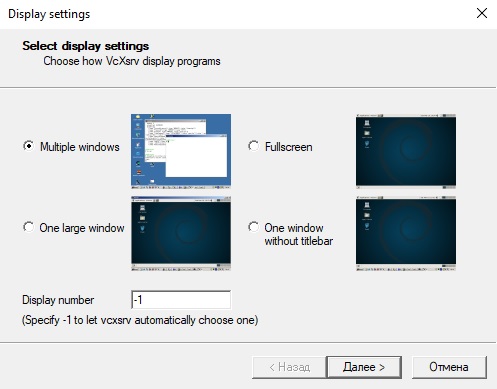
В WSL не предусмотрена работа приложений с графическим интерфейсом. Тем не менее вы можете попробовать их установить и использовать. Чтобы запускать графические приложения в Linux, нужно скачать и установить в Windows программу VcXsrv Windows X Server (https://sourceforge.net/projects/vcxsrv/).
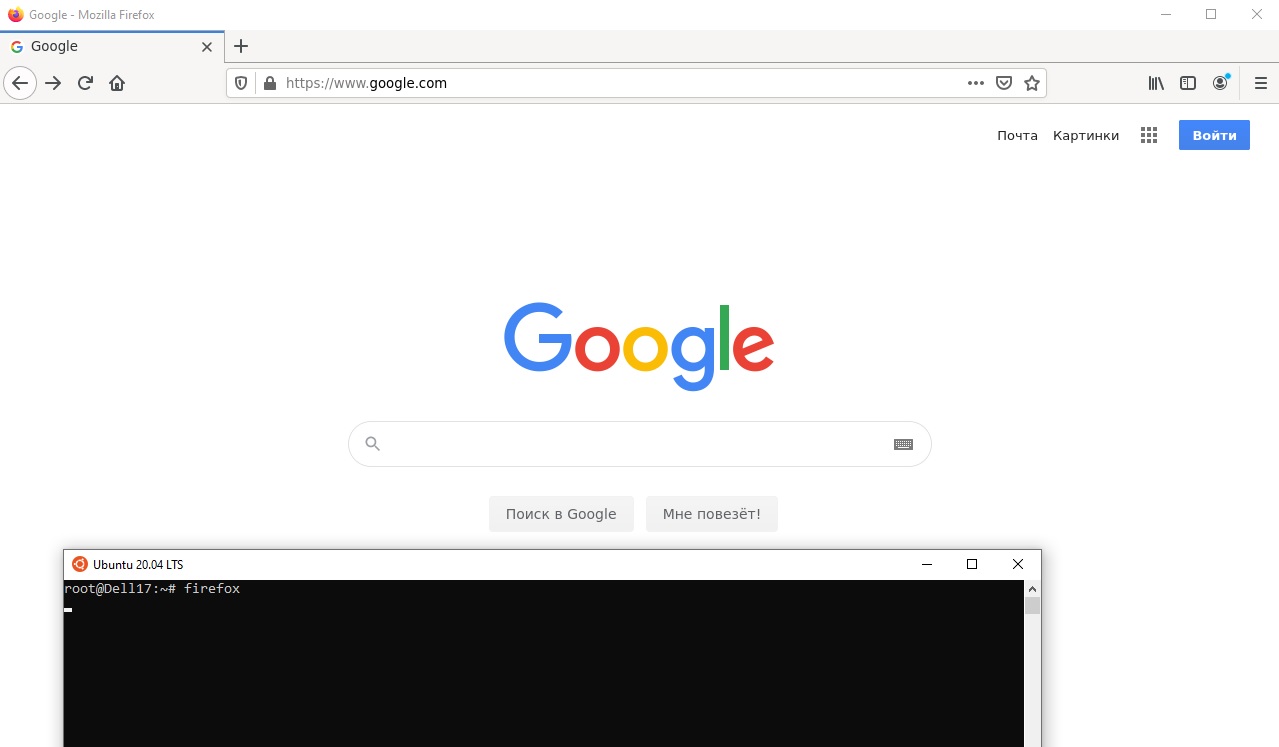
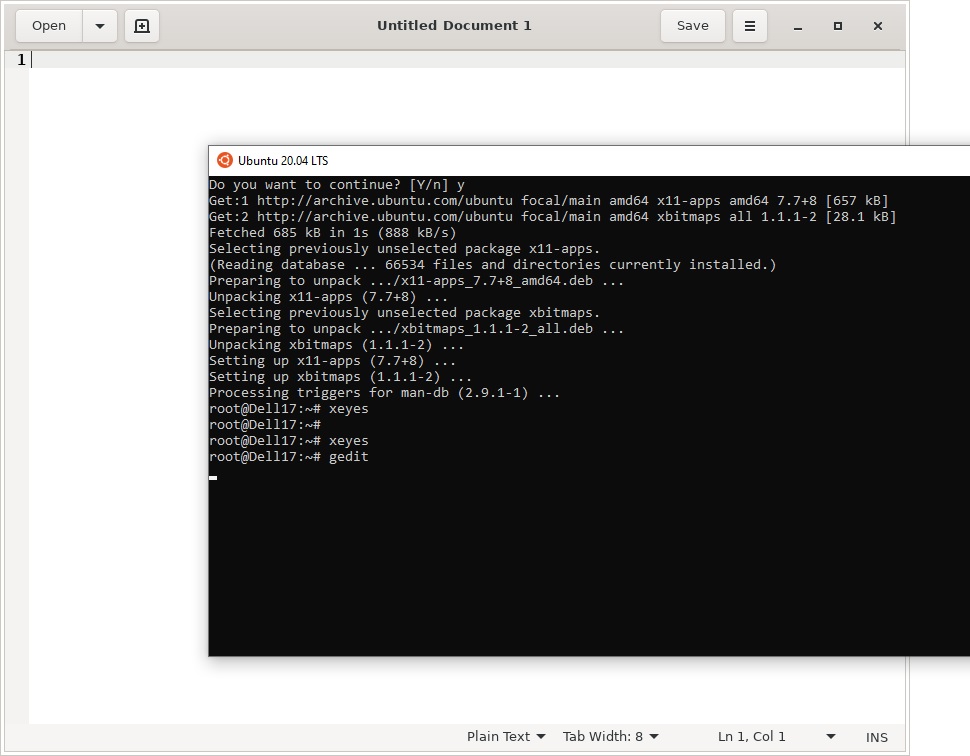
С помощью пакетного менеджера apt-get установим несколько графических программ: например, браузер, текстовый редактор или что-то ещё:
sudo apt-get install gedit
sudo apt-get install firefox
sudo apt-get install x11-app
Затем создайте файл в директории root:
cd /~
vim .bash_login
впишите строку
export DISPLAY=$(cat /etc/resolv.conf | grep nameserver | awk '{print $2}'):0
сохраните запись
Esc -> :wr -> :q
Теперь можете запустить графические программы Linux через WSL командами:
firefox
или
gedit
Вы можете установить в Windows 10 несколько дистрибутивов Linux и запускать одновременно в разных окнах WSL. Вывести весь перечень установленных дистрибутивов можете с помощью команды:
wsl --list –all
чтобы завершить работу всех запущенных дистрибутивов и ядра WSL 2, выполните команду:
wsl --shutdown
This tutorial demonstrates how to install, manage, and use a full Linux environment on your Windows 10 or Windows 11 PC with WSL2. You’ll be running a Linux kernel and executing native applications while seamlessly sharing files and services with Windows code editors and browsers.
Why Use Linux?
Your web host almost certainly uses Linux. It’s fast, open source, and runs the majority of web software including:
- servers (Apache, NGINX, LiteSpeed, etc.)
- language runtimes (PHP, Python, Node.js, Ruby, etc.)
- utility libraries (image manipulation, ZIP creation, emailers, etc.)
- databases (MySQL, MongoDB, Redis, etc.)
- other dependencies (Elasticsearch, RabbitMQ, proxies, etc.)
Some of these dependencies may be available on Windows and macOS, but installing and maintaining identical versions is difficult. They’re often slower and you may encounter subtle differences which will not become apparent until you deploy.
Some developers use Linux as their primary desktop OS, but that may not be viable if you require non-Linux software such as Microsoft or Adobe products. Alternative options:
-
Use two PCs or dual boot on a single device. Switching between systems can be cumbersome.
-
Run a Linux virtual machine (VM) using Hyper-V, VirtualBox, Parallels, WMware, or Vagrant. This requires considerable OS resources and reasonable IT knowledge. Sharing files between systems can be awkward.
-
Run web applications in Docker containers. It’s another topic to learn and Docker itself runs natively on Linux. Both the Windows and macOS editions use Linux below the surface and the Windows edition of Docker Desktop requires WSL2.
What is the Windows Subsystem for Linux?
The Windows Subsystem for Linux (WSL) lets developers run a Linux environment directly on Windows. It’s a full Linux OS running inside Windows so you can use the same apps and files seamlessly.
WSL1 was groundbreaking and translated Linux system calls to Windows equivalents. This could be slow and some features weren’t available. WSL2 uses Hyper-V virtual machine technology so Linux compatibility is excellent and file access is up to 20x faster than before.
Windows 10 and Windows 11 Differences
Microsoft introduced WSL2 in 2020, so it was fully integrated into the Windows 11 release in October 2021.
Windows 10 requires a little more configuration effort. If you’re considering an upgrade to Windows 11, do it before installing WSL2. Windows 11 is not an improvement in some respects (I still miss taskbar icon ungrouping and dragging files!) but WSL2 seems more stable and I rarely encounter issues.
PC Requirements
WSL2 uses Hyper-V. This requires hardware virtualization support which you must enable in your BIOS.
WARNING: fiddling with your BIOS settings can trash your PC! Be careful when making changes. Consult your motherboard manufacturer’s help pages or search for online advice about your specific make and model.
Hardware virtualization is available on most modern devices, but you can check by rebooting, and opening the BIOS panels — typically by hitting the DEL, F2, or F10 key as the system starts. Look for Virtualization Technology, VTx, Secure Virtual Machine (SVM) or similar options. Ensure they are enabled, save, and reboot the machine.
Finally, ensure your C: drive has at 1GB of spare disk space — ideally more. You may be able to free up some space in Settings, System, Storage or using the Disk clean-up tool in Windows Administrative Tools.
At the time of writing, WSL2 will install Linux to your C: drive, although it’s possible to move it elsewhere after installation.
Windows Requirements
WSL2 is available with the Home, Pro, or Server editions of Windows but not Windows 10/11 S. S mode only permits apps from the Microsoft Store to “improve” security. You can switch from S mode to Windows Home/Pro using the Switch to Windows Home option in Settings > Update & Security > Activation.
Windows 10 requires the May 2020 update — that’s version 2004 or above. Choose the Settings cog from the Start menu, then select System followed by About. The Windows specifications are shown at the bottom of the panel.
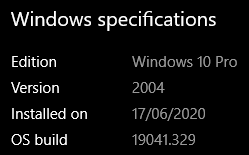
Use the Check for updates button in Settings, then Update & Security if it’s not installed. Some older PCs may never be compatible and it’s unlikely Microsoft will offer a patch.
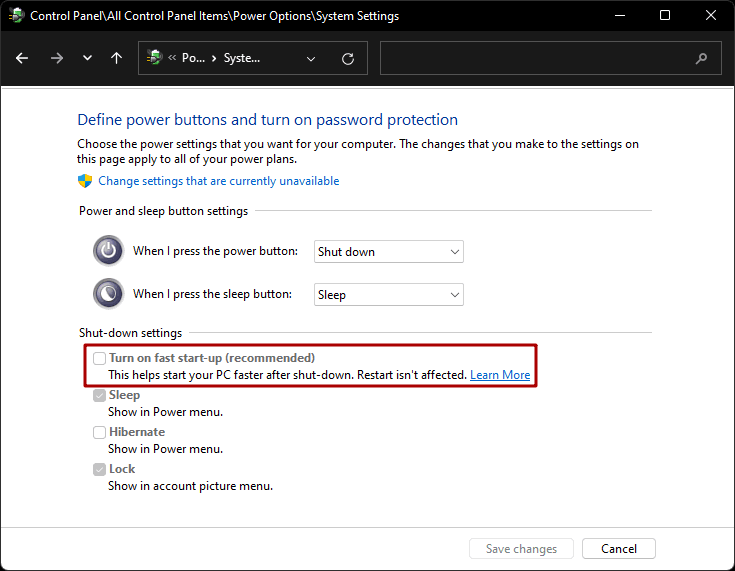
Disable Fast Start-up (Optional)
Fast start-up saves the Windows session and device drivers to a file so the next boot is faster. This can cause problems for the Linux kernel, which becomes unresponsive on the next boot. If you encounter problems, disable fast start-up from the classic Control Panel > Power Options > Choose what the power buttons do:
Alternatively, create a wsl.bat file in your Startup folder (C:Users<user-name>AppDataRoamingMicrosoftWindowsStart MenuProgramsStartup) with the content:
wsl --shutdown
This will shut down WSL after Windows boots but it will restart as soon as you access a Linux distro.
Install Windows Terminal (Optional but Recommended)
Windows Terminal is a great terminal application available from the Microsoft Store or its repository at github.com/microsoft/terminal/.
Windows Terminal automatically adds WSL2 Linux distros when they’re installed and offers a configurable range of options including tabs, split views, themes, transparency, and key bindings.
Configuration is available from the Settings menu item (Ctrl + ,), the Command Palette (Ctrl + Shift + P), or the settings.json accessed at the bottom of the Settings panel.
Enable WSL2 (Windows 10)
The following instructions apply to Windows 10. They should not be necessary in Windows 11, although you should double-check if you performed a Windows 10 to 11 upgrade.
The Virtual Machine Platform and Windows Subsystem for Linux features must be enabled in Turn Windows features on or off. The panel is accessed by hitting Start and typing “features” or from the Programs and Features icon in the classic Control Panel.
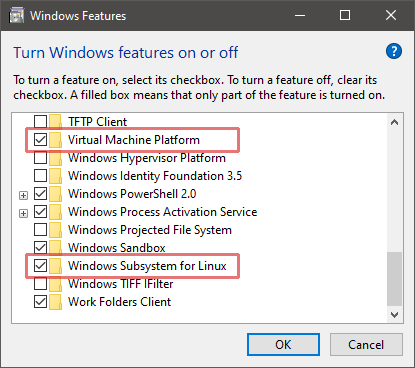
Alternatively, you can execute the following commands in a Windows Powershell terminal run as an Administrator:
dism.exe /online /enable-feature /featurename:Microsoft-Windows-Subsystem-Linux /all /norestart
dism.exe /online /enable-feature /featurename:VirtualMachinePlatform /all /norestart
Reboot Windows, then enable WSL2 as the default by entering the following command in a Windows PowerShell or command prompt:
wsl --set-default-version 2
Download Linux
Search for or locate PowerShell in the Start menu then right-click the icon and choose Run as administrator. Display a list of available Linux distros by entering:
wsl --list --online
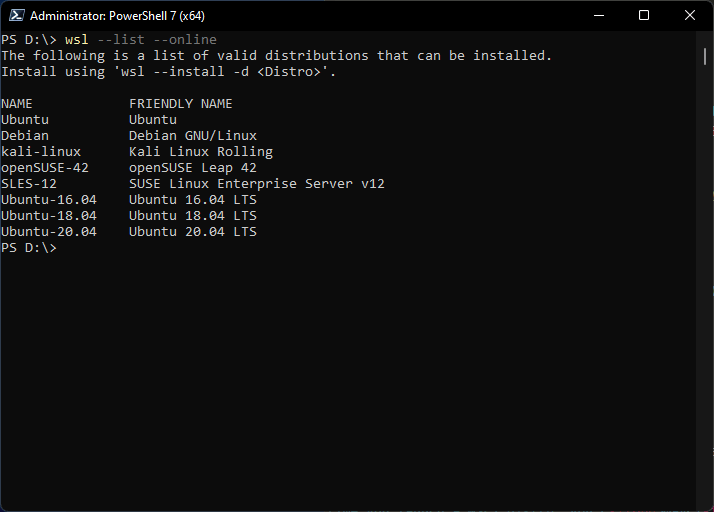
To install the default Ubuntu 20.04 distro, enter:
wsl --install
To install a specific distro by name, such as Debian, enter:
wsl --install -d Debian
Alternatively, you can install Linux distros from the Microsoft Store accessed in the Start menu. Enter “Linux” in the search box (be wary there could be software other than WSL distros).
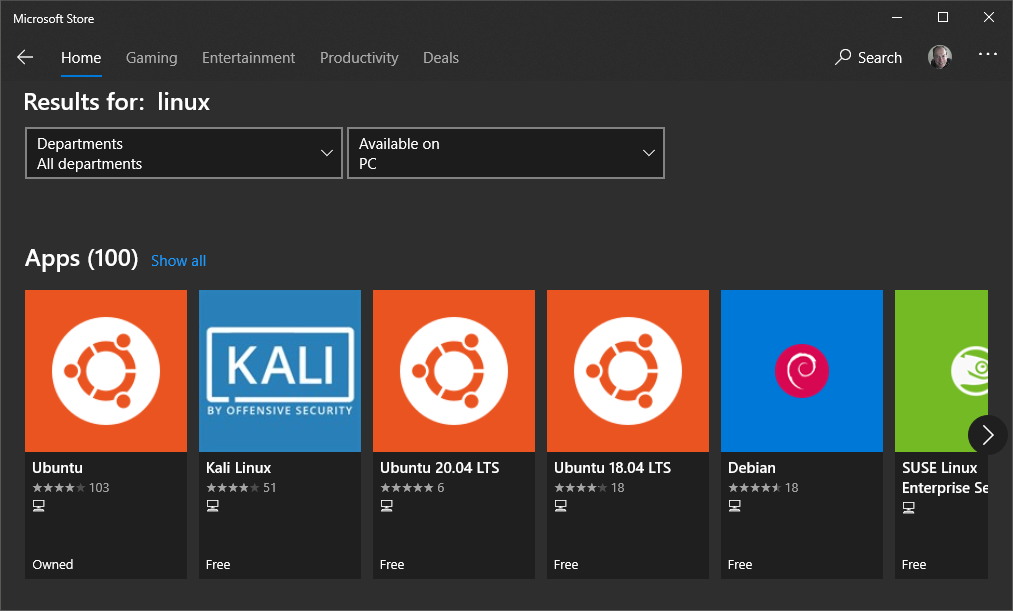
Ubuntu is a good choice unless you have specific Linux requirements. The latest edition is installed if you click the Ubuntu icon followed the Get button.
The download and installation could take some time depending on your network and PC speed. You may be prompted to reboot yet again.
Launch Linux
A new Linux (Ubuntu) option/icon will now be available in:
- the Start menu
- Windows Terminal (if installed)
- Powershell — enter
wslorbashat the prompt
Third-party terminal software such as Cmder, ConEmu, or Hyper can be used by creating profiles which launch %windir%system32bash.exe ~.
The installation process will complete the first time you run the WSL2 Linux OS.
Note: you may see a message in the terminal about a kernel update. Copy the link into your browser then download and install the update. You’ll need to launch the Linux distro again to continue with the installation.
You’ll be prompted to enter a username and password. These are the credentials for Linux administration: they’re completely separate from your Windows username and password (although choosing the same ones may be practical).
Linux will eventually be ready and your terminal will show content similar to:
Welcome to Ubuntu 20.04.4 LTS (GNU/Linux 5.10.102.1-microsoft-standard-WSL2 x86_64)

 * Documentation:  https://help.ubuntu.com
 * Management:     https://landscape.canonical.com
 * Support:        https://ubuntu.com/advantage

  System information as of Tue Aug 16 10:19:36 BST 2022

  System load:  0.0                Processes:             8
  Usage of /:   1.6% of 250.98GB   Users logged in:       0
  Memory usage: 1%                 IPv4 address for eth0: 172.21.6.83
  Swap usage:   0%


0 updates can be applied immediately.


The list of available updates is more than a week old.
To check for new updates run: sudo apt update
Update Linux
There are likely to be several Linux updates. To update Ubuntu applications, enter the following commands in the Linux terminal:
sudo apt update
sudo apt upgrade
Other Linux distros will have a similar process — so check the documentation for assistance.
You can also check for Linux kernal updates from Powershell using:
wsl --update
Switch Between WSL1 and WSL2
Existing WSL1 distros can be converted to WSL2. Enter the following command in a Windows Powershell terminal to display the installed Linux distros and their WSL version:
PS C:> wsl --list --verbose

  NAME    STATE    VERSION
* Ubuntu  Running  1
(The * asterisk highlights the default Linux installation.)
To switch Ubuntu to WSL2, enter:
wsl --set-version Ubuntu 2
Similarly, to switch back to WSL1, enter:
wsl --set-version Ubuntu 1
Set a Default Linux Distribution
One Linux distribution must be set as the default when you have more than one installed. This will be used when wsl is entered in a Windows Powershell terminal.
To set the default distro, list your Linux installations:
wsl --list
and set a default with:
wsl --setdefault <DistributionName>
Ubuntu example: wsl --setdefault Ubuntu.
Run Linux as a Specific User
To run your default distribution as a specific user, enter the following command in a Windows Powershell terminal:
wsl --user <username>
A default user is defined during installation but you can create others. A root user is also created, but you should avoid using it under normal circumstances. It’s too easy to enter a dangerous command!
Move or Clone Your Linux Disk Image
Linux disk images are installed on your C: drive. Optionally, you can either:
-
move it to another drive to free up space on
C:, or -
use the same image to create multiple Linux installations (which can be useful if you need different applications and setups for different projects — although Docker may be more practical)
The following instructions presume you’re moving the Ubuntu Linux distro to D:wsl.
In a Windows Powershell terminal (not the Ubuntu terminal), enter wsl --list to view your Linux distributions, then export one by name to a backup .tar file — such as D:backupubuntu.tar:
mkdir D:backup
wsl --export Ubuntu D:backupubuntu.tar
Unregister that distro to remove it from the C: drive:
wsl --unregister Ubuntu
Enter wsl --list to verify the distro has been removed.
Import the backup into a new WSL2 distro at another location, such as D:wsl:
mkdir D:wsl
wsl --import Ubuntu D:wsl D:backupubuntu.tar
You can make any number of named clones from the same back-up. For example:
wsl --import Clone01 D:wsl D:backupubuntu.tar
wsl --import Another D:wsl D:backupubuntu.tar
Verify the WSL distro has been successfully created by entering wsl --list and launching Ubuntu from the Start menu or Windows Terminal.
At this point, Ubuntu will use root as the default user. To revert to your own account, enter the following command:
ubuntu config --default-user <yourname>
Here, <yourname> is the username you defined during installation.
For other distros that aren’t the WSL2 default, define a user by logging on to the distro and creating/editing /etc/wsl.conf:
touch /etc/wsl.conf
nano /etc/wsl.conf
Add the following lines to the file:
[user]
default=<yourname>
Save (Ctrl + O) and exit (Ctrl + X), then restart the distro in a Powershell terminal with:
wsl --terminate <distroname>
Presuming all has gone well, you can delete the backup file (D:backupubuntu.tar).
Access Linux Files from Windows
You can access WSL2 Linux files from the network path \wsl$. Enter it in the File Explorer address bar or any file open dialog.
Your installed Linux distros are listed, so you can access the Ubuntu root directory at \wsl$Ubuntu. Your personal Linux files are typically be stored at:
wsl$Ubuntuhome<yourname>
Here, <yourname> is the username you defined during installation.
It’s best to set this as the starting folder for the distro in Windows Terminal. Open the Settings, click a profile, then change the Starting directory option.
Map a Network Drive
You can mount a network drive to \wsl$Ubuntu by opening \wsl$ in File Explorer, right-clicking the Ubuntu folder, and choosing Map network drive….
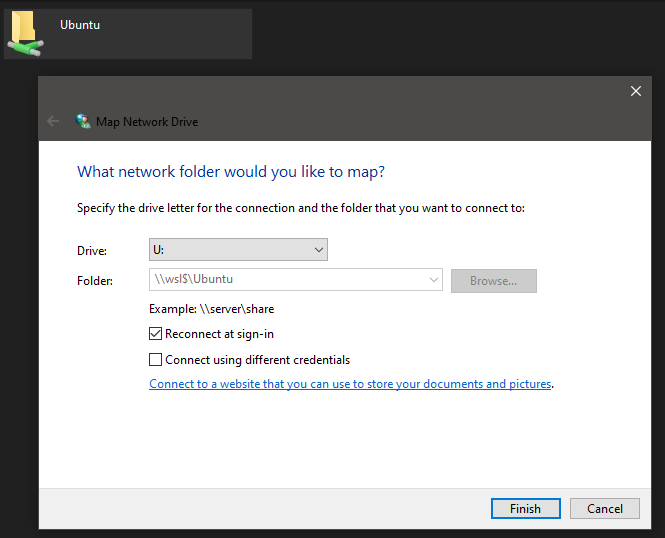
Unfortunately, it’s not currently possible to map deeper subdirectories. You may also encounter mapped-drive issues with some applications.
Accessing Windows Files from Linux
Windows drives are mounted in the Linux /mnt/ directory. For example, your personal Users folder at C:Users<yourname> is available at:
/mnt/c/Users/<yourname>
Here, <yourname> is your Windows username.
For ease of access, you can create a Linux symbolic link to any Windows folder from the terminal. For example, for C:projectscode:
cd ~
ln -s /mnt/c/projects/code/
A code folder will appear in your Linux home directory. Navigate to it using cd ~/code and you’ll actually be in /mnt/c/projects/code/, which maps directly to C:projectscode.
Accessing Windows files from Linux is considerably slower than using the native Linux file system. Where possible, create projects in the Linux file space, typically in your home folder (/home/<yourname>/ or ~).
Run Linux Commands from Windows
Any Linux (bash) shell command can be run from a Windows Powershell or command-line terminal using wsl:
wsl <linux-command>
For example, wsl ls -la lists all files in a Windows folder.
Run Windows Applications from Linux
Any Windows executable can be launched from Linux (it’s normally necessary to specify the .exe extension). For example, to open the current Linux directory in File Explorer, enter:
explorer.exe .
Or edit .bashrc in Notepad:
notepad.exe ~/.bashrc
Or open the a specific project directory in VS Code:
code ~/projects/mywebsite
Install Applications
Always remember you’re running two operating systems. They may be tightly integrated, but there are situations when you want an application installed everywhere.
For example, Git is useful in both Windows and Linux. The Windows edition is installed by downloading an executable. It’s best to ensure it doesn’t convert line endings:
git config --global core.autocrlf input
Git on Ubuntu is installed using:
sudo apt update
sudo apt install git-all
Similarly, you may want to test Node.js applications on both Windows and Linux. Again, Windows has a runtime installer, but the Node.js runtime is installed on Ubuntu using commands such as:
sudo apt-get install build-essential
curl -sL https://deb.nodesource.com/setup_18.x | sudo -E bash -
sudo apt-get install -y nodejs
git, node and npm commands will now work in either OS. Be wary that they may be different versions.
Installing Graphical Linux Applications
WSL2 allows you to run graphical X11 and Wayland Linux applications directly on Windows. You can launch Linux apps from the Start menu, pin them to the task bar, and use features such as cut and paste across applications. There are some downsides:
- not all graphical apps will work as expected
- some offer Linux features — such as file dialogs — that could confuse Windows users
- there’s little benefit installing applications with native Windows editions such as Firefox, VLC, or GIMP
To proceed, install the correct GPU driver for your PC:
- Intel GPU driver for WSL
- AMD GPU driver for WSL
- NVIDIA GPU driver for WSL
Then install any graphical application from the Linux terminal. For example, the GNOME Gedit text editor:
sudo apt install gedit
Launch it with:
gedit
Pin the app to your Start menu or task bar as you would with any other Windows program.
Gedit is a small application less than 2MB in download size. However, it requires GNOME and other Linux libraries, which incur several hundred megabytes of additional code on top of the chunky GPU drivers (1.1GB for Intel). Using graphical Linux apps in WSL2 only makes sense if you need to install several applications or there’s no native Windows alternative.
Installing Docker
One exception to the “install on both OSes” rule is Docker!
Docker runs applications in isolated Linux containers that are conceptually similar to lightweight virtual machines with an OS, single application, and its dependencies. Using Docker for web development provides a consistent environment that’s easy to install and works on any device.
Docker Desktop for Windows is fully WSL2-enabled:
- there’s no need to use Hyper-V, so Docker can be installed on Windows Home
- Docker starts and runs considerably faster when configured to use WSL2
- installing Docker Desktop on Windows enables
dockeranddocker-composein both Windows and Linux
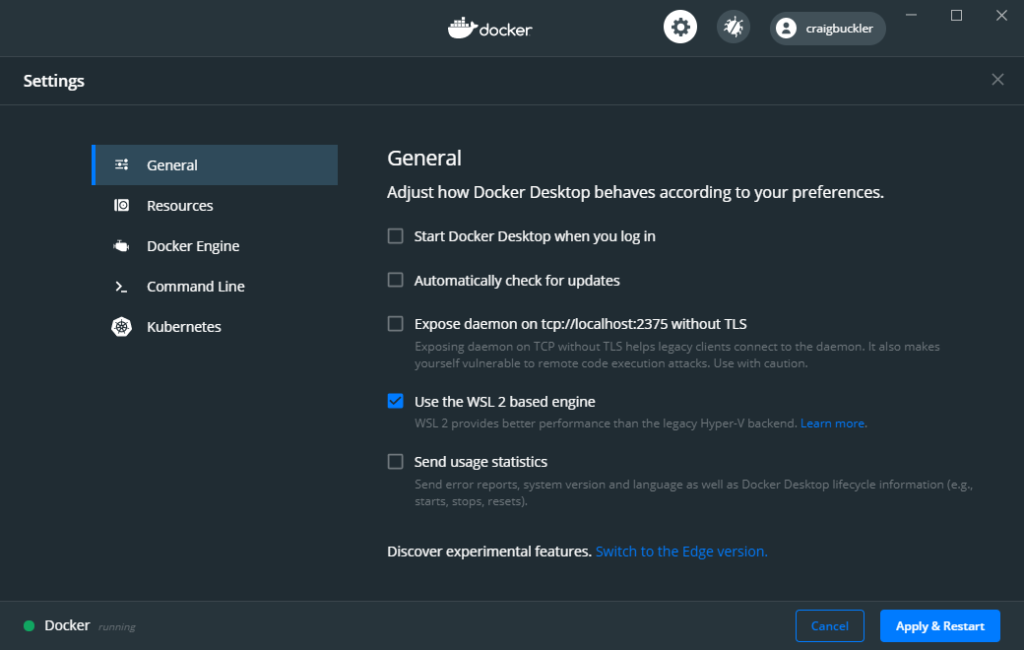
Docker Desktop suggests you use WSL2 when it’s first launched. Alternatively, you can select Settings from the Docker system tray icon menu, then choose the General tab, check Use the WSL 2 based engine, and hit Apply & Restart.
Docker uses the default Linux distro, but you can also enable it in other installed distros from the WSL Integration panel in Settings, then Resources.
Launching Apache and PHP Applications Using Docker
It’s possible to install web dependencies such as Apache and PHP directly in your WSL2 Linux environment. However, Docker is safer, quicker, and more configurable: it allows you to run different versions of PHP on the same device at the same time.
In this example, you’ll create a small PHP file and run it using the latest release of PHP 7.4 in a Docker container. Ensure you’ve installed Docker Desktop for Windows and enabled WSL2 mode, then create a folder in your Linux environment with an index.php file. For example:
mkdir ~/php
cd ~/php
touch index.php
Edit index.php, perhaps using Notepad or VS Code as shown above. Add the following content, which outputs PHP status information:
<?php
phpinfo();
Run the following docker command to start a PHP 8.1-enabled Apache web server in a container which mounts files in the current host directory to /var/www/html in the container:
docker run
  -it --rm -p 8080:80 --name php
  -v "$PWD":/var/www/html
  php:8.1-apache
Note: this command also works in Windows, but the reference to $PWD must be replaced by the full file path in Linux notation — such as /c/php/.
Open https://localhost:8080/ in any Windows web browser to view the output of the phpinfo() command.
To finish, press Ctrl + C in your Docker terminal to stop and delete the container.
WSL2 and localhost
Applications running on Windows, WSL2 Linux, and Docker containers are always accessed from localhost or 127.0.0.1.
The PHP example above exposed port 8080, which was mapped to port 80 in the container. Similarly, if you have Node.js installed in Linux, you can cd to any directory and start a static file server:
npx small-static-server
Open http://localhost:8888/ in a browser to view files in that directory (index.html is returned by default).
Be aware that ports available in one OS may be unavailable in the other. Port numbers less than 1,000 are only available to Linux super users. Port 80 is often reserved by the Windows Store Skype App and it can’t be changed (although the classic Desktop edition does permit it).
SSL certificates that are either self-signed or locally trusted using tools such as mkcert can be used interchangeably in both Windows and Linux environments.
VS Code WSL2 Integration
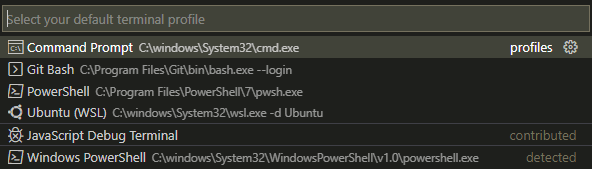
VS Code permits you to use any Windows or Linux terminal. Open the terminal with View > Terminal or Ctrl + ' then hit the down arrow next to the + icon to launch a specific type. The same menu has a Select Default Profile option where you can select the terminal to use by default.
Like other applications, VS Code can directly access Linux files at \wsl$ and debuggers running on localhost. There’s no need for further extensions, but the following options permit easier Linux and Docker file management:
- Remote – WSL: open WSL2 Linux folders
- Remote – Containers: open or attach to a running Docker container
- Remote Development Pack: includes both extensions above as well as Remote – SSH to connect to remote servers
After installing Remote – WSL, you can navigate to any Linux directory and launch a WSL-connected instance of VS Code:
cd ~/myproject
code .
Alternatively, click the remote window icon in the bottom left of the application, then choose a connection option.
![]()
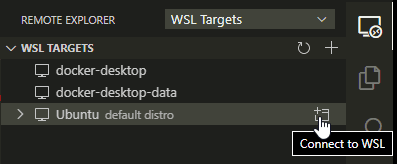
Or use the new Remote Explorer icon in the Activity Bar. This allows you to choose a target type from the drop-down and connect accordingly.
The remote instance of VS Code has a separate set of extensions and settings for Linux use, but some can be globally enabled. The Extensions panel allows you to enable and configure extensions in the remote instance.

Settings are stored in your Linux ~/.vscode-server directory.
Summary
Running Linux applications on Windows used to require virtual machines, complex Samba folder shares, and lots of patience. WSL2 has revolutionized web development. It makes it easy to write code using Windows tools then run it in a production-like Linux environment. The tight integration offers the benefits of both OSes.
Further WSL2 resources:
- Windows Subsystem for Linux Documentation
- Developing in WSL
- VS Code Remote development in WSL
- Run Linux GUI apps on the Windows Subsystem for Linux
If you enjoyed this article, you might also find these resources useful too:
- Windows Terminal: The Complete Guide
- How to Install Docker on Windows 10 Home
- How to Install PHP on Windows 10 (with Apache & MySQL)
- PHP & MySQL: Novice to Ninja
- How to Build an Image with the Dockerfile
- Understanding Docker, Containers and Safer Software Delivery
- Docker for Web Developers

If you want to try out the improved Windows Subsystem for Linux 2 (aka WSL 2) in the latest Windows versions here’s how — I cover everything you need to do to install it, in this post.
WSL 2 is a big upgrade to the original WSL Microsoft introduced in 2017. More than a simple version bump, WSL 2 is faster, more versatile, and uses a real Linux kernel for the first time.
Plus, new Linux kernel updates will be released as Windows 10 software updates — which is kinda crazy when you think about it!
Improved performance was Microsoft’s motivation for created the souped-up WSL2. And it figured the best way to do that was to add full system call compatibility, i.e. put a real Linux kernel right at the heart of things.
“[This] new architecture presents a better platform for the WSL team to deliver features that make WSL an amazing way to run a Linux environment in Windows,” say Microsoft of the tech.
The crazy shows no sign of abating either as Microsoft plans to let users run desktop Linux apps on Windows 10 and leverage GPU-intensive tasks.
And the best news is that it is much easier to install WSL on Windows 10, as this updated guide shows.
Requirements
To install WSL 2 on Windows 10 you need the minimum:
- Windows 10 May 2020 (2004), Windows 10 May 2019 (1903), or Windows 10 November 2019 (1909)
- A computer with Hyper-V Virtualization support
I’d be mighty surprised if anyone who’s reading this guide doesn’t meet those requirements but, if you don’t you can use WSL 1 rather than WSL 2.
What’s awesome is that if you use Windows 10 May 2020 (2004) update or later you can install WSL2 with a single command, or a single click — no hassle.
Installing WSL 2 on OS Build 2004 (or later)
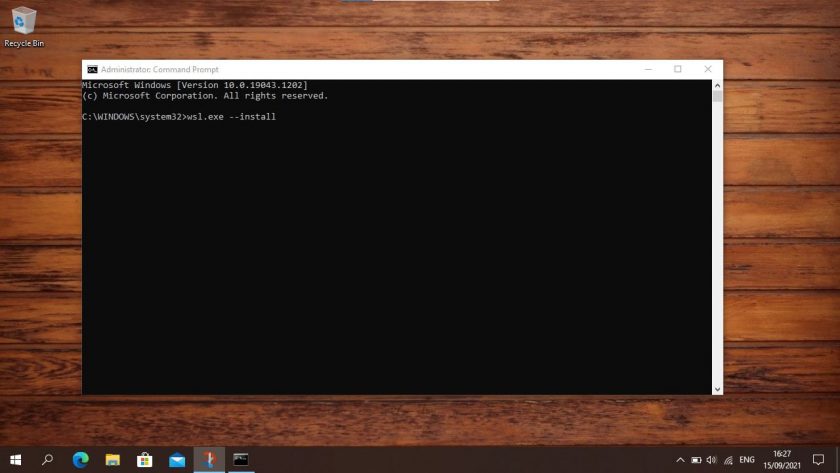
To install WSL 2 on Windows 10 OS Build 2004 or later you can open a command prompt (with Administrator permissions) and type in the following command:
wsl.exe --install
As soon as you hit enter the process gets to work enabling WSL, any optional features required, fetches the latest WSL Linux kernel version, and installs Ubuntu as the default distro:
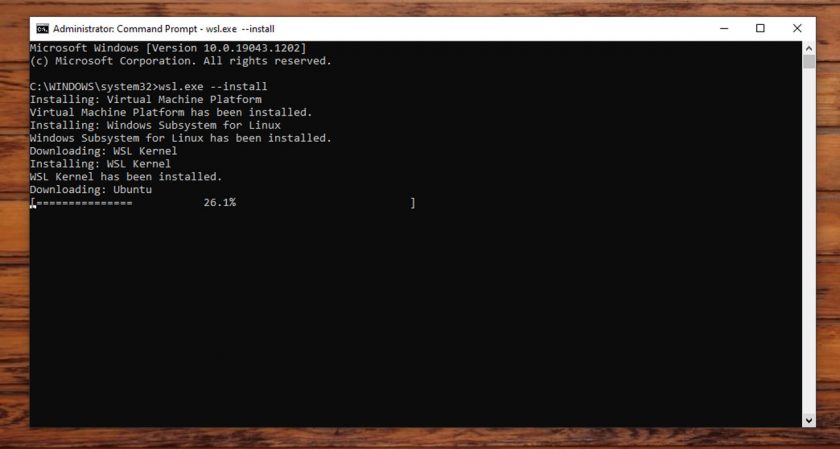
Once done, reboot your computer. Log in to Windows 10 and the command prompt will open again. This time you’ll be walked through setting up Ubuntu with a username and password (these don’t need to be the same as your Windows username and password).
Once done you can you can launch the ‘Ubuntu’ app from the Start Menu to get started, or install the Microsoft Terminal app to start exploring your newly-installed Ubuntu install — don’t forget to run an apt update && apt upgrade though — this is a REAL Ubuntu system, after all!
Install WSL 2 (Old Method)
If you use an older version of Windows 10 you can still install WSL 2 (Microsoft backported WSL 2 to older versions of Windows 10 in Windows Update KB4566116) but the process isn’t as simple as in the 2004 update.
To install WSL 2 on Windows 10 (OS Build 1909 or 1903) you need to follow 4 steps:
- Enable WSL 2
- Enable ‘Virtual Machine Platform’
- Set WSL 2 as default
- Install a Linux distro
I walk through each step in turn below. I recommend using the PowerShell app, which you need to run as an administrator. You can find PowerShell in the Windows Start Menu.
Note: it is possible to install WSL 1 using a GUI too but it’s much faster to use the command line, and since WSL is a CLI tool it kinda makes sense too!
Step 1. Enable WSL
Regardless of which version of WSL you want to use you first need to enable it. To do this open the PowerShell tool as an Administrator and run the command below. Be careful not to mistype or leave out any character in the command:
dism.exe /online /enable-feature /featurename:Microsoft-Windows-Subsystem-Linux /all /norestart
Only want to use WSL 1? You can skip to step 4.
Step 2. Enable ‘Virtual Machine Platform’
WSL 2 requires Windows 10’s “Virtual Machine Platform” feature to be enabled. This is separate from Hyper-V and hands some of the more interesting platform integrations available in the new version of the Windows Subsystem for Linux.
To enable Virtual Machine Platform on Windows 10 (2004) open PowerShell as Administrator and run:
dism.exe /online /enable-feature /featurename:VirtualMachinePlatform /all /norestart
To enable Virtual Machine Platform on Windows 10 (1903, 1909) open PowerShell as Administrator and run:
Enable-WindowsOptionalFeature -Online -FeatureName VirtualMachinePlatform -NoRestart
To ensure all of the relevant bits and pieces fall neatly in to place you should restart your system at this point or you may find that things don’t work as intended.
Step 3. Set WSL 2 as default
Open PowerShell as Administrator and run this command to set WSL 2 as the default version of WSL:
wsl --set-default-version 2
You can (at any time) configure a distro to run in WSL 1 mode if you need to.
Step 4. Install a distro
With WSL and the necessary virtualisation tech all in place all that is left for you to do is pick and install a Linux distro from the Microsoft Store.
Several different distros are available, including OpenSUSE, Pengwin, Fedora Remix, and Alpine Linux. But my personal recommendation is (naturally) Ubuntu 20.04 LTS (though 18.04 LTS and 16.04 LTS are also available).
To install Ubuntu on Windows 10 open the Microsoft Store app, search for “Ubuntu 20.04”, and hit the “Get” button:
Ubuntu 20.04 LTS on the Microsoft Store
Whilst you in the Microsoft Store I highly recommend that you also install the open source Windows Terminal app. This tool is designed to give you the best possible WSL experience:
Windows Terminal on the Microsoft Store
5. Use WSL 2
When you installed Ubuntu (or a different Linux distro) a shortcut was added to the Start Menu. Use this to “open” Ubuntu (or whichever distro you chose). The first time you run the distro things will seem a little slow. This is expected; the distro has to unpack and decompress all of its contents — just don’t interrupt the process.
You will also be promoted to set a username and password for use on the distro. Try to pick something you won’t forget.
Convert Ubuntu on WSL 1 to WSL 2
If you use WSL 1 you can upgrade an existing WSL 1 installation to WSL 2. To convert an existing WSL 1 distro to WSL 2 run the following in PowerShell, e..g,:
wsl.exe --set-version Ubuntu 2
You should replace ‘Ubuntu’ with the name of whichever distro your WSL 1 install runs.
Let me know if this guide worked for you in the comments!


Windows Subsystem for Linux 2 (WSL 2) — это вторая версия подсистемы Windows для Linux. Новая архитектура WSL 2 обеспечивает иной способ взаимодействия дистрибутивов Linux с Windows. WSL 2 использует технологию виртуализации и ядро Linux для реализации новых возможностей.
Подсистема WSL 2 доступна только в Windows 10 версии 2004, сборки 19041 или выше.
Основные приоритеты WSL 2:
- Увеличение производительности файловой системы.
- Добавление полной совместимости системных вызовов.
Простыми словами Windows Subsystem for Linux 2 работает значительно быстрее чем предыдущая версия подсистемы Linux.
Каждый дистрибутив Linux может переключаться между WSL 1 или WSL 2 в любое время.
Примечание автора: это не совсем так. Если вы использовали совсем старый дистрибутив WSL 1 из времён бета-тестирования, то он может не поддерживать WSL 2. Придётся снести старый дистрибутив и установить новый. После этой процедуры новый дистрибутив Linux сможет работать как WSL 1 так и WSL 2.
Несмотря на то, что WSL 2 гораздо производительнее, есть два случая, когда рекомендуется использовать WSL 1:
- Файлы проекта должны храниться в файловой системе Windows.
Если вы будете использовать дистрибутив Linux WSL для доступа к файлам проекта в файловой системе Windows, и эти файлы не могут храниться в файловой системе Linux, вы получите более высокую производительность в файловых системах ОС, используя WSL 1. - Проект, для которого требуется перекрестная компиляция с использованием средств Windows и Linux на одних и тех же файлах.
Операции с файлами в операционных системах Windows и Linux выполняются быстрее в WSL 1, чем на WSL 2. Поэтому если вы используете приложения Windows для доступа к файлам Linux, в настоящее время вы получите более высокую производительность при использовании WSL 1.
Ссылки
https://docs.microsoft.com/ru-ru/windows/wsl/compare-versions
https://docs.microsoft.com/ru-ru/windows/wsl/install-win10
Сравнение WSL 1 и WSL 2
| Функция | WSL 1 | WSL 2 |
|---|---|---|
| Интеграция Windows и Linux | ✅ | ✅ |
| Быстрый запуск | ✅ | ✅ |
| Незначительный расход ресурсов | ✅ | ✅ |
| Запуск с использованием текущих версий VMWare и VirtualBox | ✅ | ✅ |
| Управляемая виртуальная машина | ❌ | ✅ |
| Полнофункциональное ядро Linux | ❌ | ✅ |
| Полная совместимость системных вызовов | ❌ | ✅ |
| Производительность в файловых системах ОС | ✅ | ❌ |
WSL 2 будет работать с VMWare 15.5.5+ и VirtualBox 6+.
Подготовка к установке WSL 2
Подсистема WSL 2 доступна только в Windows 10 версии 2004, сборки 19041 или выше. Проверяю версию:
winver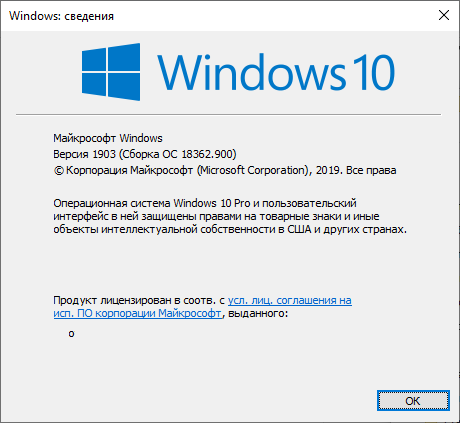
Вижу, что у меня старая версия Windows. Обновляюсь.
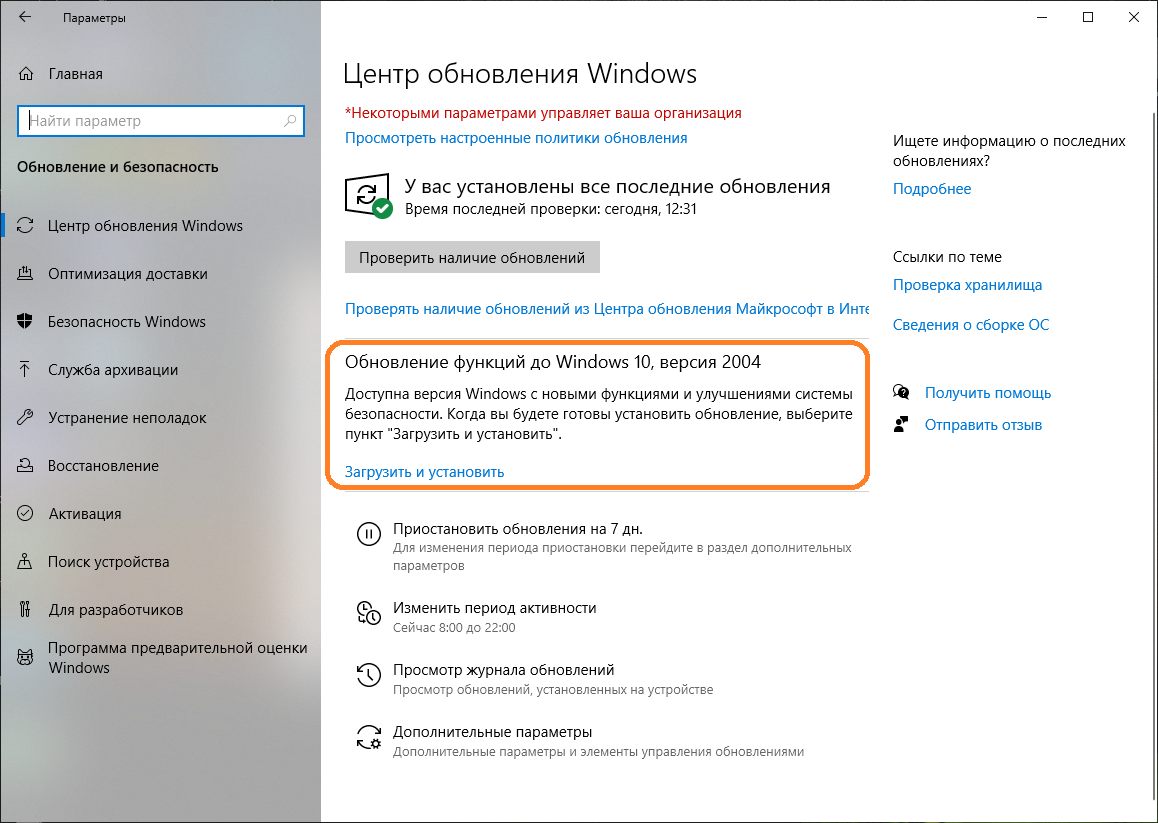
После обновления снова проверяю версию:
winver
Теперь требования для установки WSL 2 соблюдены.
Установка WSL 1 и WSL 2
Перед тем как устанавливать дистрибутивы Linux необходимо включить компонент «Подсистема Windows для Linux».
В PowerShell
В PowerShell с правами администратора:
dism.exe /online /enable-feature /featurename:Microsoft-Windows-Subsystem-Linux /all /norestart
В GUI
Панель управления > Программы и компоненты > Включение или отключение компонентов Windows.
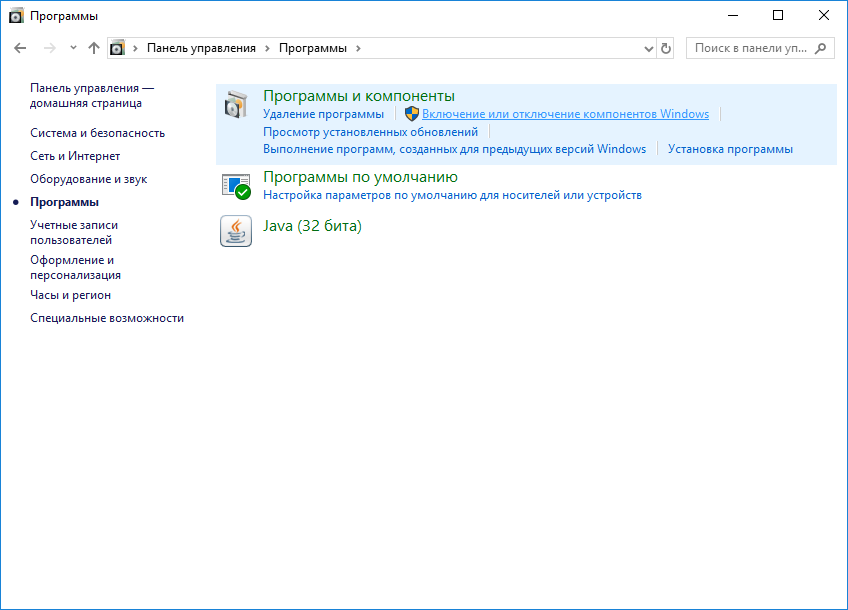
Находим в списке «Подсистема Windows для Linux», устанавливаем.
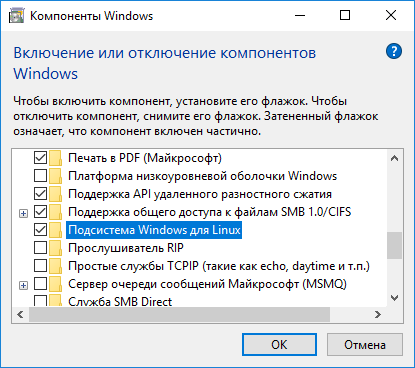
Чтобы установить только WSL 1, необходимо перезагрузить компьютер и можно устанавливать дистрибутивы Linux. Для установки WSL 2 читаем дальше.
Включаем компонент «Подсистема Windows для Linux».
В PowerShell
В PowerShell с правами администратора:
dism.exe /online /enable-feature /featurename:VirtualMachinePlatform /all /norestart
В GUI
Панель управления > Программы и компоненты > Включение или отключение компонентов Windows.
Находим в списке «Платформа виртуальной машины», устанавливаем.
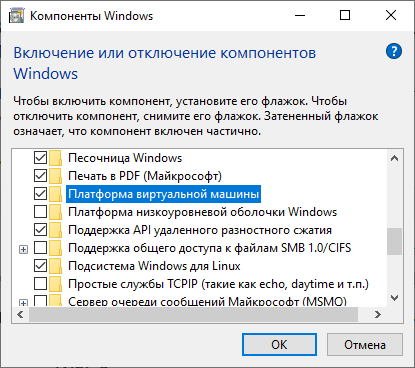
Перезагружаем компьютер.
Задаём WSL 2 в качестве версии по умолчанию. В PowerShell с правами администратора:
wsl --set-default-version 2Вы можете увидеть ошибку «WSL 2 требуется обновление компонента ядра»:

Переходим по ссылке https://aka.ms/wsl2kernel и скачиваем MSI файл с последней версией пакета обновления ядра Linux в WSL 2. Для простоты скину ссылки ниже.
Для ля 64-разрядных компьютеров:
https://wslstorestorage.blob.core.windows.net/wslblob/wsl_update_x64.msi
Для ARM64:
https://wslstorestorage.blob.core.windows.net/wslblob/wsl_update_arm64.msi
Качаю пакет.

Устанавливаю пакет wsl_update_x64.msi.

Запустить.

Next. Начинается установка.
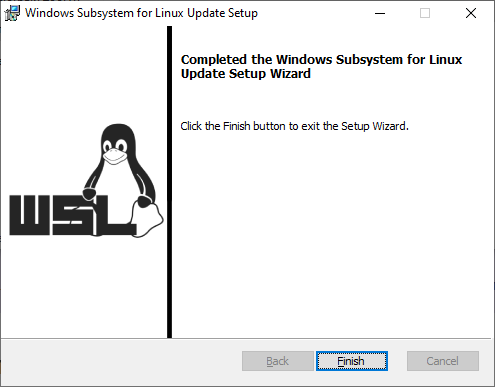
Практически моментально установка завершается. Finish.
После установки ядра выполняем команду еще раз. Она должна успешно завершиться без отображения сообщения. В PowerShell с правами администратора:
wsl --set-default-version 2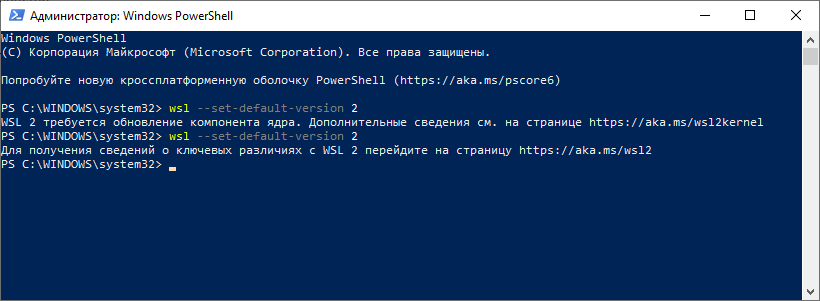
Теперь по умолчанию будет использоваться ядро WSL 2.
Если у вас уже имеются дистрибутивы Linux, то вы можете попытаться обновить им ядро WSL до 2 версии. Посмотрим список установленных дистрибутивов в PowerShell с правами администратора:
wsl -l -v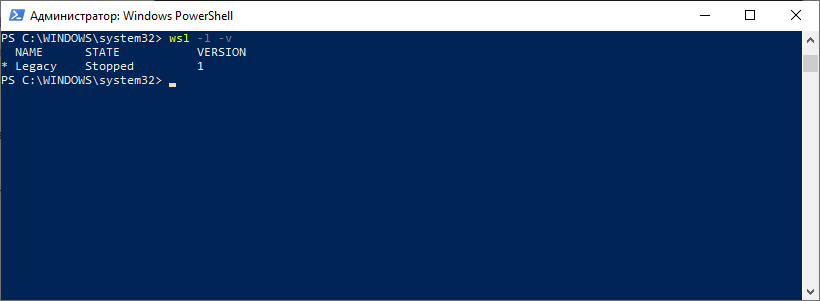
У меня установлен Linux с названием Legacy, который работает на 1 версии WSL. Попытаюсь изменить для Legacy ядро WSL на 2 версию в PowerShell с правами администратора:
wsl --set-version Legacy 2Если ваш дистрибутив Linux поддерживает вторую версию WSL, то операция пройдёт успешно, если не поддерживает, то вы увидите ошибку «Унаследованное распределение не поддерживает WSL 2». Как у меня:

В таком случае нужно снести старый дистрибутив и установить новый. Удаляю Legacy в PowerShell с правами администратора:
wsl --unregister Legacy
Проверим:
wsl -l -v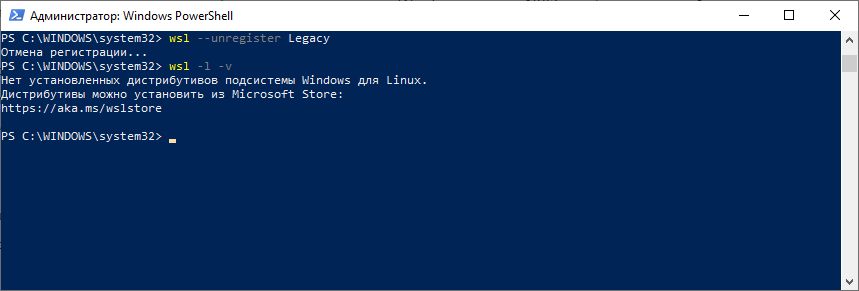
Дистрибутивов нет, можно что-нибудь установить.
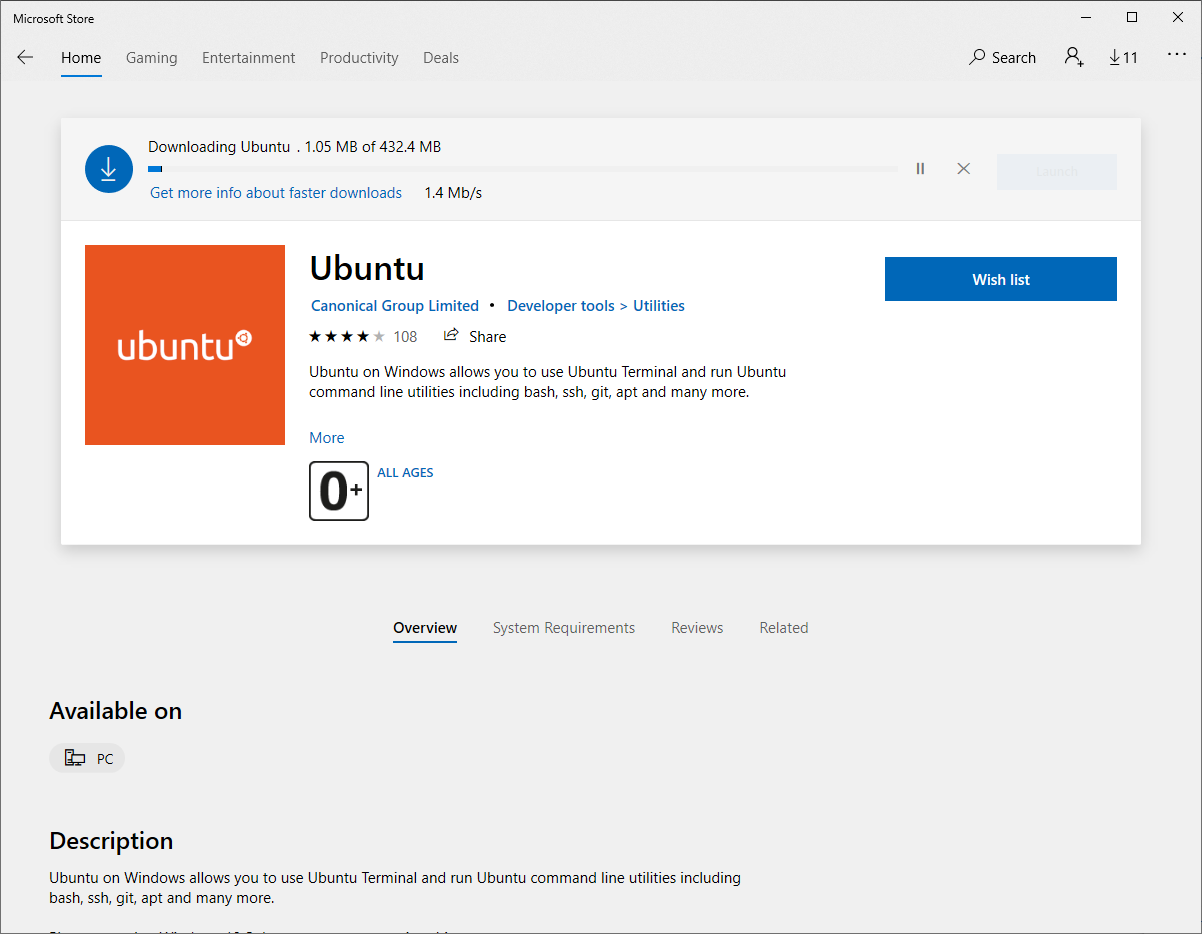
Установка дистрибутива Linux в Windows
Я пробовал перейти по ссылке https://aka.ms/wslstore, однако, она оказалась нерабочей. Поэтому я просто поискал «wsl» в Microsoft Store.

Установлю Ubuntu.
Доступны дистрибутивы:
- Ubuntu 16.04 LTS
- Ubuntu 18.04 LTS
- Ubuntu 20.04 LTS
- openSUSE Leap 15.1
- SUSE Linux Enterprise Server 12 SP5
- SUSE Linux Enterprise Server 15 SP1
- Kali Linux
- Debian GNU/Linux
- Fedora Remix for WSL
- Pengwin
- Pengwin Enterprise
- Alpine WSL
Проверим:
wsl -l -v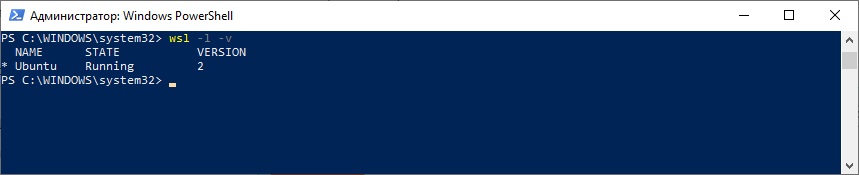
Теперь у меня Ubuntu на ядре WSL 2.
Запускаю bash:
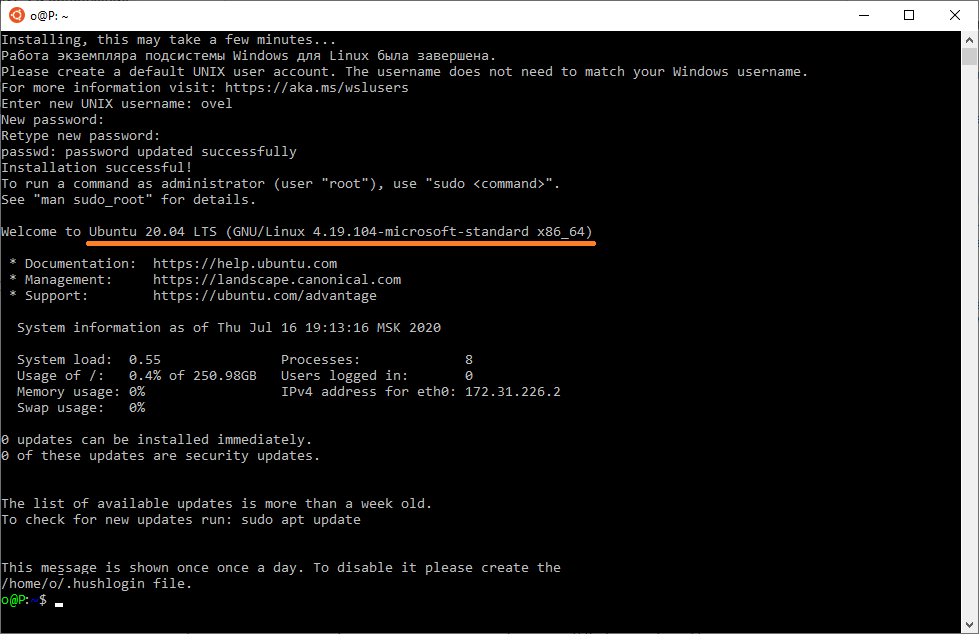
При первом запуске недавно установленного дистрибутива Linux откроется окно консоли, и вам будет предложено подождать минуту или две, чтобы файлы распаковались и сохранились на компьютере. Затем необходимо будет создать учетную запись пользователя и пароль для нового дистрибутива Linux.
Microsoft dropped plenty of jaws when it launched the Windows Subsystem for Linux, a way to run actual Linux inside Windows without the need to set up a virtual machine. The project has seen a ton of support, and WSL2 is the latest and greatest.
It takes things a little further and adds yet more awesomeness to the Linux experience on Windows 10 and Windows 11. Now, with the release of version 1.0, it has never been easier to set up WSL2 on your Windows machine, with GUI apps now even supported on Windows 10, too.
Simplified setup of WSL2 on Windows 10 and Windows 11
There is now a new, extremely simplified way to get WSL2 up and running on your Windows 10 and Windows 11 PC. To get the very latest version you need to be running Windows 10 version 21H1, 21H2, or 22H2, or on Windows 11 21H2 with all of the November updates applied.
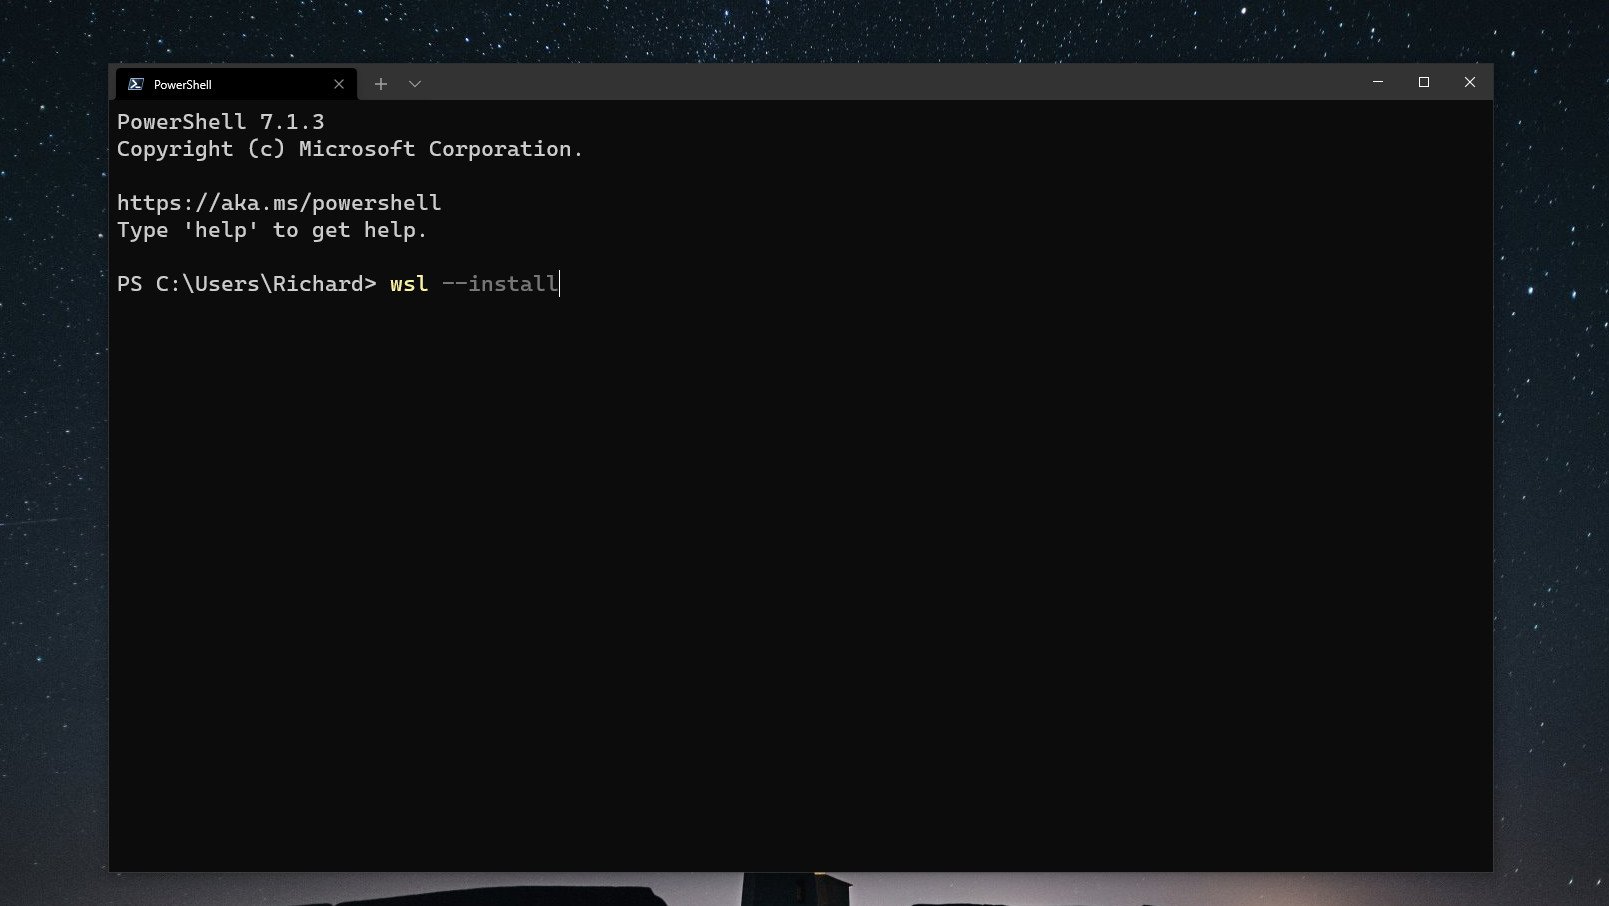
Once this is in place, open up PowerShell and enter this command:
wsl --installThat’s it. The setup process will begin and you can relax until it’s finished. By default, WSL will enable all system features required and it will download and install Ubuntu. If you don’t want a distribution installed during setup you can add the — no-distribution tag to the installation command.
WSL is now distributed through the Microsoft Store and the simplified installation process will pull this version in. Alternatively, you can download it directly from its Microsoft Store listing (opens in new tab).
You will also require the optional Windows Subsystem for Linux component if you wish to also use WSL 1 alongside WSL 2.
How to enable Windows Subsystem for Linux optional component for WSL 1
WSL2 is now the standard, but if for any reason you also want to use WSL1 alongside it, you’ll need the optional Windows Subsystem for Linux component enabling. Fortunately, you can do this in two ways. The first is by adding —enable-wsl1 to the install command used above.
But you can also enable the component at any time, even after you already have WSL2 up and running. Open PowerShell as administrator and enter this command:
dism.exe /online /enable-feature /featurename:Microsoft-Windows-Subsystem-Linux /all /norestartEventually, you will need to reboot your PC, adding norestart means you won’t be immediately kicked out of whatever you’re doing. If you want to reboot immediately, simply omit this from the end of the command.
Setting WSL2 for your Linux distros
The good thing about WSL2 is that it doesn’t replace WSL1. It just runs alongside it. This means you can run Linux installs with a combination of different versions. You’re able to set either as default as well as setting a version specifically to each Linux distro you have on your PC.
Let’s break down some of the key commands to use in PowerShell that you’ll need to know.
Setting WSL2 as default
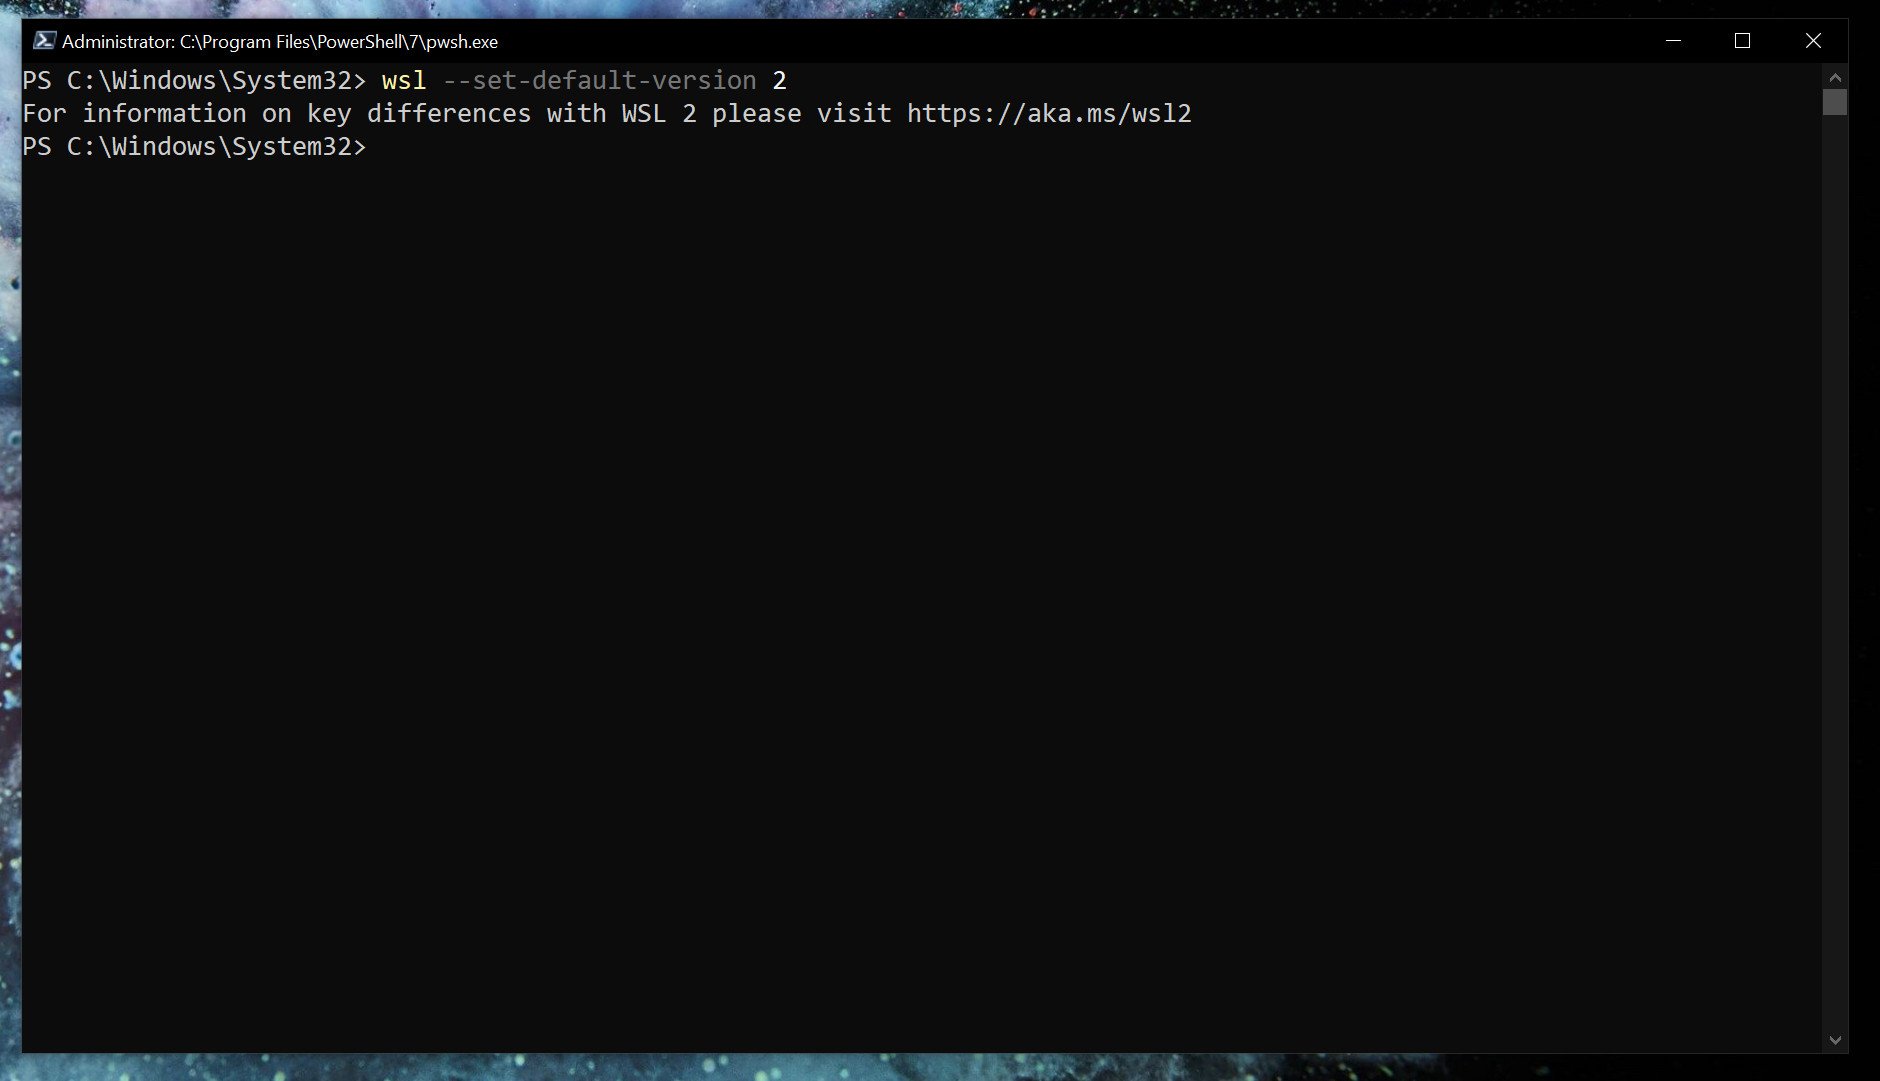
If you want everything to run on WSL2 as soon as you install it, you can set it as the default version.
wsl --set-default-version 2Listing installed Linux distros and their WSL version
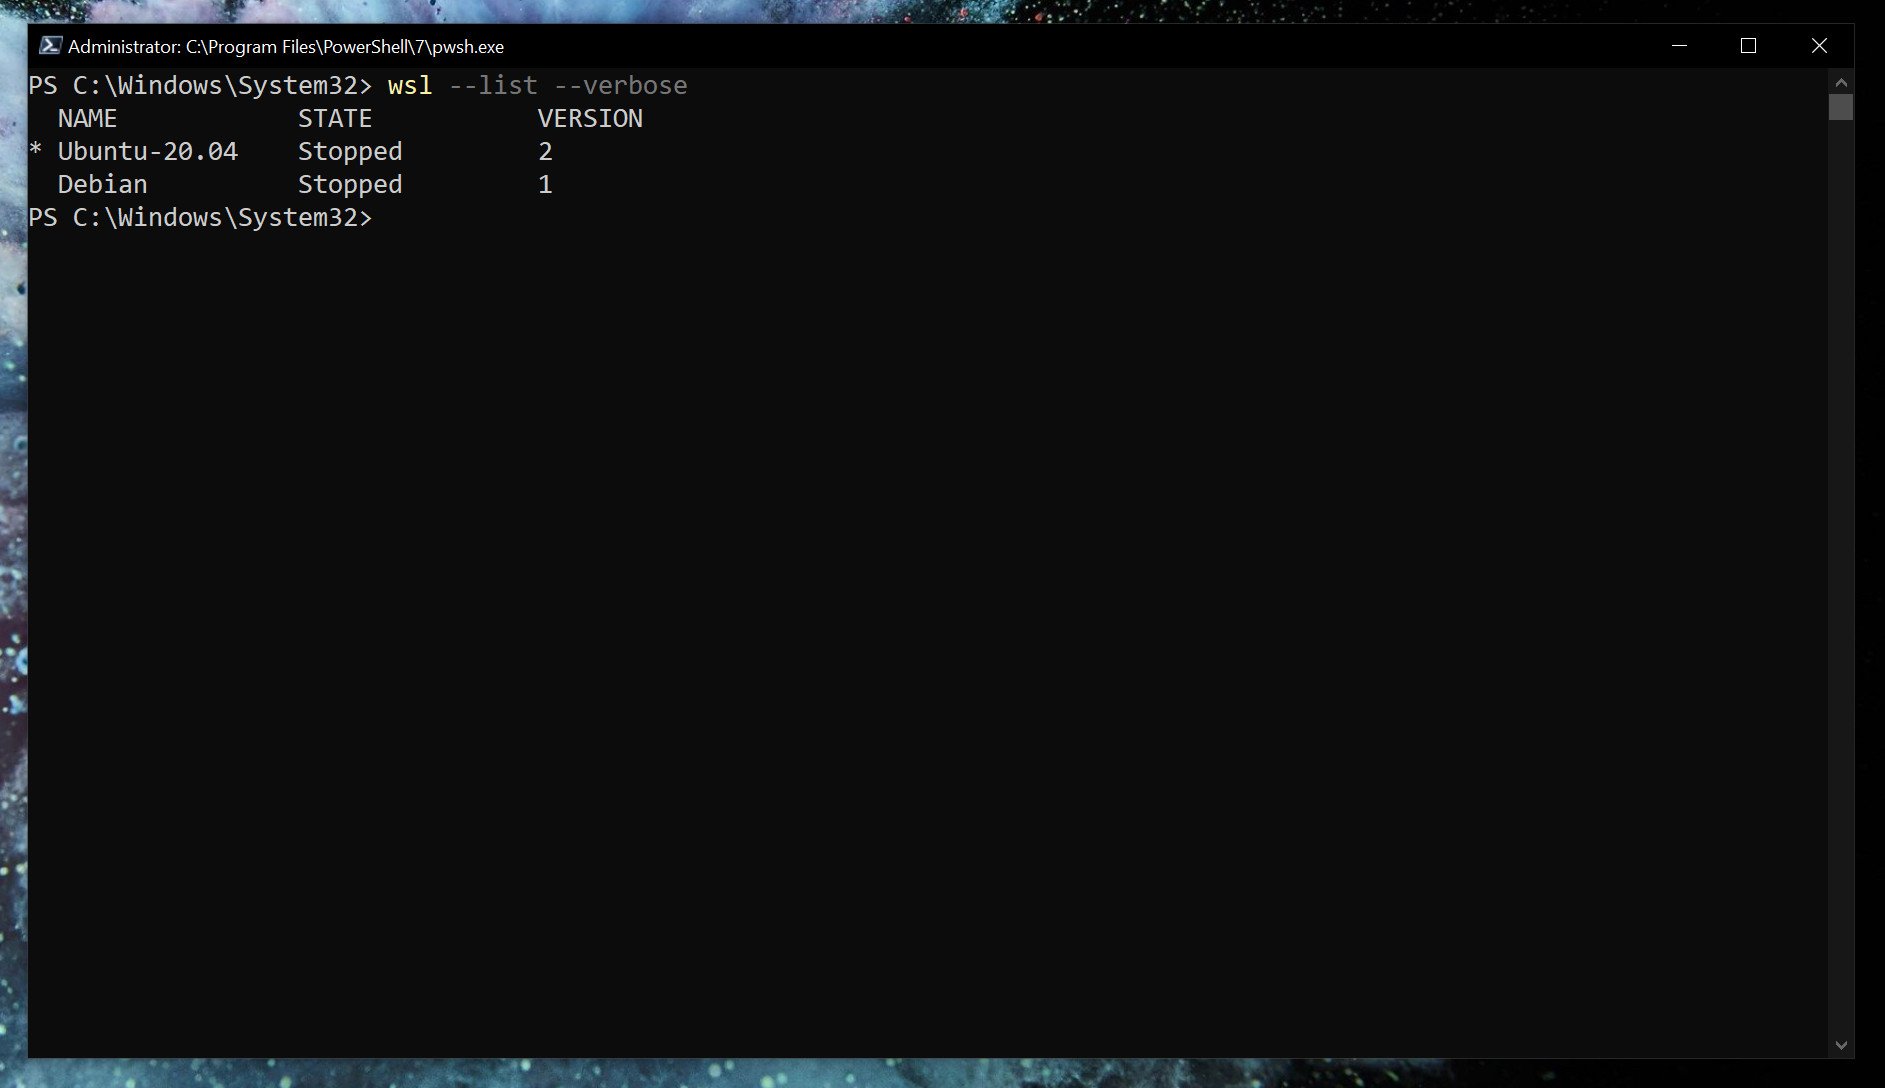
With WSL2 set as default, any Linux installs after that will use it automatically. You can easily check which version of WSL your installed Linux distros are using.
wsl --list --verbose Using the verbose flag will give you the breakdown of which version of WSL is attached to which Linux installation. Without it, you’ll simply get a list of the versions of Linux you have installed.
Changing the version of WSL per Linux installation
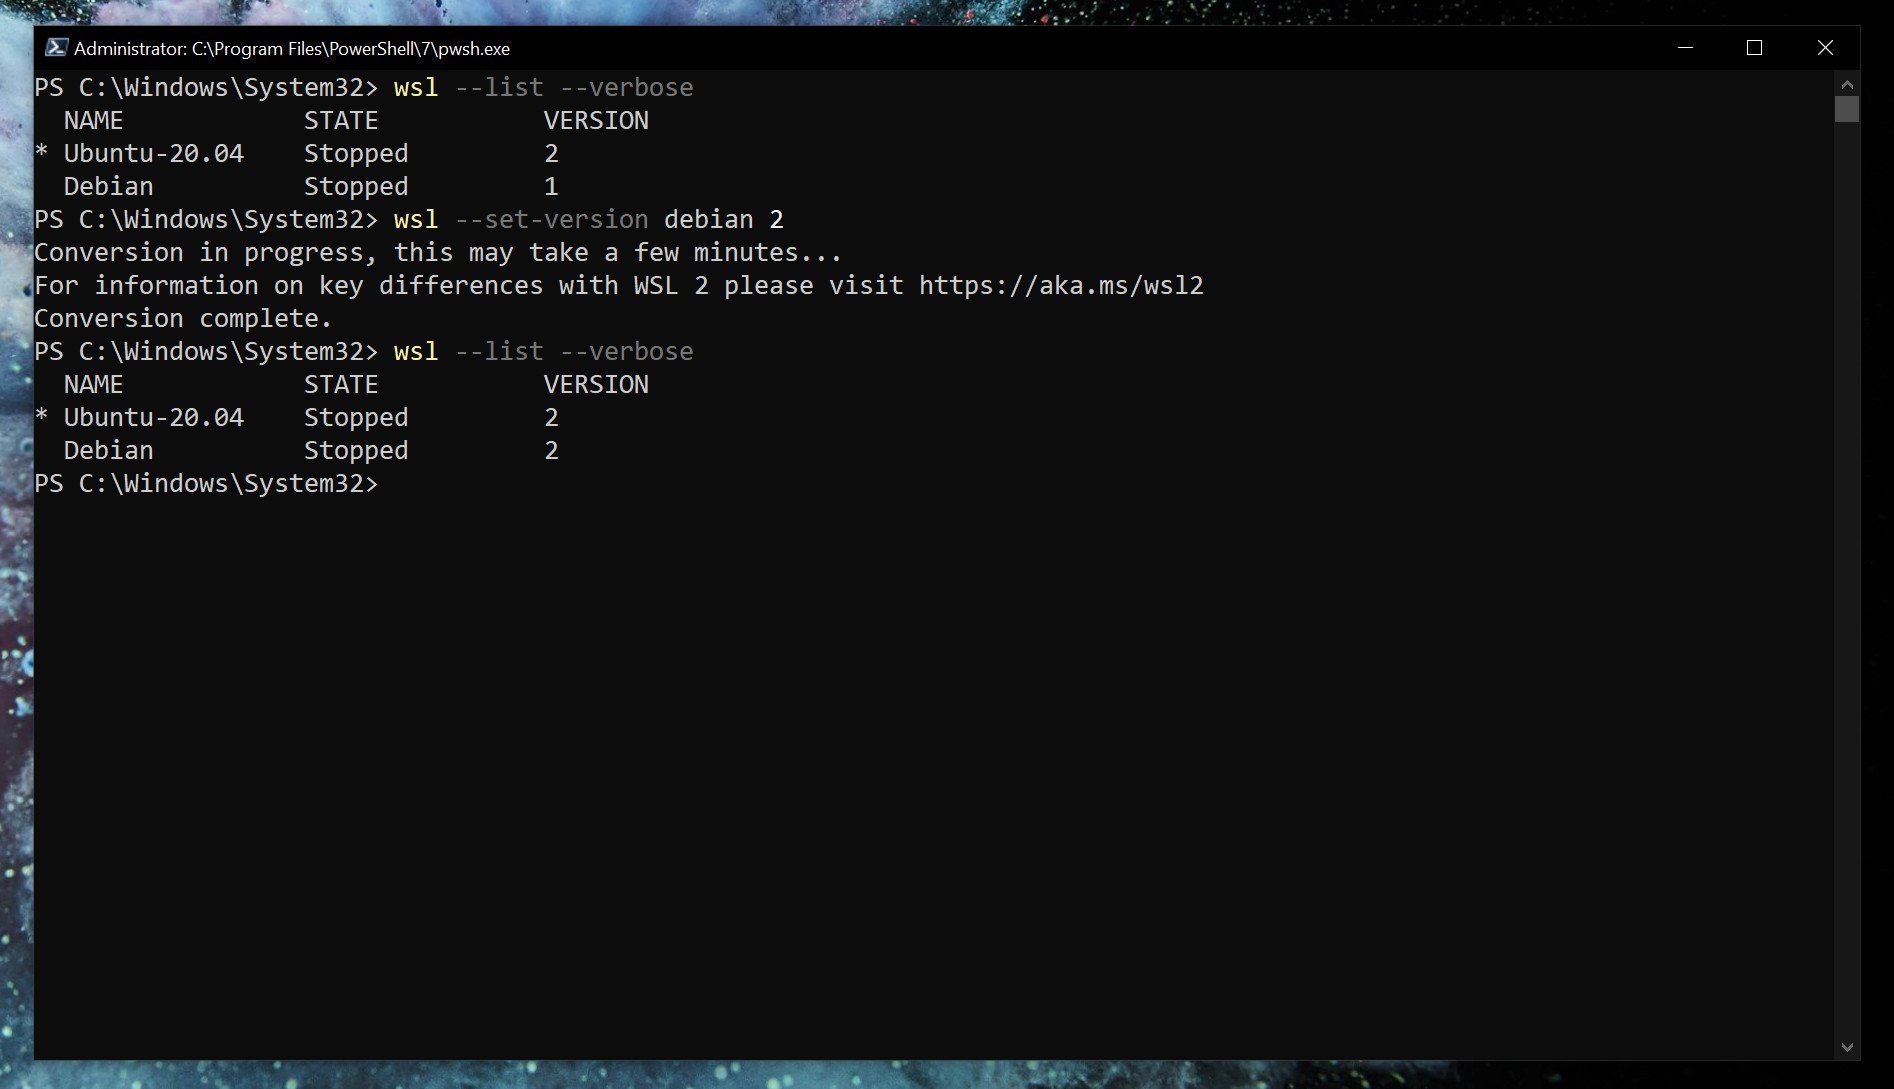
While setting WSL2 as default will apply it to anything you install afterward. If you’re already set up, you’ll need to manually convert. Likewise, if you wish to go between versions 1 and 2 or run a mixture on your system, you can do that.
wsl --set-version <distribution name=""> <versionnumber></versionnumber></distribution>So, as an example, if you have a Debian installation on WSL that you need to convert to WSL2, you’d enter
wsl --set-version debian 2Launch specific Linux installations in PowerShell
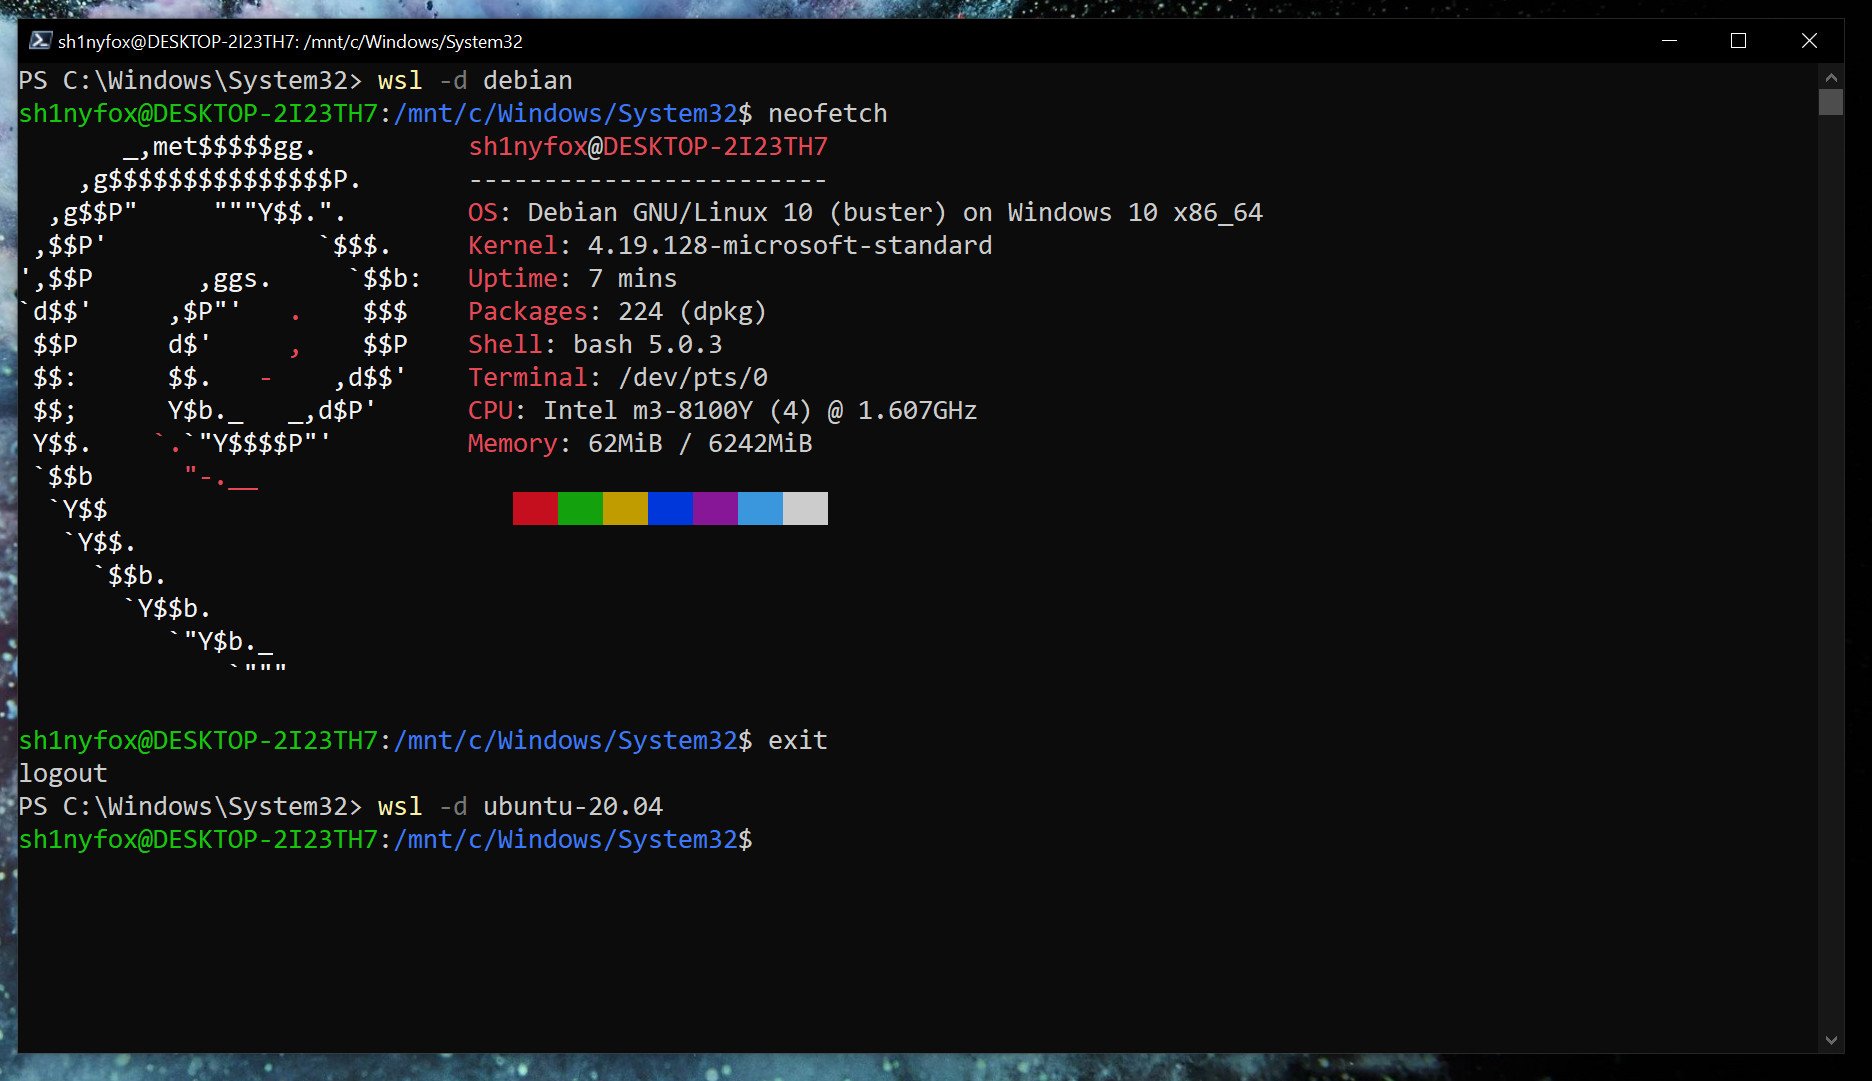
If you only have one version of Linux installed, simply typing
wslin PowerShell will launch you into the associated bash shell. But if you have multiple, you can launch a specific distro with this command.
wsl -d <distribution name=""></distribution>Once you’re done, typing
exitwill take you back into PowerShell.
From here on out, you’re ready to go forth and install all the Linux you want. Our full guide will help you along the way, but once WSL2 is set up how you like it, it just fades into the background.
It’s also worth grabbing the Windows Terminal app from the Microsoft Store if you’re using WSL. While you can just use the standard terminal installed with each or launch through PowerShell as shown above, Windows Terminal has a neat tabbed interface that lets you run multiple shells at once. Have PowerShell, Linux, Azure Cloud Shell, and even Command Prompt, all open together side-by-side in one window.

(opens in new tab)
Cutting-edge operating system
A refreshed design in Windows 11 enables you to do what you want effortlessly and safely, with biometric logins for encrypted authentication and advanced antivirus defenses.
Get the best of Windows Central in in your inbox, every day!
Richard Devine is a Managing Editor at Windows Central with over a decade of experience. A former Project Manager and long-term tech addict, he joined Mobile Nations in 2011 and has been found on Android Central and iMore as well as Windows Central. Currently, you’ll find him steering the site’s coverage of all manner of PC hardware and reviews. Find him on Mastodon at mstdn.social/@richdevine
Linux is a widely used operating system and is quite important for developers.
There are times when you might need to have both operating systems – Windows and Linux – either for work, study, or even just experimentation.
Luckily, Windows provides a convenient utility for using Linux along side Windows. This utility is called WSL (Windows Subsystem for Linux). Its recent version is WSL2 and in this guide we’ll discuss it in detail.
We will cover:
- What is WSL2 and what are its advantages?
- How to install WSL2 on Windows 10 with default settings.
- How to install WSL2 with a specific Linux distro.
What is WSL2?
Windows Subsystem for Linux provides a compatibility layer that lets you run Linux binary executables natively on Windows.
WSL2 (Windows Subsystem for Linux version 2) is the latest version of WSL. WSL2 architecture replaces WSL’s architecture by using a lightweight virtual machine. In the new version, you can run an actual Linux kernel which improves overall performance.
Advantages of using WSL
There are some advantages of WSL over a traditional VM setup:
- The setup for WSL is simple and not time consuming.
- It is light weight compared to VMs where you have to allocate resources from the host machine.
- You don’t need to install any ISO or virtual disc image for Linux machines which tend to be heavy files.
- You can use Windows and Linux side by side.
First, enable the windows subsystem for Linux option in settings.
- Go to Start. Search for «Turn Windows features on or off.»
- Check the option Windows Subsystem for Linux.
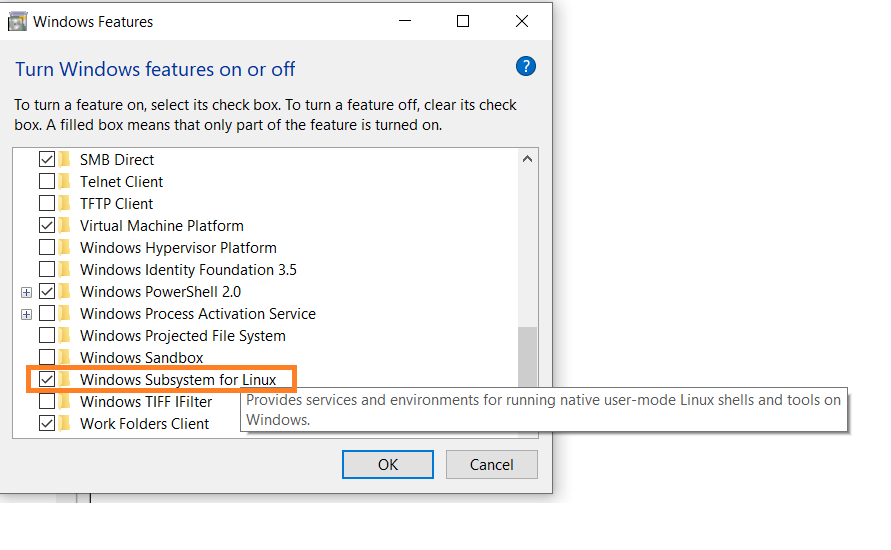
Next, open your command prompt and provide the installation commands.
- Open Command Prompt as an administrator.
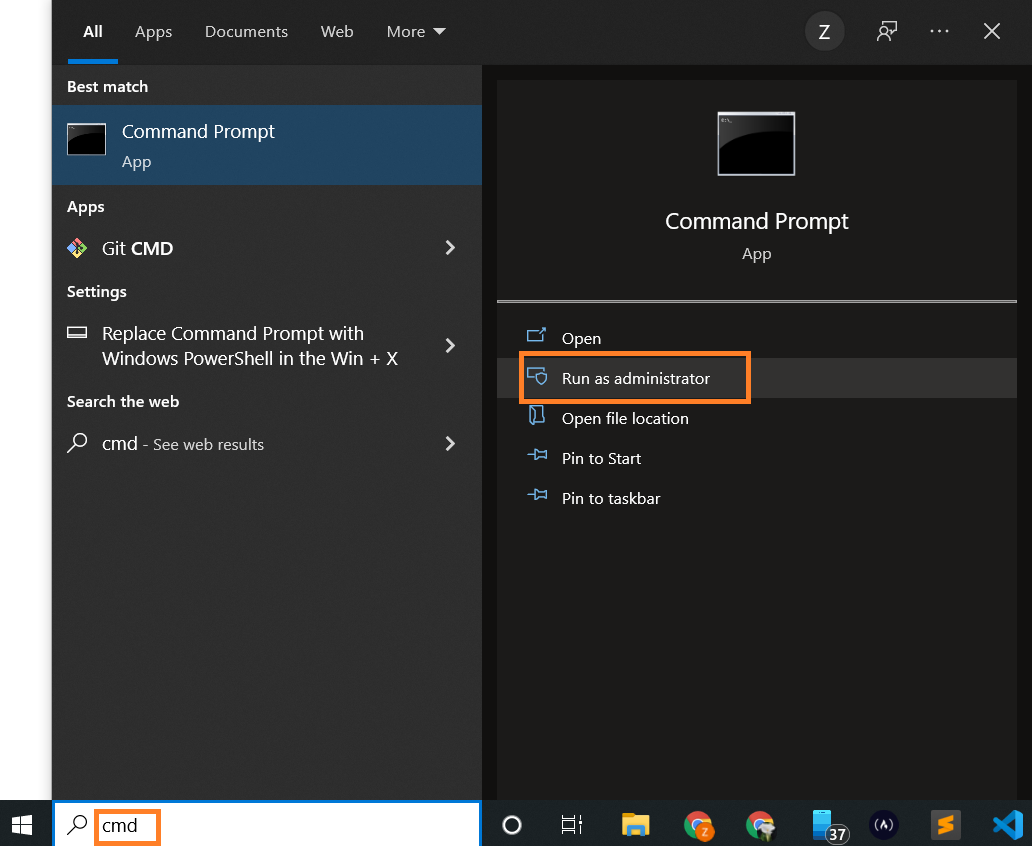
- Run the command below:
wsl --install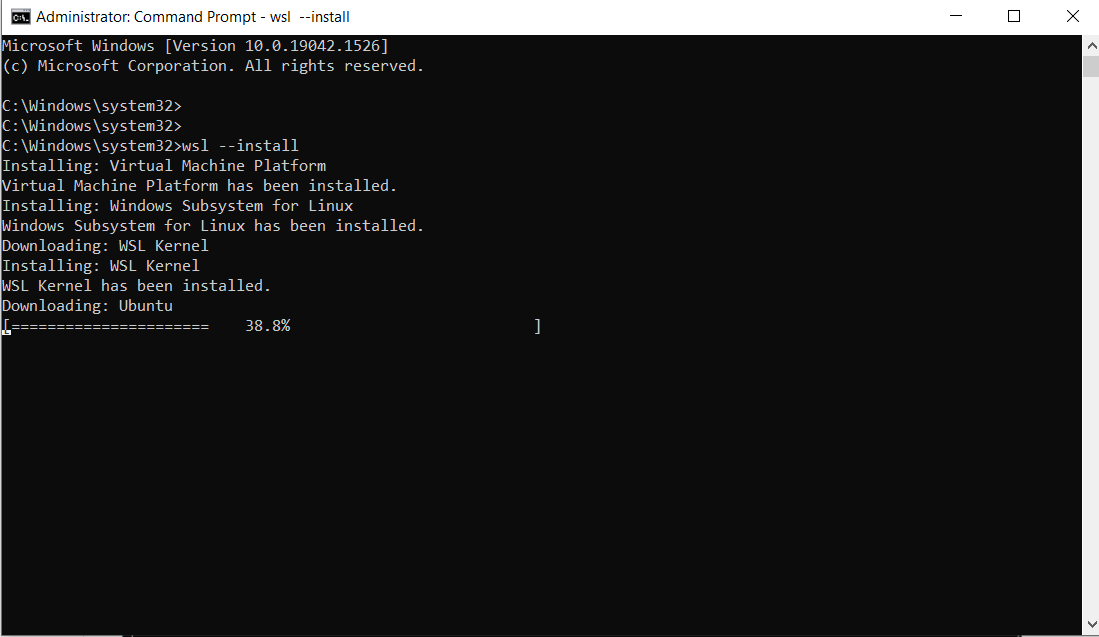
Note: By default, Ubuntu will be installed. But you can install any distro of your choice. We’ll see later how.
Once installation is complete, you’ll need to reboot your Windows machine. So, restart your Windows machine.
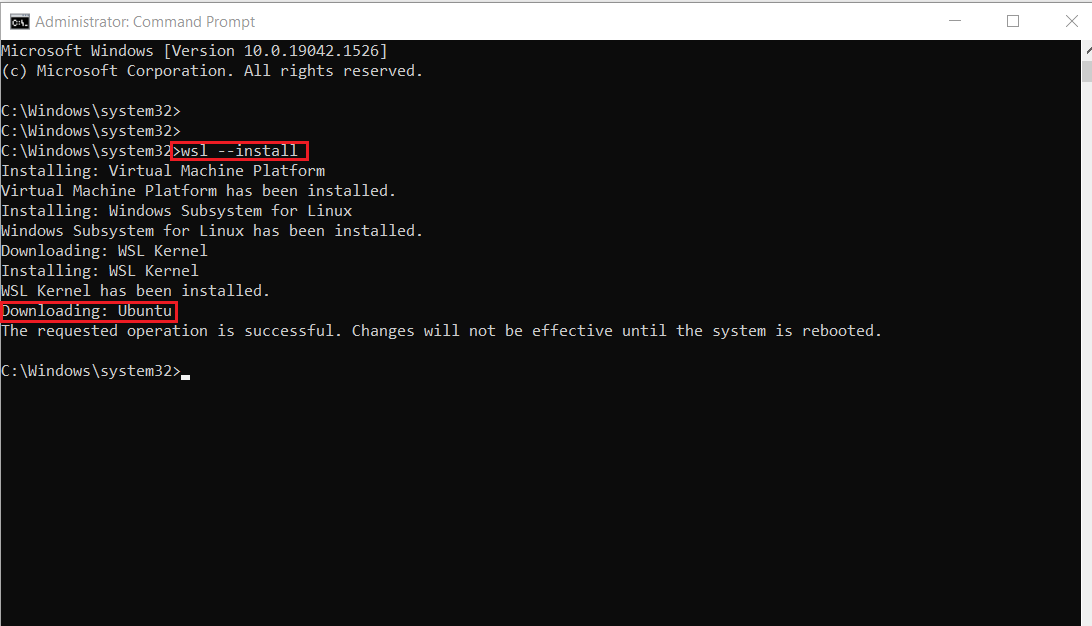
After restarting, you might see a window like this:
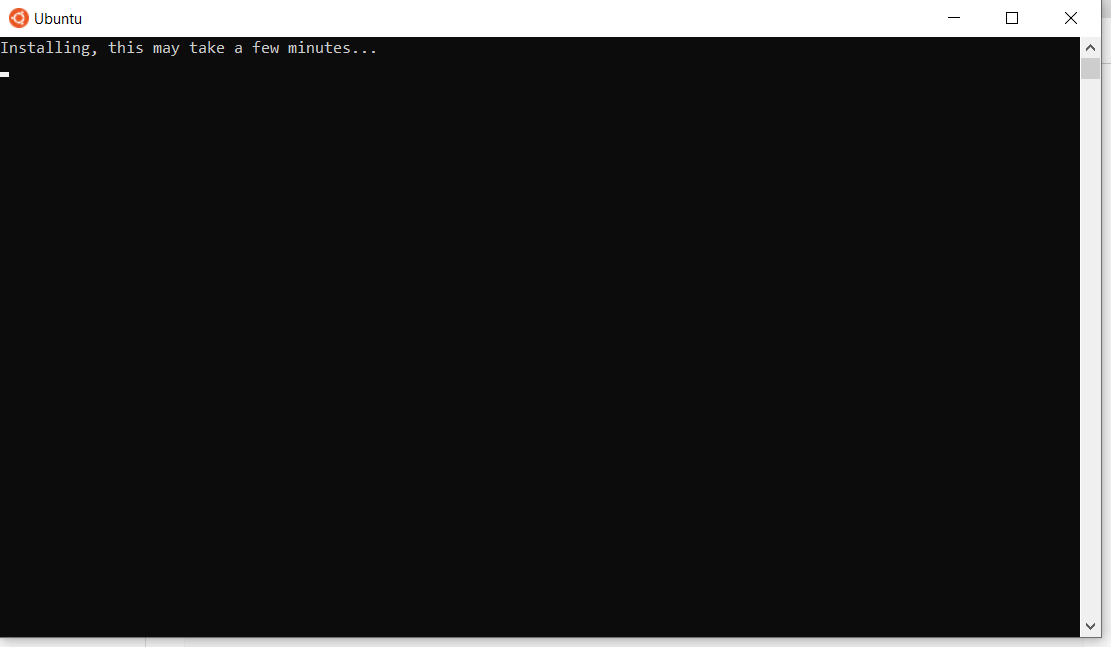
Once installation of Ubuntu is complete, you’ll be prompted to enter your username and password.
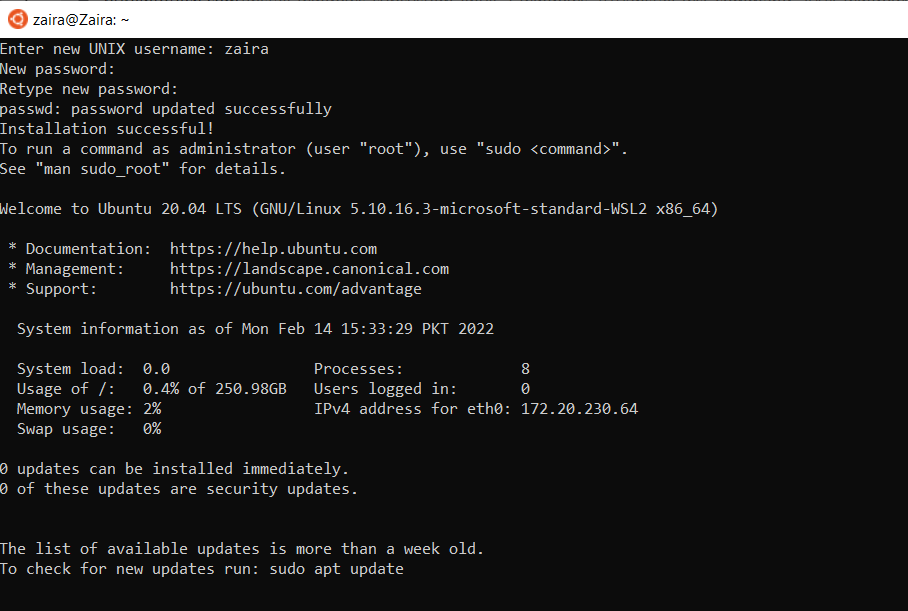
And, that’s it! You are ready to use Ubuntu.
Launch Ubuntu by searching from the start menu.
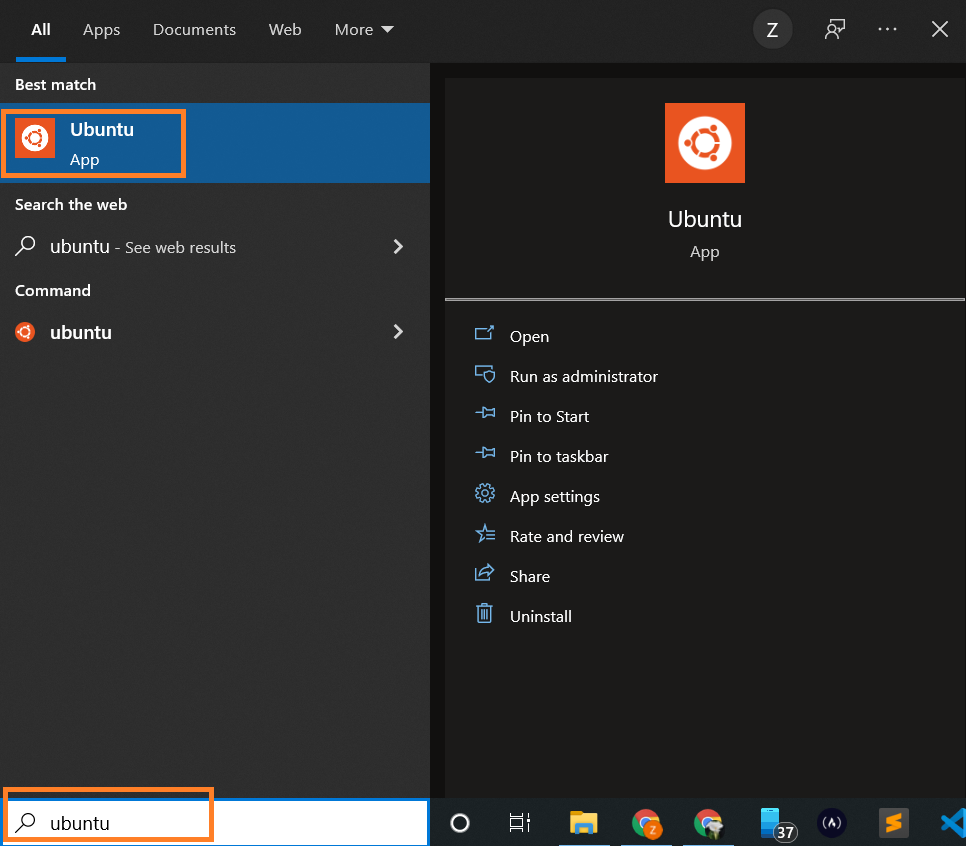
And here we have our Ubuntu instance launched.
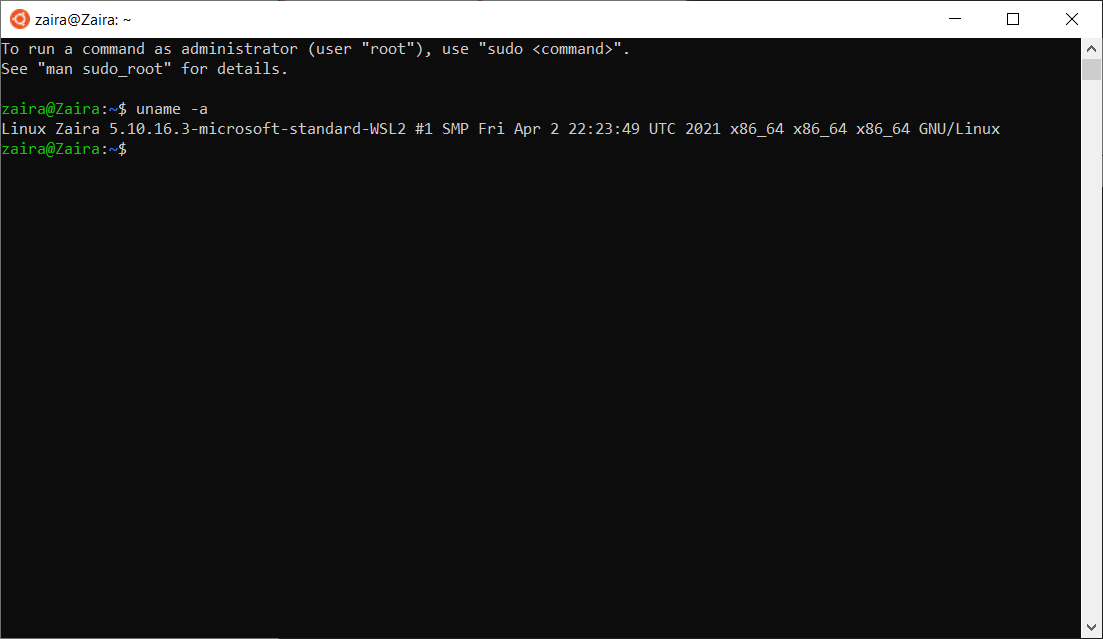
How to Install a Specific Linux Distro
If you use the default method as shown above, Ubuntu will be installed. You can find the available list of distros by running the below command on the Windows command prompt:
wsl --list --online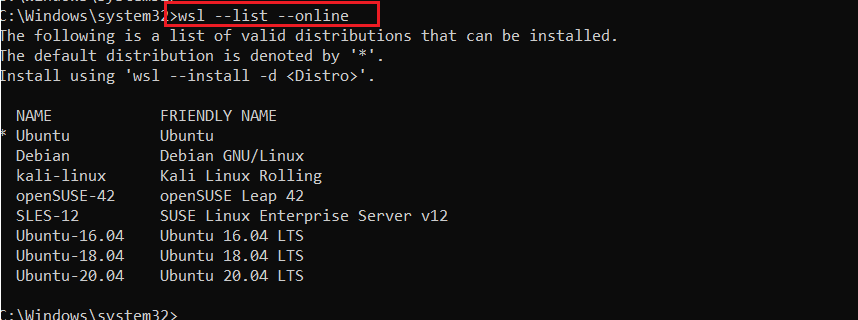
To install a specific distro, use the command below:
wsl --install -d DISTRO-NAMEFor example, to install Debian, the command would be modified as follows:
wsl --install -d DebianFollow the prompts and the specific distribution will be installed.
Tip: You can also look for updates as shown below:
wsl --updateCheck the status by launching Windows PowerShell.
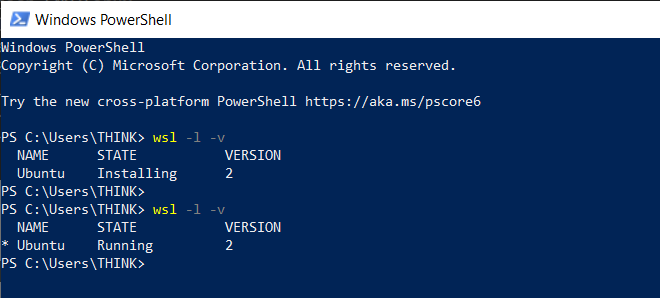
Wrapping up
WSL is a great utility to use Linux on a native Windows machine. It gives room for learning specially to those who are just starting out. I hope you found this article helpful.
Let’s connect on Twitter!
Read my other posts here.
Let’s chat on Discord.
Learn to code for free. freeCodeCamp’s open source curriculum has helped more than 40,000 people get jobs as developers. Get started