| title | description | keywords | ms.date | ms.topic | adobe-target |
|---|---|---|---|---|---|
|
Manual installation steps for older versions of WSL |
Step by step instructions to manually install WSL on older versions of Windows, rather than using the wsl install command. |
wsl, install, BashOnWindows, bash, windows subsystem for linux, install ubuntu on windows, enable WSL2, linux on windows |
11/12/2021 |
article |
true |
Manual installation steps for older versions of WSL
For simplicity, we generally recommend using the wsl --install to install Windows Subsystem for Linux, but if you’re running an older build of Windows, that may not be supported. We have included the manual installation steps below. If you run into an issue during the install process, check the installation section of the troubleshooting guide.
Step 1 — Enable the Windows Subsystem for Linux
You must first enable the «Windows Subsystem for Linux» optional feature before installing any Linux distributions on Windows.
Open PowerShell as Administrator (Start menu > PowerShell > right-click > Run as Administrator) and enter this command:
dism.exe /online /enable-feature /featurename:Microsoft-Windows-Subsystem-Linux /all /norestart
We recommend now moving on to step #2, updating to WSL 2, but if you wish to only install WSL 1, you can now restart your machine and move on to Step 6 — Install your Linux distribution of choice. To update to WSL 2, wait to restart your machine and move on to the next step.
Step 2 — Check requirements for running WSL 2
To update to WSL 2, you must be running Windows 10…
- For x64 systems: Version 1903 or later, with Build 18362 or later.
- For ARM64 systems: Version 2004 or later, with Build 19041 or later.
or Windows 11.
[!NOTE]
Builds lower than 18362 do not support WSL 2. Use the Windows Update Assistant to update your version of Windows.
To check your version and build number, select Windows logo key + R, type winver, select OK. Update to the latest Windows version in the Settings menu.
[!NOTE]
If you are running Windows 10 version 1903 or 1909, open «Settings» from your Windows menu, navigate to «Update & Security» and select «Check for Updates». Your Build number must be 18362.1049+ or 18363.1049+, with the minor build # over .1049. Read more: WSL 2 Support is coming to Windows 10 Versions 1903 and 1909.
Step 3 — Enable Virtual Machine feature
Before installing WSL 2, you must enable the Virtual Machine Platform optional feature. Your machine will require virtualization capabilities to use this feature.
Open PowerShell as Administrator and run:
dism.exe /online /enable-feature /featurename:VirtualMachinePlatform /all /norestart
Restart your machine to complete the WSL install and update to WSL 2.
Step 4 — Download the Linux kernel update package
-
Download the latest package:
- WSL2 Linux kernel update package for x64 machines
[!NOTE]
If you’re using an ARM64 machine, please download the ARM64 package instead. If you’re not sure what kind of machine you have, open Command Prompt or PowerShell and enter:systeminfo | find "System Type". Caveat: On non-English Windows versions, you might have to modify the search text, translating the «System Type» string. You may also need to escape the quotations for the find command. For example, in Germansysteminfo | find '"Systemtyp"'. -
Run the update package downloaded in the previous step. (Double-click to run — you will be prompted for elevated permissions, select ‘yes’ to approve this installation.)
Once the installation is complete, move on to the next step — setting WSL 2 as your default version when installing new Linux distributions. (Skip this step if you want your new Linux installs to be set to WSL 1).
[!NOTE]
For more information, read the article changes to updating the WSL2 Linux kernel, available on the Windows Command Line Blog.
Step 5 — Set WSL 2 as your default version
Open PowerShell and run this command to set WSL 2 as the default version when installing a new Linux distribution:
wsl --set-default-version 2
Step 6 — Install your Linux distribution of choice
-
Open the Microsoft Store and select your favorite Linux distribution.
The following links will open the Microsoft store page for each distribution:
- Ubuntu 18.04 LTS
- Ubuntu 20.04 LTS
- Ubuntu 22.04 LTS
- openSUSE Leap 15.1
- SUSE Linux Enterprise Server 12 SP5
- SUSE Linux Enterprise Server 15 SP1
- Kali Linux
- Debian GNU/Linux
- Fedora Remix for WSL
- Pengwin
- Pengwin Enterprise
- Alpine WSL
- Raft(Free Trial)
-
From the distribution’s page, select «Get».
The first time you launch a newly installed Linux distribution, a console window will open and you’ll be asked to wait for a minute or two for files to de-compress and be stored on your PC. All future launches should take less than a second.
You will then need to create a user account and password for your new Linux distribution.
CONGRATULATIONS! You’ve successfully installed and set up a Linux distribution that is completely integrated with your Windows operating system!
Troubleshooting installation
If you run into an issue during the install process, check the installation section of the troubleshooting guide.
Downloading distributions
There are some scenarios in which you may not be able (or want) to, install WSL Linux distributions using the Microsoft Store. You may be running a Windows Server or Long-Term Servicing (LTSC) desktop OS SKU that doesn’t support Microsoft Store, or your corporate network policies and/or admins do not permit Microsoft Store usage in your environment. In these cases, while WSL itself is available, you may need to download Linux distributions directly.
If the Microsoft Store app is not available, you can download and manually install Linux distributions using these links:
- Ubuntu
- Ubuntu 22.04 LTS
- Ubuntu 20.04
- Ubuntu 20.04 ARM
- Ubuntu 18.04
- Ubuntu 18.04 ARM
- Ubuntu 16.04
- Debian GNU/Linux
- Kali Linux
- SUSE Linux Enterprise Server 12
- SUSE Linux Enterprise Server 15 SP2
- SUSE Linux Enterprise Server 15 SP3
- openSUSE Tumbleweed
- openSUSE Leap 15.3
- openSUSE Leap 15.2
- Oracle Linux 8.5
- Oracle Linux 7.9
- Fedora Remix for WSL
This will cause the <distro>.appx packages to download to a folder of your choosing.
If you prefer, you can also download your preferred distribution(s) via the command line, you can use PowerShell with the Invoke-WebRequest cmdlet. For example, to download Ubuntu 20.04:
Invoke-WebRequest -Uri https://aka.ms/wslubuntu2004 -OutFile Ubuntu.appx -UseBasicParsing
[!TIP]
If the download is taking a long time, turn off the progress bar by setting$ProgressPreference = 'SilentlyContinue'
You also have the option to use the curl command-line utility for downloading. To download Ubuntu 20.04 with curl:
curl.exe -L -o ubuntu-2004.appx https://aka.ms/wslubuntu2004
In this example, curl.exe is executed (not just curl) to ensure that, in PowerShell, the real curl executable is invoked, not the PowerShell curl alias for Invoke-WebRequest.
Once the distribution has been downloaded, navigate to the folder containing the download and run the following command in that directory, where app-name is the name of the Linux distribution .appx file.
Add-AppxPackage .app_name.appx
Once the Appx package has finished downloading, you can start running the new distribution by double-clicking the appx file. (The command wsl -l will not show that the distribution is installed until this step is complete).
If you are using Windows server, or run into problems running the command above you can find the alternate install instructions on the Windows Server documentation page to install the .appx file by changing it to a zip file.
Once your distribution is installed, follow the instructions to create a user account and password for your new Linux distribution.
Install Windows Terminal (optional)
Using Windows Terminal enables you to open multiple tabs or window panes to display and quickly switch between multiple Linux distributions or other command lines (PowerShell, Command Prompt, Azure CLI, etc). You can fully customize your terminal with unique color schemes, font styles, sizes, background images, and custom keyboard shortcuts. Learn more.
Install Windows Terminal.
К написанию данной статьи меня побудил вопрос на Тостере, связанный с WSL. Я, после нескольких лет использования систем на ядре Linux, около полугода назад перешел к использованию Windows 10 на домашнем ПК. Зависимость от терминала и Linux окружения в моей работе практически сразу привели меня к вопросу: или ставить виртуалку или попробовать WSL. Я выбрал второе, и остался вполне доволен.
Под катом я расскажу как установить и настроить WSL, на какие я наткнулся проблемы и ограничения, как запускать Linux приложения из Windows и наоборот, а так же как интегрировать элементы окружения Xfce в окружение рабочего стола Windows.
Никогда не думал, что однажды вернусь на Windows, но повод попробовать мне дали стечения обстоятельств: жена, далекая от IT, дергала почти каждый раз, когда у нее возникала необходимость воспользоваться компом; проснулась ностальгия по одной игре, но она никак не хотела адекватно работать под wine; а тут еще мне подарили коробочную Windows 10 Pro. WSL я поставил чуть ли не сразу после установки системы, поигрался несколько вечеров, понял, что продукт для моих задач годный, но хочется более привычный терминал и вообще некоторых удобств.
Установка WSL и дистрибутива
Сразу оговорюсь, в интернете можно найти описание установки с помощью выполнения команды lxrun /install в командной строке или консоли PowerShell. Данный способ больше не работает (после выхода WSL в стабильный релиз). Насколько мне известно, сейчас WSL можно установить только из Microsoft Store вместе с предпочитаемым дистрибутивом.
Так же отмечу, что когда установку производил я, на выбор были доступны дистрибутивы OpenSUSE, SUSE Linux Enterprise и Ubuntu 16.04 — последний я и установил. Сейчас также доступны Ubuntu 18.04, Debian 9 и Kali Linux, возможно появятся и другие дистрибутивы. Действия по установке могут отличаться. Так же, часть проблем описанных в статье может быть уже исправлена.
Находим в магазине желаемый дистрибутив и устанавливаем. Установка пройдет быстро, так как скачает только эмулятор ядра Linux и утилиту для запуска подсистемы, которая окажется в системной папке в трех экземплярах: wsl.exe, bash.exe и ubuntu.exe (вместо ubuntu будет имя Вашего дистрибутива). Все они равнозначны и делают одно и то же — запускают собственный эмулятор терминала, в нем linux’овый bash работающий под эмулятором ядра. При первом же запуске нас попросят придумать логин и пароль для пользователя по умолчанию, а после произойдет непосредственно установка дистрибутива. В качестве пользователя по умолчанию указываем root без пароля — это потребуется для дальнейших шагов. Безопасность не пострадает, кроме того при подготовке материалов к статье, в англоязычном туториале, я наткнулся на информацию, что новые версии WSL теперь делают пользователем по умолчанию root без пароля без лишних вопросов.
Дожидаемся установки. Далее первым делом стоит обновить зеркала apt на ближайшие. Для этого понадобится CLI текстовый редактор. В комплекте только vi, я же больше предпочитаю nano, поэтому ставлю его:
apt install nanosudo вводить не требуется, так как мы уже под root’ом. Отредактируем файл /etc/apt/sources.list:
nano /etc/apt/sources.listУ меня лучше всего работают зеркала Яндекса, поэтому мой файл выглядит так:
deb http://mirror.yandex.ru/ubuntu/ xenial main universe restricted
deb-src http://mirror.yandex.ru/ubuntu/ xenial main universe  restricted

deb http://mirror.yandex.ru/ubuntu/ xenial-security main universe restricted
deb-src http://mirror.yandex.ru/ubuntu/ xenial-security main universe restricted

deb http://mirror.yandex.ru/ubuntu/ xenial-updates main universe restricted
deb-src http://mirror.yandex.ru/ubuntu/ xenial-updates main universe restricted
Нажимаем Ctrl+O для сохранения и Ctrl+X для выхода. Теперь можно обновить систему до актуального состояния:
apt update && apt upgradeПосле обновления можно создать нашего основного пользователя. В данной статье я назову его user1, Вы же можете задать привычное имя:
addgroup --gid 1000 user1
adduser --home /home/user1 --shell /bin/bash --uid 1000 -G user1,sudo user1
Далее переходим в папку юзера, зайдем под ним, установим пароль и отредактируем файл ~/.bashrc:
cd /home/user1
su user1
passwd
nano .bashrc
Мой базовый .bashrc выглядит так
# If not running interactively, don't do anything
case $- in
    *i*) ;;
      *) return;;
esac

# don't put duplicate lines or lines starting with space in the history.
# See bash(1) for more options
HISTCONTROL=ignoreboth

# append to the history file, don't overwrite it
shopt -s histappend

# for setting history length see HISTSIZE and HISTFILESIZE in bash(1)
HISTSIZE=1000
HISTFILESIZE=2000

# check the window size after each command and, if necessary,
# update the values of LINES and COLUMNS.
shopt -s checkwinsize

# If set, the pattern "**" used in a pathname expansion context will
# match all files and zero or more directories and subdirectories.
#shopt -s globstar

# make less more friendly for non-text input files, see lesspipe(1)
[ -x /usr/bin/lesspipe ] && eval "$(SHELL=/bin/sh lesspipe)"

# set variable identifying the chroot you work in (used in the prompt below)
if [ -z "${debian_chroot:-}" ] && [ -r /etc/debian_chroot ]; then
    debian_chroot=$(cat /etc/debian_chroot)
fi

# set a fancy prompt (non-color, unless we know we "want" color)
case "$TERM" in
    xterm|xterm-color|*-256color) color_prompt=yes;;
esac

# uncomment for a colored prompt, if the terminal has the capability; turned
# off by default to not distract the user: the focus in a terminal window
# should be on the output of commands, not on the prompt
#force_color_prompt=yes

if [ -n "$force_color_prompt" ]; then
    if [ -x /usr/bin/tput ] && tput setaf 1 >&/dev/null; then
    # We have color support; assume it's compliant with Ecma-48
    # (ISO/IEC-6429). (Lack of such support is extremely rare, and such
    # a case would tend to support setf rather than setaf.)
    color_prompt=yes
    else
    color_prompt=
    fi
fi

if [ "$color_prompt" = yes ]; then
    if [[ ${EUID} == 0 ]] ; then
        PS1='${debian_chroot:+($debian_chroot)}[33[01;31m]h[33[01;34m] W $[33[00m] '
    else
        PS1='${debian_chroot:+($debian_chroot)}[33[01;32m]u@h[33[00m] [33[01;34m]w $[33[00m] '
    fi
else
    PS1='${debian_chroot:+($debian_chroot)}u@h w $ '
fi
unset color_prompt force_color_prompt

# If this is an xterm set the title to user@host:dir
case "$TERM" in
xterm*|rxvt*)
    PS1="[e]0;${debian_chroot:+($debian_chroot)}u@h wa]$PS1"
    ;;
*)
    ;;
esac

# enable color support of ls and also add handy aliases
if [ -x /usr/bin/dircolors ]; then
    test -r ~/.dircolors && eval "$(dircolors -b ~/.dircolors)" || eval "$(dircolors -b)"
    alias ls='ls --color=auto'
    #alias dir='dir --color=auto'
    #alias vdir='vdir --color=auto'

    alias grep='grep --color=auto'
    alias fgrep='fgrep --color=auto'
    alias egrep='egrep --color=auto'
fi

# colored GCC warnings and errors
#export GCC_COLORS='error=01;31:warning=01;35:note=01;36:caret=01;32:locus=01:quote=01'

# some more ls aliases
alias ll='ls -alF'
alias la='ls -A'
alias l='ls -CF'

# Add an "alert" alias for long running commands.  Use like so:
#   sleep 10; alert
alias alert='notify-send --urgency=low -i "$([ $? = 0 ] && echo terminal || echo error)" "$(history|tail -n1|sed -e '''s/^s*[0-9]+s*//;s/[;&|]s*alert$//''')"'

# Alias definitions.
# You may want to put all your additions into a separate file like
# ~/.bash_aliases, instead of adding them here directly.
# See /usr/share/doc/bash-doc/examples in the bash-doc package.

if [ -f ~/.bash_aliases ]; then
    . ~/.bash_aliases
fi

# enable programmable completion features (you don't need to enable
# this, if it's already enabled in /etc/bash.bashrc and /etc/profile
# sources /etc/bash.bashrc).
if ! shopt -oq posix; then
  if [ -f /usr/share/bash-completion/bash_completion ]; then
    . /usr/share/bash-completion/bash_completion
  elif [ -f /etc/bash_completion ]; then
    . /etc/bash_completion
  fi
fi
Все, подсистема готова к использованию… почти…
Установка X-сервера, Xfce и прочих GUI’шных приложений
Первая же проблема, на которую я натолкнулся — bash-completion в предлагаемом эмуляторе терминала работал, мягко говоря, некорректно. Кроме того, данный эмулятор не умеет вкладки, а каждый его экземпляр запускает все в новом пространстве процессов, с отдельным init’ом (который кстати не заменить). Мне захотелось нормальный эмулятор терминала, некоторых других GUI приложений, а так же панельку, чтоб это все быстро запускать.
Когда я гуглил этот вопрос, я наткнулся на множество проблем, вроде необходимости перевода dbus на tcp протокол. На данный момент всех этих проблем нет. В подсистеме нормально работают unix-domain-socket’ы и все спокойно общается через них.
Первым делом нам понадобится X-сервер, притом установленный в основную систему (в Windows). Лично я использую для этих целей VcXsrv — порт X11 на Windows. Официальный сайт указанный в about самой утилиты его сейчас не предоставляет, поэтому гуглим установщик и устанавливаем все по умолчанию.
Пока идет установка возвращаемся в терминал WSL, командой exit выходим обратно в root’а. Первым делом настроим русские локали:
locale-gen ru_RU
locale-gen ru_RU.UTF-8
update-locale
Далее установим некоторые компоненты Xfce. Можно конечно установить его целиком из мета-пакета, но большинство компонентов нам не понадобится, а модульная архитектура Xfce позволяет нам поставить только необходимое:
apt install -y xfce4-session xfce4-notifyd xfce4-appfinder xfce4-panel xfce4-quicklauncher-plugin xfce4-whiskermenu-plugin xfce4-xkb-plugin xfce4-settings xfce4-terminal xfce4-taskmanager mousepadЗапускать каждый раз окружение руками не очень удобно, поэтому я автоматизировал данный процесс. Для этого в основной системе создадим в удобном для нас месте папку, а в ней 3 файла для запуска:
- config.xlaunch — файл настроек для VcXsrv
<?xml version="1.0" encoding="UTF-8"?> <XLaunch WindowMode="MultiWindow" ClientMode="NoClient" LocalClient="False" Display="0" LocalProgram="xcalc" RemoteProgram="xterm" RemotePassword="" PrivateKey="" RemoteHost="" RemoteUser="" XDMCPHost="" XDMCPBroadcast="False" XDMCPIndirect="False" Clipboard="True" ClipboardPrimary="True" ExtraParams="" Wgl="True" DisableAC="False" XDMCPTerminate="False" /> -
x-run.vbs — WSL всегда запускается со своим эмулятором терминала, если его закрыть — завершатся все его дочерние процессы. Чтоб данное окно не мозолило глаза, неплохо его запускать скрытым. К счастью в Windows встроен интерпретатор VBScript, который позволяет это сделать в одну строчку:
WScript.CreateObject("Shell.Application").ShellExecute "wsl", "cd /home/user1; DISPLAY=:0 LANG=ru_RU.UTF-8 su user1 -c xfce4-session", "", "open", 0Поясню, что здесь происходит. Мы говорим VBscript выполнить приложение wsl с параметром
cd /home/user1; DISPLAY=:0 LANG=ru_RU.UTF-8 su user1 -c xfce4-session, папка запуска нам не важна, поэтому пустая строка, действие open — запуск, 0 — скрытый режим. Самому wsl мы отдаем команду на выполнение: переход в папку пользователя, затем с установкой переменных окружения DISPLAY (дисплей X-сервера) и LANG (используемая локаль) мы запускаем xfce4-session от имени нашего пользователя user1 (благодаря команде su) - start.bat — batch файл для запуска, по желанию его можно засунуть в автозагрузку
start config.xlaunch
wscript x-run.vbs
Далее можем запустить наш start.bat и настроить панель Xfce под себя. Замечу, что здесь я наткнулся на еще одну проблему — панель прекрасно отображается поверх всех окон, но вот выделить себе место, как панель на рабочем столе Windows она не может. Если кто знает решение данной проблемы, поделитесь в комментариях.
Ну и под конец данной части, скриншот моего рабочего стола:
Взаимодействие окружения Windows и окружения подсистемы Linux
Запускать Linux приложения напрямую из Windows можно через те же 3 команды — bash, wsl или ubuntu. Не забываем, что по умолчанию запуск идет от root, поэтому стоит понижать привилегии через su, так же нужно не забывать передавать переменную окружения DISPLAY=:0 если приложению требуется X-сервер. Так же нужно менять папку, из которой должно работать приложение, через cd внутри WSL. Пример, посчитаем md5 для file.txt на диске D средствами Linux’овой md5sum:
wsl md5sum < d:file.txtДоступ к файловой системе Linux так же имеется, лежит она в %localappdata%PackagesCanonicalGroupLimited.UbuntuonWindows_79rhkp1fndgscLocalStaterootfs. Читать таким образом файлы можно, а вот писать — не желательно, можно поломать файловую систему. Думаю проблема в том, что Windows не умеет работать с правами и владельцами файловой системы Linux.
Из Linux так же можно запускать Windows приложения. Просто запускаем exe-шник и он выполнится в основной системе.
Диски Windows монтируются в /mnt в соответствии со своими буквами в нижнем регистре. Например диск D будет смонтирован в /mnt/d. Из Linux можно свободно читать и писать файлы Windows. Можно делать на них симлинки. Права у таких файлов всегда будут 0777, а владельцем будет root.
Сетевой стек у подсистемы общий с Windows. Сервер поднятый в Linux будет доступен на localhost в Windows и наоборот. Однако unix-domain-socket для Windows будет просто пустым файлом, работать с этим можно только внутри Linux. Выход во внешнюю сеть у Linux так же есть, в том числе можно слушать порты, если этого не запрещает фаервол.
ifconfig в Linux и ipconfig в Windows выдают одинаковую информацию о сетевых интерфейсах.
Из диспетчера задач Windows можно спокойно прибить процесс внутри подсистемы Linux. Однако Linux увидит только свои процессы.
Особенности, ограничения и подводные камни
Ядро Linux в WSL не настоящее. Это всего лишь прослойка-эмулятор, которая часть Linux-специфичных задач выполняет сама, а часть проксирует напрямую в ядро winNT. Большая часть api в нем реализована, но не все. Свое ядро собрать не получится, как и не получится подключить модули ядра (.ko, Kernel Object).
Init процесс у WSL тоже свой и заменить его, например, на system.d не выйдет. У меня давно есть желание написать менеджер демонов на go, который бы работал с файлами юнитов system.d и предоставлял бы схожий интерфейс, да все руки не доходят.
Нет поддержки openFUSE, соответственно примонтировать виртуальную или удаленную файловую систему не получится. Так же нельзя сделать mount из файла, mount вообще ничего кроме bind здесь, похоже, не умеет.
Так же нет никакой возможности разбить файловую систему Linux на несколько разделов/дисков.
Прямой доступ к железу практически отсутствует. Все таки мы находимся в песочнице Windows, а не в полноценном Linux. /dev и /sys заметно пустуют, в них лишь проц да виртуальные устройства. Доступ к GPU — только через X-сервер, напрямую — никак, так что нейросети обучать придется в Windows.
В JS разработке столкнулся с тем, что electron.js отказался запускаться в WSL, пришлось дублировать окружение node.js в Windows.
Итоги
Статья получилась довольно длинной, надеюсь, что она окажется еще и полезной.
WSL для меня лично оказался инструментом вполне юзабельным, решающим мои задачи fullstack backend разработчика. Виртуалка с Linux за полгода так и не понадобилась. По общим ощущениям Windows+WSL намного функциональнее, чем Linux+Wine.
Пока писал статью, обнаружил, что в Microsoft Store появилась сборка WSL с Debian 9.3, данный дистрибутив мне более симпатичен, чем Ubuntu, поэтому буду пробовать ставить.
Содержание
- Вариант 1: Установка в полуавтоматическом режиме
- Шаг 1: Выбор доступных дистрибутивов Linux
- Шаг 2: Запуск инсталляции
- Вариант 2: Установка в ручном режиме
- Шаг 1: Предварительная настройка системы
- Шаг 2: Загрузка и настройка ядра WSL2
- Шаг 3: Выбор и инсталляция дистрибутива Linux
- Вопросы и ответы
Вариант 1: Установка в полуавтоматическом режиме
Установка WSL в операционной системе Windows осуществляется посредством выполнения специальных команд в консоли. Для этого потребуется предварительно определиться с дистрибутивом Linux, а затем запустить процесс его инсталляции.
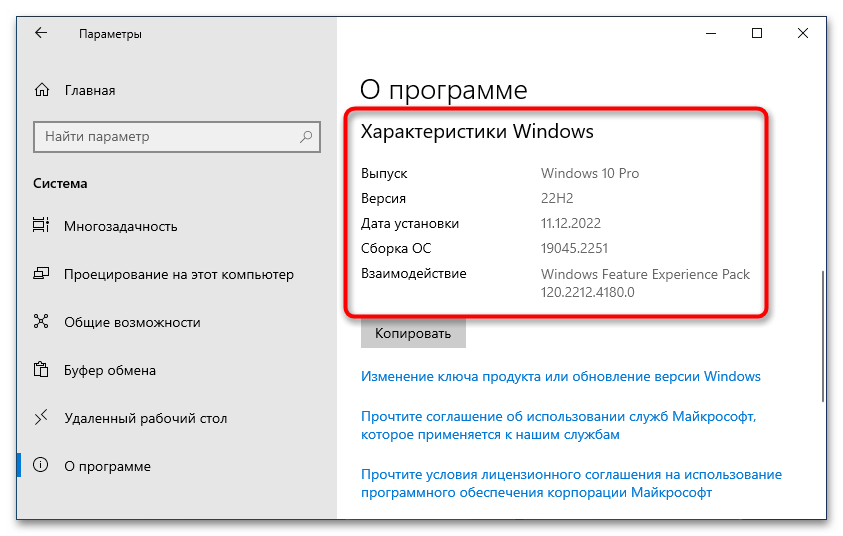
Важно! Приведенная ниже инструкция может быть выполнена только при условии использования Windows 10 версии 2004 (19041) и более новых. Узнать эту информацию можно в свойствах системы. Этой теме на нашем сайте посвящена отдельная статья, при необходимости ознакомьтесь с ней, перейдя по ссылке ниже.
Подробнее: Как узнать версию Windows 10
Шаг 1: Выбор доступных дистрибутивов Linux
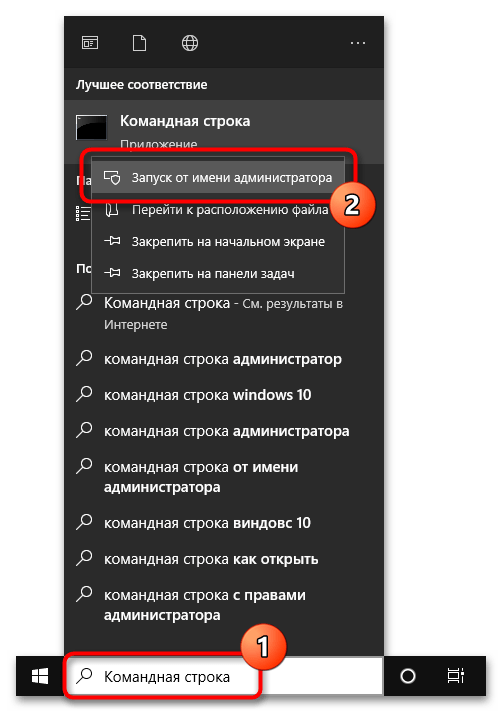
Каждому пользователю актуальной версии Windows 10 предоставляется возможность вручную выбрать дистрибутив Linux, который будет использоваться в WSL2. Для просмотра списка доступных систем необходимо ввести специальную команду в консоль, поэтому предварительно запустите «Командную строку» с правами администратора. Сделать это можно множеством способов, например посредством поискового запроса, как показано на изображении ниже.
Читайте также: Как открыть «Командную строку» от имени администратора в Windows 10
Примечание! По умолчанию всегда выбрана последняя версия дистрибутива Ubuntu. Если именно его вы и хотите установить, то пропустите этот шаг и переходите сразу ко второму.
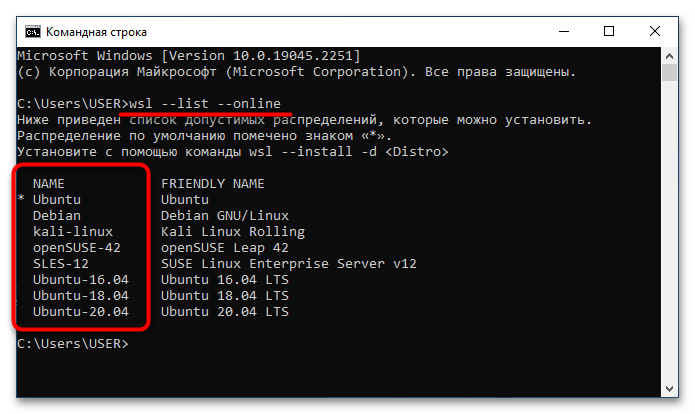
После того как окно консоли будет открыто, впишите или вставьте в него одну из нижеприведенных команд, после чего нажмите клавишу Enter:
wsl --list --online или wsl -l -o
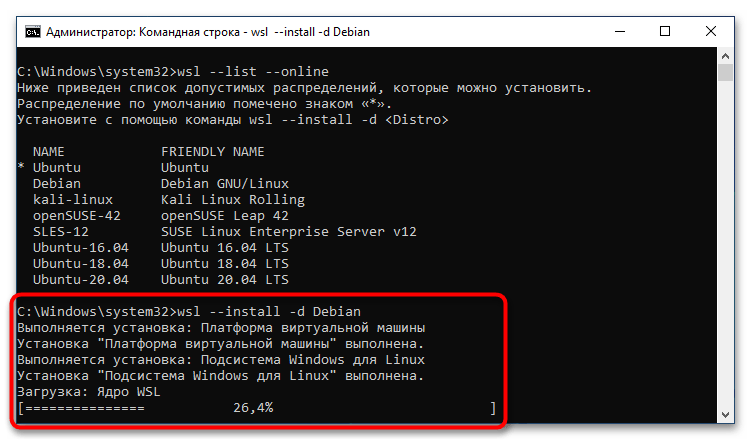
В результатах выдачи будет приведен список всех доступных дистрибутивов Linux. На этом этапе вам необходимо запомнить или скопировать в буфер обмена название, которое находится в столбце «NAME».
Обратите внимание! Если в списке доступных дистрибутивов нет желаемого, его можно импортировать в WSL2 посредством файла TAR или APPX. При необходимости есть возможность создать собственный дистрибутив на базе ядра Linux. Эти процессы описываются в официальной документации Microsoft, при необходимости ознакомиться с ними можно, воспользовавшись ссылками ниже.
Импорт любого дистрибутива Linux для использования с WSL
Создание пользовательского дистрибутива Linux для WSL
Шаг 2: Запуск инсталляции
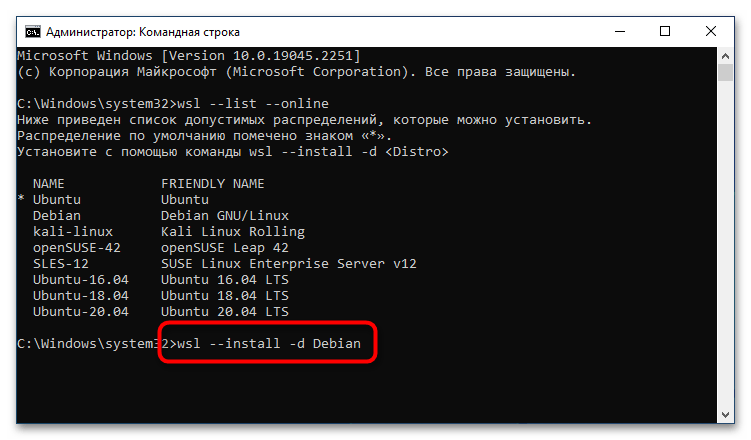
После того как версия дистрибутива Linux для WSL2 была выбрана, можно переходить непосредственно к ее инсталляции. Делается это тоже в «Командной строке», для чего нужно воспользоваться приведенной ниже командой. Не забудьте после ее ввода нажать клавишу Enter.
wsl --install -d <НазваниеДистрибутива>
Примечание! Если вы хотите установить версию по умолчанию, тогда нет необходимости прописывать название дистрибутива вручную, можно воспользоваться следующей командой:
wsl —install
Сразу после этого начнется процесс установки платформы виртуальной машины, затем инсталлируется «Подсистема Windows для Linux», а в завершение будет выполнена загрузка ядра WSL2.
После всех этих процедур можно будет воспользоваться WSL2 для вызова подсистемы Linux. Для этого достаточно будет запустить установленный дистрибутив через меню «Пуск».
Вариант 2: Установка в ручном режиме
Если версия вашей операционной системы Windows 10 ниже 2004 (19041), тогда воспользоваться вышеприведенной инструкцией не получится и большинство действий придется выполнять вручную.
Шаг 1: Предварительная настройка системы
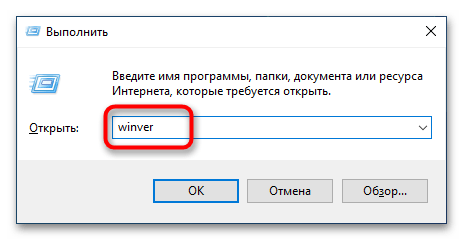
Первостепенно необходимо проверить, поддерживает ли установленная версия операционной системы обновление WSL до второй версии. Сделать это можно посредством вызова окна «Windows: сведения». Для этого нажмите сочетание горячих клавиш Win + R, впишите в поле запроса команду winver и нажмите клавишу Enter.
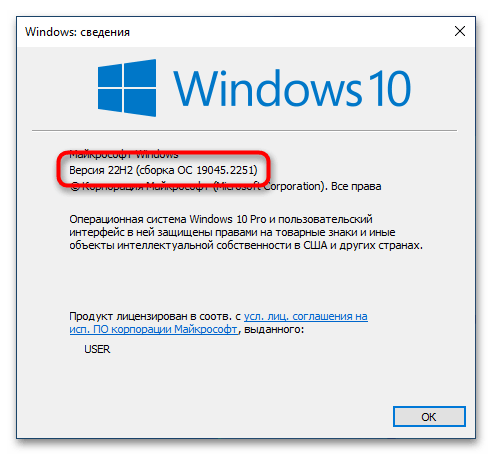
Появится соответствующее окно, в котором будет указана версия операционной системы и ее сборка. Убедитесь, что она выше 1903 (18362). Если это так, можете продолжить выполнение этой инструкции, в противном случае попробуйте прежде обновить Windows 10 до актуальной версии.
Читайте также: Как обновить Windows 10 до последней версии
Важно! Если ваш компьютер работает на процессоре с архитектурой ARM64, этот способ установки WSL2 не подойдет. Обновитесь до последней версии Windows 10 и воспользуйтесь ранее предоставляемой инструкцией.
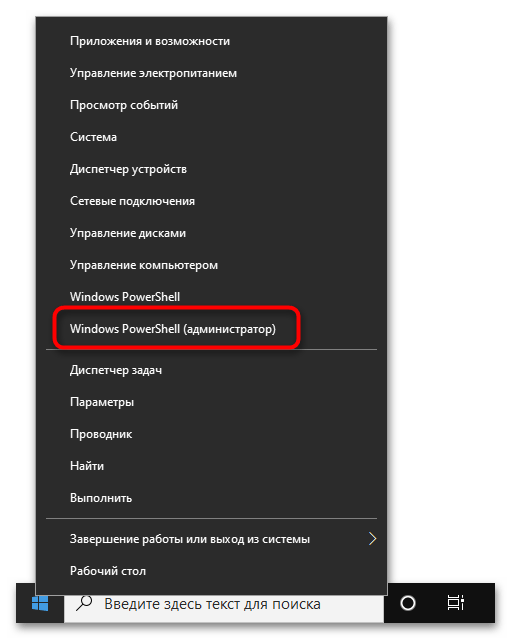
После того как вы удостоверились в актуальности версии операционной системы, необходимо произвести ее предварительную настройку, а именно — включить «Подсистему Windows для Linux» и компонент виртуальных машин. Делается это в оболочке PowerShell, поэтому предварительно запустите ее с правами администратора. Проще всего сделать это через контекстное меню кнопки «Пуск», как показано на изображении ниже. Но это не единственный способ.
Подробнее: Как открыть PowerShell в Windows 10
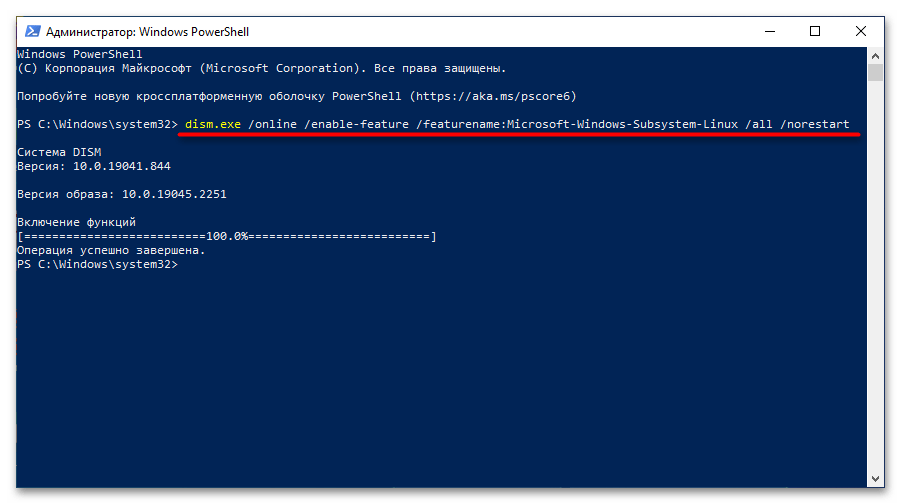
Теперь необходимо включить компонент «Подсистема Windows для Linux». Для этого скопируйте и вставьте в окно консоли PowerShell следующую команду, после чего нажмите Enter:
dism.exe /online /enable-feature /featurename:Microsoft-Windows-Subsystem-Linux /all /norestart
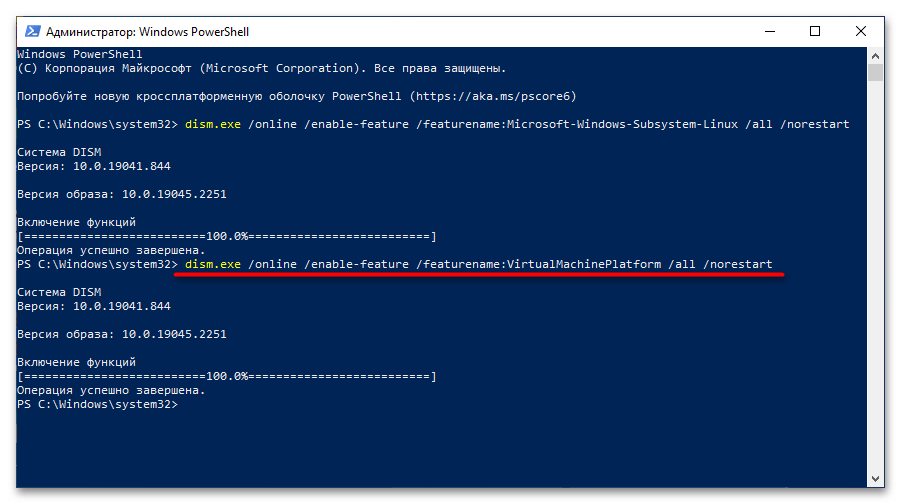
Ожидайте завершения процедуры, когда на экране появится приглашение к вводу новой команды. После этого включите компонент виртуальных машин. Это делается посредством нижепредставленной команды:
dism.exe /online /enable-feature /featurename:VirtualMachinePlatform /all /norestart
Важно! Если результатом ее выполнения является ошибка, потребуется предварительно включить виртуализацию. Делается это через BIOS, но сначала следует проверить статус этой функции в операционной системе. На нашем сайте есть отдельные статьи, посвященные этой теме.
Подробнее:
Как проверить, включена ли виртуализация в Windows 10
Как включить виртуализацию в BIOS
После того как компонент виртуальных машин будет установлен, потребуется перезагрузить компьютер.
Шаг 2: Загрузка и настройка ядра WSL2
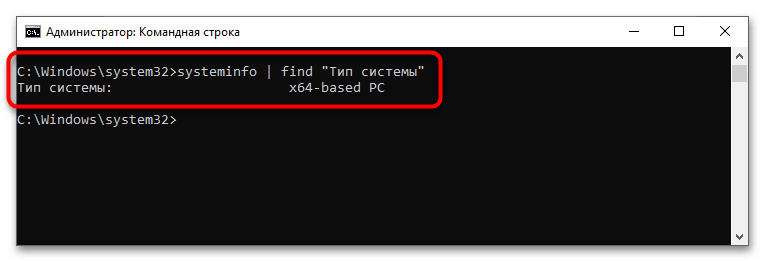
Следующим шагом будет загрузка и установка ядра второй версии WSL, но изначально нужно определить архитектуру процессора, на которой работает операционная система. Для этого вызовите окно «Командной строки», в котором выполните следующую команду:
systeminfo | find "Тип системы"
В результатах выдачи будет указана архитектура процессора. Если упоминается x64, скачайте пакет обновления ядра Linux в WSL2 для 64-разрядных компьютеров на базе процессора x86. Если в результатах выдачи есть упоминание ARM64, загрузите пакет обновлений по этой ссылке. Сохраните файл в любое удобное место, после чего запустите его, дважды кликнув по названию. Далее следуйте инструкции инсталлятора, пока не будет произведена установка.
Теперь необходимо выбрать WSL2 версией по умолчанию, чтобы при установке дистрибутивов Linux они инсталлировались в этом окружении. Для этого достаточно в окне PowerShell выполнить представленную ниже команду:
wsl --set-default-version 2
Шаг 3: Выбор и инсталляция дистрибутива Linux
Как только все необходимые компоненты будут установлены, можно переходить к выбору дистрибутива Linux для инсталляции в окружении WSL2. В отличие от первого способа, представленного в этой статье, все действия будут выполняться не в «Командной строке», а в Microsoft Store. Для удобства ниже приведен список доступных систем со ссылками на них:
- Ubuntu 18.04 LTS
- Ubuntu 20.04 LTS
- Ubuntu 22.04 LTS
- openSUSE Leap 15.1
- SUSE Linux Enterprise Server 12 SP5
- SUSE Linux Enterprise Server 15 SP1
- Kali Linux
- Debian GNU/Linux
- Fedora Remix for WSL
- Pengwin
- Pengwin Enterprise
- Alpine WSL
- Raft (пробная версия)
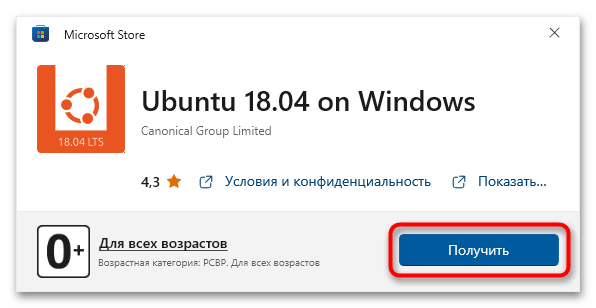
Воспользуйтесь нужной ссылкой, чтобы перейти в магазин приложений от Microsoft. Находясь на странице нужного дистрибутива, щелкните по кнопке «Получить», расположенной рядом с его названием.
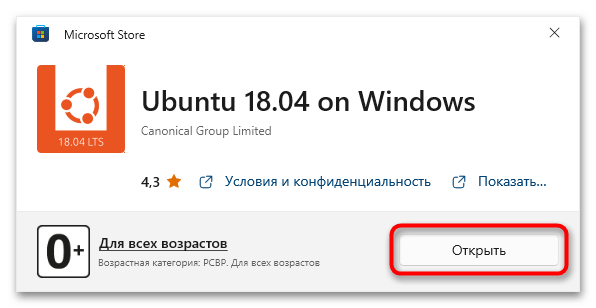
Дождитесь завершения загрузки, после чего кликните по появившейся кнопке «Открыть». Запустится окно консоли, в котором будет предложено подождать несколько минут, пока идет распаковка дистрибутива. В дальнейшем процедура инициализации ядра Linux будет занимать считанные секунды.
Примечание! Представленный выше список дистрибутивов взят с официального сайта Microsoft и может со временем измениться. В случае необходимости рекомендуем обратиться за справкой непосредственно к статье-первоисточнику.
Windows Subsystem for Linux (WSL) — подсистема ОС Windows 10, позволяющая разработчикам, тестировщикам запускать нативные приложения Linux, писать скрипты, выполнять команды непосредственно из Windows. В обновлённой Windows 10 (2004) появилась 2я версия WSL, в которой используется полноценное ядро Linux с возможностью запуска приложений и контейнеров Docker, реализована высокая скорость загрузки, небольшой объем потребляемых ресурсов, управление в фоновом режиме, обновление ядра. Таким образом вы сможете запускать ELF64 программы, которые могут получать доступ к файловой системе Windows без использования сторонних порто (таких как Cygwin).
Образ ядра Linux (версия ядра 4.19) в Windows 10 представляет собой легкую виртуальную машину, для запуска которой не нужно ставить полноценную роль Hyper-V. Системные вызовы Linux транслируются на лету в вызовы Windows без использования эмулятора (в отличии от WSL1).
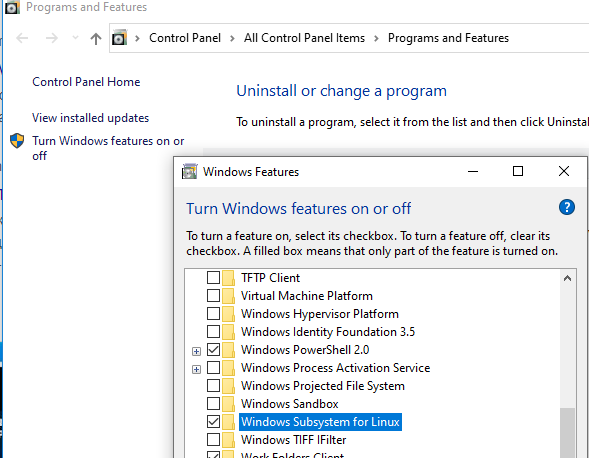
Изначально компонент WSL отключен. Чтобы его включить, вам необходимо зайти в Пуск -> Панель управления -> Программы и компоненты -> Включение и отключение компонентов Windows (Control PanelAll Control Panel ItemsPrograms and FeaturesTurn Windows features on or off), активировать галочку Подсистема Windows для Linux (Windows Subsystem for Linux), нажать кнопку ОК, и перезагрузить компьютер.
Вы можете включить компоненты WSL в Windows 10 с помощью dism:
dism.exe /online /enable-feature /featurename:VirtualMachinePlatform /all /norestart
dism.exe /online /enable-feature /featurename:Microsoft-Windows-Subsystem-Linux /all /norestart
или PowerShell
Enable-WindowsOptionalFeature -Online -FeatureName Microsoft-Windows-Subsystem-Linux
Enable-WindowsOptionalFeature -Online -FeatureName VirtualMachinePlatform
В Windows Server 2004 Semi-Annual Channel (SAC) для установки компонента WSL используется командлет Install-WindowsFeature:
Install-WindowsFeature -Name Microsoft-Windows-Subsystem-Linux
После этого также необходимо перезагрузить компьютер.
В настройка BIOS/UEFI компьютера должна быть включена поддержка аппаратной виртуализации: Intel VT (Intel Virtualization Technology) или AMD-V.
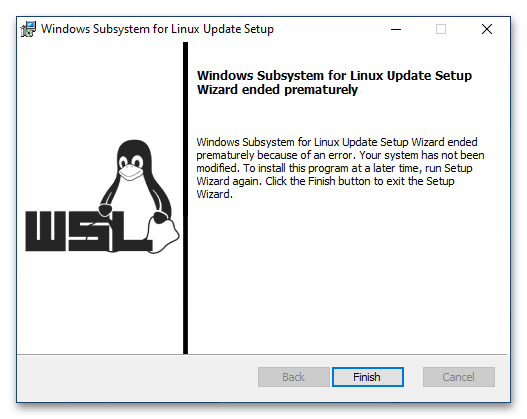
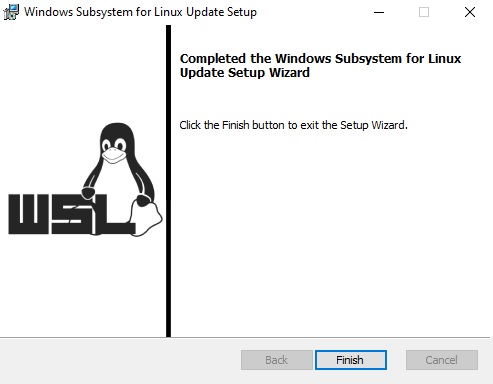
Теперь вам нужно выполнить обновление WSL до версии 2. Для этого требуется зайти на сайт https://docs.microsoft.com/ru-ru/windows/wsl/wsl2-kernel, скачать файл wsl_update_x64.msi, установить его. По завершении увидите картинку
Чтобы сделать WSL2 архитектурой по умолчанию для новых дистрибутивов, в PowerShell выполните команду:
wsl --set-default-version 2
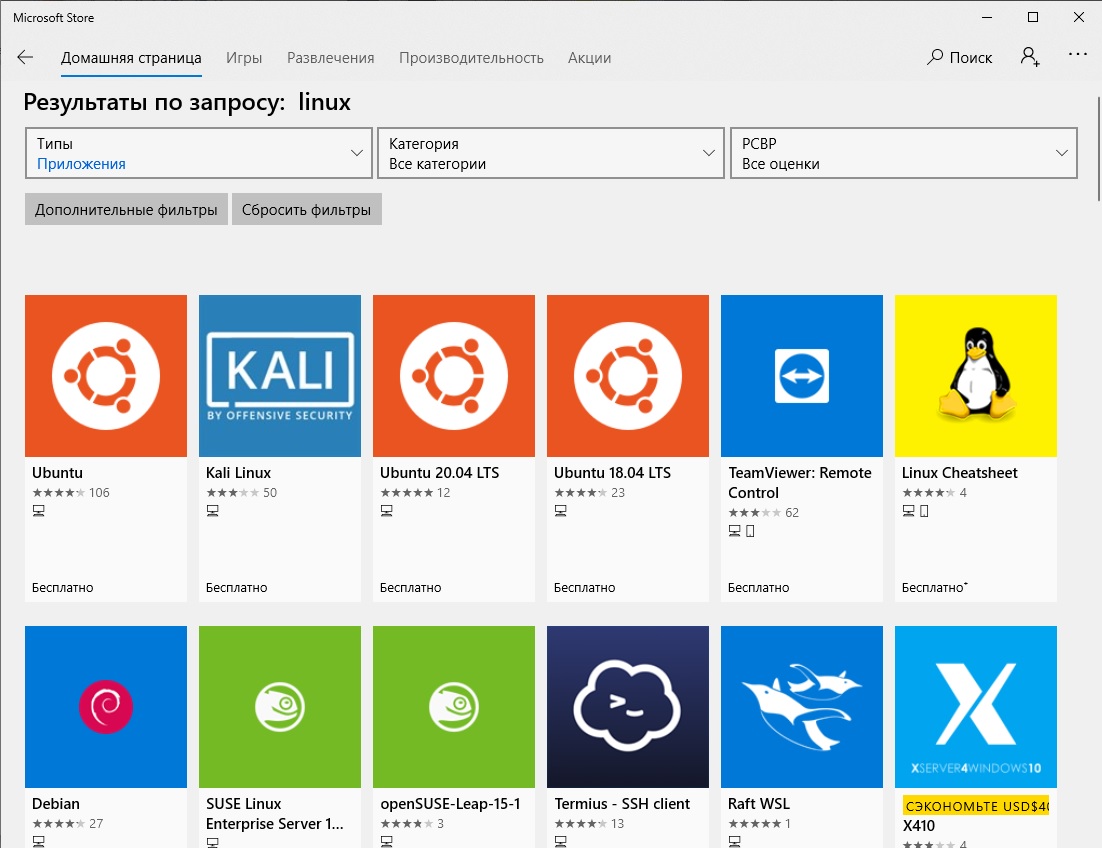
Далее вам необходимо открыть Microsoft Store, в поиске ввести слово “Linux”. В появившемся списке выберите нужный дистрибутив. Доступные Ubuntu, Debian, Kali Linux, Linux Cheatsheet, SUSE Linux Enterprise Server15, openSUSE Leap 15-1, Pengwin Enterprise, Fedora Remix for WSL или другие. В нашем примере мы будем использовать Ubuntu 20.04 LTS, нажмите кнопку Получить.
Если у вас отключен Windows Store или вы хотите установить дистрибутив WSL в Core редакции Windows Server, вы можете скачать дистрибутив Ubuntu с помощью PowerShell командлета Invoke-WebRequest:
Invoke-WebRequest https://aka.ms/wslubuntu2004 -OutFile ubuntu-2004.zip –UseBasicParsing
Распакуйте архив:
Expand-Archive -Path .ubuntu-2004.zip
Запустите установку образа Linux с помощью файла Ubuntu.exe.
Также вы можете скачать образ в виде appx файла и установить его с помощью командлета Add-AppxPackage.
После установки можно проверить используемую версию WSL с помощью команды
wsl --list –-verbose
Если у вашей среды Linux указана версия 1, нужно изменить ее на WSL2 командой:
wsl --set-version Ubuntu-20.04 2
Файл жёсткого диска с образом виртуальной машины ОС Linux Ubuntu 20.04 будет располагаться в профиле пользователя: C:Users234AppDataLocalPackagesCanonicalGroupLimited.Ubuntu20.04onWindows_79rhkp1fndgscLocalState.
После установки дистрибутива в стартовом меню появляется ярлык на него. Для запуска Ubuntu зайдите в меню Пуск, нажмите на соответствующем ярлыке и получите в отдельном окне полноценную командную оболочку Bash. Запускать WSL можно и с помощью команды wsl. При первом запуске образа в командной строке Bash вам будет предложено создать пользователя и пароль (которые не должны совпадать с учётной записью Windows). Чтобы выполнять команды с правами root, необходимо использовать дополнительный ключ (префикс) sudo. В WSL есть общие команды для Bash и CMD, и тут нужно не забывать, что система Linux чувствительна к регистру.
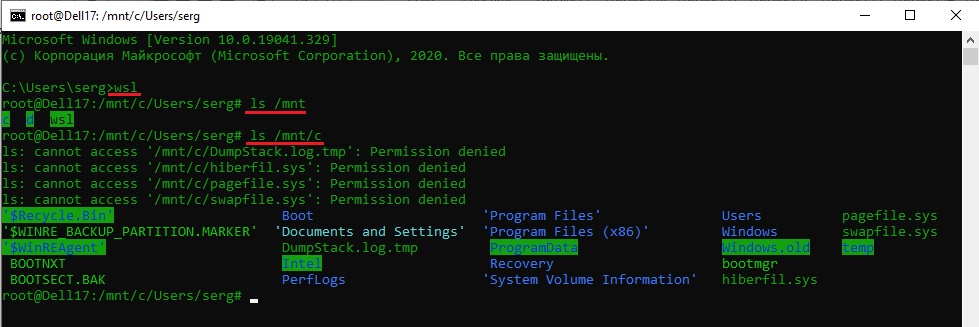
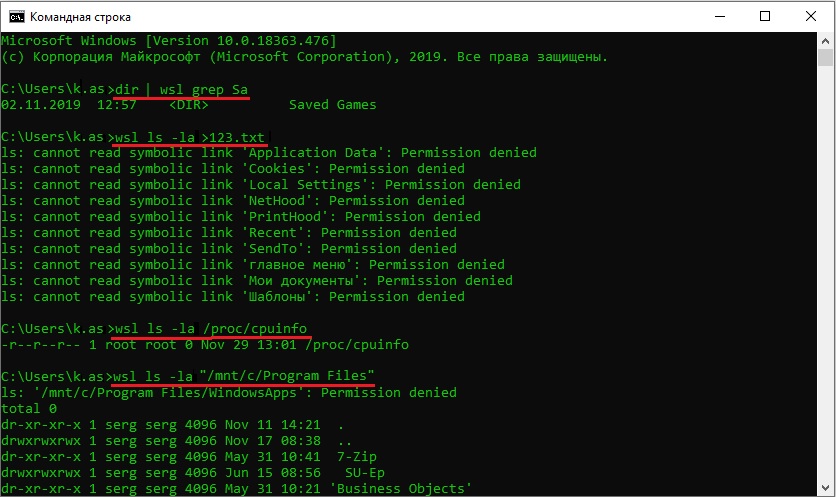
Вы можете выполнить Linux-команды из CMD. Для этого необходимо вначале указать “WSL”. Например, для просмотра списка файлов и папок в каталоге Windows, выполните:
wsl
ls /mnt
ls/mnt/c
dir | wsl grep Sa
wsl ls ‑la > 123.txt
wsl ls ‑la /proc/cpuinfo
wsl ls ‑la “/mnt/c/Program Files”
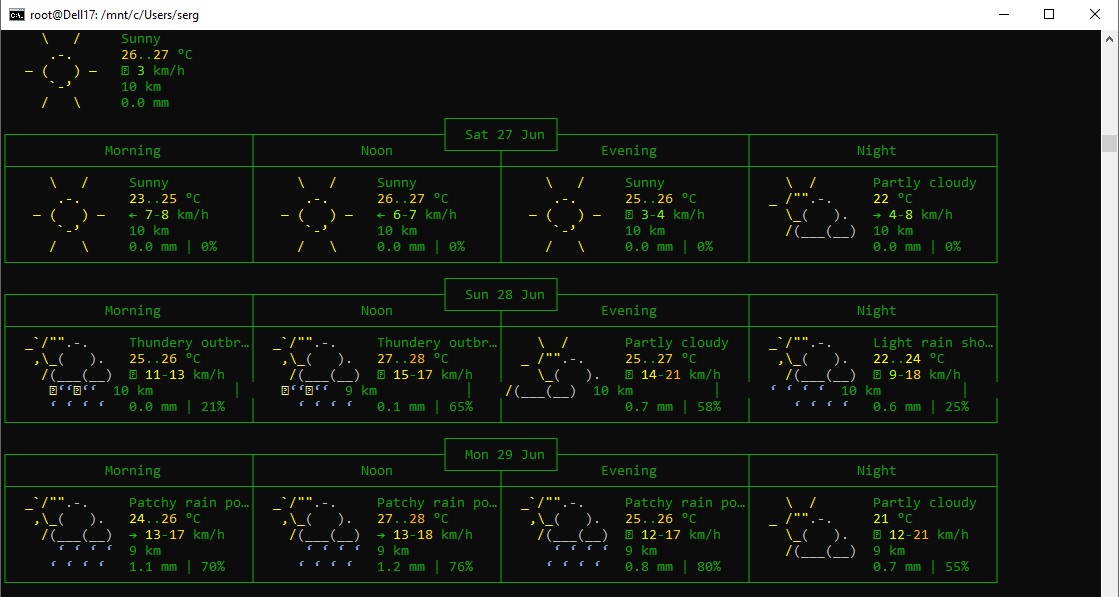
Также вы можете открыть проводник командой explorer.exe, калькулятор – calc.exe, блокнот – notepad.exe, paint – mspaint.exe, календарь – cal, погоду – curl wttr.in
Ещё один пример взаимосвязи 2х систем – вы можете открыть в Windows файл из WSL-дистрибутива по сетевому пути. Для этого в CMD наберите путь к файлу:
notepad \wsl$Ubuntu-20.04home1122.txt
Из окна консоли вы можете обновить список пакетов в Ubuntu с помощью команд:
sudo apt-get update
sudo apt-get upgrade
После обновления Ubuntu папка …/LocalState будет занимать 1.5 Гб.
Из командной строки Linux можно не только просмотреть Windows-файлы и каталоги, но и получить к ним доступ. Чтобы удобнее копировать файлы, просматривать директории и их содержимое, установите файловый менеджер Midnight Commander с помощью команды
sudo apt-get install mc
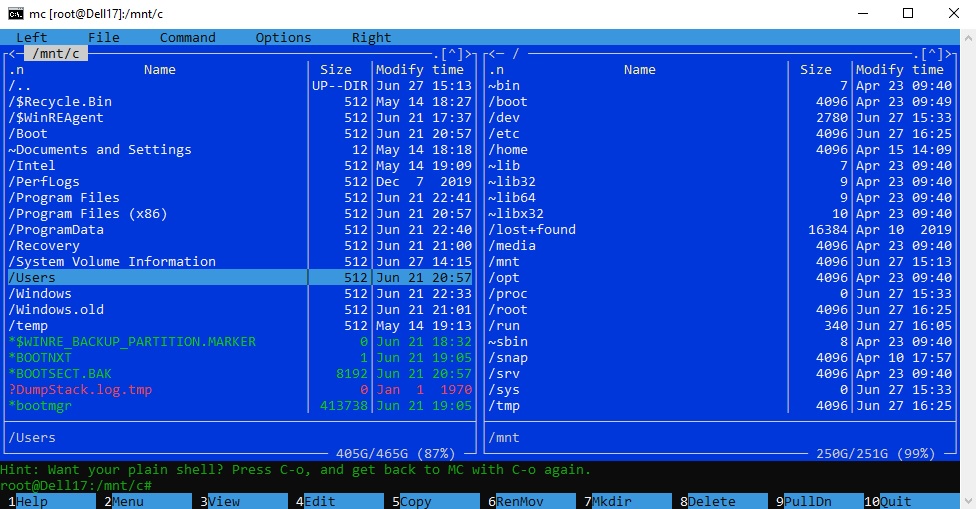
Вы можете запустить Midnight Commander как в командной оболочке Bash, так и внутри CMD. На скриншоте ниже показано, что в двух панелях MC показывается список файлов с обеих ОС.
Можно отобрахить сетевые настройки (IP адрес) IP-адрес Linux-системы:
ip addr | grep eth0
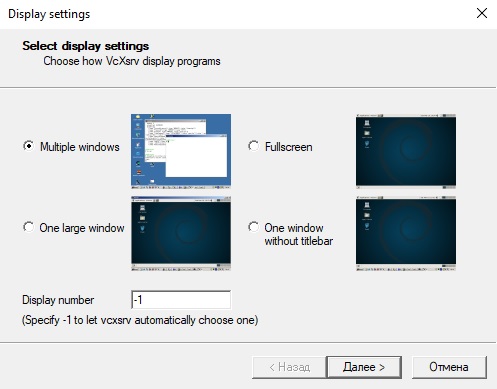
В WSL не предусмотрена работа приложений с графическим интерфейсом. Тем не менее вы можете попробовать их установить и использовать. Чтобы запускать графические приложения в Linux, нужно скачать и установить в Windows программу VcXsrv Windows X Server (https://sourceforge.net/projects/vcxsrv/).
С помощью пакетного менеджера apt-get установим несколько графических программ: например, браузер, текстовый редактор или что-то ещё:
sudo apt-get install gedit
sudo apt-get install firefox
sudo apt-get install x11-app
Затем создайте файл в директории root:
cd /~
vim .bash_login
впишите строку
export DISPLAY=$(cat /etc/resolv.conf | grep nameserver | awk '{print $2}'):0
сохраните запись
Esc -> :wr -> :q
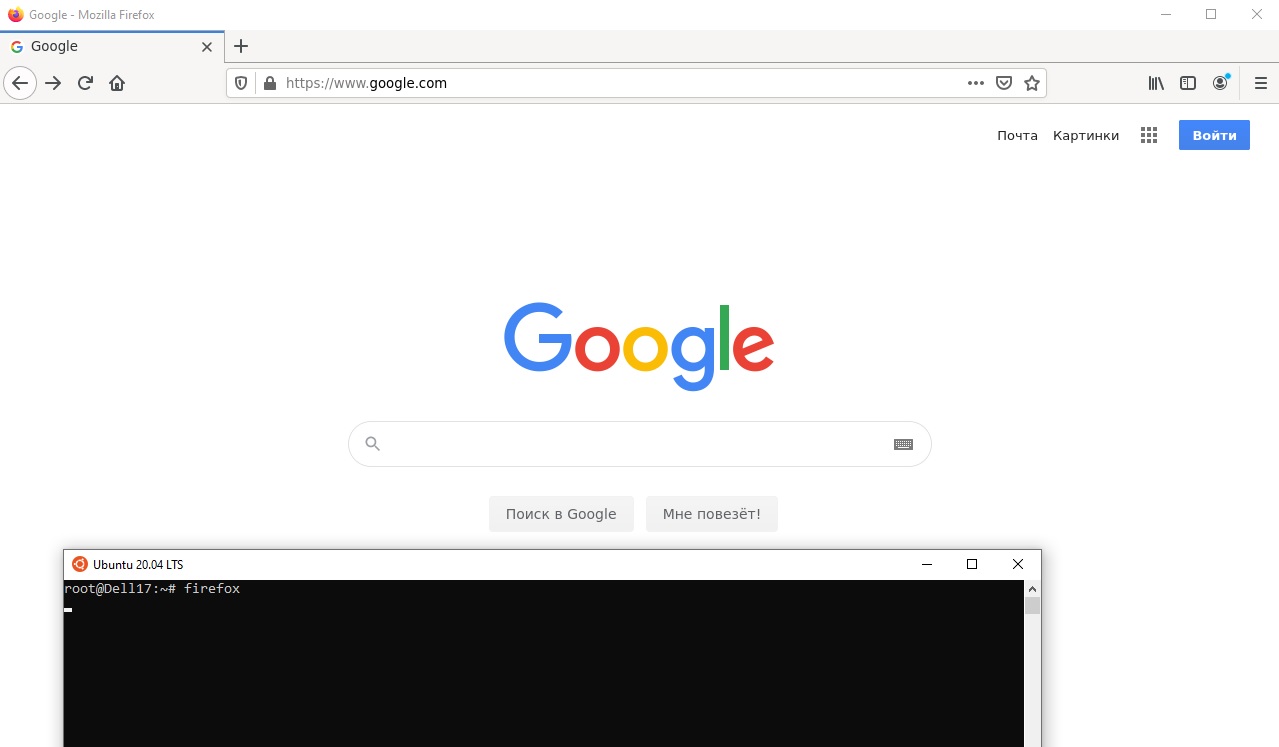
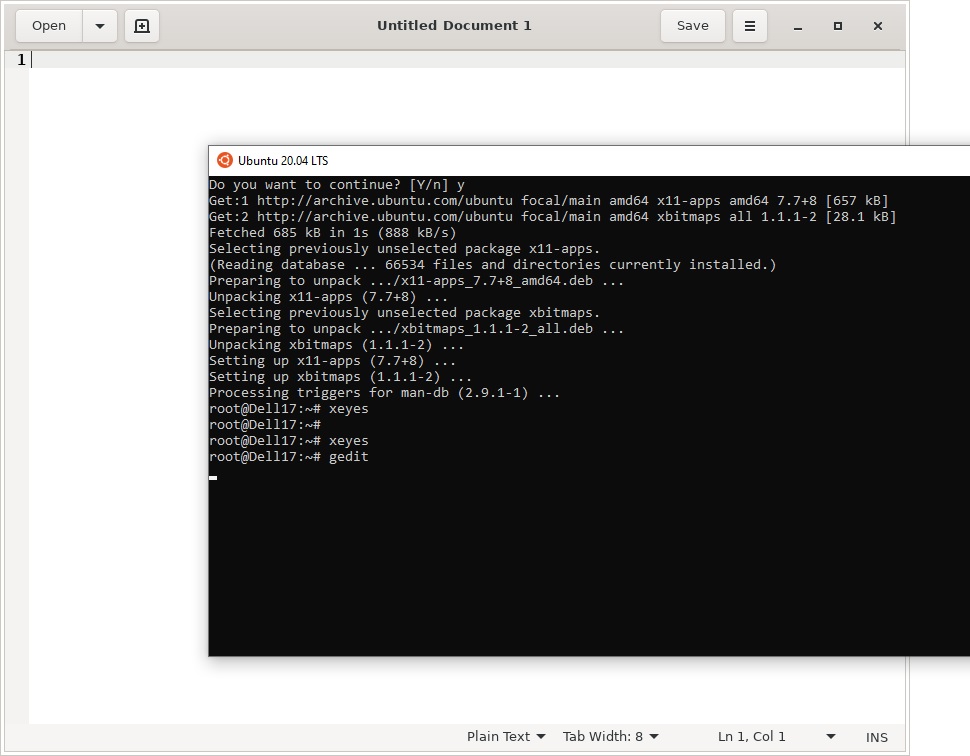
Теперь можете запустить графические программы Linux через WSL командами:
firefox
или
gedit
Вы можете установить в Windows 10 несколько дистрибутивов Linux и запускать одновременно в разных окнах WSL. Вывести весь перечень установленных дистрибутивов можете с помощью команды:
wsl --list –all
чтобы завершить работу всех запущенных дистрибутивов и ядра WSL 2, выполните команду:
wsl --shutdown
- To install WSL2 on Windows 10, open Command Prompt as admin and run “wsl –install.”
- The command will install all the WSL2 components and the Ubuntu Linux distro.
- To install a specific distro, run “wsl –install -d DISTRO-NAME.”
- To update the WSL2 kernel, run the “wsl –update” command.
WSL2 (Windows Subsystem for Linux version 2) is a new version of the architecture that allows you to use Linux on top of Windows 10 natively (using a lightweight virtual machine) and replaces WSL.
The feature runs an actual Linux kernel in a virtual machine, which improves performance and app compatibility over the previous version while maintaining the same experience as the first release.
This guide will teach you the steps to install the Windows Subsystem for Linux 2 on Windows 10.
- Install WSL2 on Windows 10
- Install WSL2 on Windows 10 (older versions)
Microsoft has simplified the installation process of the WSL on Windows 10 to only one command that downloads and installs all the required components, including the virtual machine platform and Ubuntu Linux by default.
To install Windows Subsystem for Linux on Windows 10, use these steps:
-
Open Start on Windows 10.
-
Search for Command Prompt, right-click the top result, and select the Run as administrator option.
-
Type the following command to install the WSL on Windows 10 and press Enter:
wsl --install
-
Restart your computer to finish the WSL installation on Windows 10.
-
Continue with the Linux distro setup as necessary.
Once you complete the steps, the required Linux components will automatically install the latest version of the Ubuntu Linux distribution.
Install WSL with specific distro
To install WSL with a specific distro on Windows 10, use these steps:
-
Open Start.
-
Search for Command Prompt, right-click the top result, and select the Run as administrator option.
-
Type the following command to view a list of available WSL distros to install on Windows 10 and press Enter:
wsl --list --online
Quick note: At the time of this writing, you can install Ubuntu, Debian, Kali Linux, openSUSE, and SUSE Linux Enterprise Server.
-
Type the following command to install the WSL with a specific distro on Windows 10 and press Enter:
wsl --install -d DISTRO-NAME
Remember to replace “DISTRO-NAME” in the command with the distro’s name to install, such as Debian.
-
Restart your computer.
-
Continue with the Linux distro setup as necessary.
After you complete the steps, the Windows Subsystem for Linux 2 components will install with the distro of Linux you specified.
Update WSL kernel
To update the WSL kernel to the latest version on Windows 10, use these steps:
-
Open Start.
-
Search for Command Prompt, right-click the top result, and select the Run as administrator option.
-
Type the following command to update the WSL kernel and press Enter:
wsl --update
Once you complete the steps, if an update is available, it will download and install on the device.
If the update command doesn’t work, open Settings > Update & Security > Windows Update > Advanced options, and turn on the “Receive updates for other Microsoft products when you update Windows” toggle switch.
Install WSL2 on Windows 10 (older versions)
Alternatively, you can still install WSL on Windows 10 version 1909 and older versions using the legacy processes. The process requires enabling WSL1, the Virtual Machine Platform, converting existing distros (if applicable), and configuring the Windows Subsystem for Linux 2 as the new default for future distro installations.
If you have an ARM64 system, the Linux integration is supported on version 2004 and higher.
Enable Windows Subsystem for Linux
If you are not already using Linux on Windows 10, you must enable the Windows Subsystem for Linux (version 1) with these steps:
-
Open Start on Windows 10.
-
Search for Turn Windows features on or off and click the top result to open the app.
-
Check the “Windows Subsystem for Linux” option.
-
Click the OK button.
-
Click the Restart button.
Once you complete the steps, you must enable the Virtual Machine Platform feature.
Enable Virtual Machine Platform
To enable the Virtual Machine Platform on Windows 10, use these steps:
Important: The motherboard and processor must support virtualization, and the option has to be enabled on the Basic Input/Output System (BIOS) or Unified Extensible Firmware Interface (UEFI).
-
Open Start.
-
Search for PowerShell, right-click the top result, and select the Run as administrator option.
-
Type the following command to enable the Virtual Machine Platform feature and press Enter:
Enable-WindowsOptionalFeature -Online -FeatureName VirtualMachinePlatform
-
Restart your computer.
After you complete the steps, you can set the Windows Subsystem for Linux version 2 as the new default architecture and convert existing distros.
Enable Windows Subsystem for Linux 2
To start using WSL2 or covert WSL distros to WSL2, use these steps:
-
Download this WSL 2 kernel update (required).
-
Double-click the wsl_update_x64.msi file and apply the update.
-
Open Start.
-
Search for PowerShell, right-click the top result, and select the Run as administrator option.
-
Type the following command to set Windows Subsystem for Linux 2 your default architecture for new distros that you install, and press Enter:
wsl --set-default-version 2
-
(Optional) Type the following command to convert the distro from WSL to WSL 2 and press Enter:
wsl --set-version Ubuntu 2
In the command, change “Ubuntu” for the distro’s name you want to convert. If you do not know the distro’s name, use the
wsl -l -vcommand.
Once you complete the steps, your device will start using the new version of Windows Subsystem for Linux as the default architecture. (See video tutorial on the Pureinfotech YouTube channel.)
Confirm distro platform
To confirm distros are using the Windows Subsystem for Linux 2, use these steps:
-
Open Start.
-
Search for PowerShell, right-click the top result, and select the Run as administrator option.
-
Type the following command to verify the version of the distro and press Enter:
wsl --list --verbose
-
Confirm the distro version is 2.
After you complete the steps, you will know if the process was successful or if you need to troubleshoot any of the steps.
Microsoft dropped plenty of jaws when it launched the Windows Subsystem for Linux, a way to run actual Linux inside Windows without the need to set up a virtual machine. The project has seen a ton of support, and WSL2 is the latest and greatest.
It takes things a little further and adds yet more awesomeness to the Linux experience on Windows 10 and Windows 11. Now, with the release of version 1.0, it has never been easier to set up WSL2 on your Windows machine, with GUI apps now even supported on Windows 10, too.
Simplified setup of WSL2 on Windows 10 and Windows 11
There is now a new, extremely simplified way to get WSL2 up and running on your Windows 10 and Windows 11 PC. To get the very latest version you need to be running Windows 10 version 21H1, 21H2, or 22H2, or on Windows 11 21H2 with all of the November updates applied.
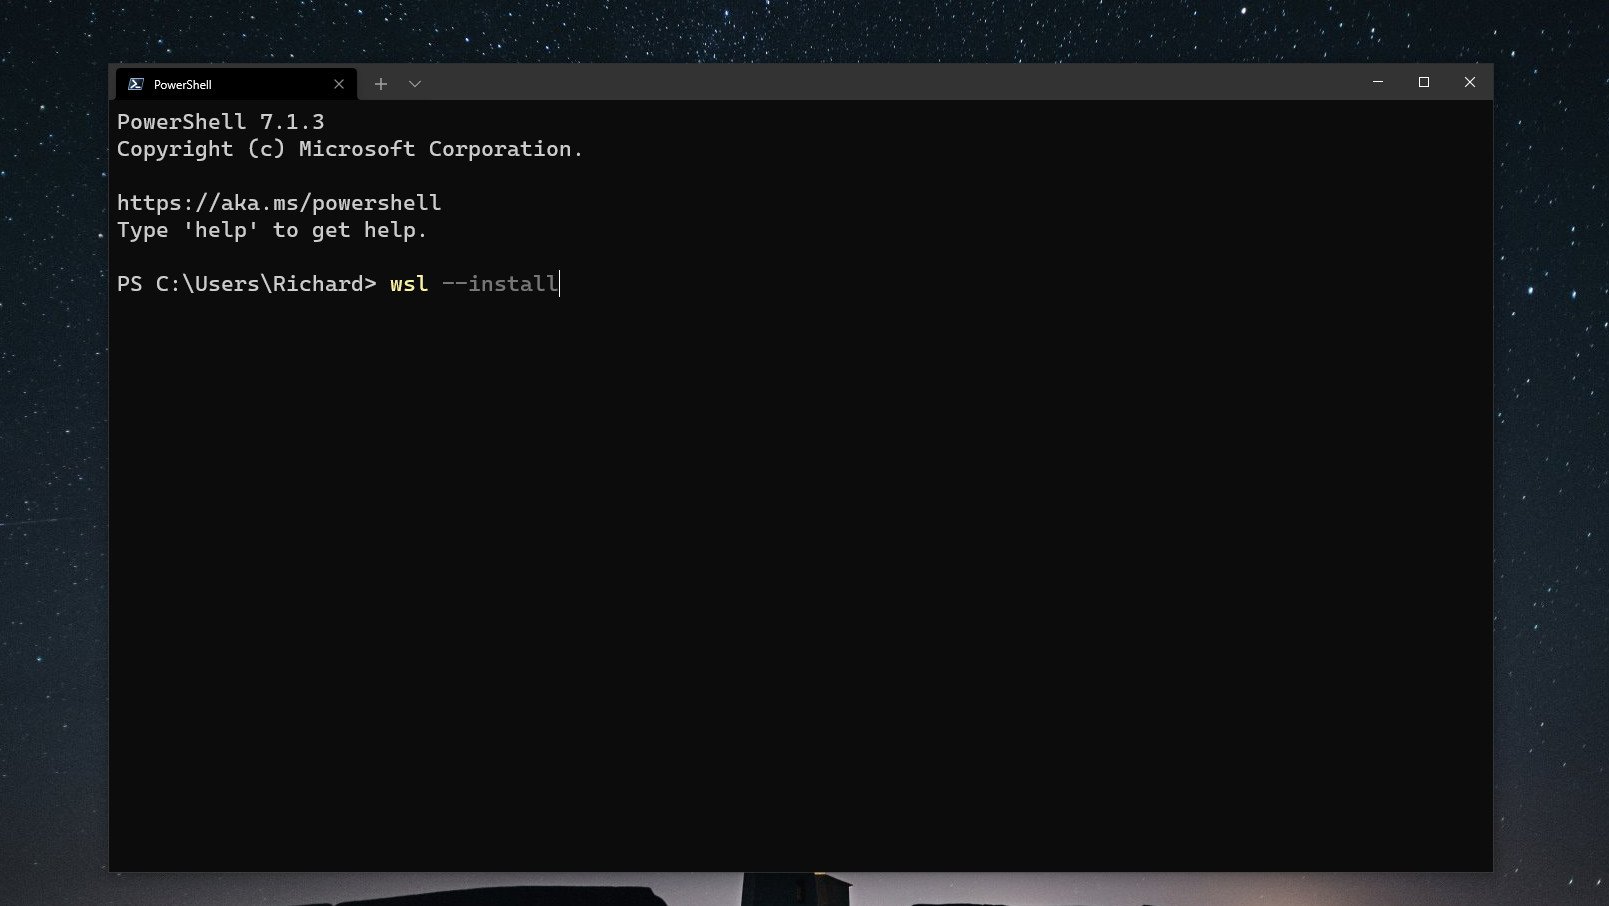
Once this is in place, open up PowerShell and enter this command:
wsl --installThat’s it. The setup process will begin and you can relax until it’s finished. By default, WSL will enable all system features required and it will download and install Ubuntu. If you don’t want a distribution installed during setup you can add the — no-distribution tag to the installation command.
WSL is now distributed through the Microsoft Store and the simplified installation process will pull this version in. Alternatively, you can download it directly from its Microsoft Store listing (opens in new tab).
You will also require the optional Windows Subsystem for Linux component if you wish to also use WSL 1 alongside WSL 2.
How to enable Windows Subsystem for Linux optional component for WSL 1
WSL2 is now the standard, but if for any reason you also want to use WSL1 alongside it, you’ll need the optional Windows Subsystem for Linux component enabling. Fortunately, you can do this in two ways. The first is by adding —enable-wsl1 to the install command used above.
But you can also enable the component at any time, even after you already have WSL2 up and running. Open PowerShell as administrator and enter this command:
dism.exe /online /enable-feature /featurename:Microsoft-Windows-Subsystem-Linux /all /norestartEventually, you will need to reboot your PC, adding norestart means you won’t be immediately kicked out of whatever you’re doing. If you want to reboot immediately, simply omit this from the end of the command.
Setting WSL2 for your Linux distros
The good thing about WSL2 is that it doesn’t replace WSL1. It just runs alongside it. This means you can run Linux installs with a combination of different versions. You’re able to set either as default as well as setting a version specifically to each Linux distro you have on your PC.
Let’s break down some of the key commands to use in PowerShell that you’ll need to know.
Setting WSL2 as default
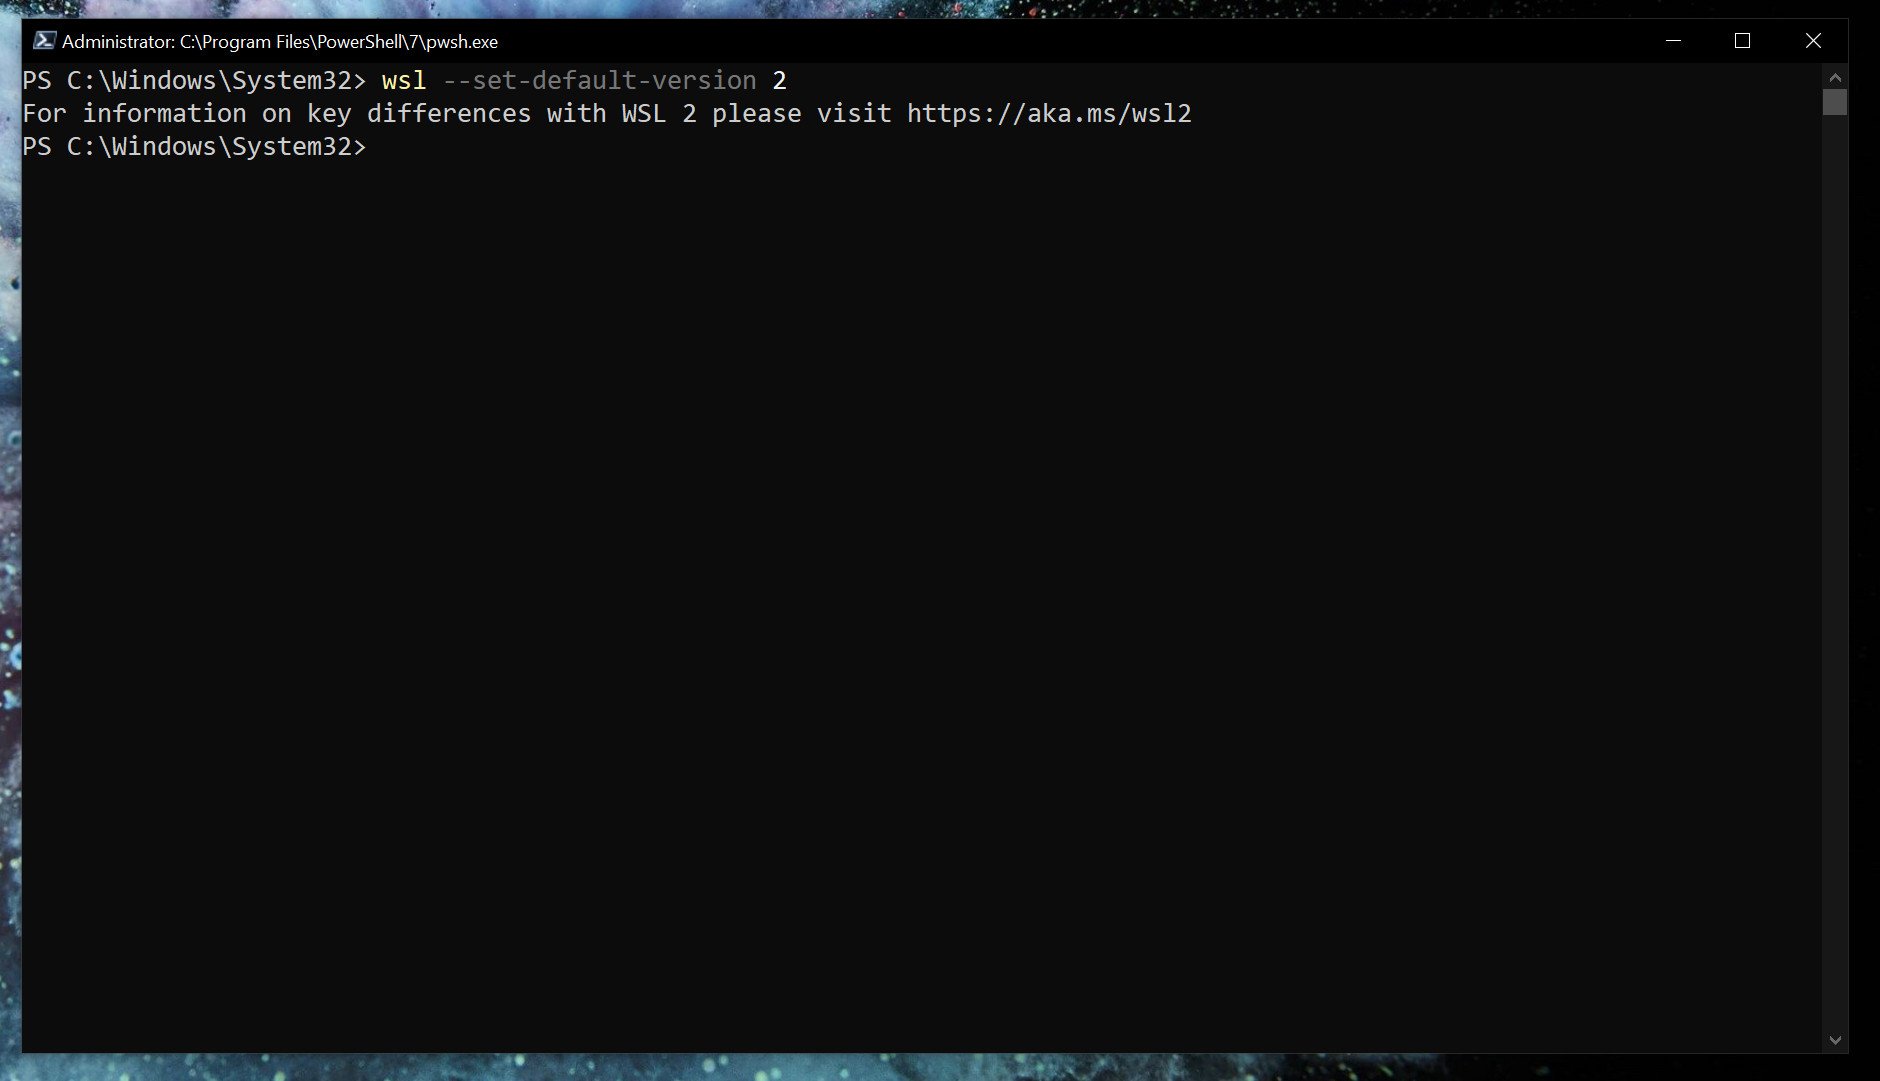
If you want everything to run on WSL2 as soon as you install it, you can set it as the default version.
wsl --set-default-version 2Listing installed Linux distros and their WSL version
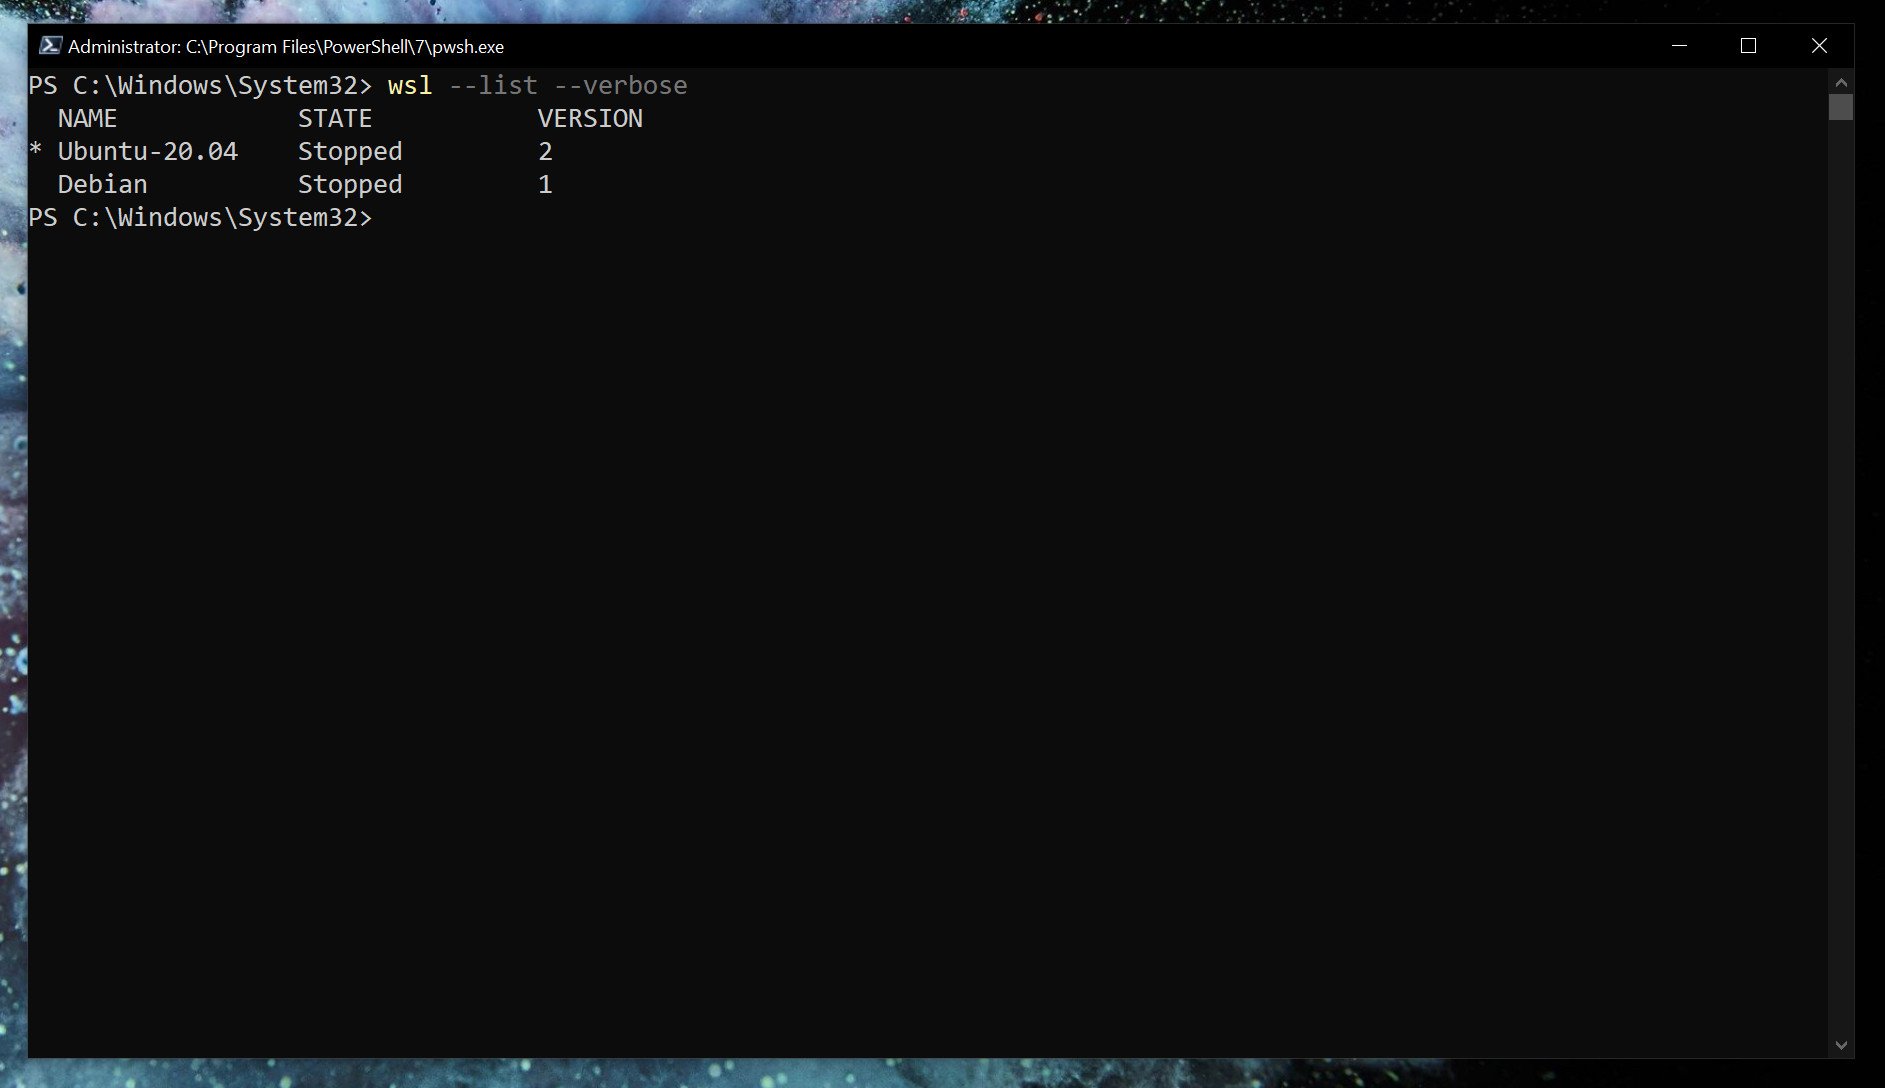
With WSL2 set as default, any Linux installs after that will use it automatically. You can easily check which version of WSL your installed Linux distros are using.
wsl --list --verbose Using the verbose flag will give you the breakdown of which version of WSL is attached to which Linux installation. Without it, you’ll simply get a list of the versions of Linux you have installed.
Changing the version of WSL per Linux installation
While setting WSL2 as default will apply it to anything you install afterward. If you’re already set up, you’ll need to manually convert. Likewise, if you wish to go between versions 1 and 2 or run a mixture on your system, you can do that.
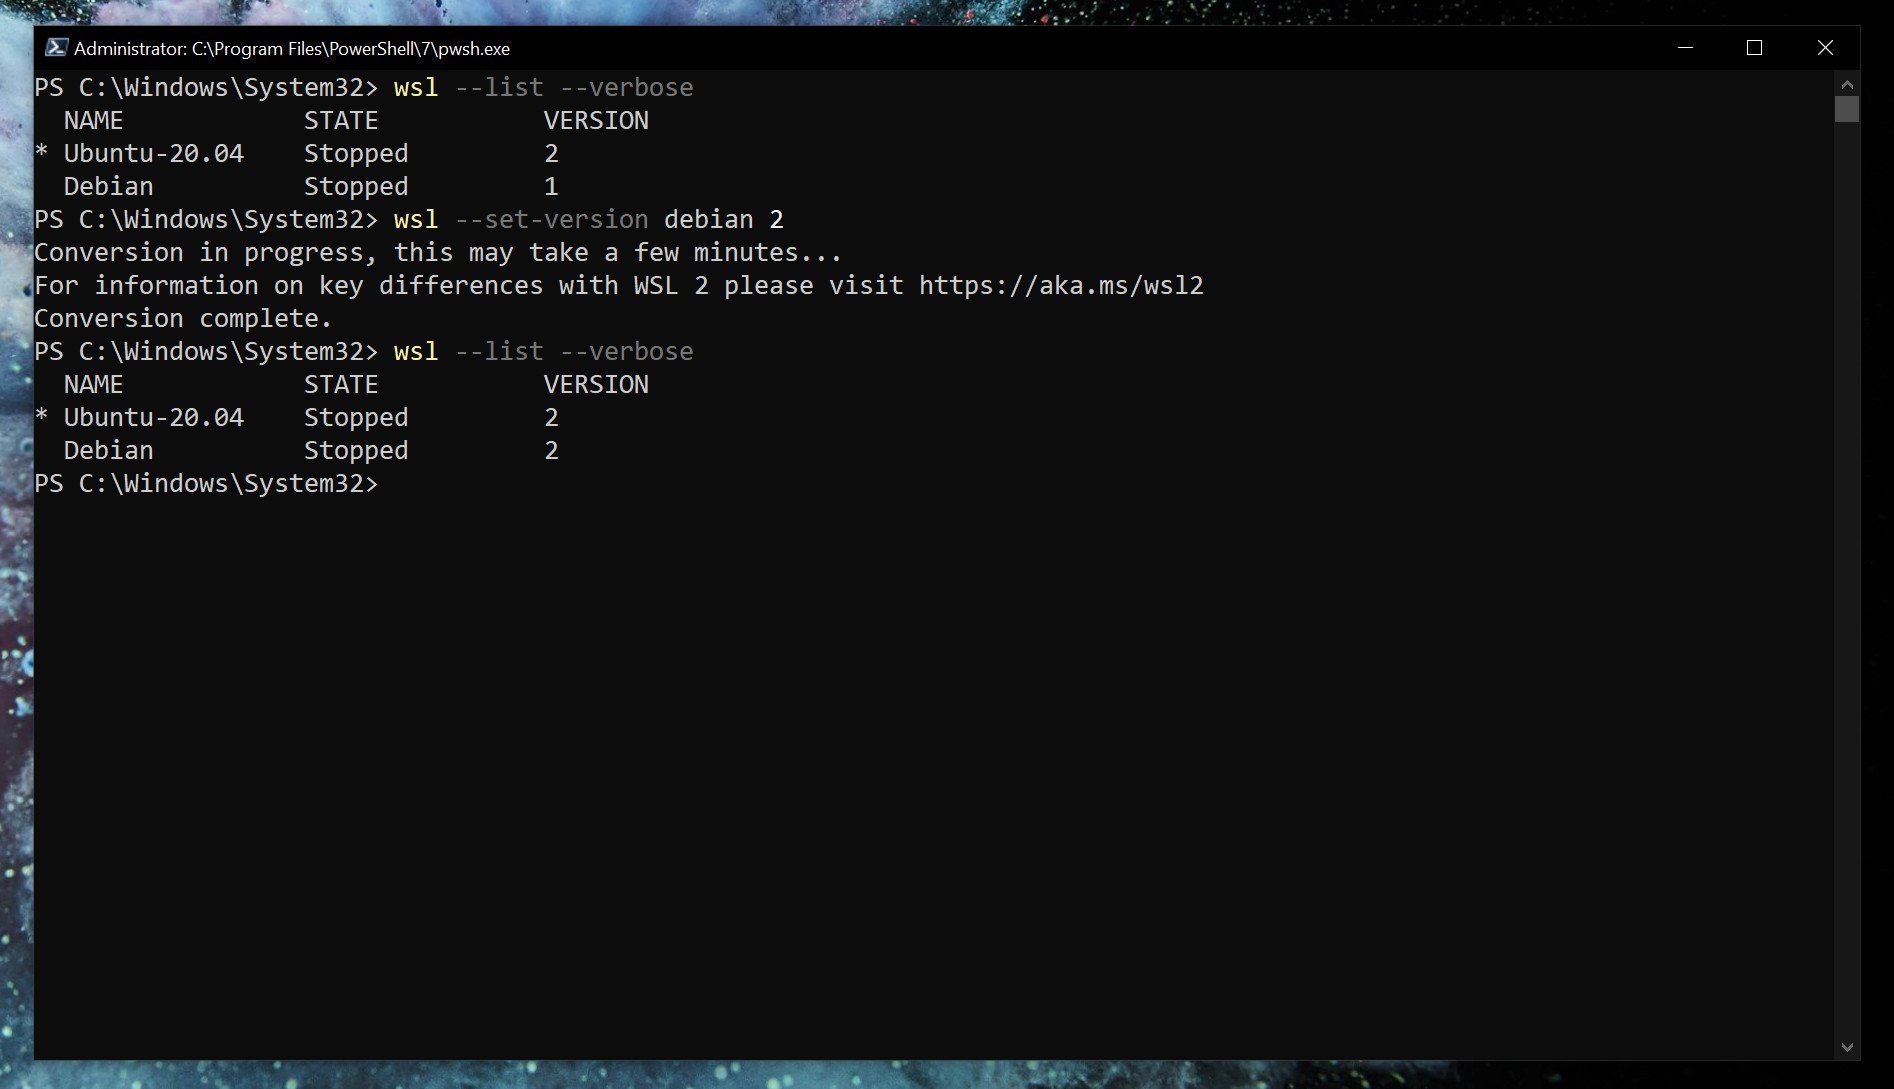
wsl --set-version <distribution name=""> <versionnumber></versionnumber></distribution>So, as an example, if you have a Debian installation on WSL that you need to convert to WSL2, you’d enter
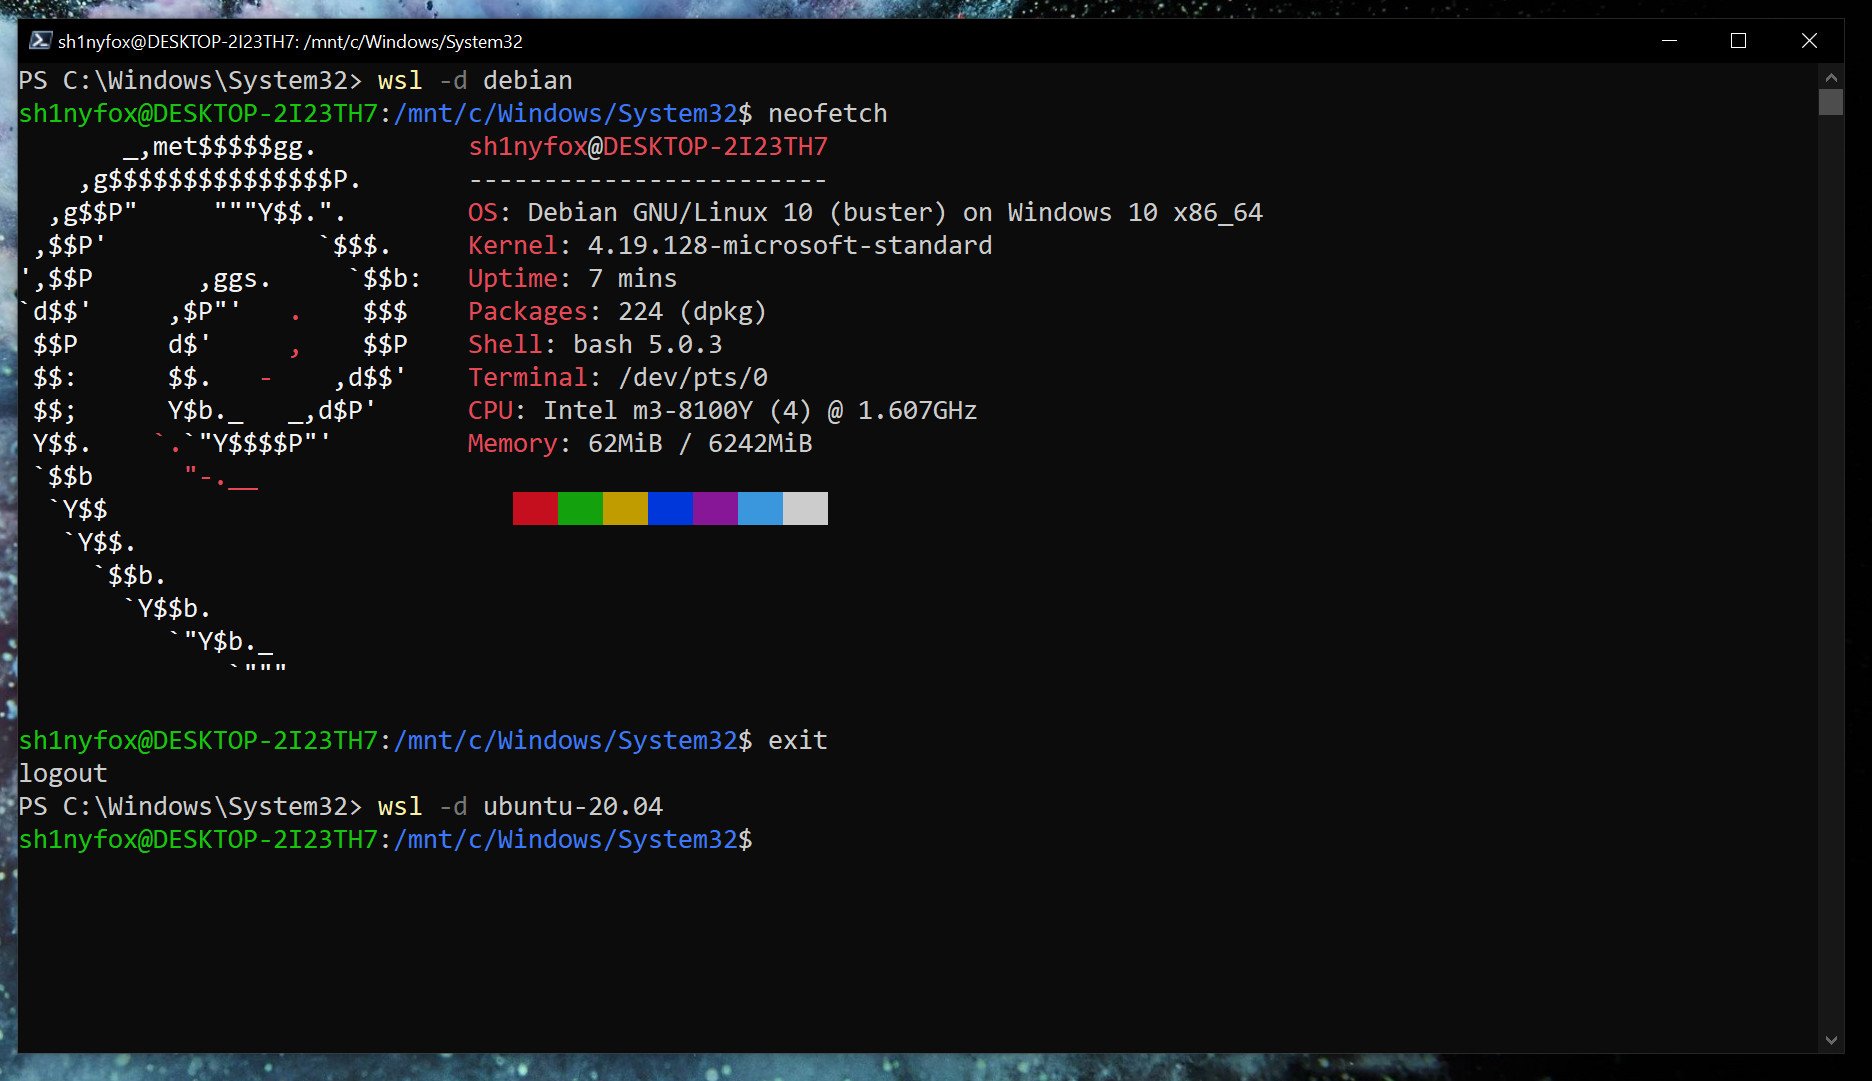
wsl --set-version debian 2Launch specific Linux installations in PowerShell
If you only have one version of Linux installed, simply typing
wslin PowerShell will launch you into the associated bash shell. But if you have multiple, you can launch a specific distro with this command.
wsl -d <distribution name=""></distribution>Once you’re done, typing
exitwill take you back into PowerShell.
From here on out, you’re ready to go forth and install all the Linux you want. Our full guide will help you along the way, but once WSL2 is set up how you like it, it just fades into the background.
It’s also worth grabbing the Windows Terminal app from the Microsoft Store if you’re using WSL. While you can just use the standard terminal installed with each or launch through PowerShell as shown above, Windows Terminal has a neat tabbed interface that lets you run multiple shells at once. Have PowerShell, Linux, Azure Cloud Shell, and even Command Prompt, all open together side-by-side in one window.
(opens in new tab)
Cutting-edge operating system
A refreshed design in Windows 11 enables you to do what you want effortlessly and safely, with biometric logins for encrypted authentication and advanced antivirus defenses.
Get the best of Windows Central in in your inbox, every day!
Richard Devine is a Managing Editor at Windows Central with over a decade of experience. A former Project Manager and long-term tech addict, he joined Mobile Nations in 2011 and has been found on Android Central and iMore as well as Windows Central. Currently, you’ll find him steering the site’s coverage of all manner of PC hardware and reviews. Find him on Mastodon at mstdn.social/@richdevine


