From Wikipedia, the free encyclopedia
 |
|
Bash running on Windows 10 |
|
| Other names | WSL |
|---|---|
| Developer(s) | Microsoft |
| Initial release | August 2, 2016; 6 years ago |
| Stable release |
WSL 2 1.0.3 |
| Repository | github.com/Microsoft/WSL (issues only) |
| Operating system | Windows 10, Windows 10 LTSB/LTSC, Windows Server 2016, Windows Server 2019, Windows 11, Windows Server 2022 |
| Predecessor | Windows Services for UNIX |
| Type | Compatibility layer, Virtualization |
| License | Subsystem: Proprietary commercial software; Linux kernel: GNU GPLv2 (only) with some code under compatible GPL variants or under permissive licenses like BSD, MIT |
| Website | learn.microsoft.com/windows/wsl/about |
Windows Subsystem for Linux (WSL) is a feature of Windows that allows developers to run a Linux environment without the need for a separate virtual machine or dual booting. There are two versions of WSL: WSL 1 and WSL 2. WSL 1 was first released on August 2, 2016, and acts as a compatibility layer for running Linux binary executables (in ELF format) by implementing Linux system calls on the Windows kernel.[3] It is available on Windows 10, Windows 10 LTSB/LTSC, Windows 11,[4] Windows Server 2016, Windows Server 2019 and Windows Server 2022.
In May 2019, WSL 2 was announced,[5] introducing important changes such as a real Linux kernel,[6] through a subset of Hyper-V features. WSL 2 differs from WSL 1 in that WSL 2 runs inside a managed virtual machine that implements the full Linux kernel. As a result, WSL 2 is compatible with more Linux binaries than WSL 1, as not all syscalls were implemented in WSL 1. Since June 2019, WSL 2 is available to Windows 10 customers through the Windows Insider program, including the Home edition.[7] WSL is not available to all Windows 10 users by default. It can be installed either by joining the Windows Insider program or manual install.[8]
As of 2022, WSL 2 includes a (rather recent LTS) Linux kernel 5.15.74.2.
History[edit]
Microsoft’s first foray into achieving Unix-like compatibility on Windows began with the Microsoft POSIX Subsystem, superseded by Windows Services for UNIX via MKS/Interix, which was eventually deprecated with the release of Windows 8.1. The technology behind Windows Subsystem for Linux originated in the unreleased Project Astoria, which enabled some Android applications to run on Windows 10 Mobile.[9] It was first made available in Windows 10 Insider Preview build 14316.[10]
Whereas Microsoft’s previous projects and the third-party Cygwin had focused on creating their own unique Unix-like environments based on the POSIX standard, WSL aims for native Linux compatibility. Instead of wrapping non-native functionality into Win32 system calls as Cygwin did, WSL’s initial design (WSL 1) leveraged the NT kernel executive to serve Linux programs as special, isolated minimal processes (known as «pico processes») attached to kernel mode «pico providers» as dedicated system call and exception handlers distinct from that of a vanilla NT process, opting to reutilize existing NT implementations wherever possible.[11]
WSL beta was introduced in Windows 10 version 1607 (Anniversary Update) on August 2, 2016. Only Ubuntu (with Bash as the default shell) was supported. WSL beta was also called «Bash on Ubuntu on Windows» or «Bash on Windows». WSL was no longer beta in Windows 10 version 1709 (Fall Creators Update), released on October 17, 2017. Multiple Linux distributions could be installed and were available for install in the Windows Store.[12]
In 2017 Richard Stallman expressed fears that integrating Linux functionality into Windows will only hinder the development of free software, calling efforts like WSL «a step backward in the campaign for freedom.»[13]
Though WSL (via this initial design) was much faster and arguably much more popular than the previous UNIX-on-Windows projects, Windows kernel engineers found difficulty in trying to increase WSL’s performance and syscall compatibility by trying to reshape the existing NT kernel to recognize and operate correctly on Linux’s API. At a Microsoft Ignite conference in 2018, Microsoft engineers gave a high-level overview of a new «lightweight» Hyper-V VM technology for containerization where a virtualized kernel could make direct use of NT primitives on the host.[14] In 2019, Microsoft announced a completely redesigned WSL architecture (WSL 2) using this lightweight VM technology hosting actual (customized) Linux kernel images, claiming full syscall compatibility.[6] Microsoft announced WSL 2 on May 6, 2019,[5] and it was shipped with Windows 10 version 2004.[15] It was also backported to Windows 10 version 1903 and 1909.[16]
GPU support for WSL 2 to do GPU-accelerated machine learning was introduced in Windows build 20150.[17] GUI support for WSL 2 to run Linux applications with graphical user interfaces (GUIs) was introduced in Windows build 21364.[18] Both of them are shipped in Windows 11.
In April 2021, Microsoft released a Windows 10 test build that also includes the ability to run Linux graphical user interface (GUI) apps using WSL 2 and CBL-Mariner.[19][18] The Windows Subsystem for Linux GUI (WSLg) was officially released at the Microsoft Build 2021 conference. It is included in Windows 10 Insider build 21364 or later.[20]
Microsoft introduced a Windows Store version of WSL on October 11, 2021 for Windows 11,[21] and WSL reached version 1.0.0 on November 16, 2022.
Notable releases[edit]
| Release / Feature | Preview build | Public build |
|---|---|---|
| WSL (Beta) (Bash on Ubuntu on Windows) | Windows 10 build 14316 | Windows 10 version 1607 (Anniversary Update) |
| WSL (no longer Beta) | Windows 10 build 16251 | Windows 10 version 1709 (Fall Creators Update) |
| WSL 2 (lightweight VM) | Windows 10 build 18917 | Windows 10 version 2004 (also backported to 1903 and 1909) |
| WSL 2 GPU support | Windows 10 build 20150 | Windows 11 (also Windows 10 21H2) |
| WSL 2 GUI support (WSLg) (last version) | Windows 10 build 21364 | Windows 11 |
| Version | Comment |
|---|---|
| 0.47.1 | First version |
| 0.67.6 | systemd support |
| 1.0.0 | First generally available version |
Features[edit]

Bash running on Windows 10
WSL is available in Windows Server 2019 and in versions of Windows 10 from version 1607, though only in 64-bit versions.
Microsoft envisages WSL as «primarily a tool for developers – especially web developers and those who work on or with open source projects».[22] In September 2018, Microsoft said that «WSL requires fewer resources (CPU, memory, and storage) than a full virtual machine» (which prior to WSL was the most direct way to run Linux software in a Windows environment), while also allowing users to use Windows apps and Linux tools on the same set of files.[22]
The first release of WSL provides a Linux-compatible kernel interface developed by Microsoft, containing no Linux kernel code, which can then run the user space of a Linux distribution on top of it, such as Ubuntu,[23][24][25][26] openSUSE,[27] SUSE Linux Enterprise Server,[28][29][12] Debian[30] and Kali Linux.[31] Such a user space might contain a GNU Bash shell and command language, with native GNU command-line tools (sed, awk, etc.), programming-language interpreters (Ruby, Python, etc.), and even graphical applications (using an X11 server at the host side).[22]
The architecture was redesigned in WSL 2,[5] with a Linux kernel running in a lightweight virtual machine environment.
wsl.exe[edit]
The wsl.exe command is used to manage distributions in the Windows Subsystem for Linux on the command-line. It can list available distributions, set a default distribution, and uninstall distributions.[32] The command can also be used to run Linux binaries from the Windows Command Prompt or Windows PowerShell.[33] wsl.exe replaces lxrun.exe which is deprecated as of Windows 10 1803 and later.[34]
WSLg[edit]
Windows Subsystem for Linux GUI (WSLg) is built with the purpose of enabling support for running Linux GUI applications (X11 and Wayland) on Windows in a fully integrated desktop experience.[35] WSLg was officially released at the Microsoft Build 2021 conference and is included in Windows 10 Insider build 21364 or later.[20] However, with the introduction of Windows 11, WSLg is finally shipping with a production build of Windows, bringing support for both graphics and audio in WSL apps.[36]
FreeRDP is used to encode all communications going from the RDP Server (in Weston) to the RDP Client (mstsc on Windows) according to the RDP protocol specifications. [37]
Prerequisites for running WSLg include:
- Windows 11 or Windows 10 Insider Preview builds 21362-21390.[35][38]
- A system with virtual GPU (vGPU) enabled for WSL is recommended, as it will allow you to benefit from hardware accelerated OpenGL rendering.[35]
Design[edit]
WSL 1[edit]

LXSS Manager Service is the service in charge of interacting with the subsystem (through the drivers lxss.sys and lxcore.sys), and the way that Bash.exe (not to be confused with the Shells provided by the Linux distributions) launches the Linux processes, as well as handling the Linux system calls and the binary locks during their execution.[39] All Linux processes invoked by a particular user go into a «Linux Instance» (usually, the first invoked process is init). Once all the applications are closed, the instance is closed.
WSL 1’s design featured no hardware emulation / virtualization (unlike other projects such as coLinux) and makes direct use of the host file system (through VolFS and DrvFS)[40] and some parts of the hardware, such as the network, which guarantees interoperability. Web servers for example, can be accessed through the same interfaces and IP addresses configured on the host, and shares the same restrictions on the use of ports that require administrative permissions, or ports already occupied by other applications.[41] There are certain locations (such as system folders) and configurations whose access/modification is restricted, even when running as root, with sudo from the shell. An instance with elevated privileges must be launched in order to get «sudo» to give real root privileges, and allow such access.[22]
WSL 1 is not capable of running all Linux software, such as 32-bit binaries,[42][43] or those that require specific Linux kernel services not implemented in WSL. Due to a lack of any «real» Linux kernel in WSL 1, kernel modules, such as device drivers, cannot be run. WSL 2, however, makes use of live virtualized Linux kernel instances. It is possible to run some graphical (GUI) applications (such as Mozilla Firefox) by installing an X11 server within the Windows (host) environment (such as VcXsrv or Xming),[44] although not without caveats, such as the lack of audio support (though this can be remedied by installing PulseAudio in Windows in a similar manner to X11) or hardware acceleration (resulting in poor graphics performance). Support for OpenCL and CUDA is also not being implemented currently, although planned for future releases.[45][46] Microsoft stated WSL was designed for the development of applications, and not for desktop computers or production servers, recommending the use of virtual machines (Hyper-V), Kubernetes, and Azure for those purposes.[22]
In benchmarks WSL 1’s performance is often near native Linux Ubuntu, Debian, Intel Clear Linux or other Linux distributions. I/O is in some tests a bottleneck for WSL.[47][48][49] The redesigned WSL 2 backend is claimed by Microsoft to offer twenty-fold increases in speed on certain operations compared to that of WSL 1.[6] In June 2020, a benchmark with 173 tests with an AMD Threadripper 3970x shows good performance with WSL 2 (20H2) with 87% of the performance of native Ubuntu 20.04.0 LTS. This is an improvement over WSL 1, which has only 70% of the performance of native Ubuntu in this comparison. WSL 2 improves I/O performance, providing a near-native level.[50]
A comparison of 69 tests with Intel i9 10900K in May 2020 shows nearly the same relative performance.[51] In December 2020, a benchmark with 43 tests with an AMD Ryzen 5900X shows good performance with WSL 2 (20H2) with 93% of the performance of native 20.04.1 LTS. This is an improvement over WSL 1, which has only 73% in this comparison.[52]
WSL 2[edit]

Version 2 introduces changes in the architecture. Microsoft has opted for virtualization through a highly optimized subset of Hyper-V features, in order to run the kernel and distributions (based upon the kernel), promising performance equivalent to WSL 1. For backward compatibility, developers don’t need to change anything in their published distributions. WSL 2 settings can be tweaked by the WSL global configuration, contained in an INI file named .wslconfig in the User Profile folder.[53][54]
The distribution installation resides inside an ext4-formatted filesystem inside a virtual disk, and the host file system is transparently accessible through the 9P protocol,[55] similarly to other virtual machine technologies like QEMU.[56] For the users, Microsoft promised up to 20 times the read/write performance of WSL 1.[5] From Windows an IFS network redirector is provided for Linux guest file access using the UNC path prefix of \wsl$.
WSL 2 requires Windows 11,[57] or Windows 10 version 1903 or higher, with Build 18362 or higher, for x64 systems, and Version 2004 or higher, with Build 19041 or higher, for ARM64 systems.[8]
WSL 2 and Windows 11 are in good shape with 95% performance of native Ubuntu 20.04 LTS.[58]
See also[edit]
- Azure Sphere
- FreeBSD § OS compatibility layers
- SmartOS § Virtualization
- Windows Terminal
- Xenix
References[edit]
- ^ «Release 1.0.3 · microsoft/WSL». GitHub. Retrieved 3 January 2023.
- ^ Craig Loewen (12 June 2019). «WSL 2 is now available in Windows Insiders». Windows Command Line.
- ^ Leeks, Stuart (2020). Windows Subsystem for Linux 2 (WSL 2) Tips, Tricks, and Techniques : Maximise Productivity of Your Windows 10 Development Machine with Custom Workflows and Configurations. Birmingham: Packt Publishing, Limited. pp. 18–19. ISBN 978-1-80056-352-0. OCLC 1202451000.
- ^ June 2021, Darren Allan 23 (23 June 2021). «Windows 11 could seamlessly run graphical Linux apps». TechRadar. Retrieved 29 June 2021.
- ^ a b c d Craig Loewen (6 May 2019). «Announcing WSL 2». Windows Command Line Tools For Developers.
- ^ a b c mscraigloewen. «About WSL 2». docs.microsoft.com.
- ^ «WSL 2 Post BUILD FAQ». Windows Command Line Tools For Developers. 14 May 2019.
- ^ a b craigloewen-msft (24 February 2022). «Install WSL on Windows 10». Microsoft.
- ^ Bright, Peter (6 April 2016). «Why Microsoft needed to make Windows run Linux software». Ars Technica. Condé Nast.
- ^ Aul, Gabe (6 April 2016). «Announcing Windows 10 Insider Preview Build 14316». Windows Experience Blog. Microsoft.
- ^ «Windows Subsystem for Linux Overview». Windows Subsystem for Linux. Retrieved 22 April 2018.
- ^ a b «What’s new in WSL in Windows 10 Fall Creators Update — Windows Command Line». Windows Command Line. 11 October 2017. Retrieved 15 October 2021.
- ^ Heath, Nick (20 September 2017). «Will Microsoft love Linux to death? Shuttleworth and Stallman on whether Windows 10 is free software’s friend». TechRepublic. Retrieved 18 February 2022.
- ^ Microsoft Ignite (2 October 2018), OS internals: Technical deep-dive into operating system innovations — BRK3365, archived from the original on 9 November 2021, retrieved 7 May 2019
- ^ «WSL 2 will be generally available in Windows 10, version 2004 — Windows Command Line». Windows Command Line. 13 March 2020. Retrieved 15 October 2021.
- ^ «WSL 2 Support is coming to Windows 10 Versions 1903 and 1909 — Windows Command Line». Windows Command Line. 20 August 2020. Retrieved 15 October 2021.
- ^ «GPU accelerated ML training inside the Windows Subsystem for Linux — Windows Developer Blog». Windows Blog. 17 June 2020. Retrieved 16 October 2021.
- ^ a b «The Initial Preview of GUI app support is now available for the Windows Subsystem for Linux — Windows Command Line». Windows Command Line. 21 April 2021.
- ^ Foley, Mary Jo (21 April 2021). «New Windows 10 test build adds first preview of Linux GUI apps on WSL». ZDNet. Retrieved 23 April 2021.
- ^ a b Abrams, Lawrence (29 May 2021). «Hands on with WSLg: Running Linux GUI apps in Windows 10». Bleeping Computer. Retrieved 30 May 2021.
- ^ «A preview of WSL in the Microsoft Store is now available! — Windows Command Line». Windows Command Line. 11 October 2021. Retrieved 16 October 2021.
- ^ a b c d e «Frequently Asked Questions for WSL». Microsoft. Retrieved 13 November 2016.
- ^ Harsh, Mike (30 March 2016). «Run Bash on Ubuntu on Windows». Building Apps for Windows. Microsoft.
- ^ Finley, Klint (30 March 2016). «Why Microsoft Making Linux Apps Run on Windows Isn’t Crazy». Wired. Condé Nast.
- ^ Kirkland, Dustin (30 March 2016). «Ubuntu on Windows – The Ubuntu Userspace for Windows Developers». Ubuntu Insights. Canonical.
- ^ Hammons, Jack (9 April 2016). «Bash on Ubuntu on Windows». MSDN. Microsoft.
- ^ Get openSUSE Leap 42 — Microsoft Store
- ^ Get SUSE Linux Enterprise Server 12 — Microsoft Store
- ^ Yegulalp, Serdar (12 May 2017). «Windows Subsystem for Linux welcomes Suse and Fedora options». InfoWorld. Retrieved 16 September 2017.
- ^ «Debian GNU/Linux for WSL now available in the Windows Store». Windows Command Line Tools For Developers. Retrieved 7 March 2018.
- ^ «Kali Linux in the Windows App Store». Retrieved 9 March 2018.
- ^ Manage and configure Windows Subsystem for Linux
- ^ Windows Subsystem for Linux interoperability with Windows
- ^ Command Reference for Windows Subsystem for Linux
- ^ a b c Welcome to WSLg, Microsoft, 7 November 2021, retrieved 7 November 2021
- ^ Salter, Jim (7 October 2021). «The best part of Windows 11 is a revamped Windows Subsystem for Linux». Ars Technica. Retrieved 7 November 2021.
- ^ «Installing WSLg». GitHub. 27 April 2022. Retrieved 27 April 2022.
- ^ «Clarify Windows 10 vs 11 and build numbers (#485) · microsoft/wslg@5ddd8d2». GitHub. Retrieved 28 May 2022.
- ^ Jack Hammons (22 April 2016). «Windows Subsystem for Linux Overview». Windows Subsystem for Linux blog on MSDN.
- ^ Jack Hammons (15 June 2016). «WSL File System Support». Windows Subsystem for Linux blog on MSDN.
- ^ Jack Hammons (8 November 2016). «WSL Networking». Windows Subsystem for Linux blog on MSDN.
- ^ «Please enable WSL to run 32 bit ELF binaries». Windows Developer feedback (Microsoft/UserVoice).
- ^ «Support for 32-bit i386 ELF binaries». GitHub.
- ^ «Windows 10’s Bash shell can run graphical Linux applications with this trick». PC World. Retrieved 10 September 2018.
- ^ «GPU not accesssible for running tensorflow and installing CUDA · Issue #1788 · Microsoft/WSL». GitHub. Retrieved 10 September 2018.
- ^ «OpenCL & CUDA GPU support». Windows Developer feedback (Microsoft/UserVoice). 15 September 2016. Retrieved 10 September 2018.
- ^ «Windows Subsystem for Linux». Phoronix.
- ^ Larabel, Michael (12 October 2018). «A Look At The Windows 10 October 2018 Update Performance With WSL». Phoronix.
- ^ Larabel, Michael (5 November 2018). «The WSL Improvements In The Windows 10 October 2018 Update». Phoronix.
- ^ Larabel, Michael (24 June 2020). «Ubuntu 20.04 vs. Windows 10 WSL/WSL2 Performance In 170+ Benchmarks». Phoronix.
- ^ Larabel, Michael (17 June 2020). «Windows 10 May 2020 Performance For WSL vs. WSL2». Phoronix.
- ^ Larabel, Michael (16 December 2020). «Windows Subsystem For Linux / WSL2 Performance With The AMD Ryzen 9 5900X». Phoronix.
- ^ Loewen, Craig (26 July 2019). «What’s new for WSL in Insiders Preview Build 18945». Microsoft devblog. Archived from the original on 26 July 2019. Retrieved 26 July 2019.
In this new update we’ve added the ability to start using global config options for WSL. These options are targeted towards power users who want to further customize their WSL experience.
- ^ Hillis, Ben (25 July 2019). «MicrosoftDocs/WSL | Build 18947». GitHub. Archived from the original on 26 July 2019. Retrieved 26 July 2019.
- ^ «A Deep Dive Into How WSL Allows Windows to Access Linux Files». Windows Command Line Tools For Developers. 30 May 2019. Retrieved 24 June 2019.
- ^ Jujjuri, Venkateswararao; Van Hensbergen, Eric; Liguori, Anthony; Pulavarty, Badari (13–16 July 2010). «VirtFS—A virtualization aware File System pass-through» (PDF). Linux Symposium.
- ^ «Comparing WSL 1 and WSL 2». Microsoft Learn. 4 October 2022. Retrieved 18 October 2022.
- ^ «Windows 11 WSL2 Performance is Quite Competitive Against Ubuntu 20.04 LTS / Ubuntu 21.10».
Further reading[edit]
- Barnes, Hayden (2021). Pro Windows Subsystem for Linux (WSL): Powerful Tools and Practices for Cross-Platform Development and Collaboration. Apress. ISBN 978-1484268728.
- Leeks, Stuart (2020). Windows Subsystem for Linux 2 (WSL 2) Tips, Tricks, and Techniques: Maximise productivity of your Windows 10 development machine with custom workflows and configurations. Packt Publishing. ISBN 978-1800562448.
- Singh, Prateek (2020). Learn Windows Subsystem for Linux: A Practical Guide for Developers and IT Professionals. Apress. ISBN 978-1484260371.
External links[edit]
- WSL on Microsoft Learn
- WSL on GitHub
- WSL2-Linux-Kernel on GitHub
- Brown, Pete (22 July 2016). «Fun with the Windows Subsystem for Linux». Windows Developer Blog. Microsoft.
Как настроить полноценное окружение разработчика, привыкшего к Linux и Mac OS X.
Традиционно считается, что разработчики (в особенности связанные с бэкенд-разработкой) предпочитают использовать unix-like-системы. Причиной тому было немало. Ситуация начала несколько меняться в 2017 году — именно тогда вышел первый стабильный релиз Windows Subsystem for Linux (также известен под более ранним названием BashOnWindows), который дал разработчикам то, чего они так давно ждали, — полноценный Linux в качестве приложения в Windows!
Но не всё оказалось так просто — лишь к концу 2018 года WSL стало возможно использовать полноценно, при этом способ отнюдь не очевиден. О нём и пойдёт речь.
Конечная цель
Для начала пара слов о том, что такое вообще Windows Subsystem for Linux, он же WSL в сокращённом варианте. Это прослойка между ядром Windows и приложениями для Linux, которая позволяет преобразовывать системные вызовы к ядру Linux в вызовы к ядру Windows. Благодаря тому, что виртуализация практически отсутствует, такое решение работает быстрее традиционной виртуализации, где эмулируется целый компьютер, как это происходит в Oracle VirtualBox и VMWare Player.
Кроме того, WSL включает в себя целый ряд утилит для интеграции с Windows — пути в файловой системе автоматически преобразовываются в нужный формат, из-под Linux можно запускать приложения в Windows (но не наоборот!), Linux в WSL имеет доступ ко всем портам и сервисам в Windows.
Для разработчика основное применение WSL сразу же видится в развёртывании среды разработки именно там. Всё же установка многих языков, компиляторов и интерпретаторов, утилит происходит в Linux куда проще — часто одной командой из репозитория. Да и привычная консоль под рукой.
В статье будет рассматриваться именно настройка среды разработки в WSL — для примера возьмём небольшой проект, написанный на Python/Angular/Go (а почему бы и нет?), разрабатываемый в Visual Studio Code. Однако описанные рекомендации в целом подойдут для любого другого редактора или IDE.
Установка для Windows 10 x64
Важный момент: WSL официально поддерживается только в Windows 10 x64, начиная с Anniversary Update. Если у вас иная версия — альтернативное решение представлено в следующем разделе.
- Включить поддержку Windows Subsystem for Unix, открыв PowerShell от администратора и выполнив команду:
PS C:Windowssystem32> Enable-WindowsOptionalFeature -Online -FeatureName Microsoft-Windows-Subsystem-Linux
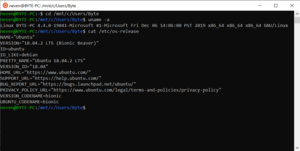
- Если у вас установлена десктопная редакция Windows 10: зайти в Microsoft Store и установить необходимый вам дистрибутив. Для нашего эксперимента будет использована Ubuntu 18.04 LTS. Затем вы сможете запустить ваш дистрибутив через меню «Пуск».
- Если у вас установлена иная редакция Windows, без Microsoft Store (например, Windows 10 LTSC либо Windows Server): в PowerShell выполнить следующие команды:
PS C:Windowssystem32> cd ~
PS C:Userssomebody> Rename-Item .Ubuntu.appx .Ubuntu.zip
PS C:Userssomebody> Expand-Archive .Ubuntu.zip .Ubuntu
PS C:Userssomebody> cd .Ubuntu
PS C:Userssomebody> .ubuntu1804.exe
При первом запуске необходимо задать ваши логин и пароль.
Далее уже вам откроется консоль с Ubuntu.
Установка для 32-битных редакций Windows 10 и Windows 7, 8 и 8.1
К сожалению, на этих редакциях WSL не поддерживается. Но мы можем без особого труда заменить его Vagrant — мощной утилитой для конфигурирования виртуальных машин. Vagrant работает поверх других сред виртуализации: VirtualBox, VMWare Player или Microsoft Hyper-V. Поэтому стоит понимать, что такой вариант будет по умолчанию медленнее, нежели WSL. А в случае с VirtualBox значительно медленнее из-за файловой системы vboxsf.
Установить Vagrant можно с официального сайта. Также вам потребуется VirtualBox и Git. После этого создайте папку для вашей виртуальной машины, в ней создайте файл Vagrantfile со следующим содержимым:
Vagrant.configure(«2») do |config|
config.vm.box = «bento/ubuntu-18.04»
config.vm.synced_folder «c:/», «/windows»
# Необходимо указать для каждого порта, который вы хотите расшарить из ВМ или в ВМ
config.vm.network :forwarded_port, host: 5432, guest: 5432
config.vm.provider «virtualbox» do |vb|
vb.memory = 2048
end
end
После чего в том же PowerShell или cmd выполните команду:
vagrant up
После загрузки, настройки и запуска виртуальной машины вы попадёте в консоль Linux. Ура!
Устанавливаем всякие скучные вещи
Разворачиваем наше окружение под Python/JS/Go.
:~$ sudo apt update
:~$ sudo apt install build-essential
:~$ sudo apt install -y git nodejs golang python-dev libreadline-dev libbz2-dev libssl-dev libsqlite3-dev libxslt1-dev libxml2-dev libffi-dev
:~$ curl -L https://raw.githubusercontent.com/yyuu/pyenv-installer/master/bin/pyenv-installer | bash
:~$ # Инсталлятор попросит вас добавить загрузку pyenv в ~/.bashrc
:~$ source ~/.bashrc
:~$ pyenv install 3.7.2
:~$ pyenv global 3.7.2
Быстро проверяем работоспособность версий и, собственно, версии:
:~$ nodejs -v
v8.10.0
:~$ go version
go version go1.10.4 linux/amd64
:~$ python -V
Python 3.7.2
:~$
Неужели всё уже работает?
Конечно нет.
Сразу стоит отметить важный факт: ни Visual Studio Code, ни Sublime Text, ни даже ваша любимая IDE ничего не знают о существовании WSL. Из коробки более-менее с ним умеют работать только продукты от JetBrains. Лично мне Visual Studio Code по настройке, скорости работы нравится куда больше (но это текстовый редактор, о чём не стоит забывать).
И единственное, что вы можете сделать в Visual Studio Code, установленной на Windows, — подключить себе WSL вместо стандартного PowerShell в терминале. Это делается в User Settings:
{
«terminal.integrated.shell.windows»: «C:\Windows\System32\wsl.exe»,
# Добавьте сюда иные настройки по вашему усмотрению
}
На этом всё. Про линтер, автодополнение кода из библиотек, подсветку ошибок можете забыть, по крайней мере для Python. Способа решения сообщество ждёт вот уже три года. Сейчас самый простой и действенный способ заставить его работать — установить в WSL.
- Установите MobaXterm и Cmder. Конечно, вы можете по своему выбору заменить их на альтернативные приложения. MobaXterm — мощный SSH-терминал со встроенным X-сервером, что позволяет ему рендерить приложения, которые запускаются на удалённом X-сервере (в данном случае — внутри WSL). Cmder — локальный эмулятор терминала с поддержкой PowerShell, cmd, bash, WSL и не только, с нормальным копипастом.
- Запустите Cmder. По умолчанию он запустит cmd, но при двойном клике на нижнюю панель покажет окно, где есть возможные варианты.
- Нам нужен тот вариант, что отмечен как {WSL::bash}. Он запустит в новой вкладке консоль внутри WSL.
- Запустите MobaXterm. Он сразу же увидит WSL, установленную в системе. Для запуска X-сервера нажмите выделенную на скриншоте кнопку.
- Настроим WSL для запуска GUI-приложений. Для этого откройте файл ~/.bashrc и допишите в него:
export DISPLAY=:0
- После этого выполните команду source ~/.bashrc для применения изменений.
- Не обязательно, но желательно установить XFCE (или другой DE на ваш вкус), а также поставить шрифты, иначе от внешнего вида VS Code у вас, возможно, вытекут глаза. По крайней мере, люди жалуются.
:~$ sudo apt install -y xfce4
:~$ sudo apt install -y fonts-noto fonts-noto-hinted fonts-noto-mono fonts-noto-unhinted
- Скачайте установщик Visual Studio Code с официального сайта.
- Установите зависимости и сам VS Code:
:~$ sudo apt install libgtk2.0-0 libxss1 libasound2
:~$ sudo dpkg -i <code deb file>
:~$ sudo apt install -f
- Запустите VS Code при помощи команды code.
Вот теперь работает  Ещё более кратко и по сути расписано вот тут.
Однако до совершенства есть ещё один штрих.
{
…
«window.titleBarStyle»: «native»,
…
}
Добавьте приведённую выше настройку в User Settings. В противном случае окно VS Code не будет ресайзиться.
А ты ещё докажи, что работает
Разворачивается оно стандартно для подобного рода проектов.
# You are on a project root
:~$ python -m venv env/
:~$ source env/bin/activate
:~$ pip install -r requirements.txt
:~$ cd frontend
:~$ npm install
:~$ ng build outDir=../backend/microblog/static
:~$ cd ../backend
:~$ python manage.py runserver
Отличия в настройке между Vagrant и WSL
Единственное существенное различие в контексте статьи — необходимость пробрасывать порты в хостовую файловую систему. По умолчанию Vagrant поднимает SSH-туннель на порту 2222 — именно туда вам будет необходимо логиниться из Cmder и добавить соответствующее соединение в MobaXterm.
Более подробно об использовании Vagrant с MobaXterm можно прочитать по ссылке.
Итоги
Но стоит заметить, что даже подобные извращения могут помочь многим людям, вынужденно сталкивающимися с… не всегда очевидным поведением новой технологии от Microsoft.
Table of Contents
- Introduction
- POSIX Subsystem
- File Systems
- Implementation
- Application Compliance to POSIX.1
- Files Used
- Disabling the POSIX Subsystem
- Windows Services for UNIX
- Community Resources
- Blogs
- TechNet Pages
- Microsoft Knowledge Base Articles
- Technical Articles
- See Also
- Documents
- Books
Introduction
Microsoft Windows supports the execution of UNIX programs since Windows NT 4.0: the Windows support for UNIX started by providing POSIX compatibility and continued with the availability of the Windows Services for UNIX or Subsystem for UNIX-based Applications
(SUA) provided by Windows Vista and Windows Server 2008 and by Windows 7 and Windows Server 2008 R2. This article will briefly describe the feature of these subsystems thus providing an overview of the evolution of the UNIX support in the Windows versions.
With Windows 8.1 and Windows Server 2012 R2 SUA is
no longer available.
↑
Back to top
POSIX Subsystem
Microsoft POSIX subsystem is one of 3 subsystems of several operating systems from the Windows NT family (together with OS/2 and Windows subsystems). Microsoft Windows
implements only the first version of the POSIX standards, namely
POSIX.1. The official code of POSIX.1 is ISO/IEC 9945-1:1990 or
IEEE standard 1003-1:1990. The subsystem was included because of 1980s US federal government’s requirements listed in Federal Information Processing Standard (FIPS) 151-2. Versions Windows NT 3.5, Windows NT 3.51 and Windows NT 4 were certified
as compliant with the FIPS 151-2. The runtime environment of the subsystem is provided by two files:
psxss.exe and psxdll.dll. A POSIX application uses
psxdll.dll to communicate with the subsystem while communicating with
posix.exe to provide display capabilities on the Windows desktop. Because only the first version of POSIX (POSIX.1) is implemented, a POSIX application cannot create a thread or window, nor can it use RPC or socket. Instead of implementing the later versions
of POSIX, Microsoft offers Windows Services for UNIX. Starting with Windows XP, the POSIX subsystem is not included as part of standard Windows distributions and has been replaced by Interix.
The Windows NT POSIX subsystem is designed to run POSIX applications and meets the requirements of POSIX.1. POSIX (Portable Operating System Interface for Computing Environments) is a set of standards being drafted by the Institute of Electrical and Electronic
Engineers (IEEE). It defines various aspects of an operating system, including topics such as programming interface, security, networking and graphical interface. So far, only one of these standards, POSIX.1 (also called IEEE Standard 1003.1-1990), has made
the transition from draft to final form and gained a base of customer acceptance. POSIX.1
defines C-language API calls between applications and the operating system. It is
an API based on ideas drawn from the UNIX file system and process model. Because POSIX.1 addresses only API-level issues, most applications written to the POSIX.1 API must rely on non-POSIX operating system extensions to provide services such
as security and networking. POSIX applications need certain file-system functionality, such as support for case-sensitive filenames and support for files with multiple names (or hard links). The new file system, NTFS, supports these POSIX requirements. Any
POSIX application requiring access to file system resources must have access to an NTFS partition; POSIX applications that do not access file system resources can run on any supported file system.
POSIX.1 is a source-level standard: it does not provide any binary compatibility.
↑
Back to top
File Systems
POSIX requires a certain amount of functionality from the file system, such as the ability for a file to have more than one name (or hard links) and case-sensitive file naming: neither FAT nor HPFS supports these features, which is another reason why a new
file system was required for Windows NT.
NTFS supports both hard links and case-sensitive naming. If you want to run in a POSIX-conforming environment, you need at least one NTFS disk partition on your computer. You can run POSIX applications from any Windows NT file system. If the application does
not need to access the file system, the application will run with no problems; however, if the application does require access to the file system, it might not behave correctly on a non-NTFS disk partition.
↑
Back to top
Implementation
The POSIX subsystem is implemented in Windows NT as a protected server. POSIX applications communicate with the POSIX subsystem through
a message-passing facility in the Executive known as a Local Procedure Call (LPC).
Figure 1 depicts the POSIX Subsystem implementation.

Figure 1: POSIX subsystem implementation.
The POSIX subsystem and each POSIX application run in a protected address space that protects them from any other application that might be running on Windows NT. POSIX application are preemptively multitasked with respect to each other
and with respect to other applications running in the system.
↑
Back to top
Application Compliance to POSIX.1
POSIX.1 has four categories of compliance, ranging from very strict to very loose. Windows NT 4.0 supports strictly conforming POSIX.1 applications and ISO/IEC conforming POSIX.1 applications. Windows NT supports the latter by virtue of
the fact that only 110 of the 149 functions of standard C are part of POSIX.1 and standard C is itself an ISO standard (ISO/IEC 9899).
The POSIX.1 categories of compliance are the following
- a strictly conforming POSIX.1 application requires only the facilities described in the POSIX.1 standard and applicable language standards. This type of application accepts the following conditions:
- any behavior described in ISO/IEC 9945-1 as unspecified or implementation-defined;
- symbolic constants;
- any value in the range permitted in ISO/IEC 9945-1;
- an ISO/IEC-conforming POSIX.1 application is one that uses
only the facilities described in ISO/IEC 9945-1 and approved conforming language bindings for the ISO or IEC standard. This type of application
must include a statement of conformance that documents all options and limit dependencies and all other ISO or IEC standards used. This level of conformance is not as strict as the previous one: it allows a POSIX.1 application to make use of
other ISO or IEC standards, such as GKS and it allows POSIX.1 applications within this level to require options or limit values beyond the minimum; - a <National Body> conforming POSIX.1 application differs from an ISO/IEC-conforming POSIX.1 application in that this type of application may also use specific standards of a single ISO/IEC organization, such as ANSI or British Standards
Institute (BSI). This type of application must include a statement of conformance that documents all options and limit dependencies and all other <National Body> standards used; - a conforming POSIX.1 application using extensions is an application that differs from a conforming POSIX.1 application only because it
uses nonstandard facilities that are consistent with ISO/IEC 9945-1; such an application must fully document its requirements for these extended facilities. This is the
lowest level of conformance: almost any C program could satisfy this with the appropriate documentation.
POSIX applications can be started from a Windows NT console window (command prompt), My Computer, the Windows NT Explorer, or by invocation from within another POSIX application.
↑
Back to top
Files Used
As mentioned before, the POSIX subsystem uses three files: psxss.exe is the POSIX subsystem server, the main component of the subsystem;
posix.exe is the POSIX console session manager, responsible for handling communications between POSIX and the Windows Executive;
psxdll.dll is the POSIX dynamic library that a POSIX application can use to communicate with the POSIX server.
Figure 2 depicts the POSIX Subsystem files interaction.

Figure 2: the POSIX Subsystem files interaction.
↑
Back to top
Disabling the POSIX Subsystem
There is little to gain by disabling the POSIX subsystem in Windows NT because POSIX is only started once a POSIX-based application is started. There are no memory savings or performance increases.
If you want to disable the POSIX subsystem, you can do so by opening the Registry Editor, going to the
HKEY_LOCAL_MACHINESYSTEMCurrentControlSetControlSession ManagerSubsystems subkey and deleting the POSIX value.
↑
Back to top
Windows Services for UNIX
Windows Services for UNIX (SFU) or Subsystem for UNIX-based Applications (SUA) is a software package produced by Microsoft which provides
a Unix subsystem and other parts of a full Unix environment on Windows NT and some of its immediate successor operating-systems. It was an extension and replacement of the minimal Microsoft POSIX subsystem from Windows NT.
SFU 1.0 and 2.0 (NT 4.0 and Windows 2000) used the MKS Toolkit; starting with
SFU 3.0 (Windows XP; 1999), SFU used the Interix subsystem, which was acquired by Microsoft in 1999 from US-based Softway Systems as part of an asset acquisition; these are available free from Microsoft as a download.
Windows Server 2003 R2 included SFU 3.5 (on Disk 2), and renamed it to Subsystem for UNIX-based Applications (SUA). In Windows Server 2008 and high-end versions of Windows Vista (Enterprise and Ultimate), a minimal SUA is included, but most of the utilities
must again be downloaded from Microsoft’s web site.
Like the Microsoft POSIX subsystem in Windows NT that it replaces, Interix is not an emulation of a Unix kernel, but rather
an implementation of a user-mode subsystem running directly on top of the Windows NT kernel. Windows Services for Unix and Subsystem for Unix-based Applications provide header files and libraries that make it easier to recompile or port Unix
applications for use on Windows; they do not make Unix binaries compatible with Windows binaries: it is best thought of as a distinct Unix-like platform.
↑
Back to top
Community Resources
Blogs
- Services for UNIX MSDN Blog
TechNet Pages
- Subsystem for UNIX-based Applications
Microsoft Knowledge Base Articles
- Background Information on POSIX and XPG (KB93354)
- Limitations of POSIX Applications on Windows NT (KB149902)
- HOW TO: Understand Compatibility for a UNIX-to-Windows Migration (KB323952)
Technical Articles
- InterOp: Windows Services for UNIX by Charlie Russel (TechNet Magazine, Spring 2005)
See Also
NOTE: this section provides links that are external to the TechNet Wiki.
Documents
- ISO/IEC 9945-1:1990
Information technology — Portable Operating System Interface (POSIX) — Part 1: System Application Program Interface (API) [C Language]
Books
- Microsoft Windows NT Workstation 4.0 Resource Kit
(Chapter 5:»Windows NT Workstation 4.0 Architecture«, Chapter 29:»POSIX Compatibility«) by Microsoft Corporation (Microsoft Press, October 1996) - Inside Windows 2000, 3rd Edition (Chapter 2:»System Architecture«) by David A. Solomon and Mark E. Russinovich (Microsoft Press, August 2000)
- Windows Internals, 4th Edition (Chapter 2:»System Architecture«) by David A. Solomon and Mark E. Russinovich (Microsoft Press, December 2004)
- Windows Internals, 5th Edition (Chapter 2:»System Architecture«) by David A. Solomon, Mark E. Russinovich and Alex Ionescu (Microsoft Press, June
2009)
К написанию данной статьи меня побудил вопрос на Тостере, связанный с WSL. Я, после нескольких лет использования систем на ядре Linux, около полугода назад перешел к использованию Windows 10 на домашнем ПК. Зависимость от терминала и Linux окружения в моей работе практически сразу привели меня к вопросу: или ставить виртуалку или попробовать WSL. Я выбрал второе, и остался вполне доволен.
Под катом я расскажу как установить и настроить WSL, на какие я наткнулся проблемы и ограничения, как запускать Linux приложения из Windows и наоборот, а так же как интегрировать элементы окружения Xfce в окружение рабочего стола Windows.

Никогда не думал, что однажды вернусь на Windows, но повод попробовать мне дали стечения обстоятельств: жена, далекая от IT, дергала почти каждый раз, когда у нее возникала необходимость воспользоваться компом; проснулась ностальгия по одной игре, но она никак не хотела адекватно работать под wine; а тут еще мне подарили коробочную Windows 10 Pro. WSL я поставил чуть ли не сразу после установки системы, поигрался несколько вечеров, понял, что продукт для моих задач годный, но хочется более привычный терминал и вообще некоторых удобств.
Установка WSL и дистрибутива
Сразу оговорюсь, в интернете можно найти описание установки с помощью выполнения команды lxrun /install в командной строке или консоли PowerShell. Данный способ больше не работает (после выхода WSL в стабильный релиз). Насколько мне известно, сейчас WSL можно установить только из Microsoft Store вместе с предпочитаемым дистрибутивом.
Так же отмечу, что когда установку производил я, на выбор были доступны дистрибутивы OpenSUSE, SUSE Linux Enterprise и Ubuntu 16.04 — последний я и установил. Сейчас также доступны Ubuntu 18.04, Debian 9 и Kali Linux, возможно появятся и другие дистрибутивы. Действия по установке могут отличаться. Так же, часть проблем описанных в статье может быть уже исправлена.
Находим в магазине желаемый дистрибутив и устанавливаем. Установка пройдет быстро, так как скачает только эмулятор ядра Linux и утилиту для запуска подсистемы, которая окажется в системной папке в трех экземплярах: wsl.exe, bash.exe и ubuntu.exe (вместо ubuntu будет имя Вашего дистрибутива). Все они равнозначны и делают одно и то же — запускают собственный эмулятор терминала, в нем linux’овый bash работающий под эмулятором ядра. При первом же запуске нас попросят придумать логин и пароль для пользователя по умолчанию, а после произойдет непосредственно установка дистрибутива. В качестве пользователя по умолчанию указываем root без пароля — это потребуется для дальнейших шагов. Безопасность не пострадает, кроме того при подготовке материалов к статье, в англоязычном туториале, я наткнулся на информацию, что новые версии WSL теперь делают пользователем по умолчанию root без пароля без лишних вопросов.
Дожидаемся установки. Далее первым делом стоит обновить зеркала apt на ближайшие. Для этого понадобится CLI текстовый редактор. В комплекте только vi, я же больше предпочитаю nano, поэтому ставлю его:
apt install nanosudo вводить не требуется, так как мы уже под root’ом. Отредактируем файл /etc/apt/sources.list:
nano /etc/apt/sources.listУ меня лучше всего работают зеркала Яндекса, поэтому мой файл выглядит так:
deb http://mirror.yandex.ru/ubuntu/ xenial main universe restricted
deb-src http://mirror.yandex.ru/ubuntu/ xenial main universe  restricted

deb http://mirror.yandex.ru/ubuntu/ xenial-security main universe restricted
deb-src http://mirror.yandex.ru/ubuntu/ xenial-security main universe restricted

deb http://mirror.yandex.ru/ubuntu/ xenial-updates main universe restricted
deb-src http://mirror.yandex.ru/ubuntu/ xenial-updates main universe restricted
Нажимаем Ctrl+O для сохранения и Ctrl+X для выхода. Теперь можно обновить систему до актуального состояния:
apt update && apt upgradeПосле обновления можно создать нашего основного пользователя. В данной статье я назову его user1, Вы же можете задать привычное имя:
addgroup --gid 1000 user1
adduser --home /home/user1 --shell /bin/bash --uid 1000 -G user1,sudo user1
Далее переходим в папку юзера, зайдем под ним, установим пароль и отредактируем файл ~/.bashrc:
cd /home/user1
su user1
passwd
nano .bashrc
Мой базовый .bashrc выглядит так
# If not running interactively, don't do anything
case $- in
    *i*) ;;
      *) return;;
esac

# don't put duplicate lines or lines starting with space in the history.
# See bash(1) for more options
HISTCONTROL=ignoreboth

# append to the history file, don't overwrite it
shopt -s histappend

# for setting history length see HISTSIZE and HISTFILESIZE in bash(1)
HISTSIZE=1000
HISTFILESIZE=2000

# check the window size after each command and, if necessary,
# update the values of LINES and COLUMNS.
shopt -s checkwinsize

# If set, the pattern "**" used in a pathname expansion context will
# match all files and zero or more directories and subdirectories.
#shopt -s globstar

# make less more friendly for non-text input files, see lesspipe(1)
[ -x /usr/bin/lesspipe ] && eval "$(SHELL=/bin/sh lesspipe)"

# set variable identifying the chroot you work in (used in the prompt below)
if [ -z "${debian_chroot:-}" ] && [ -r /etc/debian_chroot ]; then
    debian_chroot=$(cat /etc/debian_chroot)
fi

# set a fancy prompt (non-color, unless we know we "want" color)
case "$TERM" in
    xterm|xterm-color|*-256color) color_prompt=yes;;
esac

# uncomment for a colored prompt, if the terminal has the capability; turned
# off by default to not distract the user: the focus in a terminal window
# should be on the output of commands, not on the prompt
#force_color_prompt=yes

if [ -n "$force_color_prompt" ]; then
    if [ -x /usr/bin/tput ] && tput setaf 1 >&/dev/null; then
    # We have color support; assume it's compliant with Ecma-48
    # (ISO/IEC-6429). (Lack of such support is extremely rare, and such
    # a case would tend to support setf rather than setaf.)
    color_prompt=yes
    else
    color_prompt=
    fi
fi

if [ "$color_prompt" = yes ]; then
    if [[ ${EUID} == 0 ]] ; then
        PS1='${debian_chroot:+($debian_chroot)}[33[01;31m]h[33[01;34m] W $[33[00m] '
    else
        PS1='${debian_chroot:+($debian_chroot)}[33[01;32m]u@h[33[00m] [33[01;34m]w $[33[00m] '
    fi
else
    PS1='${debian_chroot:+($debian_chroot)}u@h w $ '
fi
unset color_prompt force_color_prompt

# If this is an xterm set the title to user@host:dir
case "$TERM" in
xterm*|rxvt*)
    PS1="[e]0;${debian_chroot:+($debian_chroot)}u@h wa]$PS1"
    ;;
*)
    ;;
esac

# enable color support of ls and also add handy aliases
if [ -x /usr/bin/dircolors ]; then
    test -r ~/.dircolors && eval "$(dircolors -b ~/.dircolors)" || eval "$(dircolors -b)"
    alias ls='ls --color=auto'
    #alias dir='dir --color=auto'
    #alias vdir='vdir --color=auto'

    alias grep='grep --color=auto'
    alias fgrep='fgrep --color=auto'
    alias egrep='egrep --color=auto'
fi

# colored GCC warnings and errors
#export GCC_COLORS='error=01;31:warning=01;35:note=01;36:caret=01;32:locus=01:quote=01'

# some more ls aliases
alias ll='ls -alF'
alias la='ls -A'
alias l='ls -CF'

# Add an "alert" alias for long running commands.  Use like so:
#   sleep 10; alert
alias alert='notify-send --urgency=low -i "$([ $? = 0 ] && echo terminal || echo error)" "$(history|tail -n1|sed -e '''s/^s*[0-9]+s*//;s/[;&|]s*alert$//''')"'

# Alias definitions.
# You may want to put all your additions into a separate file like
# ~/.bash_aliases, instead of adding them here directly.
# See /usr/share/doc/bash-doc/examples in the bash-doc package.

if [ -f ~/.bash_aliases ]; then
    . ~/.bash_aliases
fi

# enable programmable completion features (you don't need to enable
# this, if it's already enabled in /etc/bash.bashrc and /etc/profile
# sources /etc/bash.bashrc).
if ! shopt -oq posix; then
  if [ -f /usr/share/bash-completion/bash_completion ]; then
    . /usr/share/bash-completion/bash_completion
  elif [ -f /etc/bash_completion ]; then
    . /etc/bash_completion
  fi
fi
Все, подсистема готова к использованию… почти…
Установка X-сервера, Xfce и прочих GUI’шных приложений
Первая же проблема, на которую я натолкнулся — bash-completion в предлагаемом эмуляторе терминала работал, мягко говоря, некорректно. Кроме того, данный эмулятор не умеет вкладки, а каждый его экземпляр запускает все в новом пространстве процессов, с отдельным init’ом (который кстати не заменить). Мне захотелось нормальный эмулятор терминала, некоторых других GUI приложений, а так же панельку, чтоб это все быстро запускать.
Когда я гуглил этот вопрос, я наткнулся на множество проблем, вроде необходимости перевода dbus на tcp протокол. На данный момент всех этих проблем нет. В подсистеме нормально работают unix-domain-socket’ы и все спокойно общается через них.
Первым делом нам понадобится X-сервер, притом установленный в основную систему (в Windows). Лично я использую для этих целей VcXsrv — порт X11 на Windows. Официальный сайт указанный в about самой утилиты его сейчас не предоставляет, поэтому гуглим установщик и устанавливаем все по умолчанию.
Пока идет установка возвращаемся в терминал WSL, командой exit выходим обратно в root’а. Первым делом настроим русские локали:
locale-gen ru_RU
locale-gen ru_RU.UTF-8
update-locale
Далее установим некоторые компоненты Xfce. Можно конечно установить его целиком из мета-пакета, но большинство компонентов нам не понадобится, а модульная архитектура Xfce позволяет нам поставить только необходимое:
apt install -y xfce4-session xfce4-notifyd xfce4-appfinder xfce4-panel xfce4-quicklauncher-plugin xfce4-whiskermenu-plugin xfce4-xkb-plugin xfce4-settings xfce4-terminal xfce4-taskmanager mousepadЗапускать каждый раз окружение руками не очень удобно, поэтому я автоматизировал данный процесс. Для этого в основной системе создадим в удобном для нас месте папку, а в ней 3 файла для запуска:
- config.xlaunch — файл настроек для VcXsrv
<?xml version="1.0" encoding="UTF-8"?> <XLaunch WindowMode="MultiWindow" ClientMode="NoClient" LocalClient="False" Display="0" LocalProgram="xcalc" RemoteProgram="xterm" RemotePassword="" PrivateKey="" RemoteHost="" RemoteUser="" XDMCPHost="" XDMCPBroadcast="False" XDMCPIndirect="False" Clipboard="True" ClipboardPrimary="True" ExtraParams="" Wgl="True" DisableAC="False" XDMCPTerminate="False" /> -
x-run.vbs — WSL всегда запускается со своим эмулятором терминала, если его закрыть — завершатся все его дочерние процессы. Чтоб данное окно не мозолило глаза, неплохо его запускать скрытым. К счастью в Windows встроен интерпретатор VBScript, который позволяет это сделать в одну строчку:
WScript.CreateObject("Shell.Application").ShellExecute "wsl", "cd /home/user1; DISPLAY=:0 LANG=ru_RU.UTF-8 su user1 -c xfce4-session", "", "open", 0Поясню, что здесь происходит. Мы говорим VBscript выполнить приложение wsl с параметром
cd /home/user1; DISPLAY=:0 LANG=ru_RU.UTF-8 su user1 -c xfce4-session, папка запуска нам не важна, поэтому пустая строка, действие open — запуск, 0 — скрытый режим. Самому wsl мы отдаем команду на выполнение: переход в папку пользователя, затем с установкой переменных окружения DISPLAY (дисплей X-сервера) и LANG (используемая локаль) мы запускаем xfce4-session от имени нашего пользователя user1 (благодаря команде su) - start.bat — batch файл для запуска, по желанию его можно засунуть в автозагрузку
start config.xlaunch
wscript x-run.vbs
Далее можем запустить наш start.bat и настроить панель Xfce под себя. Замечу, что здесь я наткнулся на еще одну проблему — панель прекрасно отображается поверх всех окон, но вот выделить себе место, как панель на рабочем столе Windows она не может. Если кто знает решение данной проблемы, поделитесь в комментариях.
Ну и под конец данной части, скриншот моего рабочего стола:

Взаимодействие окружения Windows и окружения подсистемы Linux
Запускать Linux приложения напрямую из Windows можно через те же 3 команды — bash, wsl или ubuntu. Не забываем, что по умолчанию запуск идет от root, поэтому стоит понижать привилегии через su, так же нужно не забывать передавать переменную окружения DISPLAY=:0 если приложению требуется X-сервер. Так же нужно менять папку, из которой должно работать приложение, через cd внутри WSL. Пример, посчитаем md5 для file.txt на диске D средствами Linux’овой md5sum:
wsl md5sum < d:file.txtДоступ к файловой системе Linux так же имеется, лежит она в %localappdata%PackagesCanonicalGroupLimited.UbuntuonWindows_79rhkp1fndgscLocalStaterootfs. Читать таким образом файлы можно, а вот писать — не желательно, можно поломать файловую систему. Думаю проблема в том, что Windows не умеет работать с правами и владельцами файловой системы Linux.
Из Linux так же можно запускать Windows приложения. Просто запускаем exe-шник и он выполнится в основной системе.
Диски Windows монтируются в /mnt в соответствии со своими буквами в нижнем регистре. Например диск D будет смонтирован в /mnt/d. Из Linux можно свободно читать и писать файлы Windows. Можно делать на них симлинки. Права у таких файлов всегда будут 0777, а владельцем будет root.
Сетевой стек у подсистемы общий с Windows. Сервер поднятый в Linux будет доступен на localhost в Windows и наоборот. Однако unix-domain-socket для Windows будет просто пустым файлом, работать с этим можно только внутри Linux. Выход во внешнюю сеть у Linux так же есть, в том числе можно слушать порты, если этого не запрещает фаервол.
ifconfig в Linux и ipconfig в Windows выдают одинаковую информацию о сетевых интерфейсах.
Из диспетчера задач Windows можно спокойно прибить процесс внутри подсистемы Linux. Однако Linux увидит только свои процессы.
Особенности, ограничения и подводные камни
Ядро Linux в WSL не настоящее. Это всего лишь прослойка-эмулятор, которая часть Linux-специфичных задач выполняет сама, а часть проксирует напрямую в ядро winNT. Большая часть api в нем реализована, но не все. Свое ядро собрать не получится, как и не получится подключить модули ядра (.ko, Kernel Object).
Init процесс у WSL тоже свой и заменить его, например, на system.d не выйдет. У меня давно есть желание написать менеджер демонов на go, который бы работал с файлами юнитов system.d и предоставлял бы схожий интерфейс, да все руки не доходят.
Нет поддержки openFUSE, соответственно примонтировать виртуальную или удаленную файловую систему не получится. Так же нельзя сделать mount из файла, mount вообще ничего кроме bind здесь, похоже, не умеет.
Так же нет никакой возможности разбить файловую систему Linux на несколько разделов/дисков.
Прямой доступ к железу практически отсутствует. Все таки мы находимся в песочнице Windows, а не в полноценном Linux. /dev и /sys заметно пустуют, в них лишь проц да виртуальные устройства. Доступ к GPU — только через X-сервер, напрямую — никак, так что нейросети обучать придется в Windows.
В JS разработке столкнулся с тем, что electron.js отказался запускаться в WSL, пришлось дублировать окружение node.js в Windows.
Итоги
Статья получилась довольно длинной, надеюсь, что она окажется еще и полезной.
WSL для меня лично оказался инструментом вполне юзабельным, решающим мои задачи fullstack backend разработчика. Виртуалка с Linux за полгода так и не понадобилась. По общим ощущениям Windows+WSL намного функциональнее, чем Linux+Wine.
Пока писал статью, обнаружил, что в Microsoft Store появилась сборка WSL с Debian 9.3, данный дистрибутив мне более симпатичен, чем Ubuntu, поэтому буду пробовать ставить.
Welcome to WSLg
WSLg is short for Windows Subsystem for Linux GUI and the purpose of the project is to enable support for running Linux GUI applications (X11 and Wayland) on Windows in a fully integrated desktop experience.
WSLg provides an integrated experience for developers, scientists or enthusiasts that prefer or need to run Windows on their PC but also need the ability to run tools or applications which works best, or exclusively, in a Linux environment. While users can accomplish this today using a multiple system setup, with individual PC dedicated to Windows and Linux, virtual machine hosting either Windows or Linux, or an XServer running on Windows and projected into WSL, WSLg provides a more integrated, user friendly and productive alternative.
WSLg strives to make Linux GUI applications feel native and natural to use on Windows. From integration into the Start Menu for launch to appearing in the task bar, alt-tab experience to enabling cut/paste across Windows and Linux applications, WSLg enables a seamless desktop experience and workflow leveraging Windows and Linux applications.

Installing WSLg
Pre-requisites
-
WSLg is supported on both Windows 11 and Windows 10. Windows 10 users must ensure their Windows 10 installation is fully up to date by visiting Windows Update and installing all available updates.
-
WSLg is available both as part of the Windows 11 WSL inbox support as well as through the Windows Subsystem for Linux from the Microsoft Store. It is highly recommended to use the Microsoft Store version of WSL, which supports both Windows 10 and Windows 11, and contains the most up to date version of WSL and WSLg.
-
Make sure to update your graphics driver to the latest driver available from your GPU manufacturer’s website to benefit from GPU acceleration in your WSL environment.
Install instructions (Fresh Install — no prior WSL installation)
From a command prompt with administrator privileges, run the command wsl --install -d Ubuntu, then reboot if prompted.
After reboot the installation will continue. You’ll be asked to enter a username and password. These will be your Linux credentials, they can be anything you want and don’t have to match your Windows credentials.
Voilà! WSL and WSLg are installed and ready to be used!
Install instructions (Existing WSL install)
If you have an existing WSL installation without WSLg and want to update to the latest version of WSL which includes WSLg, run the command wsl --update from an elevated command prompt.
Please note that WSLg is only compatible with WSL 2 and will not work for WSL distribution configured to work in WSL 1 mode. Verify that your Linux distro is configured for running in WSL 2 mode, if not switch to WSL 2. While you can continue to run Linux distro in WSL 1 mode after installing WSLg if you so desired, a distro configured to run in WSL 1 mode will not be able to communicate with WSLg and will not be able to run GUI applications.
You can list your currently installed distro and the version of WSL they are configured for using the following command from an elevated command prompt.
If running in version 1 mode, switch to version 2. This can take a while.
wsl --set-version _distro_name_ 2
Restart WSL by running this command from an elevated command prompt, make sure to save any pending work first:
Updating WSL + WSLg
To update to the latest version of WSL and WSLg released for preview, simply run wsl --update from an elevated command prompt or powershell.
You’ll need to restart WSL for the changes to take effect. You can restart WSL by running wsl --shutdown from an elevated command prompt. If WSL was currently running, it will shutdown, make sure to first save any in progress work! WSL will be automatically restarted the next time you launch a WSL application or terminal.
First Launch
If you have installed the Ubuntu Linux distro per these instructions, you’ll find an Ubuntu icon in your start menu, launch it. This will launch the WSL 2 VM, launch the Ubuntu WSL distro in that VM and give you a terminal to interact with it. Voilà! You’re running Linux on Windows!
If you would like to explore additional Linux distributions built for WSL, you can use the wsl --list --online command from an elevated command prompt to enumerate the list of available distributions for your system. You can have multiple Linux distributions installed within WSL and they will happily coexist side-by-side, so don’t be scared to experiment and try things out.
Congrats you are done and ready to use GUI apps!
Install and run GUI apps
If you want to get started with some GUI apps, you can run the following commands from your Linux terminal to download and install some popular applications. If you are using a different distribution than Ubuntu, it may be using a different package manager.
## Update list of available packages
sudo apt update

## Gedit
sudo apt install gedit -y

## GIMP
sudo apt install gimp -y

## Nautilus
sudo apt install nautilus -y

## VLC
sudo apt install vlc -y

## X11 apps
sudo apt install x11-apps -y

## Google Chrome
cd /tmp
sudo wget https://dl.google.com/linux/direct/google-chrome-stable_current_amd64.deb
sudo dpkg -i google-chrome-stable_current_amd64.deb
sudo apt install --fix-broken -y
sudo dpkg -i google-chrome-stable_current_amd64.deb

## Microsoft Teams
cd /tmp
sudo curl -L -o "./teams.deb" "https://teams.microsoft.com/downloads/desktopurl?env=production&plat=linux&arch=x64&download=true&linuxArchiveType=deb"
sudo apt install ./teams.deb -y

## Microsoft Edge Dev Browser
sudo curl https://packages.microsoft.com/repos/edge/pool/main/m/microsoft-edge-dev/microsoft-edge-dev_101.0.1193.0-1_amd64.deb -o /tmp/edge.deb
sudo apt install /tmp/edge.deb -y
Once these applications are installed, you’ll find them in your start menu under the distro name. For example Ubuntu -> Microsoft Edge. You can also launch these from your terminal window using the commands:
xcalc,xclock,xeyesgimpgedit ~/.bashrcnautilusvlcgoogle-chrometeamsmicrosoft-edge
WSLg Architecture Overview

User Distro
The user distro is essentially the WSL distribution you are using for your Linux work. You can use the command wsl --list --online from an elevated Windows command prompt to list the WSL distributions available on your system. You can run multiple user distros side-by-side and they will peacefully coexist, so don’t be afraid of trying out new distro. Each user distro will be paired with a unique instance of the system distro, but you can still interact across GUI applications running in different user distro seamlessly, such as cut/paste between them. The underlying containerization of the various userspace should be invisible to you.
All user and system distros for a particular Windows user run within the same WSL virtual machine against a single instance of the Linux kernel. Different Windows users on a PC have their own VM and instance of WSL. Your Linux environment is guaranteed to always be your own and not shared with other Windows users on the same PC.
WSLg System Distro
The system distro is where all of the magic happens. The system distro is a containerized Linux environment where the WSLg XServer, Wayland server and Pulse Audio server are running. Communication socket for each of these servers are projected into the user distro so client applications can connect to them. We preconfigure the user distro environment variables DISPLAY, WAYLAND_DISPLAY and PULSE_SERVER to refer these servers by default so WSLg lights up out of the box.
Users wanting to use different servers than the one provided by WSLg can change these environment variables. User can also choose to turn off the system distro entirely by adding the following entry in their .wslconfig file (located at c:usersMyUser.wslconfig). This will turn off support for GUI applications in WSL.
[wsl2]
guiApplications=false
The system distro is based on the Microsoft CBL-Mariner Linux. This is a minimal Linux environment, just enough to run the various pieces of WSLg. For details on how to build and deploy a private system distro please see our build instructions.
Every WSL 2 user distro is paired with its own instance of the system distro. The system distro runs partially isolated from the user distro to which it is paired, in its own NS/PID/UTS namespace but shares other namespaces such as IPC, to allow for shared memory optimization across the boundary.
While a user can get a terminal into the system distro, the system distro is not meant to be used directly by users. Every instance of the system distro is loaded read-only from its backing VHD. Any modifications, made to the in-memory instance of the system distro (such as installing new packages or creating a new file), are effectively discarded when WSL is restarted. The reason we do this is to enable a servicing model for the system distro where we replace the old one with the new one without having to worry about migrating any user data contained within. We use a read-only mapping such that the user gets a well known discard behavior on any changes, every time WSL is restarted, instead of getting a surprise when WSL is serviced.
Although the Microsoft published WSLg system distro as read-only, we do want to encourage folks to tinker with it and experiment. Although we expect very few folks to actually need or want to do that, we’ve shared detailed instruction on our contributing page on how to both build and deploy a private version of the system distro. Most users who just want to use GUI applications in WSL don’t need to worry about those details.
WSLGd
WSLGd is the first process to launch after init. WSLGd launches Weston (with XWayland), PulseAudio and establishes the RDP connection by launching mstsc.exe on the host in silent mode. The RDP connection will remain active and ready to show a new GUI applications being launch on a moment’s notice, without any connection establishment delays. WSLGd then monitors these processes and if they exit by error (say as a result of a crash), it automatically restarts them.
Weston
Weston is the Wayland project reference compositor and the heart of WSLg. For WSLg, we’ve extended the existing RDP backend of libweston to teach it how to remote applications rather than monitor/desktop. We’ve also added various functionality to it, such as support for multi-monitor, cut/paste, audio in/out, etc…
The application integration is achieved through an RDP technology called RAIL (Remote Application Integrated Locally) and VAIL (Virtualized Application Integrated Locally). The main difference between RAIL and VAIL is how pixels are transported across from the RDP server to the RDP client. In RAIL, it is assumed that the Server and Client are running on different physical systems communicating over the network and thus pixels need to be copied over the RDP transport. In VAIL, it is understood that the Server and Client are on the same physical system and can share memory across the Guest/Host VM boundary. We’ve added support for both RAIL and VAIL to the libweston RDP backend, although for WSLg only the VAIL support is effectively used. While building WSLg, we first implemented RAIL while the necessary pieces enabling the switch to VAIL were being developed in parallel. We decided to keep that support in as it could reuse in other interesting scenarios outside of WSLg, for example for remoting application from a Pi running Linux. To share memory between the Linux guest and Windows host we use virtio-fs.
RAIL-Shell
Weston is modular and has various shells today, such as the desktop shell, fullscreen shell (aka kiosk), and automative shell. For WSLg we introduced a new shell called the RAIL Shell. The purpose of the RAIL Shell is to help with the remoting of individual windows from Linux to Windows, as such the shell is very simplistic and doesn’t involve any actual widgets or shell owned pixels.
FreeRDP
Weston leverages FreeRDP to implement its backend RDP Server. FreeRDP is used to encode all communications going from the RDP Server (in Weston) to the RDP Client (mstsc on Windows) according to the RDP protocol specifications. It is also used to decode all traffic coming from the RDP Client into the RDP server.
Pulse Audio Plugin
For audio in (microphone) and out (speakers/headphone) WSLg runs a PulseAudio server. WSLg uses a sink plugin for audio out, and a source plugin for audio in. These plugins effectively transfer audio samples between the PulseServer and the Weston RDP Server. The audio streams are merged by the Weston RDP Server onto the RDP transport, effectively enabling audio in/out in the Weston RDP backend across all scenarios (Desktop/RAIL/VAIL style remoting), including WSLg.
WSL Dynamic Virtual Channel Plugin (WSLDVCPlugin)
WSLg makes use of a custom RDP virtual channel between the Weston RDP Server and the mstsc RDP Client running on the Windows host. This channel is used by Weston to enumerate all Linux GUI applications (i.e. applications which have a desktop file entry of type gui) along with their launch command line and icon. The open source WSLDVCPlugin processes the list of Linux GUI applications sent over this channel and creates links for them in the Windows start menu.
OpenGL accelerated rendering in WSLg
While WSLg works with or without virtual GPU support, if you intend to run graphics intensive applications such as Blender or Gazebo, it is best to be running on a system with a GPU and driver that can support WSL. An overview of our vGPU architecture and how we make it possible for Linux applications to access the GPU in WSL is available at our DirectX blog.
Support for OpenGL accelerated rendering is made possible through the work our D3D team has done with Collabora and the Mesa community on creating a d3d12 Gallium driver.
Support for Linux, including support for WSLg, has been upstream and part of the Mesa 21.0 release. To take advantage of this acceleration, you’ll need to update the version of Mesa installed in your user distro. It also requires that your distro vendor chose to build and publish the new d3d12 Gallium driver to their package repository. We’re working with the various WSL distro publishers to inform them of these changes.
Please note that for the first release of WSLg, vGPU interops with the Weston compositor through system memory. If running on a discrete GPU, this effectively means that the rendered data is copied from VRAM to system memory before being presented to the compositor within WSLg, and uploaded onto the GPU again on the Windows side. As a result, there is a performance penalty proportionate to the presentation rate. At very high frame rates such as 600fps on a discrete GPU, that overhead can be as high as 50%. At lower frame rate or on integrated GPU, performance much closer to native can be achieved depending on the workload. Using a vGPU still provides a very significant performance and experience improvement over using a software renderer despite this v1 limitation.
WSLg Code Flow
WSLg builds on the great work of the Linux community and makes use of a large number of open source projects. Most components are used as-is from their upstream version and didn’t require any changes to light up in WSLg. Some components at the heart of WSLg, in particular Weston, FreeRDP and PulseAudio, required changes to enable the rich WSLg integration. These changes aren’t yet upstream. Microsoft is working with the community to share these contributions back with each project such that, over time, WSLg can be built from upstream component directly, without the need for any WSLg specific modifications.
All of these in-flight contributions are kept in Microsoft mirror repos. We keep these mirrors up to date with upstream releases and stage our WSLg changes in those repos. WSLg pulls and builds code from these mirror repos as part of our Insider WSLg Preview releases. These mirrors are public and accessible to everyone. Curious developers can take a peek at early stages of our contribution by looking at code in those mirrors, keeping in mind that the final version of the code will likely look different once the contribution reaches the upstream project and is adapted based on the feedback receives by the various project owners. All of our mirrors follow the same model. There is a main branch which correspond to the upstream branch at our last synchronization point. We update the main branch from time to time to pick update from the upstream project. There is also a working branch that contains all of our in-flight changes. WSLg is built using the working branch from each of the mirror projects.
The projects that WSLg maintains mirrors for will change over time as in-flight contributions evolve. Once some contributions are upstream, it may no longer be necessary to maintain a mirror, at which point it will be removed and WSLg will start to leverage the upstream version of the component directly. As we light up new functionality in WSLg, new mirrors may be introduced to stage contributions to new components. As such, expect the list of mirrors to change overtime.
At this point in time, we have the following project mirrors for currently in-flight contributions.
| Project | Upstream Repo | WSLg Mirror |
|---|---|---|
| Weston | https://github.com/wayland-project/weston | https://github.com/microsoft/Weston-mirror |
| FreeRDP | https://github.com/FreeRDP/FreeRDP | https://github.com/microsoft/FreeRDP-mirror |
| PulseAudio | https://github.com/pulseaudio/pulseaudio | https://github.com/microsoft/PulseAudio-mirror |
The following is a high level overview of the currently in-flight contributions to each project contained within these mirrors.
Weston
WSLg leverages Weston as the Wayland compositor bridging the Linux and Windows worlds using RDP technology to remote application content between them. Weston already had an RDP backend, but it was limited to single-monitor-desktop remoting. We’ve greatly enhanced that RDP backend to include advanced functionality, such as multi-monitor support, clipboard integration for copy/paste, and audio in/out. We’ve enabled new remoting modes called RAIL (Remote Application Integrated Locally) and VAIL (Virtualized Application Integrated Locally), where individual applications, rather than desktops/monitors, are remoted. These changes are not specific to WSLg; they add functionality to the existing RDP backend and are reusable in other scenarios as well (i.e. using the new Weston RDP backend to remote application running on a Raspberry Pi to another device running an RDP client).
To enable rich integration in WSLg, we’ve also added a small plugin to the RDP backend specific to WSLg. In Weston, the plugin is responsible for attaching to the user distro and searching for installed applications (aka the desktop file). The plugin sends the Windows host a list of all applications found along with their launch commands and icons. On the Windows host, an open source mstsc plugin part of the WSLg project uses that information to create shortcuts for these Linux applications to the Windows Start Menu.
We’ve also fixed several bugs impacting various applications. Generally, these were problems that impacted Weston in all modes and were not specific to WSLg.
FreeRDP
Weston currently uses FreeRDP for its RDP Backend. WSLg continues to leverage FreeRDP and we have added support for a new RDP Protocol/Channel to enable VAIL optimized scenario as well as support for the WSLg plugin. We’ve also fixed various bugs that were impacting interops with mstsc or causing instability.
PulseAudio
For PulseAudio, our contributions focused on a sink and a source plugin that shuffle audio data between PulseAudio and the Weston RDP backend such that the audio data can be integrated over the RDP connection back to the host. There are no changes to the core of PulseAudio outside of adding these new plugins.
Contributing
If you would like to tinker with or contribute to WSLg, please see our CONTRIBUTING page for details, including how to build and run private a version of WSLg.
Reporting a non-security issues
For non-security related issues, such as reporting a bug or making a suggestion for a new feature, please use this project’s issues tracker.
Reporting security issues
To report security issues with WSLg or any other Microsoft products, please follow the instructions detailed here.
Trademarks
This project may contain trademarks or logos for projects, products, or services. Authorized use of Microsoft trademarks or logos is subject to and must follow Microsoft’s Trademark & Brand Guidelines. Use of Microsoft trademarks or logos in modified versions of this project must not cause confusion or imply Microsoft sponsorship. Any use of third-party trademarks or logos are subject to those third-party’s policies.