| title | description | ms.date | author | ms.author | manager | audience | ms.topic | ms.prod | localization_priority | ms.reviewer | ms.custom | ms.technology | adobe-target |
|---|---|---|---|---|---|---|---|---|---|---|---|---|---|
|
Remote Server Administration Tools |
This article describes the tools that are available in Remote Server Administration Tools for Windows. |
09/08/2020 |
Deland-Han |
delhan |
dcscontentpm |
itpro |
troubleshooting |
windows-server |
medium |
kaushika |
sap:server-manager, csstroubleshoot |
windows-server-system-management-components |
true |
Remote Server Administration Tools (RSAT) for Windows
RSAT enables IT administrators to remotely manage roles and features in Windows Server from a computer that is running Windows 10 and Windows 7 Service Pack 1.
Applies to: Windows 10 — all editions, Windows 7 Service Pack 1, Windows Server 2019, Windows Server 2012 R2
Original KB number: 2693643
Introduction
You can’t install RSAT on computers that are running Home or Standard editions of Windows. You can install RSAT only on Professional or Enterprise editions of the Windows client operating system. Unless the download page specifically states that RSAT applies to a beta, preview, or other prerelease version of Windows, you must be running a full (RTM) release of the Windows operating system to install and use RSAT. Some users have found ways of manually cracking or hacking the RSAT MSU to install RSAT on unsupported releases or editions of Windows. This behavior is a violation of the Windows end-user license agreement.
Installing RSAT is similar to installing Adminpak.msi in Windows 2000-based or Windows XP-based client computers. However, there’s one major difference: in Windows 7, the tools aren’t automatically available after you download and install RSAT. Enable the tools that you want to use by using Control Panel. To enable the tools, click Start, click Control Panel, click Programs and Features, and then click Turn Windows features on or off.
In the RSAT releases for Windows 10, tools are again all enabled by default. You can open Turn Windows features on or off to disable tools that you don’t want to use for Windows 7.
:::image type=»content» source=»./media/remote-server-administration-tools/turn-windows-features-on-or-off.svg» alt-text=»The Turn Windows features on or off option in Windows 7.» border=»false»:::
For RSAT in Windows 7, you must enable the tools for the roles and features that you want to manage after you run the downloaded installation package.
[!NOTE]
You can’t do the following changes for RSAT in Windows 8 or later versions.
:::image type=»content» source=»./media/remote-server-administration-tools/enable-rsat-tools-for-roles-and-features.svg» alt-text=»Enable the tools for the roles and features that you want to manage under Remote Server Administration Tools in Windows 7.»:::
If you have to install management tools in Windows Server 2012 R2 for specific roles or features that are running on remote servers, you don’t have to install additional software. Start the Add Roles and Features Wizard in Windows Server 2012 R2 and later versions. Then, on the Select Features page, expand Remote Server Administration Tools, and then select the tools that you want to install. Complete the wizard to install your management tools.
:::image type=»content» source=»./media/remote-server-administration-tools/select-features.svg» alt-text=»Select the tools that you want to install under Remote Server Administration Tools in Windows Server 2012 R2.»:::
Download locations for RSAT
- Remote Server Administration Tools for Windows 10
RSAT for Windows 10 platform and tools support matrix
| Remote Server Administration Tools Technology | Description | Manages technology in Windows Server 2012 R2 | Manages technology in Windows Server 2016 Technical Preview and Windows Server 2012 R2 |
|---|---|---|---|
| Active Directory Certificate Services (AD CS) tools | AD CS tools include the Certification Authority, Certificate Templates, Enterprise PKI, and Online Responder Management snap-ins. | √ | √ |
| Active Directory Domain Services (AD DS) tools and Active Directory Lightweight Directory Services (AD LDS) tools | AD DS and AD LDS tools include the following tools:
— Active Directory Administrative Center
|
√ | |
| Best Practices Analyzer | Best Practices Analyzer cmdlets for Windows PowerShell | √ | √ |
| BitLocker Drive Encryption Administration Utilities | Manage-bde, Windows PowerShell cmdlets for BitLocker, BitLocker Recovery Password Viewer for Active Directory |
√ | √ |
| DHCP Server tools | DHCP Server tools include the DHCP Management Console, the DHCP Server cmdlet module for Windows PowerShell, and the Netsh command-line tool. | √ | √ |
| DirectAccess, Routing, and Remote Access | — Routing and Remote Access management console — Connection Manager Administration Kit console — Remote Access provider for Windows PowerShell — Web Application Proxy |
√ | √ |
| DNS Server tools | DNS Server tools include the DNS Manager snap-in, the DNS module for Windows PowerShell, and the Ddnscmd.exe command-line tool. | √ | √ |
| Failover Clustering tools | Failover Clustering tools include Failover Cluster Manager, Failover Clusters (Windows PowerShell cmdlets), MSClus, Cluster.exe, Cluster-Aware Updating management console, Cluster-Aware Updating cmdlets for Windows PowerShell | √ | √
GUI tools support Windows Server 2016 Technical Preview and Windows Server 2012 R2. Only PowerShell tools work in Windows Server 2012. |
| File Services tools | File Services tools include the following tools:
— Share and Storage Management tools
— File Server Resource Manager tools
— Services for NFS Administration tools |
√ | √
The Share and Storage Management snap-in is deprecated after the release of Windows Server 2016. Storage Replica is new in Windows Server 2016 Technical Preview, and won’t work in Windows Server 2012 R2. |
| Group Policy Management tools | Group Policy Management tools include Group Policy Management Console, Group Policy Management Editor, and Group Policy Starter GPO Editor. | √ | √
Group Policy has some new features in Windows Server 2016 Technical Preview that aren’t available on older operating systems. |
| Hyper-V tools | Hyper-V tools include the Hyper-V Manager snap-in and the Virtual Machine Connection remote access tool. | Hyper-V tools aren’t part of Remote Server Administration Tools for Windows 10. These tools are available as part of Windows 10. You don’t have to install RSAT to use the tools. The Hyper-V Manager console for Windows Server 2016 Technical Preview doesn’t support managing Hyper-V servers running Server 2008 or Server 2008 R2. | Hyper-V in Windows 10 can manage Hyper-V in Windows Server 2012 R2. |
| IP Address Management (IPAM) Management tools | IP Address Management client console | √
IPAM tools in Remote Server Administration Tools for Windows 10 can’t be used to manage IPAM running in Windows Server 2012 R2. |
√
IPAM tools in Remote Server Administration Tools for Windows 10 can’t be used to manage IPAM running in Windows Server 2012 R2. |
| Network Adapter Teaming, or NIC Teaming | NIC Teaming management console | √ | √ |
| Network Controller | Network Controller PowerShell module | Not available | √ |
| Network Load Balancing tools | Network Load Balancing tools include the Network Load Balancing Manager, Network Load Balancing Windows PowerShell cmdlets, and the NLB.exe and WLBS.exe command-line tools. | √ | √ |
| Remote Desktop Services tools | Remote Desktop Services tools include: — Remote Desktop snap-ins — RD Gateway Manager — tsgateway.msc— RD Licensing Manager — licmgr.exe — RD Licensing Diagnoser — lsdiag.msc
Use Server Manager to administer all other RDS role services except RD Gateway and RD Licensing. |
√ | √ |
| Server for NIS tools | Server for NIS tools include an extension to the Active Directory Users and Computers snap-in, and the Ypclear.exe command-line tool | These tools aren’t available in RSAT for Windows 10 and later releases. | |
| Server Manager | Server Manager includes the Server Manager console.
Remote management with Server Manager is available in Windows Server 2016 Technical Preview, Windows Server 2012 R2, and Windows Server 2012. |
√ | √ |
| Simple Mail Transfer Protocol (SMTP) Server tools | SMTP Server tools include the SMTP snap-in. | These tools aren’t available in RSAT for Windows 8 and later releases. | |
| Storage Explorer tools | Storage Explorer tools include the Storage Explorer snap-in. | These tools aren’t available in RSAT for Windows 8 and later releases. | |
| Storage Manager for Storage Area Network (SAN) tools | Storage Manager for SAN tools include the Storage Manager for SAN snap-in and the Provisionstorage.exe command-line tool. | These tools aren’t available in RSAT for Windows 8 and later releases. | |
| Volume Activation | Manage Volume Activation, vmw.exe | √ | √ |
| Windows System Resource Manager tools | Windows System Resource Manager tools include the Windows System Resource Manager snap-in and the Wsrmc.exe command-line tool. | √
WSRM has been deprecated in Windows Server 2012 R2. Tools for managing WSRM aren’t available in RSAT for Windows 8.1 and later releases of RSAT. |
|
| Windows Server Update Services tools | Windows Server Update Services tools include the Windows Server Update Services snap-in, WSUS.msc, and PowerShell cmdlets. | √ | √ |
RSAT for Windows 10, version 1809 or later versions
[!NOTE]
You can’t use the Turn Windows features on and off dialog from the Control Panel
Installing the RSAT Tools for Windows 10 version 1809 and later version is slightly different from earlier versions. RSAT is now part of the Operating System an can be installed via Optional Features.
To enable the tools, click Start, click Settings, click Apps, and then click Optional features, after that click on the panel Add a feature and enter Remote in the search bar.
References
-
Deploy Remote Server Administration Tools
-
Remotely managing your Server Core using RSAT
-
Screencast: How to Install and Enable Microsoft RSAT (Remote Server Administration Tools) for Windows Vista
-
Using MMC Snap-ins and RSAT
Table of Contents
- Applies to
- Introduction
- Download locations for RSAT
- RSAT for Windows 10 Platform and Tools Support Matrix
- RSAT for Windows 8 and Windows 8.1 Platform and Tools Support Matrix
- Related topics
- Related forum threads
Applies to
All systems
Windows 10, Windows 8.1, Windows 8, Windows 7, Windows Vista, Windows Server Technical Preview, Windows Server 2012 R2, Windows Server 2012, Windows Server 2008, and Windows Server 2008 R2
Introduction
Remote Server Administration Tools (RSAT) enables IT administrators to remotely manage roles and features in Windows Server 2012 R2, Windows Server 2012, Windows Server 2008 or Windows Server 2008 R2 from a computer that is running Windows 10, Windows 8.1,
Windows 8, Windows Vista, or Windows 7.
RSAT cannot be installed on computers that are running Home, Standard, or Education editions of Windows. You can only install RSAT on Professional or Enterprise editions of the Windows client operating system. Unless the download page specifically states
that RSAT applies to a Beta or Preview or other prerelease version of Windows, you must be running a full (RTM) release of the Windows operating system to install and use RSAT. Although some users have found ways of manually cracking or hacking the RSAT MSU
to install RSAT on unsupported releases or editions of Windows, this is a violation of the Windows end-user license agreement.
This is similar to installing the adminpak.msi on Windows 2000 or Windows XP client computers. There is one major difference: in Windows Vista and Windows 7, the tools are not automatically available after
RSAT is downloaded and installed . You must enable the tools that you want to use by using the Control Panel. To do so, click
Start, click Control Panel, click Programs and then click
Turn Windows features on or off (as shown in the following figure).
However, in the RSAT releases for Windows 10, Windows 8.1, and Windows 8, tools are once again all enabled by default. You can open
Turn Windows on or off to disable tools that you don’t want to use. In RSAT for Windows 10, Windows 8.1, and Windows 8, GUI-based tools are accessed from within the Server Manager console, on the
Tools menu.

For RSAT that runs on Windows Vista and Windows 7, after running the downloaded installation package, you must enable the tools for the roles and features that you want to manage (as shown in the following figure).
You don’t need to do this for RSAT for Windows 8 or later.

If you need to install management tools in Windows Server 2008, Windows Server 2008 R2, Windows Server 2012, Windows Server 2012 R2, or Windows Server 2016 Technical Preview for specific roles or features running on remote servers, there’s no need to install
additional software. Open the Add Features Wizard in Windows Server 2008 or Windows Server 2008 R2, or the
Add Roles and Features Wizard in Windows Server 2012 and later releases, and on the
Select Features page, expand Remote Server Administration Tools and select the tools that you want to install. Complete the wizard to install your management tools. See the following figure.

Download locations for RSAT
- Remote Server Administration Tools for Windows 10
- Remote Server Administration Tools (RSAT) for Windows 8.1
- Remote Server Administration Tools (RSAT) for Windows 8Remote
Server Administration Tools (RSAT) for Windows 7 with SP1 (both x86 and x64) - Remote Server Administration Tools (RSAT) for Windows Vista 32-bit (x86)
- Remote Server Administration Tools (RSAT) for Windows Vista 64-bit (x64)
RSAT for Windows 10 Platform and Tools Support Matrix
| Remote Server Administration Tools Technology | Description | Manages technology on Windows Server 2012 and Windows Server 2012 R2 | Manages technology on Windows Server 2016 Technical Preview, WS12 R2, and WS12 |
| Active Directory Certificate Services Tools | Active Directory Certificate Services Tools includes the Certification Authority, Certificate Templates, Enterprise PKI, and Online Responder Management snap-ins. | √ | √ |
| Active Directory Domain Services (AD DS) Tools and Active Directory Lightweight Directory Services (AD LDS) Tools |
Active Directory Domain Services (AD DS) and Active Directory Lightweight Directory Services (AD LDS) Tools includes Active Directory Administrative Center; Active Directory Domains and Trusts; Active Directory Sites and Services; Active Directory Users |
√ |
|
|
Best Practices Analyzer |
Best Practices Analyzer cmdlets for Windows PowerShell |
√ |
√ |
|
BitLocker Drive Encryption Administration Utilities |
Manage-bde; Windows PowerShell cmdlets for BitLocker; BitLocker Recovery Password Viewer for Active Directory |
√ |
√ |
|
DHCP Server Tools |
DHCP Server Tools includes the DHCP Management Console, the DHCP Server cmdlet module for Windows Powershell, and the |
√ |
√ |
|
DirectAccess, Routing and Remote Access |
Routing and Remote Access management console; Connection Manager Administration Kit console; Remote Access provider for Windows PowerShell; Web Application Proxy |
√ |
√ |
|
DNS Server Tools |
DNS Server Tools include the DNS Manager snap-in, the DNS module for Windows PowerShell, and the |
√ |
√ |
|
Failover Clustering Tools |
Failover Clustering Tools include Failover Cluster Manager, Failover Clusters (Windows PowerShell Cmdlets), MSClus, Cluster.exe, Cluster-Aware Updating management console, Cluster-Aware Updating cmdlets for Windows PowerShell |
√ |
√ GUI tools support Windows Server 2016 Technical Preview and Windows Server 2012 R2. Only PowerShell tools work on Windows Server 2012. |
|
File Services Tools |
File Services Tools include the following: Share and Storage Management Tools; Distributed File System Tools; File Server Resource Manager Tools; Services for NFS Administration Tools; iSCSI management cmdlets for Windows PowerShell; Work Folders Management |
√ |
√ The Share and Storage Management snap-in is deprecated after the release of Windows Server 2016. Storage Replica is new in Windows Server 2016 Technical Preview, and won’t work on WS12 R2 and WS12. |
|
Group Policy Management Tools |
Group Policy Management Tools include Group Policy Management Console, Group Policy Management Editor, and Group Policy Starter GPO Editor. |
√ |
√ Group Policy has some new features in Windows Server 2016 Technical Preview which are not available on older operating systems. |
|
Hyper-V Tools |
Hyper-V Tools include the Hyper-V Manager snap-in and the Virtual Machine Connection remote access tool. |
Hyper-V tools are not part of Remote Server Administration Tools for Windows 10. These tools are available as part of Windows 10; there is no need to install RSAT to use them. The Hyper-V Manager console for Windows Server 2016 Technical Preview doesn’t |
Hyper-V in Windows 10 can manage Hyper-V in Windows Server 2012 R2 and Windows Server 2012. |
|
IP Address Management (IPAM) Management Tools |
IP Address Management client console |
√ IPAM tools in Remote Server Administration Tools for Windows 10 cannot be used to manage IPAM running on Windows Server 2012 R2 and Windows Server 2012. |
√ IPAM tools in Remote Server Administration Tools for Windows 10 cannot be used to manage IPAM running on Windows Server 2012 R2 and Windows Server 2012. |
|
Network Adapter Teaming, or NIC Teaming |
NIC Teaming management console |
√ |
√ |
|
Network Controller |
Network Controller PowerShell module |
Not available |
√ |
|
Network Load Balancing Tools |
Network Load Balancing Tools include the Network Load Balancing Manager; Network Load Balancing Windows PowerShell Cmdlets; and the NLB.exe and WLBS.exe command line tools. |
√ |
√ |
|
Remote Desktop Services Tools |
Remote Desktop Services Tools include the Remote Desktop snap-ins; RD Gateway Manager, tsgateway.msc; RD Licensing Manager, licmgr.exe; RD Licensing Diagnoser, lsdiag.msc. Use Server Manager for administration of all other RDS role services except RD Gateway and RD Licensing. |
√ |
√ |
|
Server for NIS Tools |
Server for NIS Tools includes an extension to the Active Directory Users and Computers snap-in, and the Ypclear.exe command-line tool |
These tools are not available in RSAT for Windows 10 and later releases. |
|
|
Server Manager |
Server Manager includes the Server Manager console. Remote management with Server Manager is available in Windows Server 2016 Technical Preview, Windows Server 2012 R2, and Windows Server 2012. |
√ |
√ |
|
SMTP Server Tools |
SMTP Server Tools include the Simple Mail Transfer Protocol (SMTP) snap-in. |
These tools are not available in RSAT for Windows 8 and later releases. |
|
|
Storage Explorer Tools |
Storage Explorer Tools include the Storage Explorer snap-in. |
These tools are not available in RSAT for Windows 8 and later releases. |
|
|
Storage Manager for Storage Area Networks (SANs) Tools |
Storage Manager for SANs Tools include the Storage Manager for SANs snap-in and the |
These tools are not available in RSAT for Windows 8 and later releases. |
|
|
Volume Activation |
Manage Volume Activation, vmw.exe |
√ |
√ |
|
Windows System Resource Manager Tools |
Windows System Resource Manager Tools include the Windows System Resource Manager snap-in and the |
√ WSRM has been deprecated in Windows Server 2012 R2, and tools for managing WSRM are not available in Remote Server Administration Tools for Windows 8.1. and later releases of RSAT. |
|
|
Windows Server Update Services Tools |
Windows Server Update Services Tools include the Windows Server Update Services snap-in, WSUS.msc, and PowerShell cmdlets. |
√ |
√ |
RSAT for Windows 8 and Windows 8.1 Platform and Tools Support Matrix
| Remote Server Administration Tools technology | Description | Manages technology on Windows Server 2008 | Manages technology on Windows Server 2012 and Windows Server 2012 R2 |
| Active Directory Certificate Services Tools | Active Directory Certificate Services Tools includes the Certification Authority, Certificate Templates, Enterprise PKI, and Online Responder Management snap-ins. | √ | √ |
| Active Directory Domain Services (AD DS) Tools and Active Directory Lightweight Directory Services (AD LDS) Tools |
Active Directory Domain Services (AD DS) and Active Directory Lightweight Directory Services (AD LDS) Tools includes Active Directory Administrative Center; Active Directory Domains and Trusts; Active Directory Sites and Services; Active Directory Users GPFixup.exe; KSetup.exe; KtPass.exe; NlTest.exe; NSLookup.exe; W32tm.exe. — Server for NIS Tools includes an extension to the Active Directory Users and Computers snap-in, and the |
√, Windows PowerShell and ADAC remote management require the Active Directory Web Service download package. | √
Identity Management for UNIX, which includes Server for NIS, is deprecated in Windows Server 2012 R2, and tools for managing these features are no longer available in RSAT for Windows 8.1. |
| Best Practices Analyzer | Best Practices Analyzer cmdlets for Windows PowerShell | Can run on WS08 R2 when the Windows Management Framework 3.0 package is installed on WS08 R2. No BPA models are available for WS08. | √ |
| BitLocker Drive Encryption Administration Utilities | Manage-bde; Windows PowerShell cmdlets for BitLocker; BitLocker Recovery Password Viewer for Active Directory |
Not available | √ |
| Cluster-Aware Updating | Cluster-Aware Updating management console, Cluster-Aware Updating cmdlets for Windows PowerShell | Not available | √ |
| DHCP Server Tools | DHCP Server Tools includes the DHCP Management Console, the DHCP Server cmdlet module for Windows Powershell, and the Netsh command-line tool. |
√
Windows PowerShell module does not run on WS08 and WS08 R2 |
√ |
| DirectAccess, Routing and Remote Access | Routing and Remote Access management console; Connection Manager Administration Kit console; Remote Access provider for Windows PowerShell | Not available | √ |
| DNS Server Tools | DNS Server Tools include the DNS Manager snap-in, the DNS module for Windows PowerShell and the Ddnscmd.exe command-line tool. |
√ | √ |
| Failover Clustering Tools | Failover Clustering Tools include Failover Cluster Manager, Failover Clusters (Windows PowerShell Cmdlets), MSClus, Cluster.exe | √
Failover Cluster Manager runs only on Windows Server 2012. The Windows PowerShell cmdlet set supports Windows Server 2012 and WS08R2. MSClus and Cluster.EXE support Windows Server 2012, WS08R2 and WS08. |
√ |
| File and Storage Services Tools | File Services Tools include the following: Share and Storage Management Tools; Distributed File System Tools; File Server Resource Manager Tools; Services for NFS Administration Tools; iSCSI management cmdlets for Windows PowerShell
|
√
iSCSI cmdlets for Windows PowerShell can be used to manage iSCSI on Windows Server 2012 only. |
√ |
| Group Policy Management Tools | Group Policy Management Tools include Group Policy Management Console, Group Policy Management Editor, and Group Policy Starter GPO Editor. | √ | √ |
| Hyper-V Tools | Hyper-V Tools include the Hyper-V Manager snap-in and the Virtual Machine Connection remote access tool. | Hyper-V Manager console doesn’t support managing Hyper-V servers running Server 2008 or Server 2008 R2. | Hyper-V tools are not part of Remote Server Administration Tools for Windows 8 or Windows 8.1. These tools are available as part of Windows 8 and Windows 8.1; there is no need to install RSAT to use them. The Hyper-V Manager console for Windows Server 2012 doesn’t support managing Hyper-V servers running Server 2008 or Server 2008 R2. Managing Hyper-V running on Windows Server 2012 by using Windows PowerShell tools available in RSAT for Windows 8.1 works, but is not officially supported. Likewise, using RSAT for Windows 8 to manage Hyper-V on Windows Server 2012 R2 works, but is not officially supported. |
| IP Address Management (IPAM) Management Tools | IP Address Management client console | Not available | √
IPAM tools in Remote Server Administration Tools for Windows 8.1 cannot be used to manage IPAM running on Windows Server 2012. |
| Network Adapter Teaming, or NIC Teaming | Network Adapter Teaming management console | Not available | √ |
| Network Load Balancing Tools | Network Load Balancing Tools include the Network Load Balancing Manager; Network Load Balancing Windows PowerShell Cmdlets; and the NLB.exe and WLBS.exe Command Line Tools. | √ | √ |
| Remote Desktop Services Tools | Remote Desktop Services Tools include the Remote Desktop snap-ins; RD Gateway Manager, tsgateway.msc; RD Licensing Manager, licmgr.exe; RD Licensing Diagnoser, lsdiag.msc.
Server Manager should be used for administration of all other RDS role services except RD Gateway and RD Licensing. |
√ | √ |
| Server Manager | Server Manager includes the Server Manager console.
Remote management with Server Manager is available in Windows Server 2008 R2 and Windows Server 2012. |
Available for WS08 R2 and forward, not WS08 | √ |
| SMTP Server Tools | SMTP Server Tools include the Simple Mail Transfer Protocol (SMTP) snap-in. | √ | The tools are not available in RSAT for Windows 8 and later |
| Storage Explorer Tools | Storage Explorer Tools include the Storage Explorer snap-in. | √ | The tools are not available in RSAT for Windows 8 and later |
| Storage Manager for Storage Area Networks (SANs) Tools | Storage Manager for SANs Tools include the Storage Manager for SANs snap-in and the Provisionstorage.exe command-line tool. |
√ | The tools are not available in RSAT for Windows 8 and later |
| Volume Activation | Manage Volume Activation, vmw.exe | The tool can be used to manage volume activation on remote servers running WS08 or WS08 R2, but cannot run on those operating systems. | √ |
| Windows System Resource Manager Tools | Windows System Resource Manager Tools include the Windows System Resource Manager snap-in and the Wsrmc.exe command-line tool. |
√ | √
WSRM has been deprecated in Windows Server 2012 R2, and thus tools for managing WSRM are not available in Remote Server Administration Tools for Windows 8.1. |
| Windows Server Update Services Tools | Windows Server Update Services Tools include the Windows Server Update Services snap-in, WSUS.msc |
√ | √ |
Reference:
KB 858830
Related topics
- Remote Server Administration Tools for Windows 10 Help
- Remote Server Administration Tools for Windows 8 and 8.1 Help
- Description of Windows Server 2008 Remote Server Administration Tools for Windows Vista Service Pack 1
- RSAT Released for Windows
7 - Remotely
Managing your Server Core Using RSAT - Screencast:
How to Install and Enable Microsoft RSAT (Remote Server Administration Tools) for Windows Vista - Using
MMC Snap-ins and RSAT
Related forum threads
- Remote Server Administration Tools (RSAT)
- New
Version of RSAT for Windows 7 RTM? - RSAT
 Windows Server 2012 R2 вышел 18 октября 2013 года. С тех пор на эту серверную операционную систему Microsoft выпущено несколько сотен обновлений исправляющих уязвимости и дефекты продукта, а так же улучшающие функционал.
Огромное количество обновлений — источник головной боли. Наиболее актуальный дистрибутив сервера, так называемый «Update2», в который интегрированы обновления по ноябрь 2014 года, безнадежно устарел. Установив с него операционную систему, вы получите вдогонку еще 200+ обновлений, которые будут устанавливаться 2-4 часа.
В этой короткой инструкции мы освежим ноябрьский дистрибутив, интегрировав в него все кумулятивные пакеты обновлений и обновления безопасности.
Помимо дистрибутива мы освежим и память администратора, вспомнив как обновляется носитель для установки, зачем выполняется каждый шаг, и какие нас может ожидать подвохи на разных этапах.
Делать будем по максимуму просто, используя штатные инструменты.
Все работы лучше проводить на сервере с уже развернутом Windows Server 2012 R2, чтобы не было накладок с версией утилиты DISM. Так же на нем удобно подключать ISO файлы, не распаковывая их.
Готовим рабочие директории
Для работы потребуются следующие каталоги:
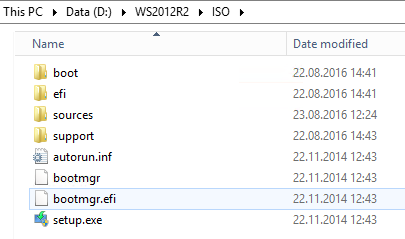
ISO — в этот каталог копируются файлы дистрибутива. В скопируйте в него содержимое дистрибутива SW_DVD9_Windows_Svr_Std_and_DataCtr_2012_R2_64Bit_English_-4_MLF_X19-82891.ISO, предварительно смонтировав образ, а затем размонтировав.
MOUNT — пустой каталог, в него будут монтироваться образы из wim-файла.
CU — в этот каталог поместим кумулятивные обновления
SU — в этом каталоге будут находиться обновления безопасности и другие обновления
mkdir D:WS2012R2ISO
mkdir D:WS2012R2MOUNT
mkdir D:WS2012R2CU
mkdir D:WS2012R2SU
Скачиваем кумулятивные обновления
Tip & Trick #1. Microsoft выпускает для Windows Server 2012 R2 кумулятивные пакеты обновлений, но в них входят только обновления, исправляющие ошибки и улучшающие функционал. Обновления безопасности не включены. При этом обновления и не особо кумулятивны. Некоторые не включают в себя предыдущие обновления, и надо ставить «кумулятивное» за каждый месяц. Бардак. В октябре эта ситуация изменится к лучшему.
Со списком кумулятивных обновлений вы можете ознакомиться на этой wiki странице.
С ноября 2014 года нам потребуется интегрировать следующие обновления:
1. December 2014 Windows RT 8.1, Windows 8.1, and Windows Server 2012 R2. KB3013769, cкачать.
2. July 2016 Windows RT 8.1, Windows 8.1, and Windows Server 2012 R2. KB3172614, скачать.
Пакеты за май и июнь поглощены этим июльским пакетом. Но перед установкой обязательно обновление April 2015 servicing stack update for Windows 8.1 and Windows Server 2012 R2. KB3021910, скачать.
3. August 2016 Windows RT 8.1, Windows 8.1, and Windows Server 2012 R2. KB3179574, скачать.
Обновленный клиент центра обновления можно не интегрировать
Свежий Windows Update Client for Windows 8.1 and Windows Server 2012 R2: June 2016 вошел в KB3161606
KB3161606 поглощен KB3172614.
UPD: Я несколько преувеличил то, насколько Microsoft качественно подготовила дистрибутив. Обновления April 2014 и November 2014 действительно интегрированы. А все промежуточные — нет. Поэтому добавляем
May 2014 update rollup for Windows RT 8.1, Windows 8.1, and Windows Server 2012 R2. KB2955164, скачать
June 2014 update rollup for Windows RT 8.1, Windows 8.1, and Windows Server 2012 R2. KB2962409, скачать.
July 2014 update rollup for Windows RT 8.1, Windows 8.1, and Windows Server 2012 R2. KB2967917, скачать.
August 2014 update rollup for Windows RT 8.1, Windows 8.1, and Windows Server 2012 R2. KB2975719, скачать.
September 2014 update rollup for Windows RT 8.1, Windows 8.1, and Windows Server 2012 R2. KB2984006, скачать.
October 2014 update rollup for Windows RT 8.1, Windows 8.1, and Windows Server 2012 R2. KB2995388, скачать.
Tip & Trick #2. В разных статьях для интеграции обновлений предлагается извлечь из msu cab-файл. Делать это для offline-образа необязательно — интегрируйте msu без распаковки.
В папку CU разместите упомянутые выше msu файлы — Windows8.1-KB3013769-x64.msu, Windows8.1-KB3021910-x64.msu, Windows8.1-KB3138615-x64.msu, Windows8.1-KB3172614-x64.msu, Windows8.1-KB3179574-x64.msu.
Скачиваем обновления безопасности
Помимо кумулятивных обновлений интегрируем обновления, которые способна скачать утилита WSUS Offline Update.
Для этого:
- Скачиваем программу download.wsusoffline.net
- Выбираем обновления для Windows Server 2012 R2

- После скачивания открываем каталог wsusofflineclientw63-x64glb и *.cab файлы копируем в каталог C:WS2012R2SU

ОСТОРОЖНО: Если в список попали KB2966828 или KB2966827, удалите их, иначе после установки не получится добавить компонент Net Framework 3.5 (подробности).
Обновления готовы, приступим к интеграции.
Интеграция обновлений
Для интеграции обновлений нам потребуется:
- Смонтировать содержимое одного из образов в install.wim
dism /mount-wim /wimfile:{путь к wim файлу} /Index:{N} /mountdir:{путь к директории монтирования} - Интегрировать в offline установку каждое обновление
dism /image:{путь к директории монтирования} /add-package /packagepath:{путь к *.msu или *.cab файлу} - Сохранить изменения
dism /Unmount-WIM /MountDir:{путь к директории монтирования} /Commit
Этот процесс легко следующим автоматизировать командным файлом:
for /l %%N in (1,1,4) do (
dism /mount-wim /wimfile:"D:WS2012R2ISOsourcesinstall.wim" /Index:%%N /mountdir:D:WS2012R2MOUNT
for %%f in (D:WS2012R2CU*.*) DO (dism /image:D:WS2012R2MOUNT /add-package /packagepath:%%f)
for %%f in (D:WS2012R2SU*.*) DO (dism /image:D:WS2012R2MOUNT /add-package /packagepath:%%f)
dism /unmount-WIM /MountDir:D:WS2012R2MOUNT /Commit
)
Tip: Запуская командный файл, перенаправьте вывод в журнал
UpdateWIM.cmd >>log.txt 2>>&1
В результате мы получим файл D:WS2012R2ISOsourcesinstall.wim размером в 6.15Gb. Можем ли мы его уменьшить? Да, с помощью экспорта можно получить оптимизированный файл размером в 5.85Gb.
Экономия небольшая, кроме того после этого не очень красиво выглядит диалог выбора операционной системы при установке, поэтому следующий шаг опционален.
Что надо сделать?
Для получения сжатого образа необходимо:
- Экспортировать первый образ из оригинального wim-файла в новый файл
dism /export-image /sourceimagefile:{путь к исходному файлу wim} /sourceindex:1 /destinationimagefile:{путь к новому файлу wim} /compress:max - Подключить следующий образ из оригинального wim-файла в точку монтирования
dism /mount-wim /wimfile:"D:WS2012R2ISOsourcesinstall.wim" /Index:2 /mountdir:{директория для монтированния образа} - Добавить в новый файл следующий образ методом «захвата»
dism /append-image /imagefile:{путь к новому файлу wim} /captureDir:{директория с смонтированным образом} /name:{оригинальное имя} /description:{оригинальное описание} - Размонтировать образ, повторить итерацию добавления для каждого дополнительного образа
dism /unmount-WIM /MountDir:{директория с смонтированным образом} /Discard
Автоматизируем скриптом:
dism /export-image /sourceimagefile:D:WS2012R2ISOsourcesinstall.wim /sourceindex:1 /destinationimagefile:D:WS2012R2ISOsourcesinstall1.wim  /compress:max

dism /mount-wim /wimfile:"D:WS2012R2ISOsourcesinstall.wim" /Index:2 /mountdir:D:WS2012R2MOUNT

dism /append-image /imagefile:D:WS2012R2ISOsourcesinstall1.wim /captureDir:mount /name:"Windows Server 2012 R2 SERVERSTANDARD" /description:"Windows Server 2012 R2 SERVERSTANDARD"

dism /unmount-WIM /MountDir:D:WS2012R2MOUNT /discard

dism /mount-wim /wimfile:"D:WS2012R2ISOsourcesinstall.wim" /Index:3 /mountdir:D:WS2012R2MOUNT

dism /append-image /imagefile:D:WS2012R2ISOsourcesinstall1.wim /captureDir:mount /name:"Windows Server 2012 R2 SERVERDATACENTERCORE" /description:"Windows Server 2012 R2 SERVERDATACENTERCORE"

dism /unmount-WIM /MountDir:D:WS2012R2MOUNT /discard

dism /mount-wim /wimfile:"D:WS2012R2ISOsourcesinstall.wim" /Index:4 /mountdir:D:WS2012R2MOUNT

dism /append-image /imagefile:D:WS2012R2ISOsourcesinstall1.wim /captureDir:mount /name:"Windows Server 2012 R2 SERVERDATACENTER" /description:"Windows Server 2012 R2 SERVERDATACENTER"

dism /unmount-WIM /MountDir:D:WS2012R2MOUNT /discard
Удалите оригинальный install.wim, а сформированный install1.wim переименуйте в install.wim
Создание компактного образа install.esd
По совету D1abloRUS, если вы хотите получить инсталляционный диск минимального размера умещающийся на DVD5, можно экспортировать один (и только один) из образов в esd файл. Например, для экспорта Windows Server 2012 R2 Standard, используйте команду
dism /export-image /sourceimagefile:D:WS2012R2ISOsourcesinstall.wim /sourceindex:2 /destinationimagefile:D:WS2012R2ISOsourcesinstall.esd /compress:recovery
Оригинальный install.wim можно удалить.
Сборка ISO-файла
Для сборки нам потребуется утилита oscdimg.exe из комплекта Windows ADK. Если у вас ее не оказалось, можно просто скачать утилиту по ссылке (не используйте из этого комплекта ничего, кроме самой утилиты).
Tip & Trick #3. Для того, чтобы не было проблем с загрузкой из образа, следует расположить загрузочные файлы в пределах первых 4 гигабайт образа. Для этого используем файл bootorder.txt
bootbcd
bootboot.sdi
bootbootfix.bin
bootbootsect.exe
bootetfsboot.com
bootmemtest.exe
booten-usbootsect.exe.mui
bootfontschs_boot.ttf
bootfontscht_boot.ttf
bootfontsjpn_boot.ttf
bootfontskor_boot.ttf
bootfontswgl4_boot.ttf
sourcesboot.wim
Пути в этом файле указываются относительно корневой директории с образом, поэтому подстраивать пути на ваши фактические не требуется.
Tip & Trick #4. Если install.wim имеет размер больше 4700Mb, то инсталлятор вылетит с ошибкой «Windows cannot open the required file D:sourcesinstall.wim. Error code: 0x8007000D».
Нас учили что жизнь — это бой, поэтому разделим исходный install.wim на два командой
dism /split-Image /imagefile:D:WS2012R2ISOsourcesinstall.wim /swmfile:D:WS2012R2ISOsourcesinstall.swm /filesize:4096
Оригинальный файл install.wim можно удалить.
Tip & Trick #5. Вообще Microsoft говорит, что
пить
так делать нельзя.
In Windows 8.1 and Windows 8, Windows Setup does not support installing a split .wim file.
Мы говорим, что будем! Инсталлятор прекрасно подхватывает swm-файл. Проблем с установкой не будет.
Собираем образ командой:
oscdimg -m -n -yoD:WS2012R2bootorder.txt -bD:WS2012R2ISOBOOTetfsboot.com -lIR5_SSS_X64FREV_EN-US_DV9 D:WS2012R2ISO en_windows_server_2012R2_August_2016.iso
Уважаемый ildarz подсказывает, что для создания образа, одинаково хорошо работающего с BIOS и EFI, следует руководствоваться KB947024 и создавать образ так:
oscdimg -m -u2 -udfver102 -yoD:WS2012R2bootorder.txt -bootdata:2#p0,e,bD:WS2012R2ISOBOOTEtfsboot.com#pEF,e,bD:WS2012R2ISOEFImicrosoftBOOTefisys.bin -lIR5_SSS_X64FREV_EN-US_DV9 D:WS2012R2ISO en_windows_server_2012R2_August_2016.iso
Работоспособность проверена в ESXi с любым типом загрузки (BIOS/EFI).
Все получилось? Поздравляю!

Но решена ли проблема полностью? Для идеала необходимо интегрировать еще сотню «опциональных» и «рекомендованных» обновлений, но с этим не будем торопиться. Дадим Microsoft шанс самим разобраться в том бардаке, который они устроили с обновлениями.
PS. Зачем мы все это делали? Для того, чтобы освежить память, сделать работу чуть удобнее и получить несколько простых командных файлов, при помощи которых в дальнейшем можно практически автоматизированно интегрировать обновления в серверный дистрибутив, экономя время ввода сервера в эксплуатацию. Тем более есть надежда, что начиная с октября интегрировать обновления станет гораздо проще.
Точно так же вы сможете интегрировать Windows 7 convenience rollup и не наступить на грабли распаковки обновлений, невозможности загрузки из образа, превышения размера install.wim.
Спасибо за внимание и до новых встреч, друзья.
Если есть возможность поделиться опытом — жду вас в комментариях.
Posted by Oksana Zybinskaya on
August 3, 2016
New Server Management Tools (SMT) suite now on supports Windows Server 2012 and Windows Server 2012 R2, as it has been recently announced by Microsoft.
SMT includes a collection of well-known tools, such as Task Manager, Registry Editor, Event Viewer, Device Manager and Control Panel. Windows Update has been also added to that list few months ago. The difference is that now these tools actually are services housed in Microsoft’s Azure datacenters. Organizations must set up an on-premises gateway (which is called “server management gateway” by Microsoft) in order to use them.
“All SMT tools, except Windows Update and Device Manager, will now work with Windows Server 2012 R2 and 2012,”- Microsoft.

Tools for Remote Management
The SMT collection of tools was first introduced as one way to manage the headless Nano Server component of Windows Server 2016, which is a much smaller version of the also headless Server Core deployment option (said to have a footprint 20 times smaller than Server Core).
Nano Server can only be managed remotely by certain tools, as Microsoft stripped out the graphical user interface (GUI) from Windows Server 2016 with the Nano Server option. It can also be managed using “Windows PowerShell, Windows Management Instrumentation (WMI), Windows Remote Management, and Emergency Management Services (EMS),” (MS TechNet documentation).
Organizations using Windows Server 2012-branded products will be able to use the new SMT tools through the Azure portal, as they have browser-based GUI-like management capabilities, along with PowerShell scripting features.
New SMT Features
– Credentials can now be saved to the server management gateway. They are encrypted at Azure datacenters using AES 256 encryption, but can only be unlocked via credentials stored on an organization’s server management gateway;
– a new Certificate manager tool addition to the SMT suite will let organizations diagnose problems and remotely manage certificates on servers, with commands such as import, export and delete;
– a GUI for checking firewall rules on servers;
– a file browsing capability to the PowerShell script editor in SMT, which allows saving the scripts to Azure Blob storage.
– a separate Storage SMT tool that provides “detailed information” about disk use, file shares and volumes.
File Explorer capabilities right now in SMT still just have limited functionality, namely “browse, rename and delete” (Microsoft), but File Explorer capabilities are planned to be added to other SMT tools, such as the “PowerShell Script Editor and Processes for opening and saving files.”
The SMT preview requires Windows Management Framework 5.0 for Windows Server 2012 R2, but it’s not needed for Windows Server 2016 Technical Preview. Also, an Azure subscription is needed in place. The preview is accessible through an Azure portal account via the Marketplace.
This is the review of an article.
Source: redmondmag.com
- Installing and Configuring a SQL Server Failover Clustered Instance on Microsoft Azure Virtual Machines
- Instructions for Real Support Cases: iSCSI Connections Configuration in Windows Server 2012 R2 Done Right
Filed under:
Software by Oksana Zybinskaya
Данная статья предназначена для тех, кто искал подробное и понятное руководство о том, как установить и настроить роль Windows Server Update Services на Windows Server 2012 R2.
В этом руководстве мы будем рассматривать тот случай, когда у вас уже есть сервер с установленной на нем операционной системой Windows Server 2012 R2.
Подробно о том, как установить Windows Server 2012 R2, вы можете прочитать в моем руководстве “Установка Windows Server 2012 R2”.
Узнать о том, как установить Active Directory Domain Services на Windows Server 2012 R2, вы можете, прочитав “Установка Active Directory Domain Services на Windows Server 2012 R2”.
Перед началом установки роли Windows Server Update Services необходимо присвоить серверу корректное имя в соответствии со стандартами вашей организации, а затем указать статический IP-адрес в настройках сетевого подключения. Кроме того сервер необходимо добавить в домен.
В моем руководстве “Базовая настройка Windows Server 2012 R2” вы можете прочитать о том, как произвести базовые настройки Windows Server 2012 R2 и добавить сервер в домен.
Обратите внимание, перед установкой обновлений на промышленные сервера необходимо протестировать установку обновлений на тестовых серверах.
Переходим на будущий сервер обновлений и заходим в систему под учетной записью с правами администратора.
Первым делом необходимо продумать, в какую папку будут загружаться обновления. Для хранения загруженных обновлений лучше всего использовать папку на отдельном локальном диске. Объем свободного места на выделенном диске должен быть не меньше 10 Gb.
Создадим новую папку для обновлений.
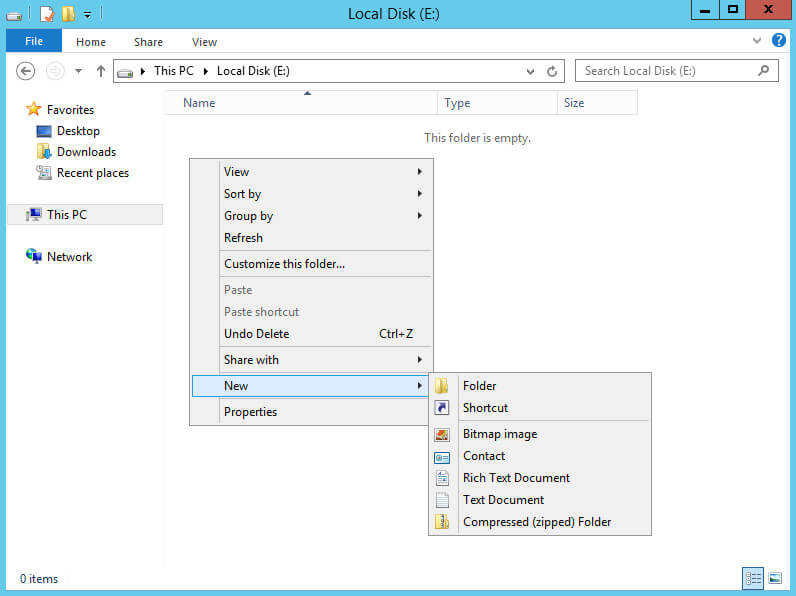
Переходим на дополнительный локальный диск и нажимаем правой кнопкой мыши на свободном месте, в открывшемся меню выбираем “New”, затем “Folder”.
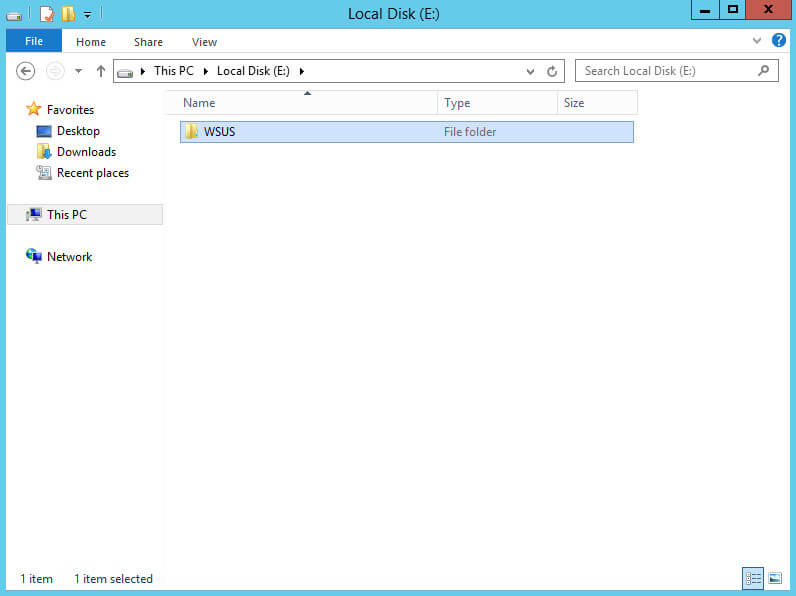
Указываем имя для новой папки и нажимаем на кнопку “Enter”.
Новая папка для обновлений готова.
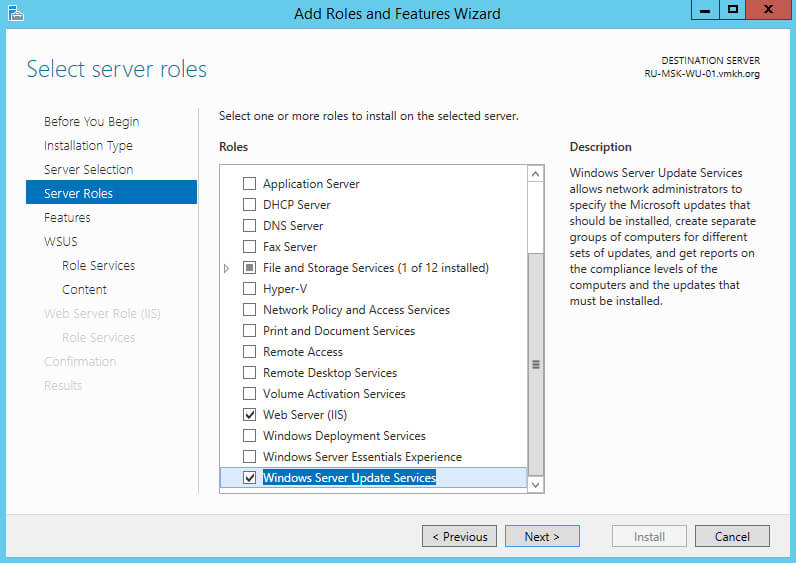
Теперь можно приступить к установке роли “Windows Server Update Services”.
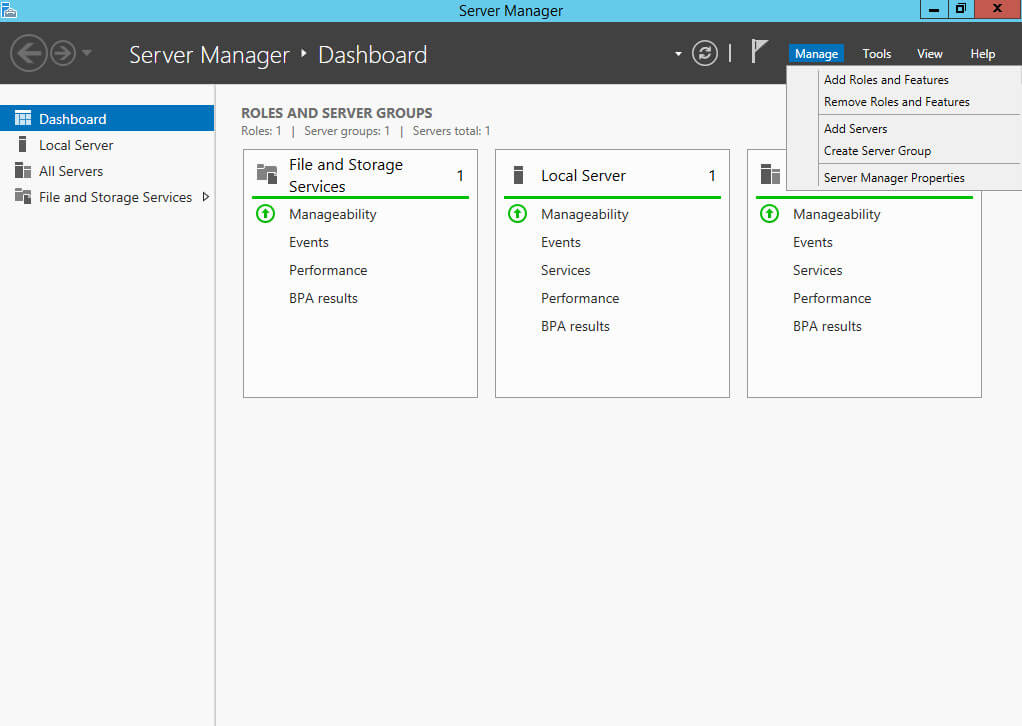
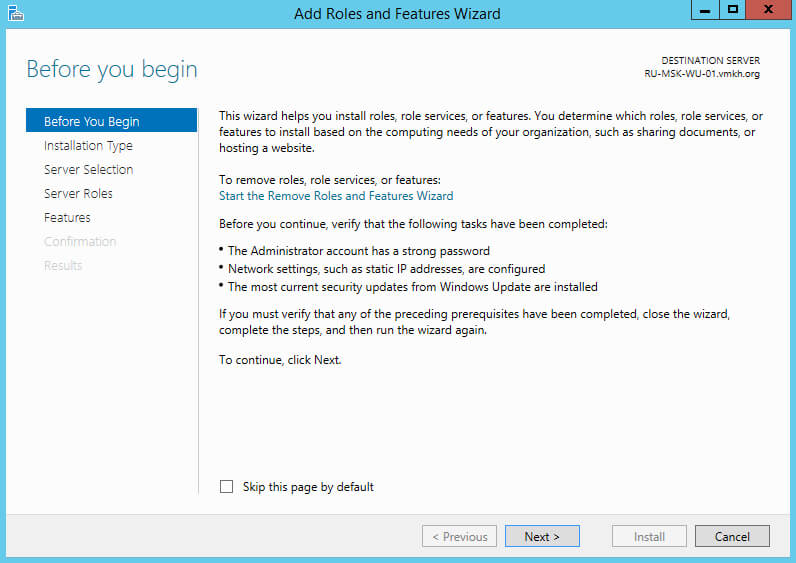
Открываем “Server Manager”, нажимаем на кнопку “Manage” в правом верхнем углу экрана и выбираем “Add Roles and Features”.
Нажимаем на кнопку “Next”.
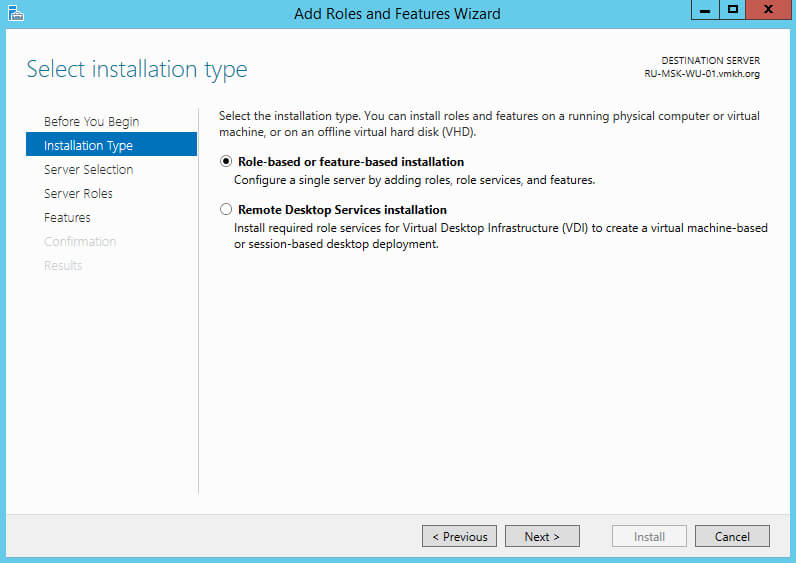
Выбираем тип установки “Role-based or feature-based installation” и нажимаем на кнопку “Next”.
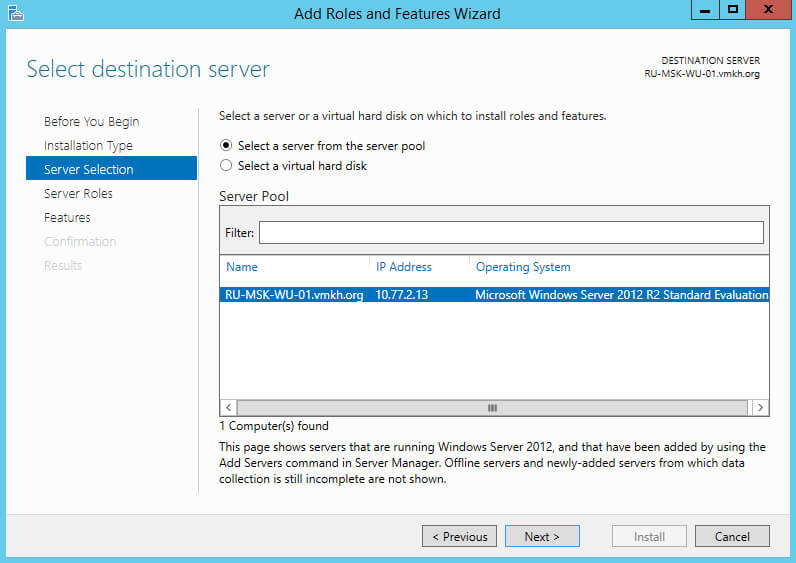
Далее выбираем сервер, на который будет производиться установка роли.
Нажимаем на кнопку “Next”.
Выбираем роль “Windows Server Update Services”.
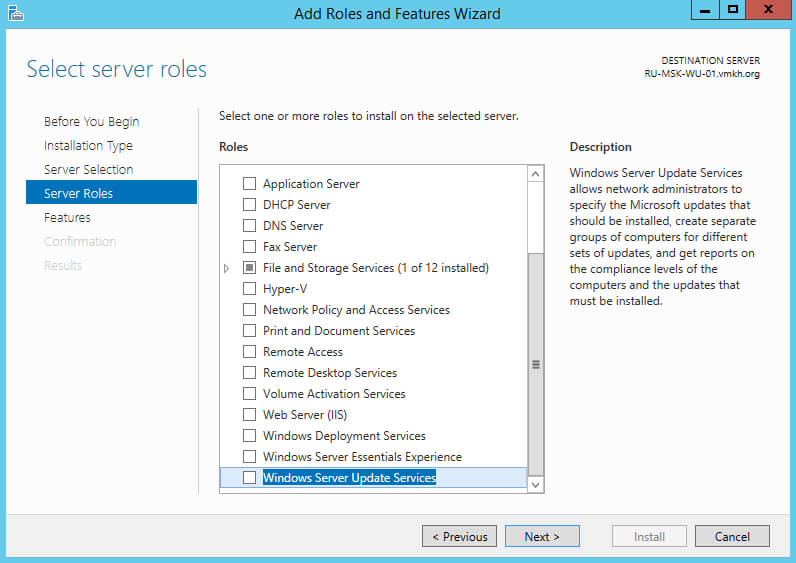
На следующем этапе “Мастер установки ролей” предупредит, что для установки роли “Windows Server Update Services” нужно установить несколько компонентов.
Нажимаем на кнопку “Add Features”.

Нажимаем на кнопку “Next”.
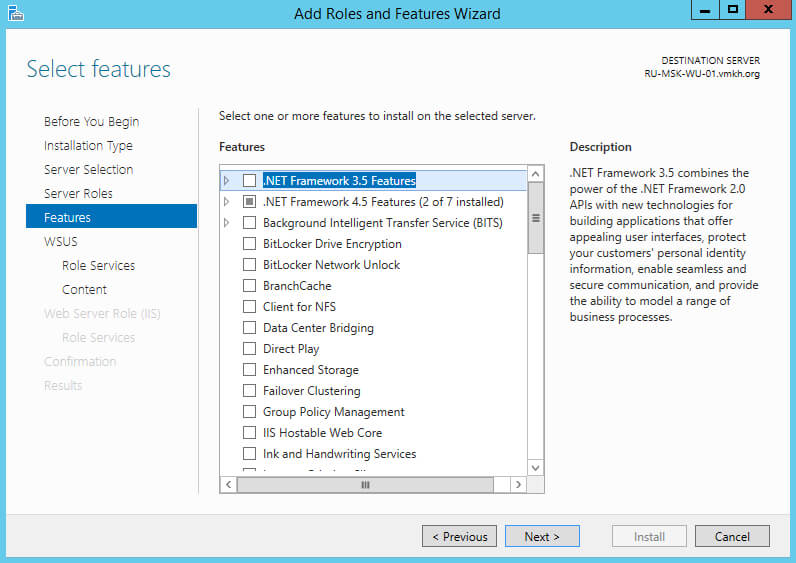
На этапе добавления компонентов оставляем все значения по умолчанию.
Нажимаем на кнопку “Next”.
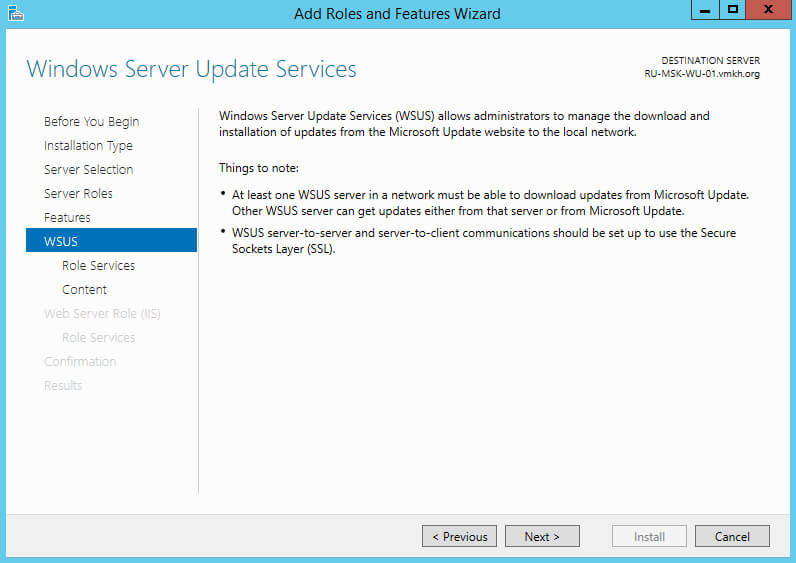
Далее “Мастер установки ролей” предлагает ознакомиться с дополнительной информацией касательно роли “Windows Server Update Services”.
Нажимаем на кнопку “Next”.
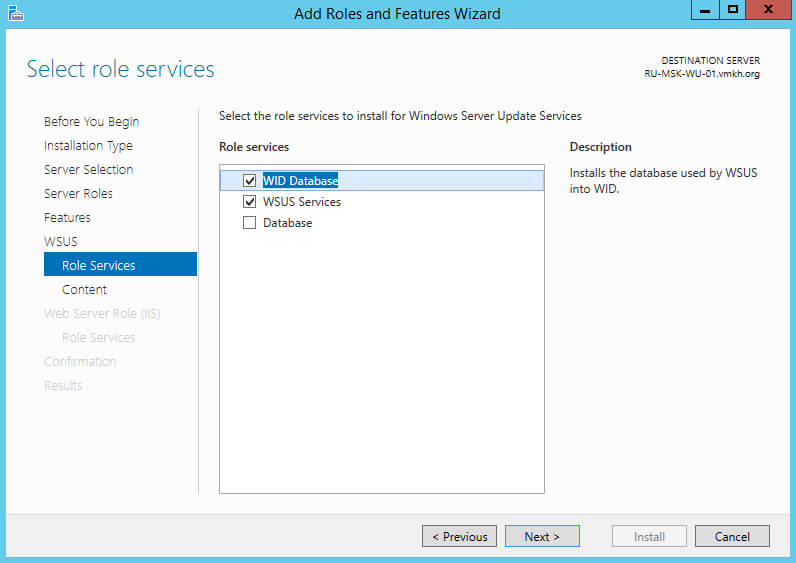
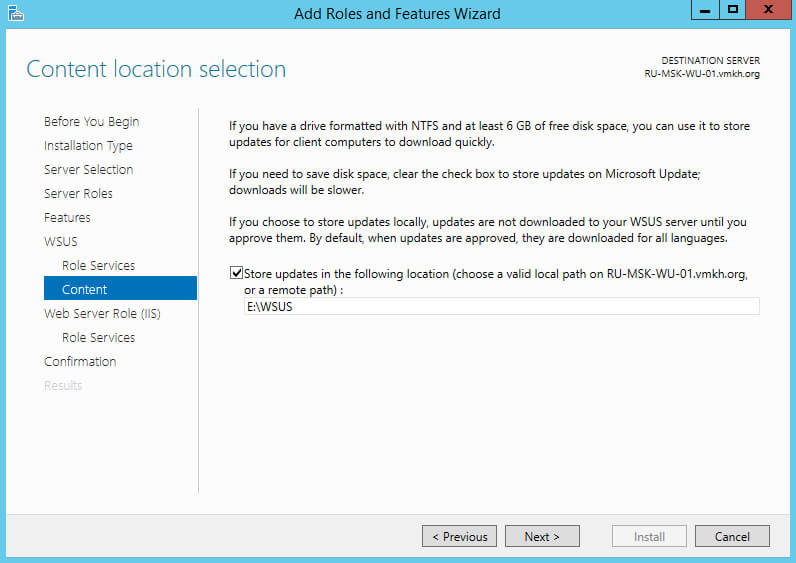
Теперь необходимо выбрать, где служба обновлений будет хранить свои служебные данные. Для этого можно использовать SQL Server или хранить данные во внутренней базе данных Windows (WID — Windows Internal Database). WID не имеет ограничения на размер базы данных и не требует дополнительной лицензии для использования.
В данном руководстве для хранения данных будет использоваться Windows Internal Database.
Выбираем “WID Database” и “WSUS Services”.
Нажимаем на кнопку “Next”.
Указываем путь к ранее созданной папке, где планируется хранить загруженные обновления.
Нажимаем на кнопку “Next”.
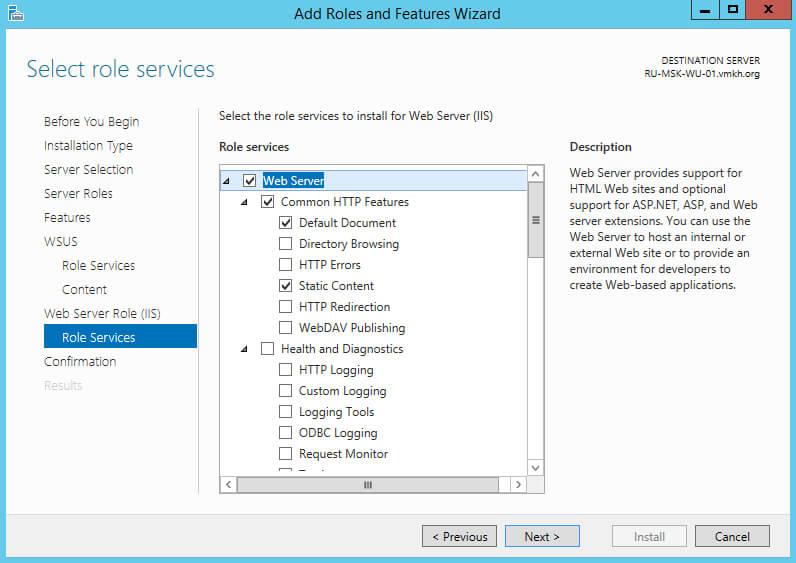
На следующем этапе “Мастер установки ролей” предупредит, что для работы роли “Windows Server Update Services” будет дополнительно установлена роль веб-сервера “Internet Information Services”.
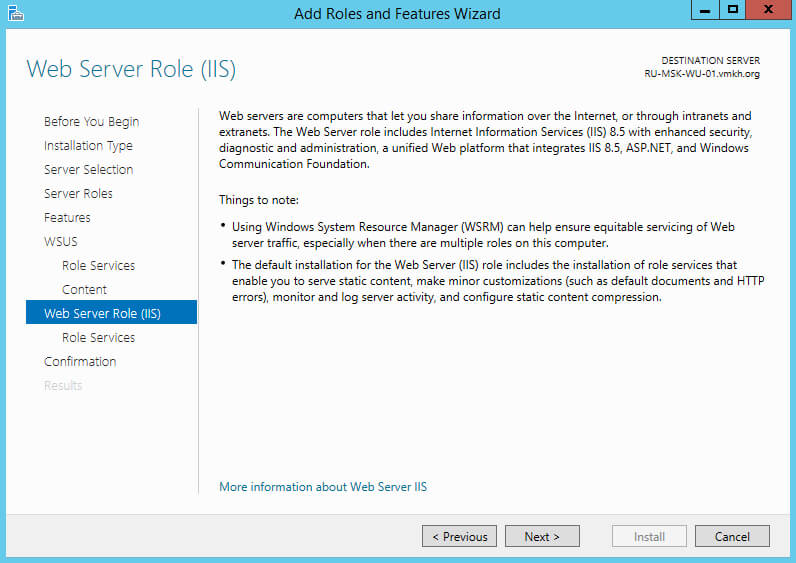
На этапе добавления компонентов оставляем все значения по умолчанию.
Нажимаем на кнопку “Next”.
Для того чтобы начать установку выбранной роли, нажимаем на кнопку “Install”.
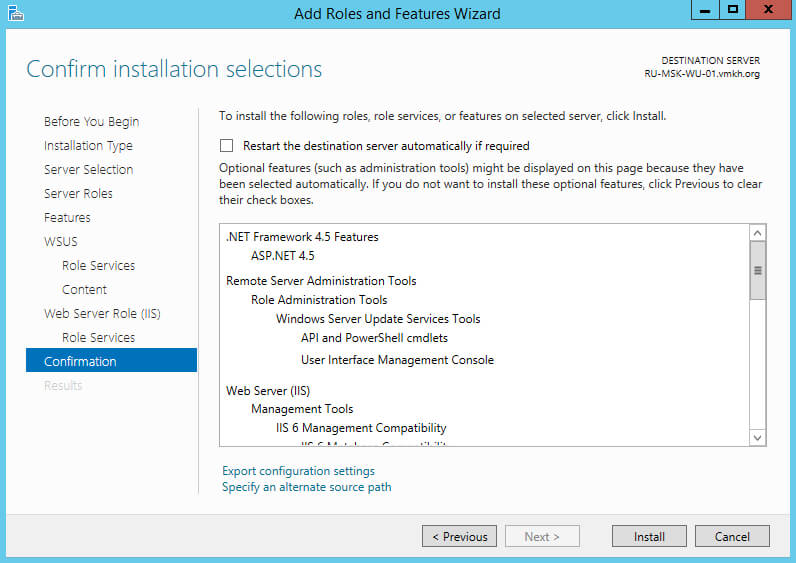
Началась установка выбранной роли и необходимых для нее компонентов.
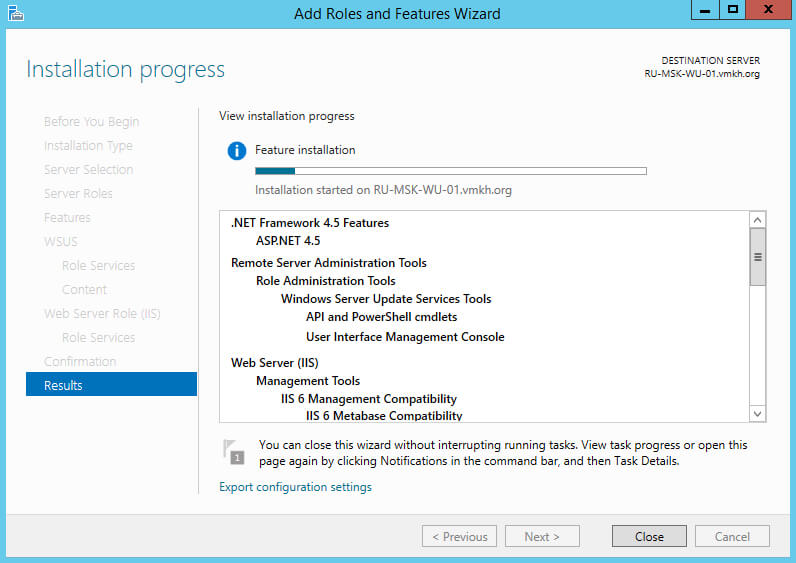
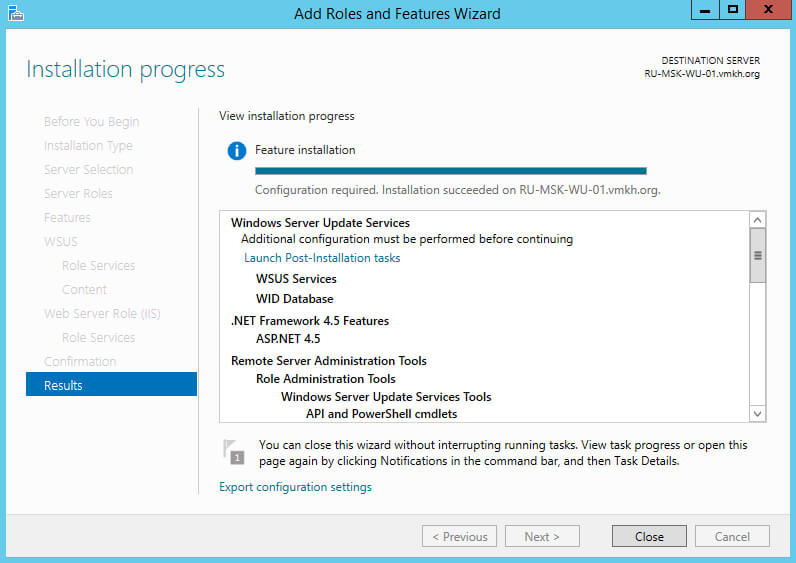
Установка роли “Windows Server Update Services” завершена.
Теперь нажимаем на кнопку “Launch Post-Installation tasks”, для того чтобы “Мастер установки ролей” запустил задачи по первичной настройке новой роли.
Начался процесс выполнения задач по первичной настройке новой роли.
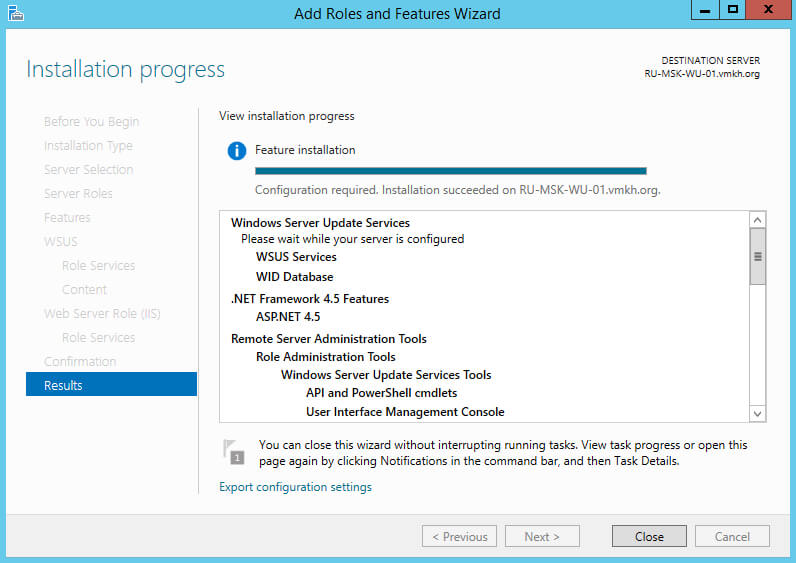
Процесс выполнения задач по первичной настройке новой роли завершен.
Нажимаем на кнопку “Close”.

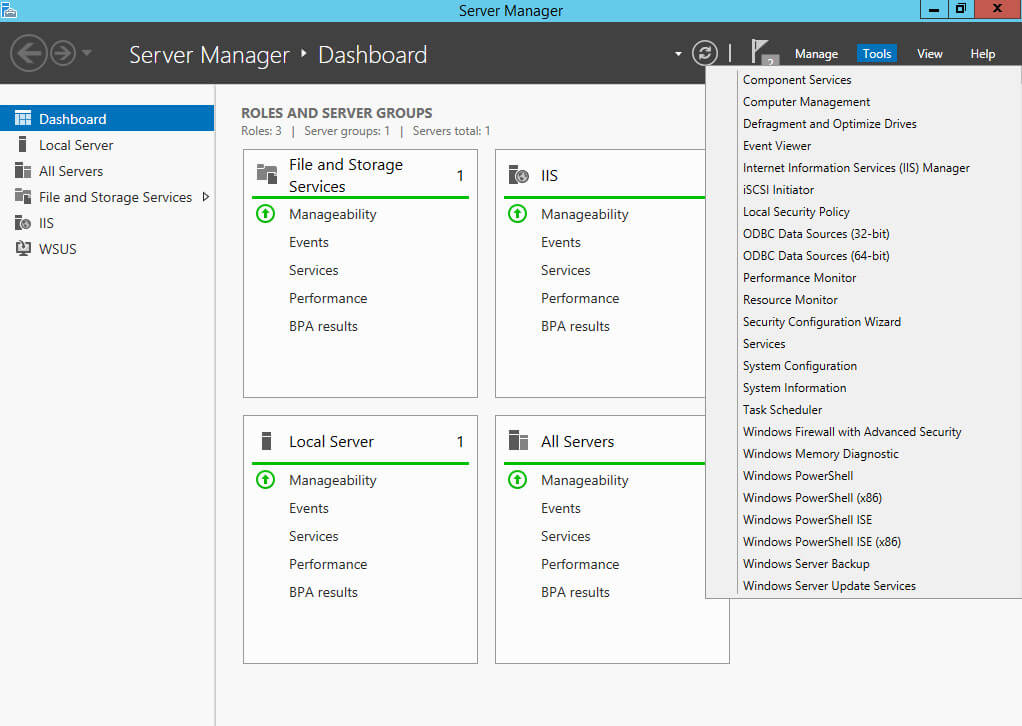
Теперь необходимо произвести базовую настройку роли Windows Server Update Services.
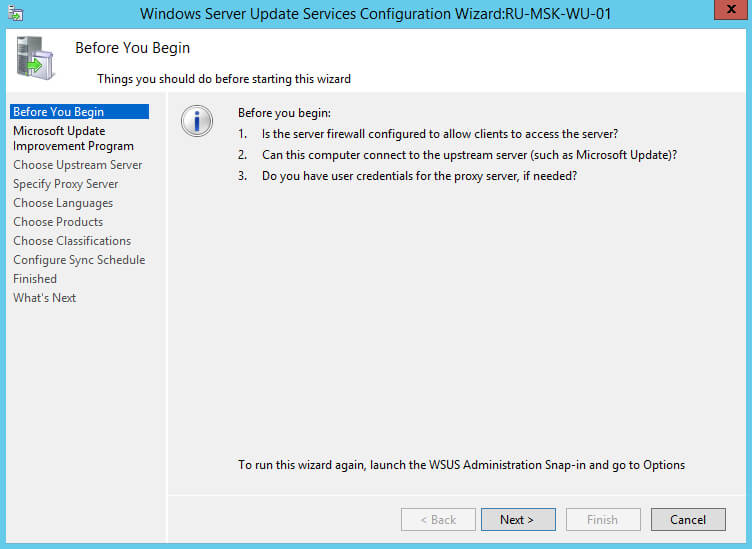
Возвращаемся в “Server Manager”, нажимаем на кнопку “Tools” в правом верхнем углу экрана и выбираем “Windows Server Update Services”.
Нажимаем на кнопку “Next”.
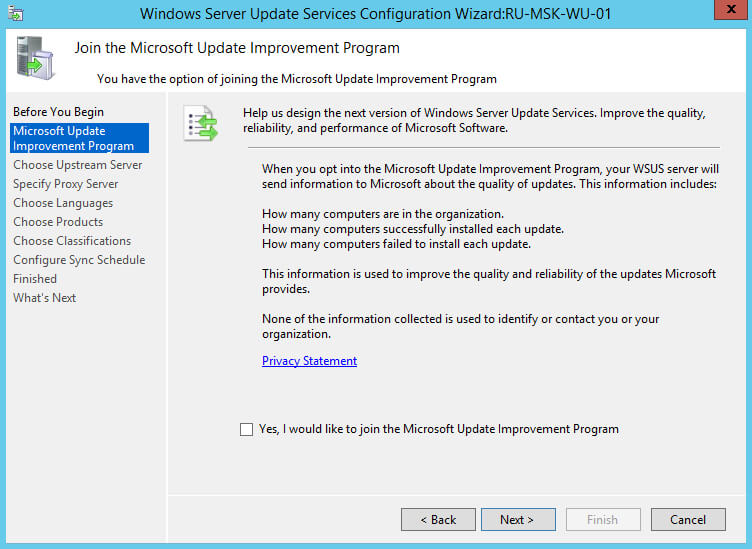
Далее предлагается принять участие в программе по улучшению качества.
Снимаем галочку “Yes, I would like to join the Microsoft Update Improvement Program” и нажимаем на кнопку “Next”.
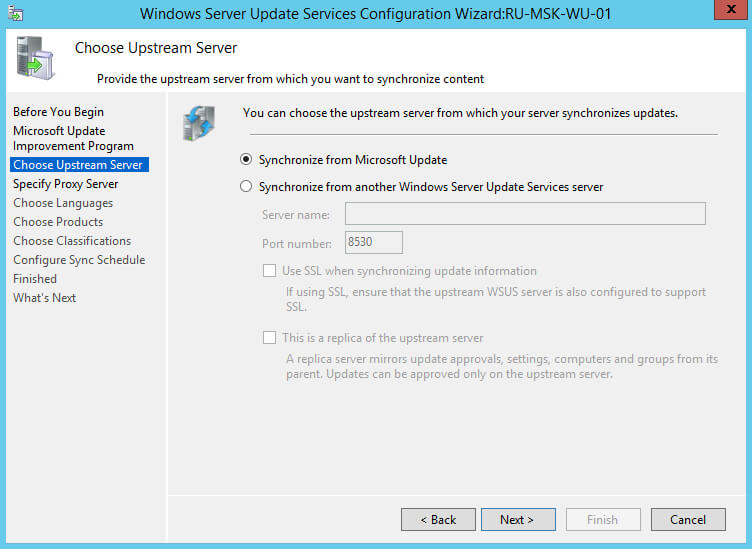
Теперь необходимо выбрать источник, откуда ваш сервер будет загружать обновления для дальнейшего распространения их в локальной сети. Для этого можно использовать сервера компании Microsoft или загружать обновления с другого сервера с ролью Windows Server Update Services в вашей локальной сети.
В данном руководстве сервер будет загружать обновления через Интернет с серверов компании Microsoft.
Выбираем “Synchronize from Microsoft Update” и нажимаем на кнопку “Next”.
Далее можно указать настройки для подключения к сети Интернет через прокси-сервер.
В данном руководстве прокси-сервер не используется.
Нажимаем на кнопку “Next”.

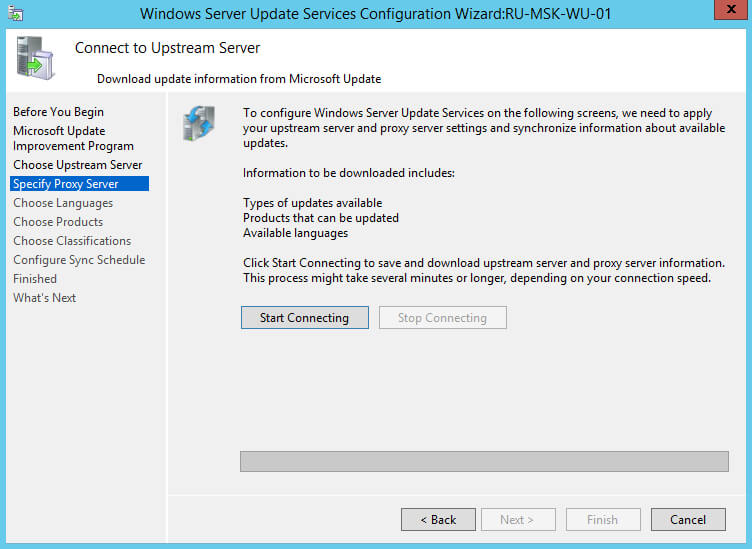
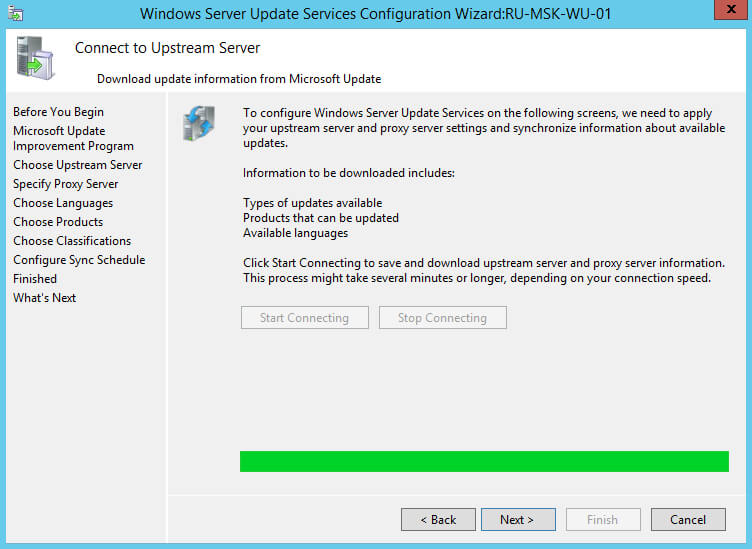
Теперь необходимо подключиться к источнику с обновлениями, чтобы получить сведения о доступных обновлениях.
Нажимаем на кнопку “Start Connecting”.
Процесс подключения к источнику с обновлениями завершен.
Нажимаем на кнопку “Next”.
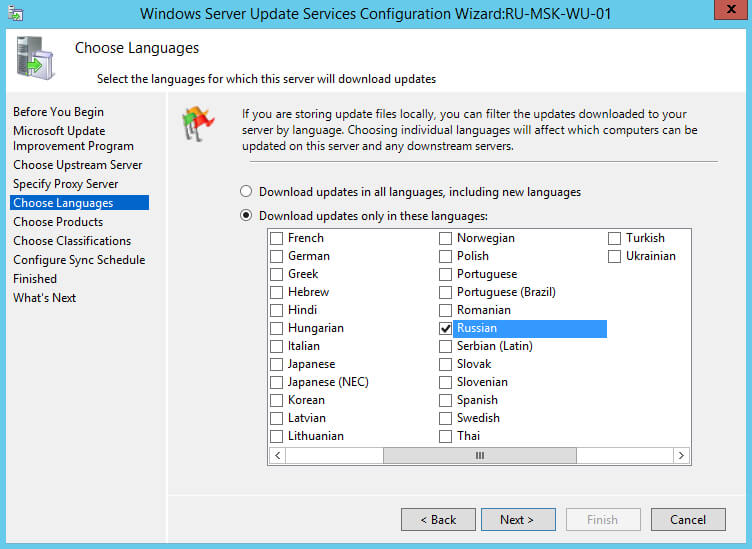
Далее необходимо выбрать, для каких языков нужно загружать обновления.
Выбираем нужные языки и нажимаем на кнопку “Next”.
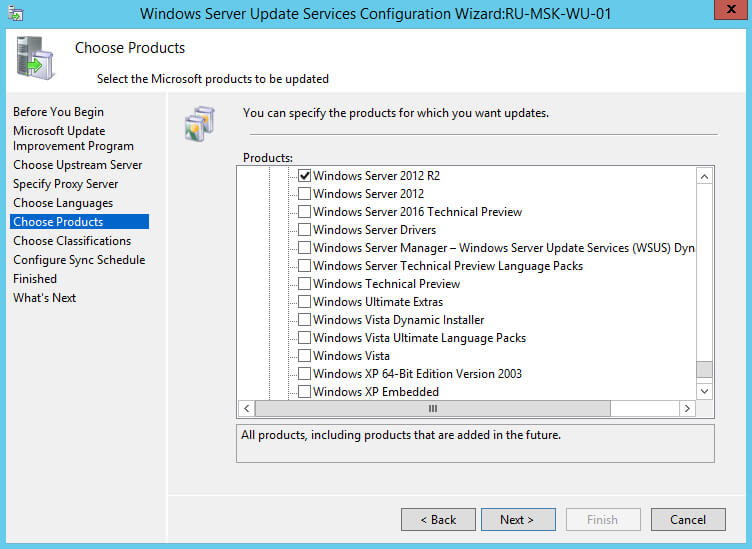
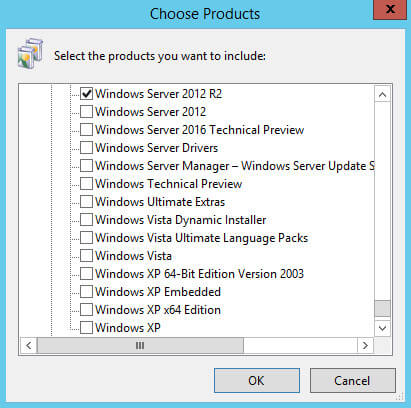
Теперь необходимо выбрать, для каких продуктов нужно загружать обновления.
В данном руководстве будут устанавливаться обновления для операционной системы Windows Server 2012 R2.
Выбираем, для каких продуктов планируется устанавливать обновления, и нажимаем на кнопку “Next”.
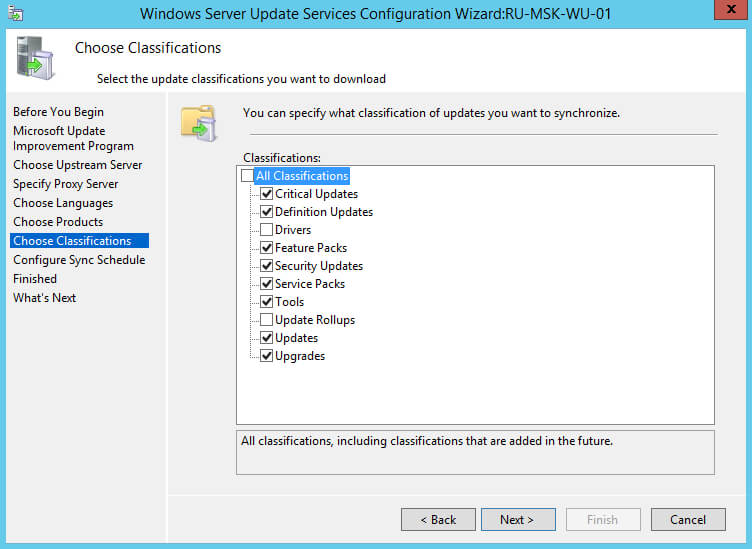
Далее необходимо выбрать нужные обновления по классификации.
Выбираем все классификации кроме “Drivers” и “Update Rollups”.
Обратите внимание, обновления, которые относятся к классификациям “Drivers” и “Update Rollups”, не рекомендуется устанавливать, используя сервер обновлений, чтобы иметь возможность полностью контролировать процесс установки и, таким образом, минимизировать получение ошибок в ходе обновления.
Нажимаем на кнопку “Next”.
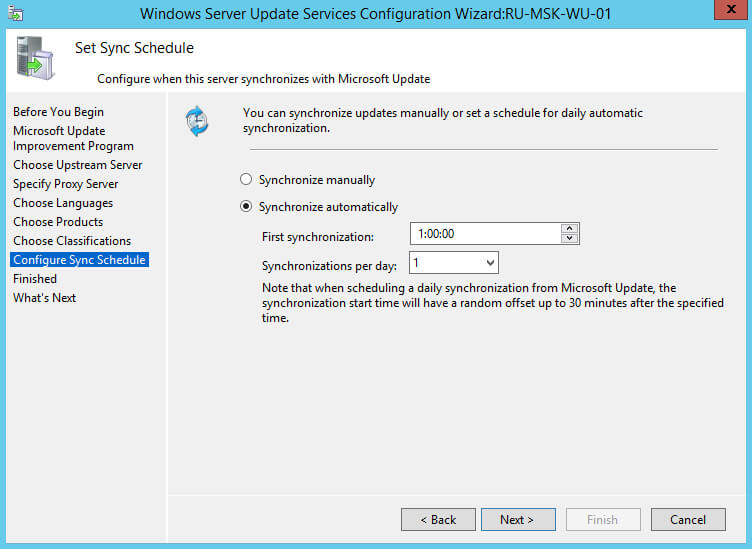
Теперь необходимо выбрать расписание, по которому ваш сервер будет загружать обновления для дальнейшего распространения их в локальной сети.
В данном руководстве сервер будет загружать обновления каждый день автоматически.
Выбираем “Synchronize automatically” и указываем удобное для вас время загрузки обновлений на ваш сервер.
Нажимаем на кнопку “Next”.
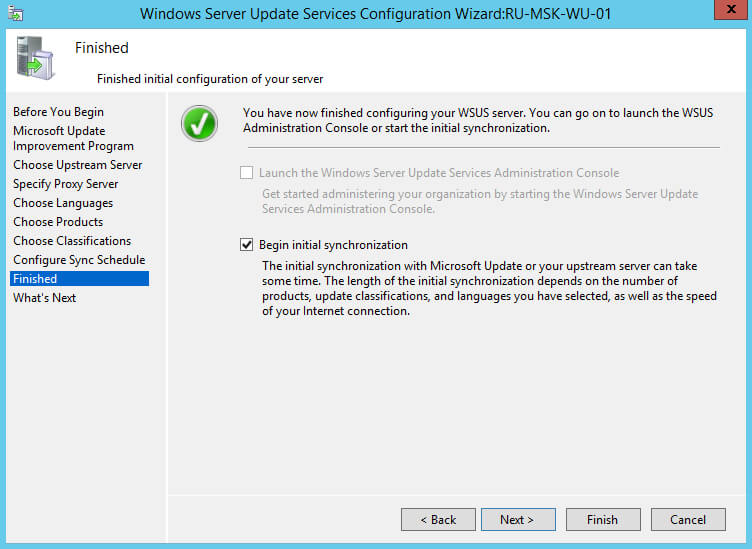
Теперь можно запустить процесс первоначальной синхронизации с серверами компании Microsoft.
Ставим галочку на пункте “Begin initial synchronization” и нажимаем на кнопку “Next”.
Далее буду даны рекомендации по дальнейшей настройке роли Windows Server Update Services.
Нажимаем на кнопку “Finish”.
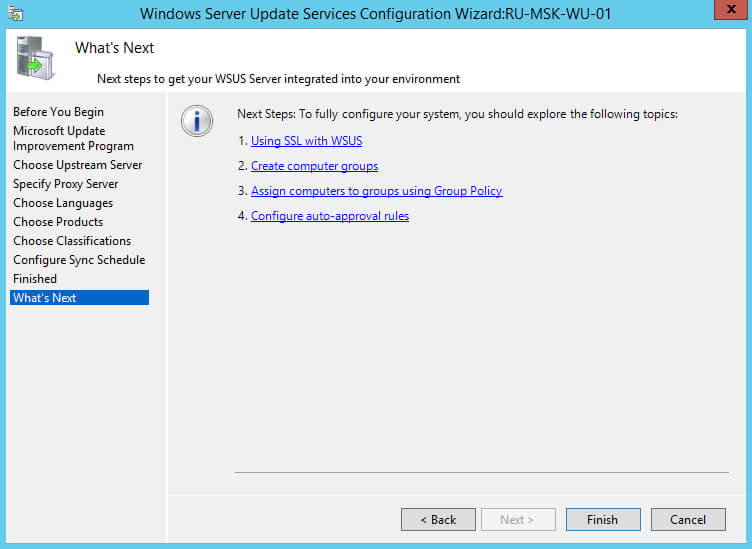
Базовая настройка роли Windows Server Update Services произведена.
Теперь необходимо создать групповую политику, которая распространит информацию о вашем сервере обновлений на компьютеры для последующей загрузки обновлений с вашего сервера.
В данном руководстве будет рассматриваться единая групповая политика для серверов и рабочих станций.
Обратите внимание, в промышленной среде рекомендуется использовать индивидуальные групповые политики для каждого типа компьютеров.
Переходим на контроллер домена и заходим в систему под учетной записью с правами администратора домена.
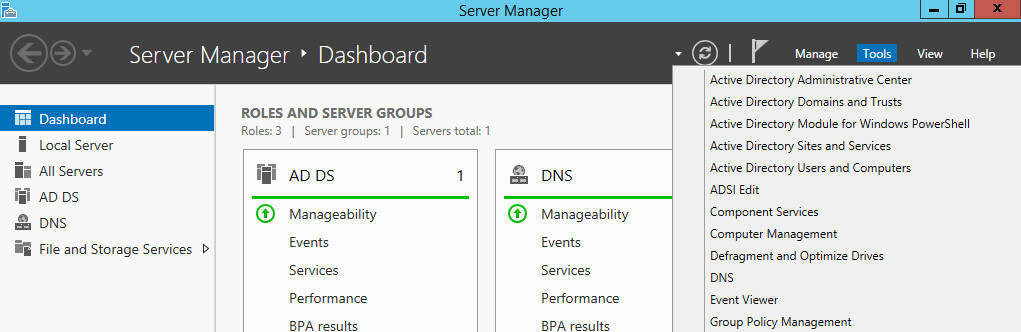
Открываем “Server Manager”, нажимаем на кнопку “Tools” в правом верхнем углу экрана и выбираем “Group Policy Management”.
Нажимаем правой кнопкой мыши на имя домена и выбираем “Create a GPO in this domain, and Link it here”.
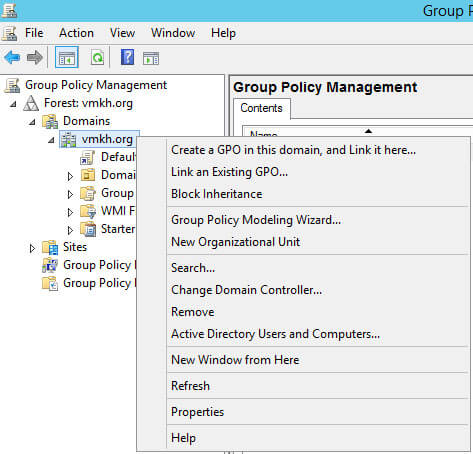
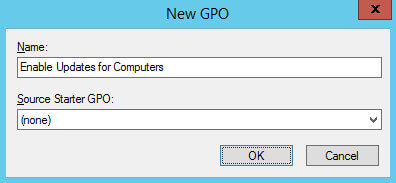
Указываем имя для новой групповой политики и нажимаем на кнопку “OK”.
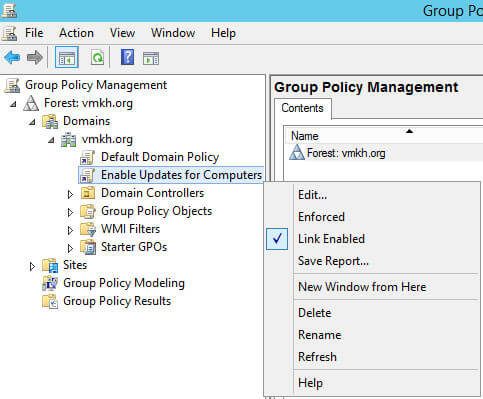
Далее нажимаем на новую политику правой кнопкой мыши и выбираем “Edit”.
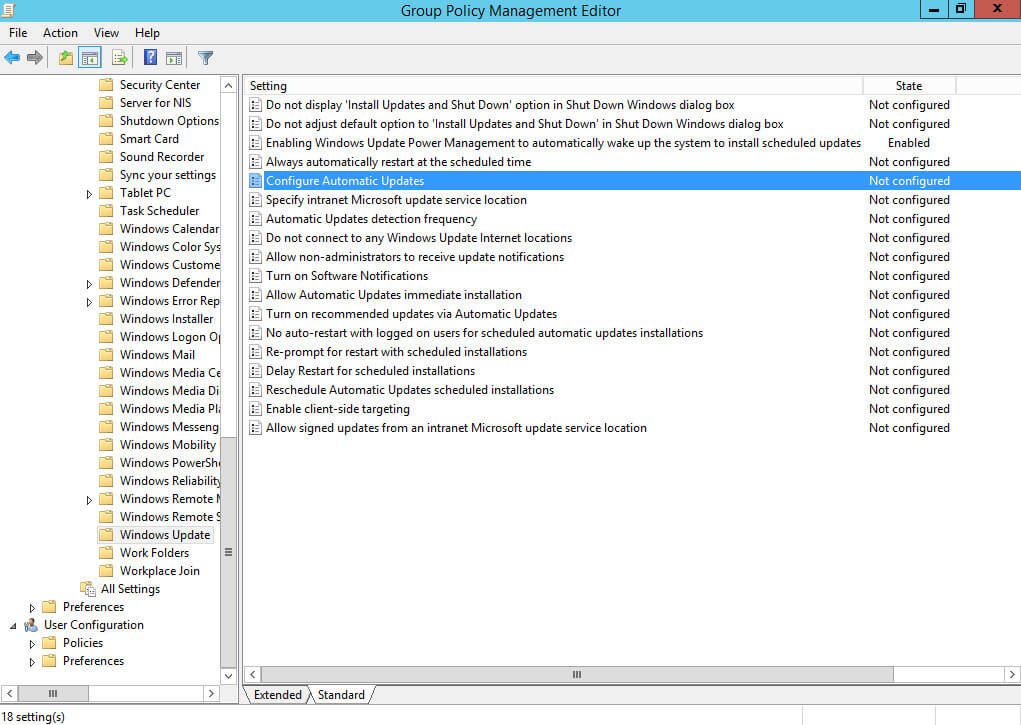
В редакторе групповой политики переходим в раздел “Computer Configuration”, затем в подраздел “Policies”, далее находим раздел “Administrative Templates” и выбираем “Windows Components”, затем “Windows Update”.
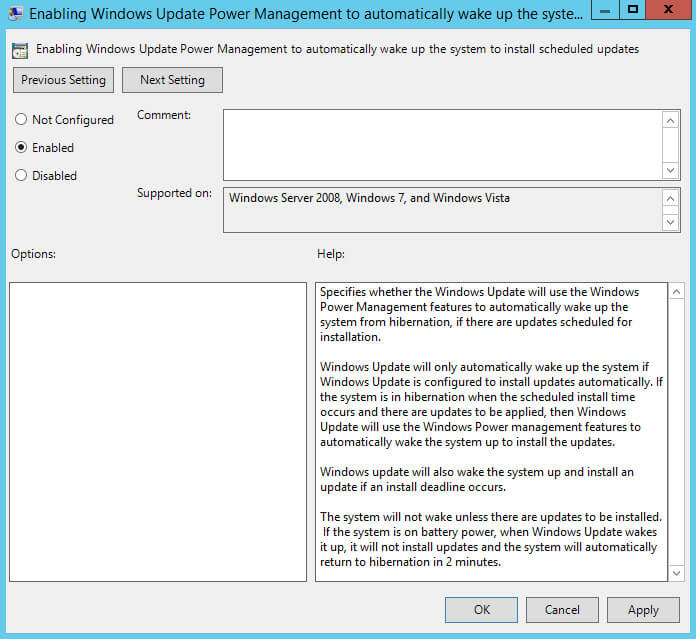
Далее нажимаем два раза левой кнопкой мыши на пункт “Enabling Windows Update Power Management to automatically wake up the system to install scheduled updates”.
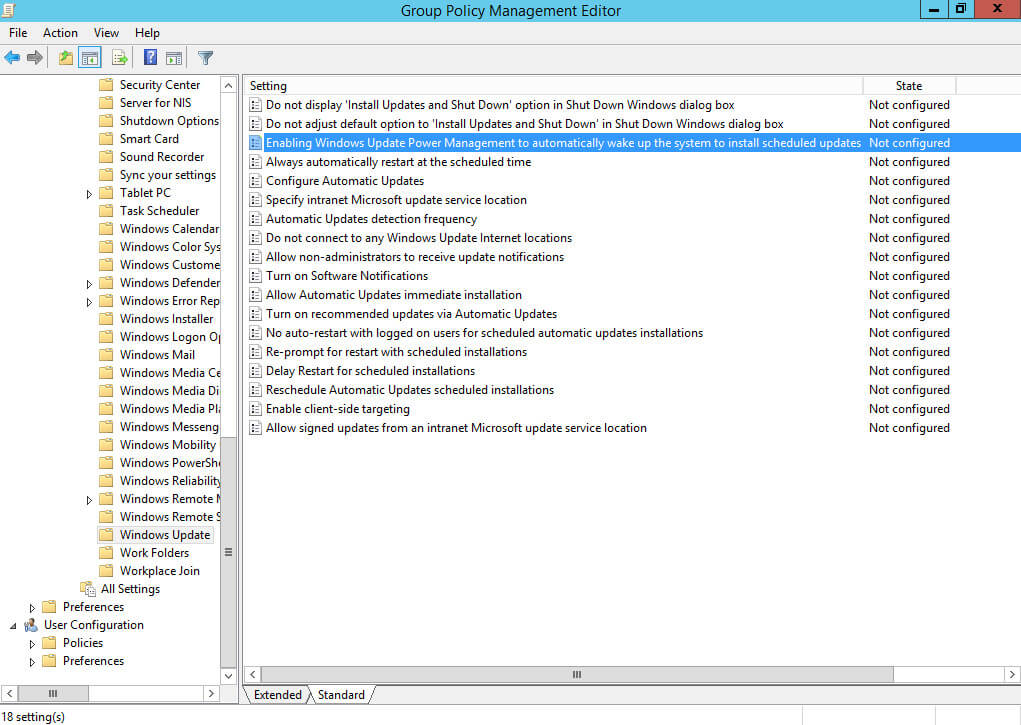
Данная настройка позволяет выводить систему из режима сна для установки обновлений.
Выбираем “Enabled”.
Обратите внимание, если групповая политика рассчитана только для серверов, то эту настройку можно не применять.
Нажимаем на кнопку “OK”.
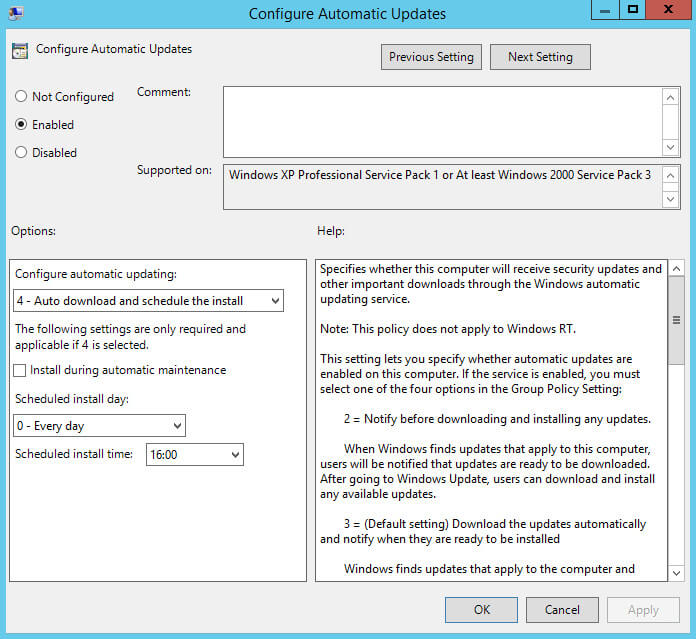
Далее нажимаем два раза левой кнопкой мыши на пункт “Configure Automatic Updates”.
Данная настройка позволяет выбрать параметры установки обновлений и расписание, по которому они будут устанавливаться.
Выбираем “Enabled”.
В данном руководстве обновления будут автоматически загружаться и устанавливаться каждый день в четыре часа вечера на все компьютеры.
Обратите внимание, в промышленной среде для важных серверов не рекомендуется использовать автоматическую установку обновлений, чтобы иметь возможность полностью контролировать процесс установки и, таким образом, минимизировать получение ошибок в ходе обновления.
В разделе “Configure automatic updating” выбираем “Auto download and schedule the install”.
В разделе “Scheduled install day” выбираем удобное расписание для установки обновлений”.
Нажимаем на кнопку “OK”.
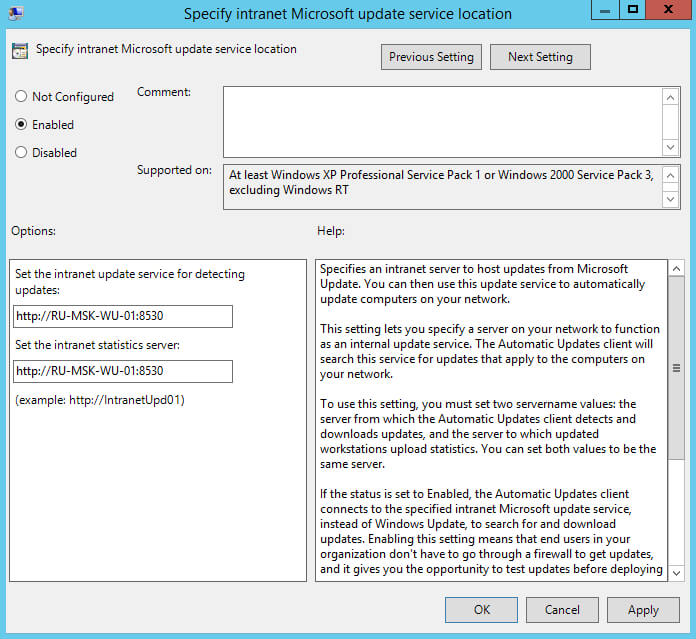
Далее нажимаем два раза левой кнопкой мыши на пункт “Specify intranet Microsoft update service location”.
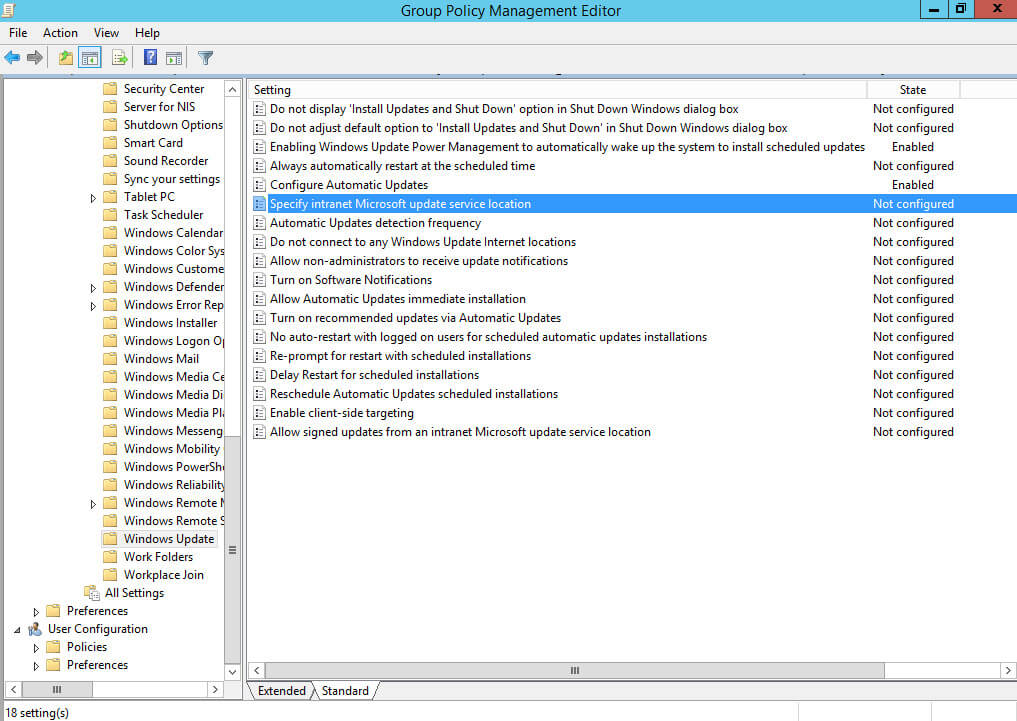
Данная настройка позволяет указать адрес вашего сервера обновлений.
Выбираем “Enabled”.
В поле “Set the intranet update service for detecting updates” указываем адрес, по которому ваш сервер обновлений доступен в локальной сети по протоколу HTTP, и порт 8530.
В поле “Set the intranet statistics server” указываем адрес, по которому ваш сервер обновлений доступен в локальной сети по протоколу HTTP, и порт 8530.
Нажимаем на кнопку “OK”.
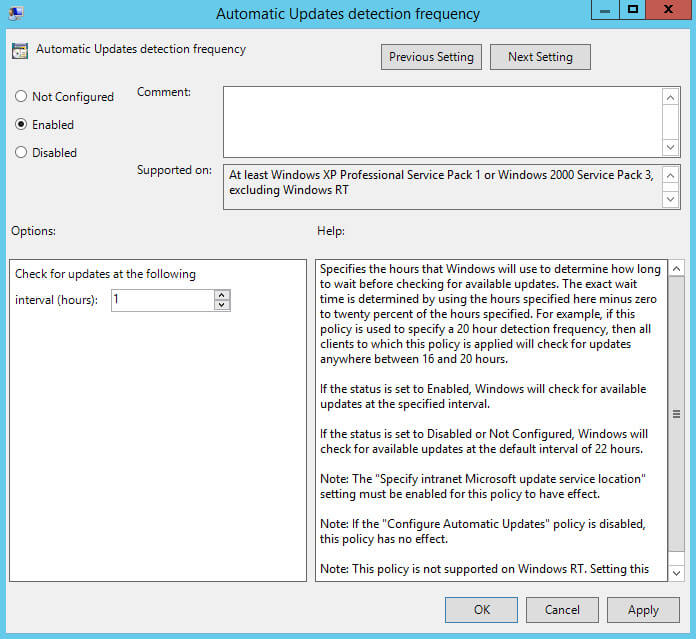
Далее нажимаем два раза левой кнопкой мыши на пункт “Automatic Updates detection frequency”.
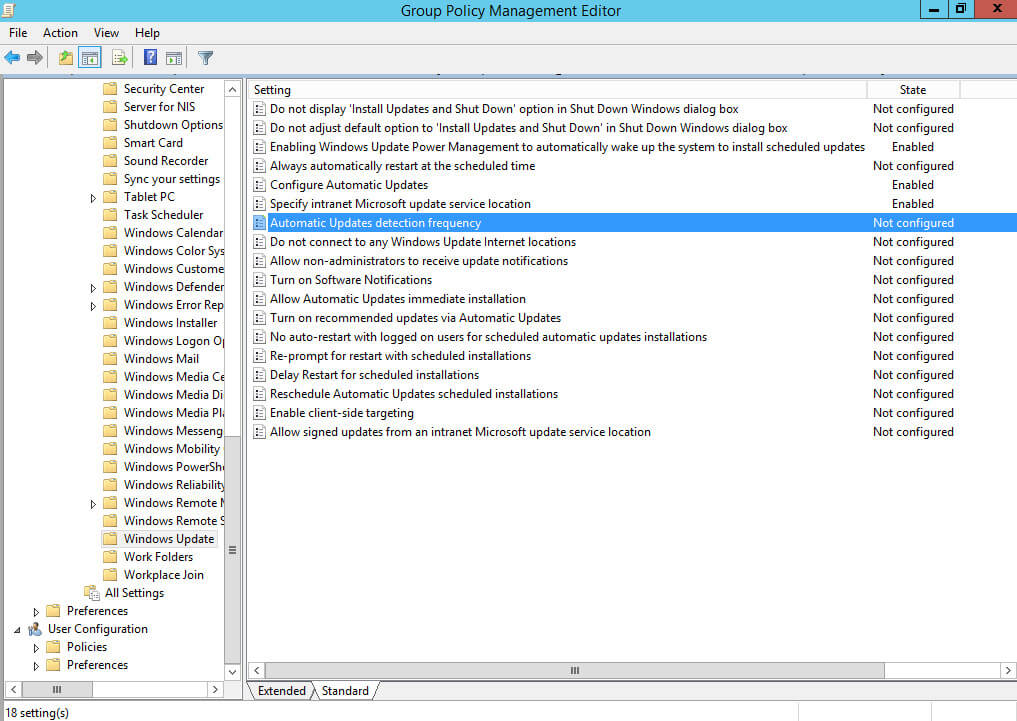
Данная настройка позволяет установить интервал проверки на наличие новых обновлений на вашем сервере обновлений.
Выбираем “Enabled”.
В данном руководстве проверка на наличие новых обновлений будет проводиться один раз в час.
В поле “Interval (hours)” указываем удобный интервал для установки обновлений.
Нажимаем на кнопку “OK”.
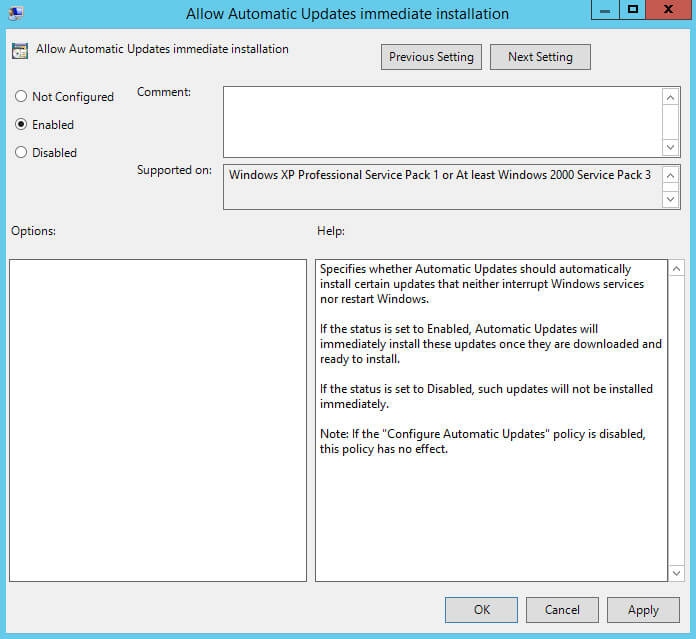
Далее нажимаем два раза левой кнопкой мыши на пункт “Allow Automatic Updates immediate installation”.
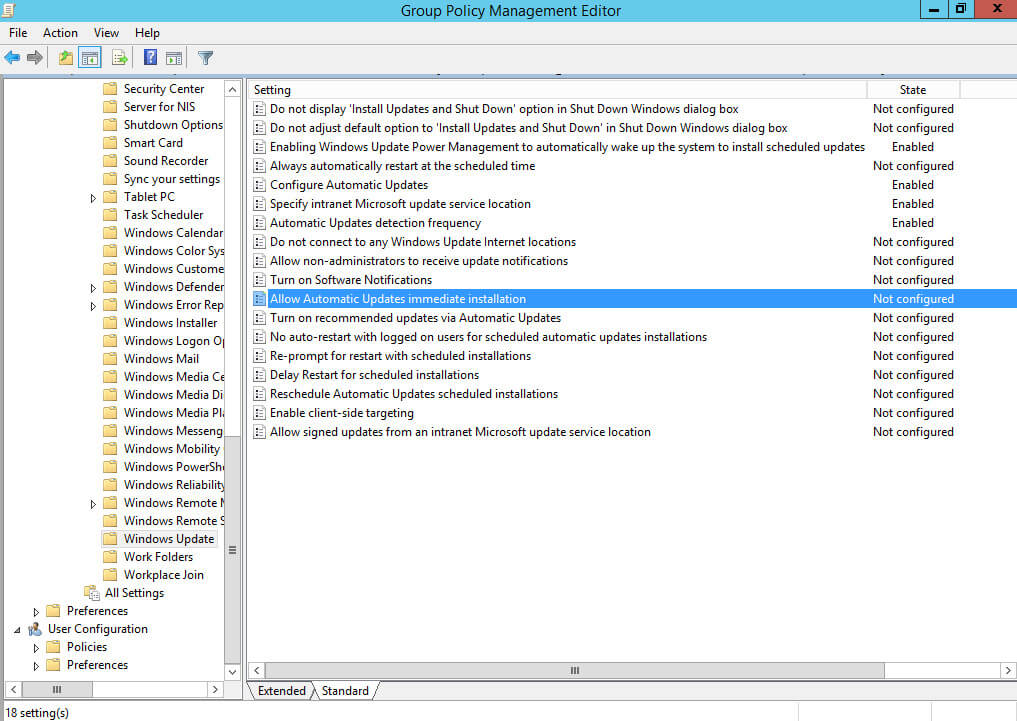
Данная настройка позволяет немедленно начать установку обновлений, после того как они будут загружены и подготовлены к установке на целевых компьютерах.
Выбираем “Enabled”.
Нажимаем на кнопку “OK”.
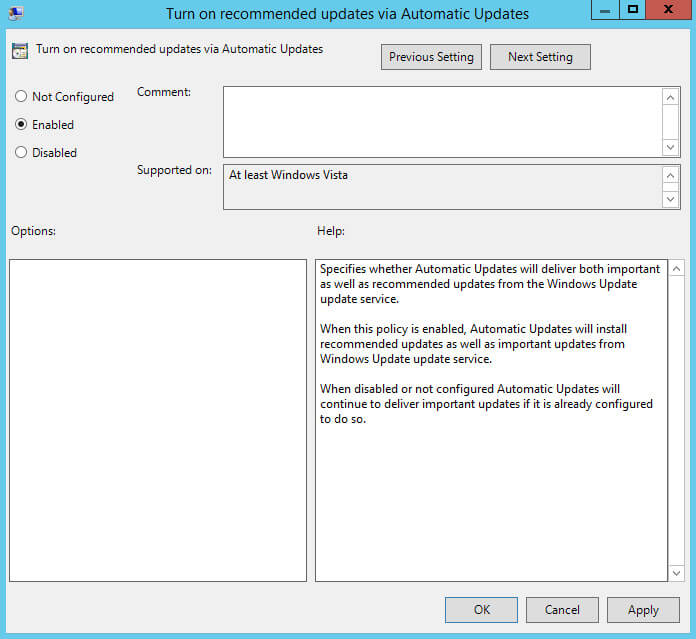
Далее нажимаем два раза левой кнопкой мыши на пункт “Turn on recommended updates via Automatic Updates”.
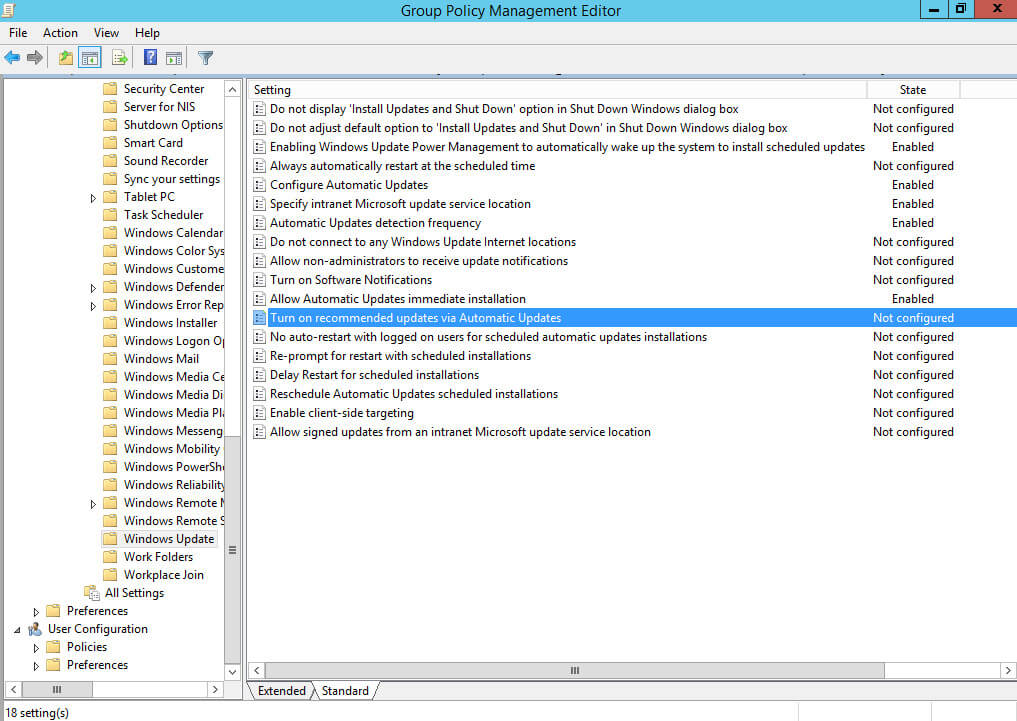
Данная настройка позволяет устанавливать на компьютеры не только важные обновления, но и рекомендуемые.
Выбираем “Enabled”.
Нажимаем на кнопку “OK”.
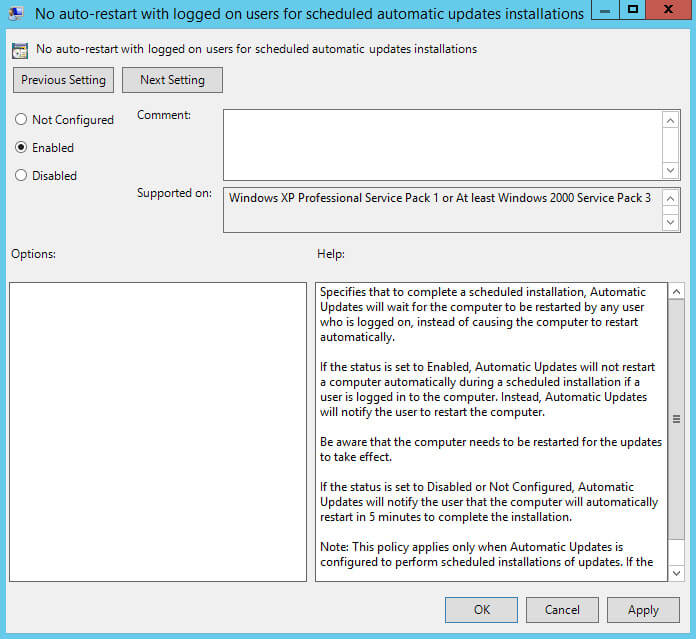
Далее нажимаем два раза левой кнопкой мыши на пункт “No auto-restart with logged on users for scheduled automatic updates installation”.
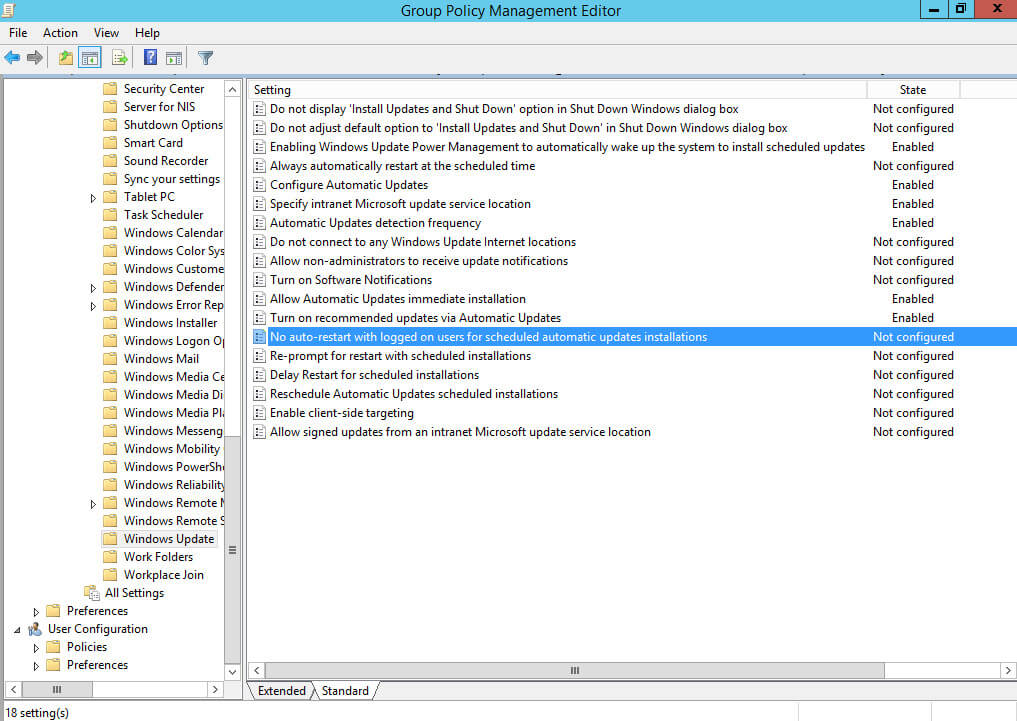
Данная настройка позволяет запретить автоматическую перезагрузку компьютера, если на него вошел пользователь.
Выбираем “Enabled”.
Нажимаем на кнопку “OK”.
Теперь проверим применение групповой политики.
Для этого необходимо запустить обновление групповых политик на компьютере, который попадает под действие новой групповой политики и на который требуется установить обновления.
В данном руководстве в качестве компьютера, на который будут устанавливаться обновления, используется сервер на базе операционной системы Windows Server 2012 R2, который выполняет роль контроллера домена.
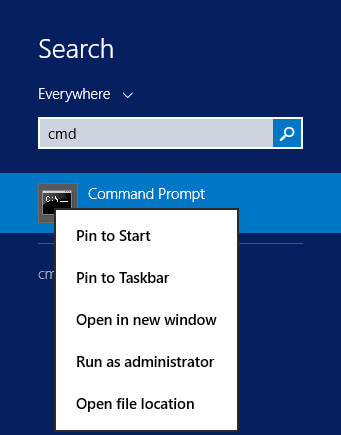
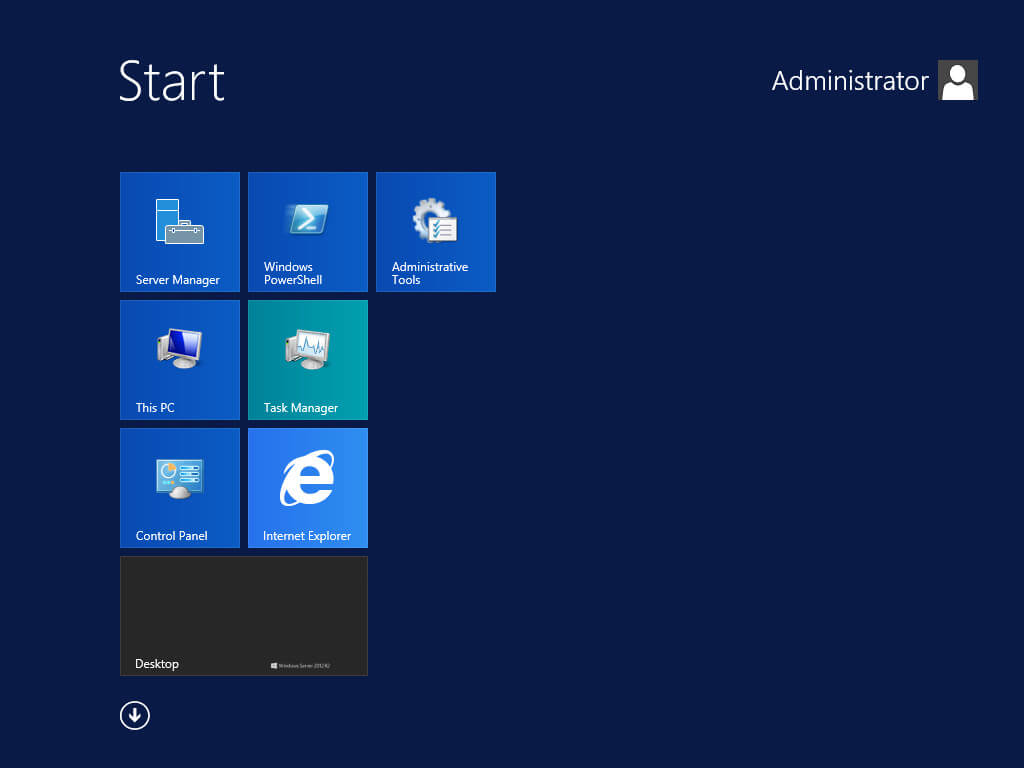
Нажимаем “Start”, указываем в строке поиска “cmd”, затем нажимаем правой кнопкой мыши на “Command Prompt” и выбираем “Run as administrator”.
Ускорим применение новой политики на сервер с помощью команды:
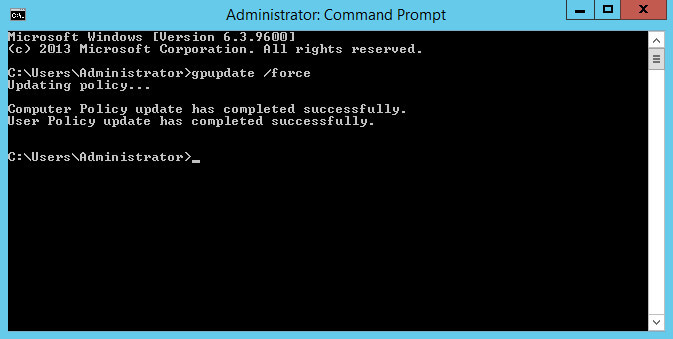
gpupdate /force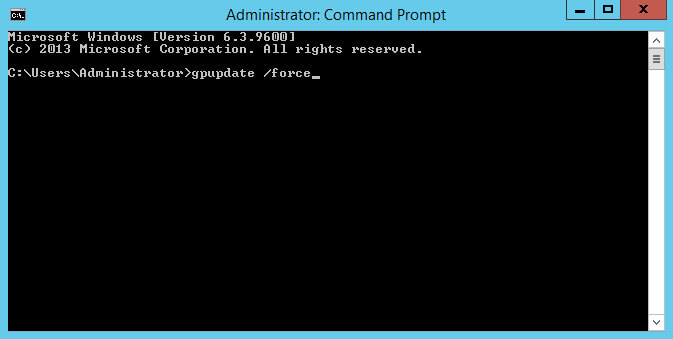
Обновления групповых политик успешно завершено.
Теперь проверим, что сервер получил необходимые настройки для загрузки обновлений с сервера, на котором установлена роль Windows Server Update Services.
Переходим в меню “Start” и нажимаем кнопку “Control Panel”.

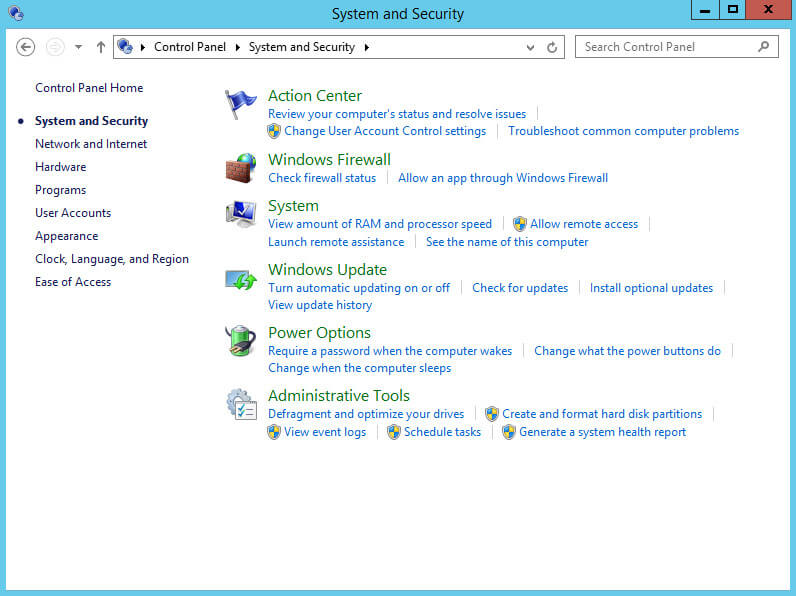
Далее переходим в раздел “System and Security”.
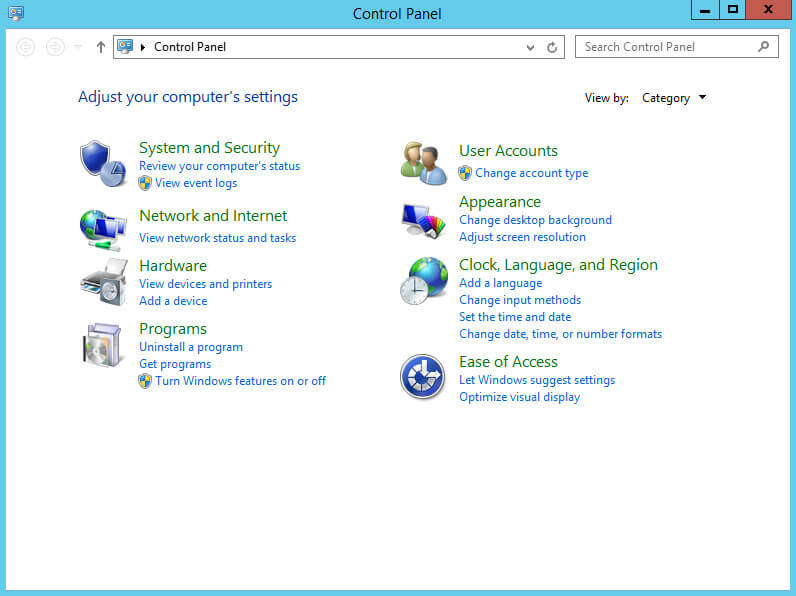
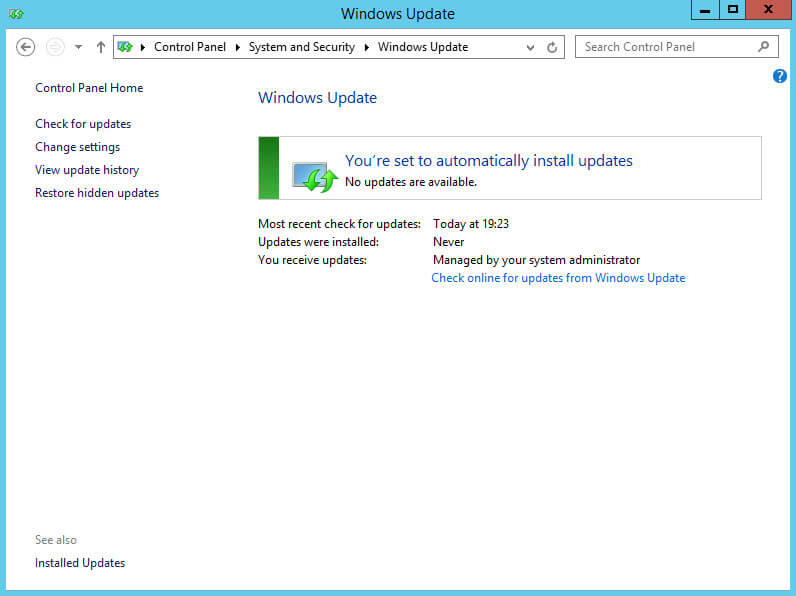
Выбираем раздел “Windows Update”.
Если вы все сделали правильно, то в разделе “Windows Update” в пункте “You receive updates” должно отображаться “Managed by your system administrator”.
Теперь необходимо создать новую группу компьютеров, разрешить установку определенных обновлений на эту группу и добавить в эту группу компьютеры, на которые планируется устанавливать обновления.
Возвращаемся на сервер, на котором установлена роль Windows Server Update Services.
Заходим в систему под учетной записью с правами администратора.
Открываем “Server Manager”, нажимаем на кнопку “Tools” в правом верхнем углу экрана и выбираем “Windows Server Update Services”.

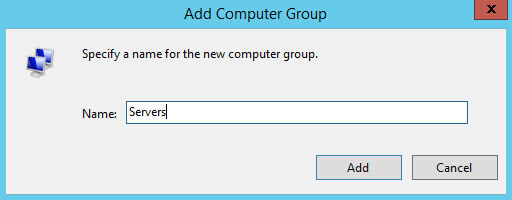
Переходим в раздел “Computers” и нажимаем правой кнопкой мыши на подраздел “All Computers”. В открывшемся меню выбираем “Add Computer Group”.
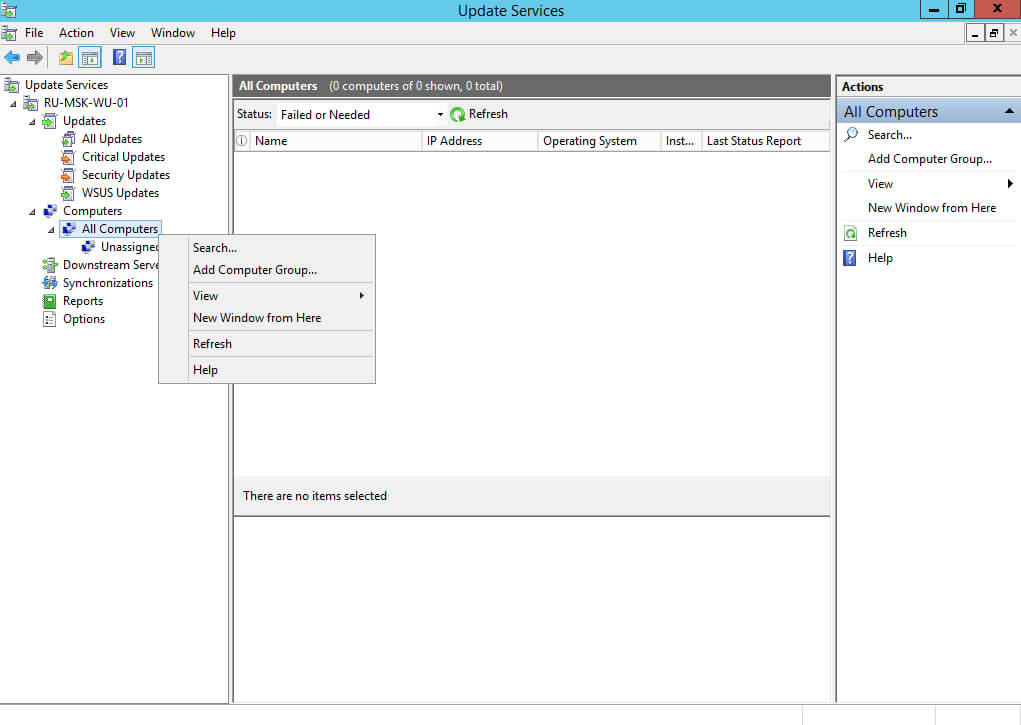
В данном руководстве будет использоваться группа “Servers”, куда будут добавляться сервера, на которые требуется установить обновления.
Указываем имя для новой группы компьютеров и нажимаем на кнопку “Add”.
Теперь в новую группу необходимо добавить компьютеры, на которые требуется установить обновления.
В данном руководстве в качестве компьютера, куда будут устанавливаться обновления, используется сервер, который выполняет роль контроллера домена.
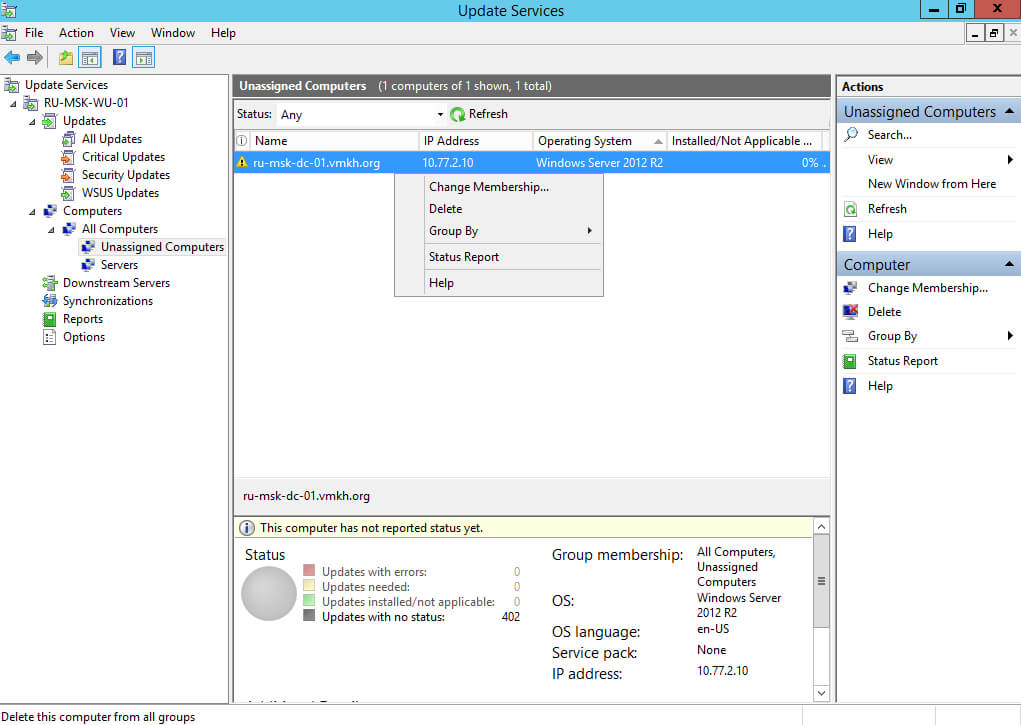
Переходим в раздел “Computers”, затем в подраздел “Unassigned Computers”. В меню “Status” выбираем “Any” и нажимаем на кнопку “Refresh”.
В этом подразделе появляются все компьютеры, на которые распространилась информация о вашем сервере обновлений.
Нажимаем правой кнопкой мыши на компьютер, на который требуется установить обновления, и в открывшемся меню выбираем “Change Membership”.
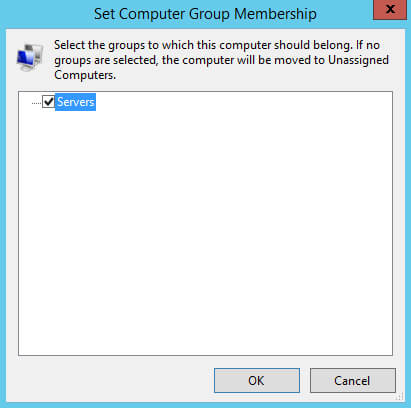
Указываем группу компьютеров, в которую необходимо добавить компьютер и нажимаем на кнопку “OK”.
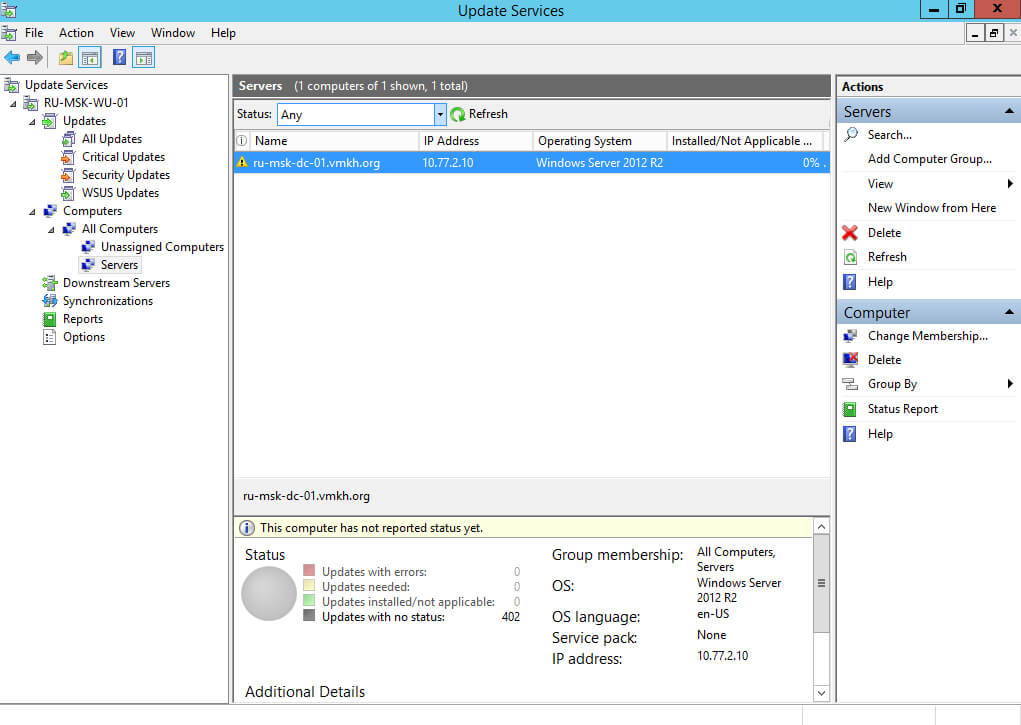
Переходим в раздел “Computers”, затем в подраздел “Servers”. В меню “Status” выбираем “Any” и нажимаем на кнопку “Refresh”.
Компьютер успешно добавлен в группу “Servers”.
Теперь необходимо разрешить установку обновлений на новую группу компьютеров.
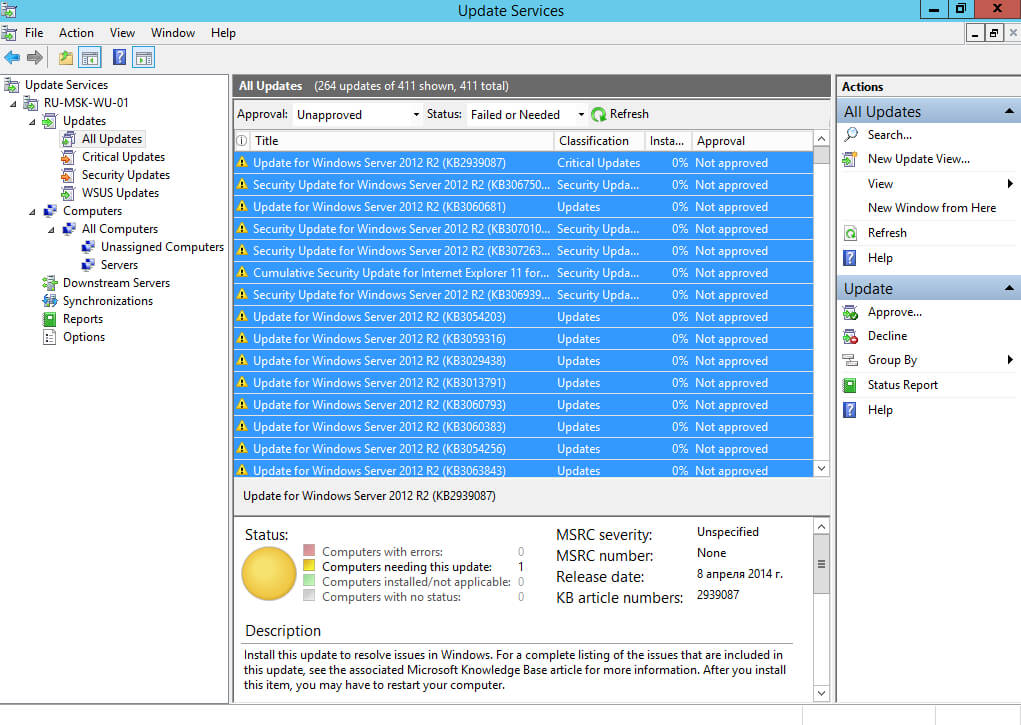
В разделе “Updates” переходим в подраздел “All Updates” и в правой части экрана выбираем необходимые для установки обновления.
В данном руководстве будут разрешены все обновления для операционной системы Windows Server 2012 R2.
Выбираем обновления, которые необходимо разрешить для установки, и нажимаем на кнопку “Approve”.
Теперь нужно выбрать группу компьютеров, на которую нужно разрешить установку выбранных обновлений.
Выбираем “Servers”, и в открывшемся меню выбираем “Approved for Install”.
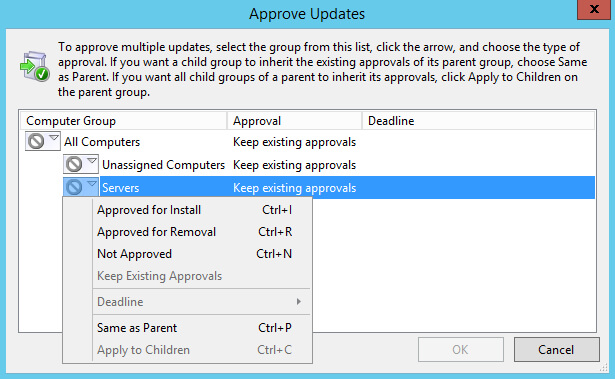
Все готово к разрешению на установку выбранных обновлений на группу “Servers”.
Нажимаем на кнопку “OK”.

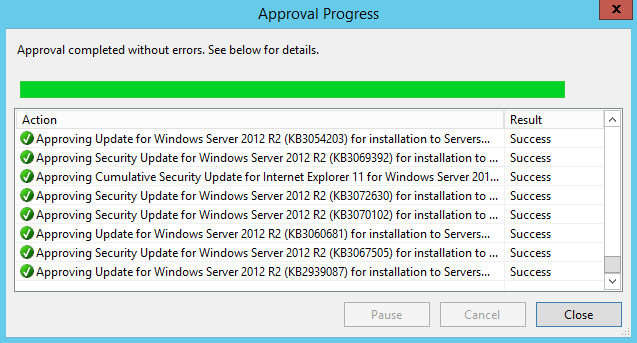
Обновления успешно разрешены для установки на выбранную группу компьютеров.
Нажимаем на кнопку “Close”.
Теперь необходимо подождать, и через некоторое время на указанную группу компьютеров будут загружены и установлены только те обновления, которые были разрешены.
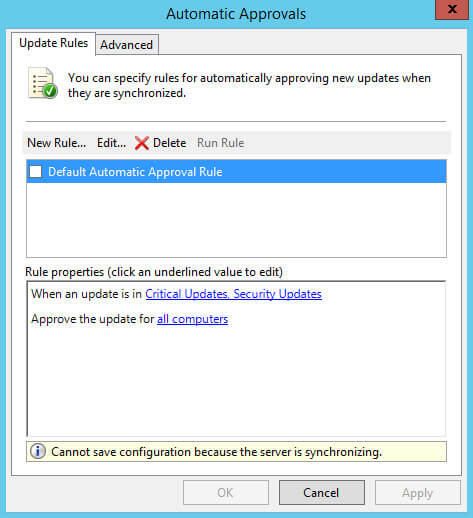
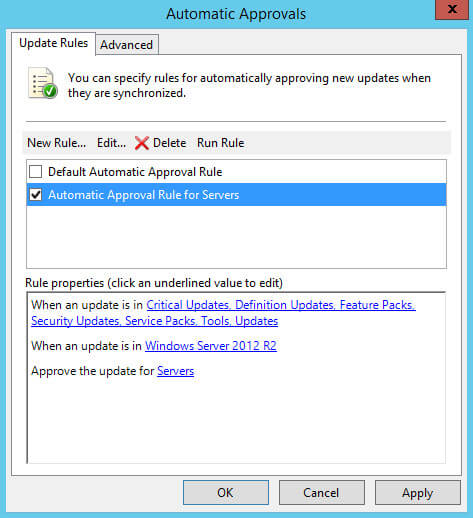
Теперь можно создать правило для автоматического разрешения новых обновлений.
Обратите внимание, в промышленной среде для важных серверов не рекомендуется использовать правила для автоматического разрешения обновлений, чтобы иметь возможность полностью контролировать процесс установки и, таким образом, минимизировать получение ошибок в ходе обновления.
В разделе “Options” выбираем “Automatic Approvals”.
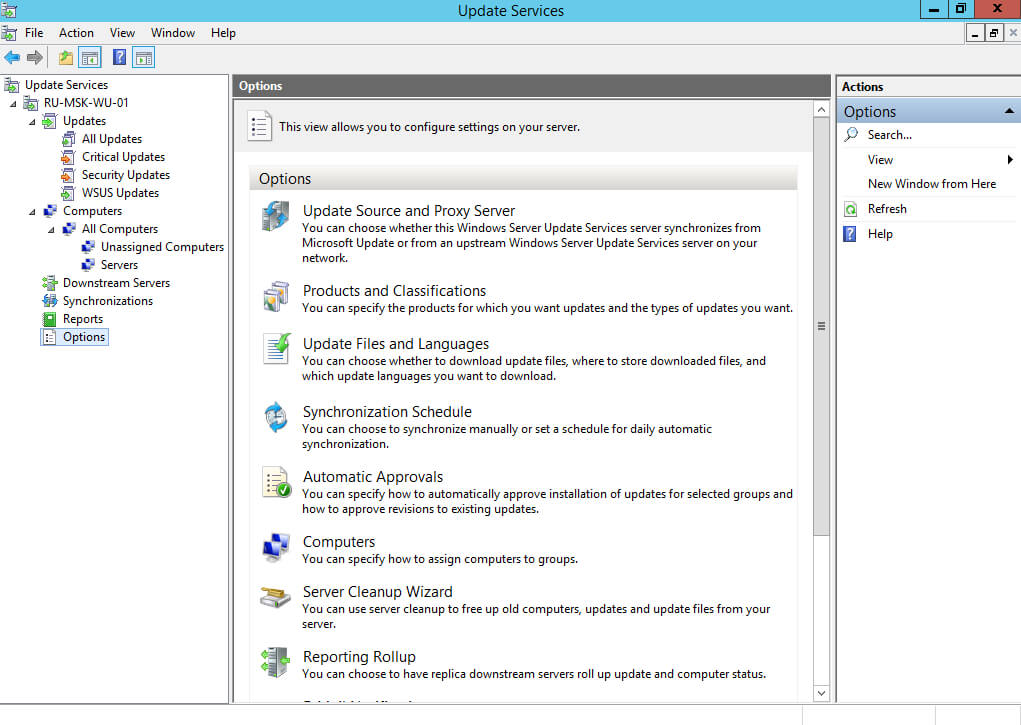
Нажимаем на кнопку “New Rule”.
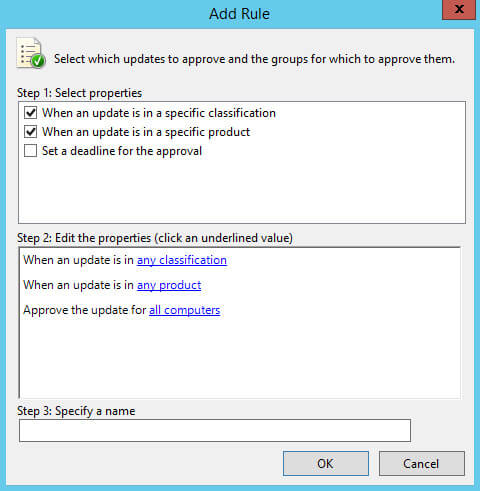
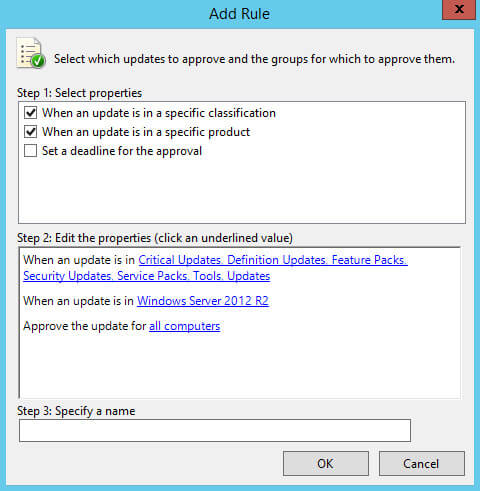
В разделе “Step 1: Select properties” ставим галочку на пункте “When an update is in a specific classification”, чтобы указать для каких классификаций обновления будут разрешаться автоматически.
Затем ставим галочку на пункте “When an update is in a specific product”, чтобы указать для каких продуктов обновления будут разрешаться автоматически.
В разделе “Step 2: Edit the properties” выбираем “Any classification”.
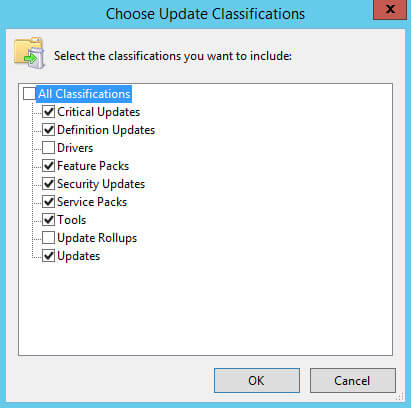
Далее необходимо выбрать нужные обновления по классификации.
Выбираем все классификации кроме “Drivers” и “Update Rollups”.
Обратите внимание, обновления, которые относятся к классификациям “Drivers” и “Update Rollups”, не рекомендуется устанавливать, используя сервер обновлений, чтобы иметь возможность полностью контролировать процесс установки и, таким образом, минимизировать получение ошибок в ходе обновления.
Нажимаем на кнопку “OK”.
Теперь необходимо выбрать для каких продуктов нужно автоматически разрешать обновления.
В разделе “Step 2: Edit the properties” выбираем “Any product”.
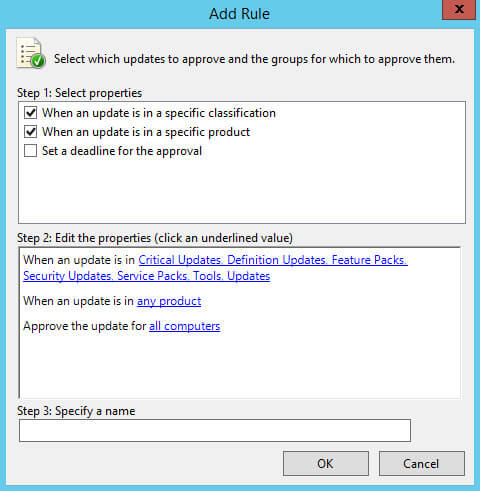
В данном руководстве будут автоматически разрешаться обновления для операционной системы Windows Server 2012 R2.
Выбираем продукты, на которые планируется устанавливать обновления, и нажимаем на кнопку “OK”.
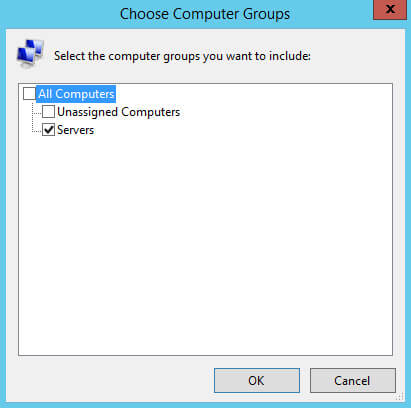
Теперь необходимо выбрать для какой группы компьютеров необходимо автоматически разрешать обновления.
В разделе “Step 2: Edit the properties” выбираем “All computers”.
В данном руководстве в качестве группы, на которую необходимо автоматически разрешать обновления, используется группа “Servers”.
Выбираем группу компьютеров, для которой необходимо автоматически разрешать обновления, и нажимаем на кнопку “OK”.
Теперь необходимо указать имя для нового правила.
В разделе “Step 3: Specify a name” указываем имя для нового правила и нажимаем на кнопку “OK”.
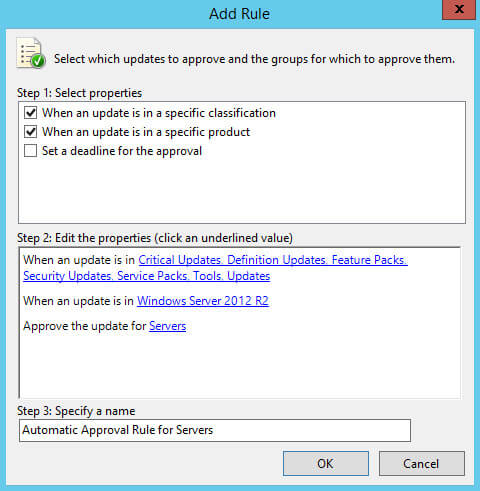
Создание правила для автоматического разрешения новых обновлений завершено.
Ставим галочку на новом правиле и нажимаем на кнопку “OK”.
Теперь проверим, установились ли обновления.
Через день возвращаемся на компьютер, на котором должны были установиться обновления.
В данном руководстве в качестве компьютера, на который устанавливались обновления, использовался контроллер домена.
Заходим в систему под учетной записью с правами администратора домена и переходим в меню “Start”.
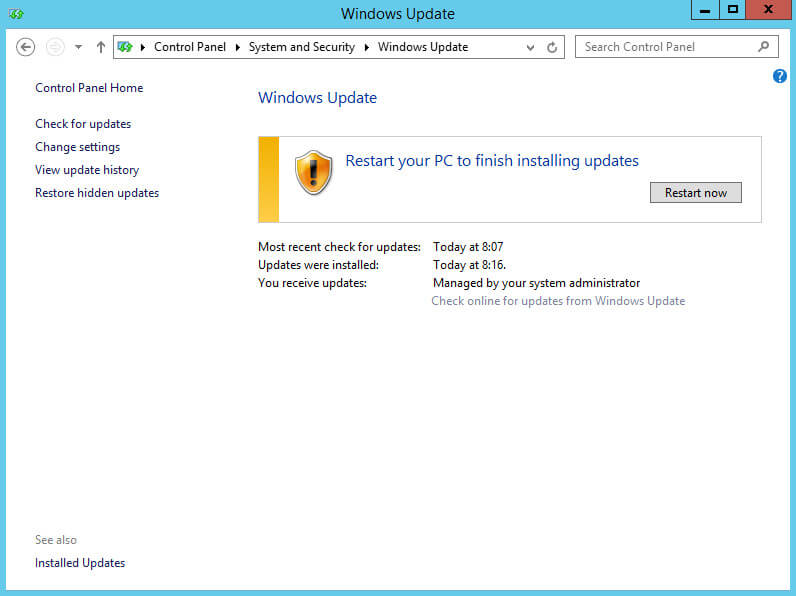
Теперь переходим в раздел “System and Security”.

Выбираем раздел “Windows Update”.

Обновления успешно установились на сервер.
Чтобы завершить установку обновлений необходимо перезагрузить сервер.
Нажимаем на кнопку “Restart now”.
Набор компонентов RSAT (Remote Server Administration Tools / Средства удаленного администрирования сервера) позволяет удаленно управлять серверными ролями и компонентами на серверах Windows Server с обычной рабочей станции . В RSAT входят как графические MMC оснастки, так и утилиты командной строки, и модули PowerShell. Вы можете установить RSAT как на десктопных версиях Windows 10 или 11, так и на платформе Windows Server. В этой статье мы покажем, как установить RSAT в Windows 10 и Windows 11, и в Windows Server 2022/2019/2022 в онлайн и в офлайн режиме через Feature on Demand из графического интерфейса Windows и через консоль PowerShell.
Содержание:
- Установка RSAT из графического интерфейса Windows 10 через Features on Demand (FoD)
- Установка RSAT в Windows 10 с помощью PowerShell
- Установка RSAT в Windows 11
- Как установить Remote Server Administration Tools в Windows Server 2022,2019,2016?
- Ошибка 0x800f0954 при установке RSAT в Windows 10
- Установка RSAT в Windows 10 в офлайн режиме
- Частые ошибки установки Remote Server Administration Tools в Windows
Установка RSAT из графического интерфейса Windows 10 через Features on Demand (FoD)
До версии Windows 10 1809 пакет удаленного администрирования серверов RSAT (Remote Server Administration Tools) устанавливался в виде MSU обновления, которое нужно было вручную скачивать с серверов Microsoft и устанавливать на компьютерах. При каждом обновлении билда Windows 10 нужно было устанавливать новую версию RSAT. Сейчас на странице загрузки RSAT сайте Microsoft висит следующая надпись:
IMPORTANT: Starting with Windows 10 October 2018 Update, RSAT is included as a set of “Features on Demand” in Windows 10 itself.
Дело в том, что в современных билдах Windows 10 пакет Remote Server Administration Tools не нужно скачивать вручную. Средства его установки уже встроены в образ Windows 10 и доступны через опцию Функции по требованию / Features on Demand.
Дистрибутив Windows 10 не включает в себя установочные файлы RSAT. Для их установки вашему компьютеру нужен прямой доступ в Интернет. Кроме того установить RSAT можно Professional и Enterprise редакциях в Windows 10, но не в Windows 10 Home.
Чтобы установить RSAT в Windows 10 нужно перейти в раздел Settings -> Apps -> Optionla Features -> Add a feature (Параметры Windows -> Приложения -> Дополнительные возможности -> Добавить компонент).
Выберите нужные компоненты RSAT и нажмите Install.
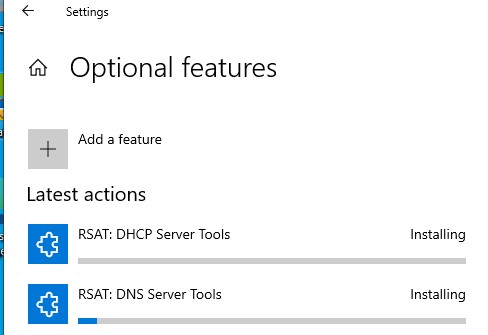
Для установки некоторых компонентов RSAT может потребоваться перезагрузка.
Для Windows 10 доступны следующие инструменты администрирования RSAT:
- RSAT: Active Directory Domain Services and Lightweight Directory Services Tools
- RSAT: BitLocker Drive Encryption Administration Utilities
- RSAT: Active Directory Certificate Services Tools
- RSAT: DHCP Server Tools (настройка и управление DHCP сервером на Windows Server)
- RSAT: DNS Server Tools
- RSAT: Failover Clustering Tools
- RSAT: File Services Tools
- RSAT: Group Policy Management Tools
- RSAT: IP Address Management (IPAM) Client
- RSAT: Data Center Bridging LLDP Tools
- RSAT: Network Controller Management Tools
- RSAT: Network Load Balancing Tools
- RSAT: Remote Access Management Tools
- RSAT: Remote Desktop Services Tools
- RSAT: Server Manager
- RSAT: Shielded VM Tools
- RSAT: Storage Migration Service Management Tools
- RSAT: Storage Replica Module for Windows PowerShell
- RSAT: System Insights Module for Windows PowerShell
- RSAT: Volume Activation Tools (консоль активации KMS сервера)
- RSAT: Windows Server Update Services Tools
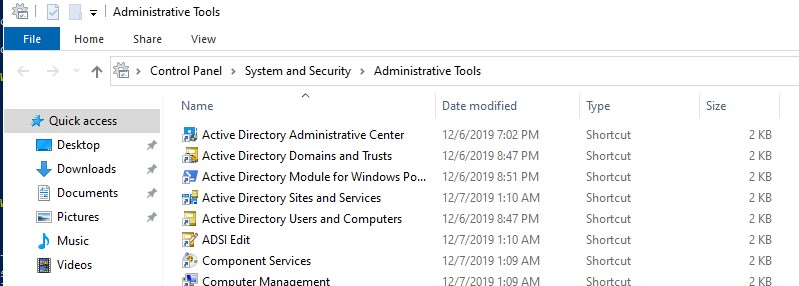
После установки, графические mmc оснастки RSAT доступны в панели управления в секции Administrative Tools (Control PanelSystem and SecurityAdministrative Tools).
Установка RSAT в Windows 10 с помощью PowerShell
Вы можете установить компоненты администрирования RSAT с помощью PowerShell. В этом примере мы покажем, как управлять компонентами RSAT в Windows 10 20H2.
С помощью следующей PowerShell команды можно вывести список компонентов RSAT, установленных на вашем компьютере:
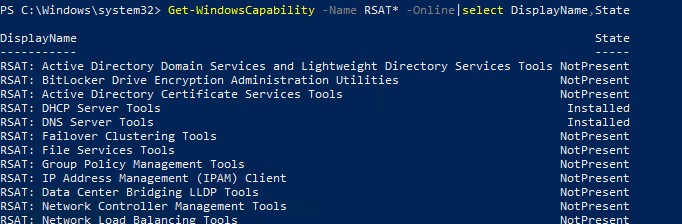
Можно представить статус установленных компонентов RSAT в более удобной таблице:
Get-WindowsCapability -Name RSAT* -Online | Select-Object -Property DisplayName, State
В нашем примере инструменты управления DHCP и DNS установлены (
Installed
), а все остальные модуль RSAT отсутствуют (
NotPresent
).
Для установки RSAT в Windows используется PowerShell командлет Add-WindowsCapability.
Чтобы установить конкретный инструмент RSAT, например инструменты управления AD (в том числе консоль ADUC из модуль Active Directory для Windows Powershell), выполните команду:
Add-WindowsCapability –online –Name Rsat.ActiveDirectory.DS-LDS.Tools~~~~0.0.1.0
Для установки консоли управления DNS и модуля PowerShell DNSServer, выполните:
Add-WindowsCapability –online –Name Rsat.Dns.Tools~~~~0.0.1.0
И т.д.
Add-WindowsCapability -Online -Name Rsat.BitLocker.Recovery.Tools~~~~0.0.1.0
Add-WindowsCapability -Online -Name Rsat.CertificateServices.Tools~~~~0.0.1.0
Add-WindowsCapability -Online -Name Rsat.DHCP.Tools~~~~0.0.1.0
Add-WindowsCapability -Online -Name Rsat.FailoverCluster.Management.Tools~~~~0.0.1.0
 Add-WindowsCapability -Online -Name Rsat.FileServices.Tools~~~~0.0.1.0
Add-WindowsCapability -Online -Name Rsat.GroupPolicy.Management.Tools~~~~0.0.1.0
Add-WindowsCapability -Online -Name Rsat.IPAM.Client.Tools~~~~0.0.1.0
Add-WindowsCapability -Online -Name Rsat.LLDP.Tools~~~~0.0.1.0
Add-WindowsCapability -Online -Name Rsat.NetworkController.Tools~~~~0.0.1.0
Add-WindowsCapability -Online -Name Rsat.NetworkLoadBalancing.Tools~~~~0.0.1.0
Add-WindowsCapability -Online -Name Rsat.RemoteAccess.Management.Tools~~~~0.0.1.0
Add-WindowsCapability -Online -Name Rsat.RemoteDesktop.Services.Tools~~~~0.0.1.0
Add-WindowsCapability -Online -Name Rsat.ServerManager.Tools~~~~0.0.1.0
Add-WindowsCapability -Online -Name Rsat.Shielded.VM.Tools~~~~0.0.1.0
Add-WindowsCapability -Online -Name Rsat.StorageMigrationService.Management.Tools~~~~0.0.1.0
Add-WindowsCapability -Online -Name Rsat.StorageReplica.Tools~~~~0.0.1.0
Add-WindowsCapability -Online -Name Rsat.SystemInsights.Management.Tools~~~~0.0.1.0
Add-WindowsCapability -Online -Name Rsat.VolumeActivation.Tools~~~~0.0.1.0
Add-WindowsCapability -Online -Name Rsat.WSUS.Tools~~~~0.0.1.0
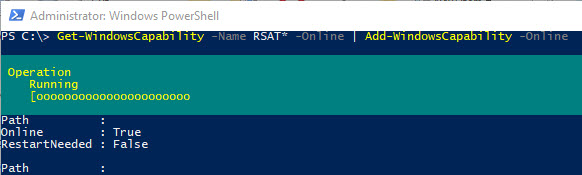
Чтобы установить сразу все доступные инструменты RSAT, выполните:
Get-WindowsCapability -Name RSAT* -Online | Add-WindowsCapability –Online
Также вы можете установить компоненты RSAT с помощью утилиты управления образом DISM. Например:
DISM.exe /Online /add-capability /CapabilityName:Rsat.ActiveDirectory.DS-LDS.Tools~~~~0.0.1.0 /CapabilityName:Rsat.GroupPolicy.Management.Tools~~~~0.0.1.0 /CapabilityName:Rsat.WSUS.Tools~~~~0.0.1.0
Чтобы установить только отсутствующие компоненты RSAT, выполните:
Get-WindowsCapability -Name RSAT* -Online | where State -EQ NotPresent | Add-WindowsCapability –Online
Теперь убедитесь, что инструменты RSAT установлены (статус Installed);

После этого установленные инструменты RSAT отобразятся в панели Manage Optional Features.
Установка RSAT в Windows 11
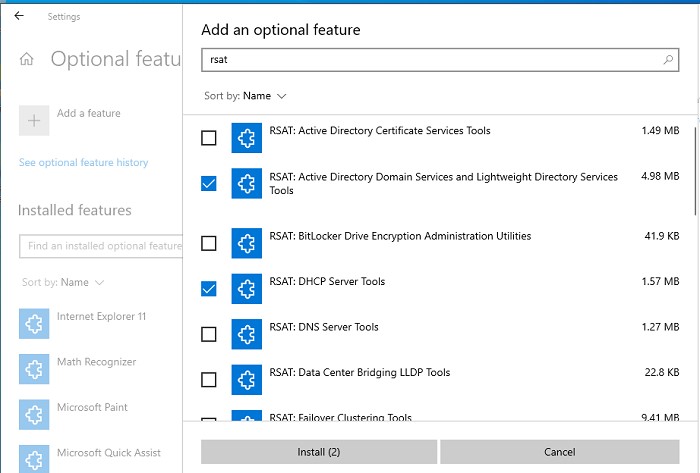
RSAT в Windows 11 также можно установить через панель Settings -> Apps -> Optional Features -> Add an optional feature (View features).
Наберите
RSAT
в поисковой строке и выберите компоненты для установки.

Также вы можете использовать PowerShell для установки RSAT в Windows 11:
Add-WindowsCapability –online –Name Rsat.ActiveDirectory.DS-LDS.Tools~~~~0.0.1.0

Как установить Remote Server Administration Tools в Windows Server 2022,2019,2016?
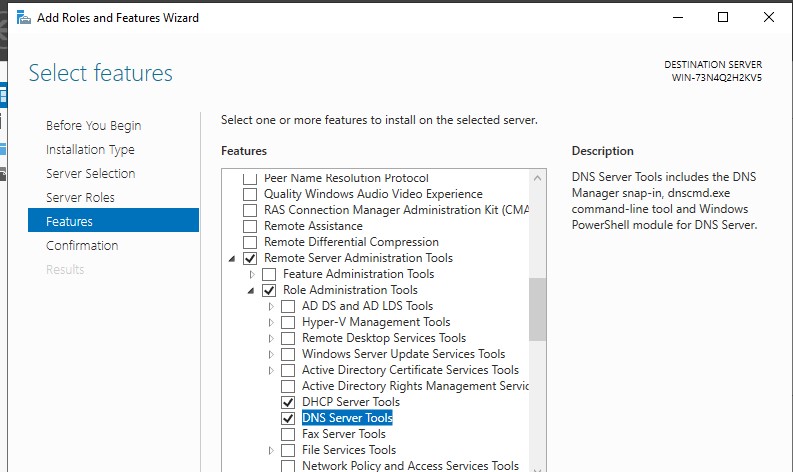
В Windows Server для установки RSAT не нужен доступ в интернет. Компоненты RSAT можно устанавливать при установке соответствующих ролей или фич Windows Server, либо можно установить их через Server Manager (Add roles and Features -> Features -> Remote Server Administration Tools). Все компоненты RSAT разбиты на две секции: Feature Administration Tools и Role Administration Tools. Выберите необходимые компоненты и нажмите Next -> Next.
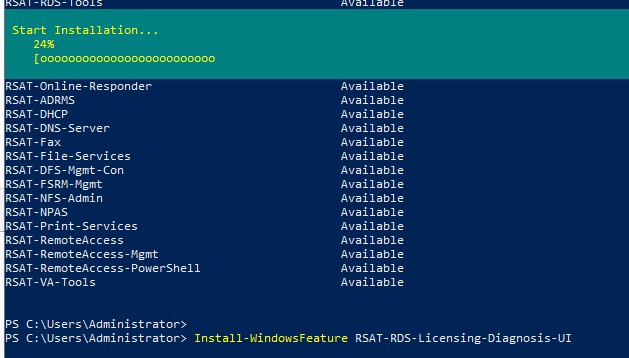
Для установки RSAT в Windows Server используется командлет установки компонентов и ролей — Install-WindowsFeature. Вывести список доступных компонентов RSAT в Windows Server 2022, 2019 и 2016:
Get-WindowsFeature| Where-Object {$_.name -like "*RSAT*"}| ft Name,Installstate
Для установки выбранного компонента RSAT, укажите его имя. Например, установим консоль диагностики лицензирования RDS:
Install-WindowsFeature RSAT-RDS-Licensing-Diagnosis-UI
Установленные графические консоли RSAT доступны из Server Manager или через панель управления.
Ошибка 0x800f0954 при установке RSAT в Windows 10
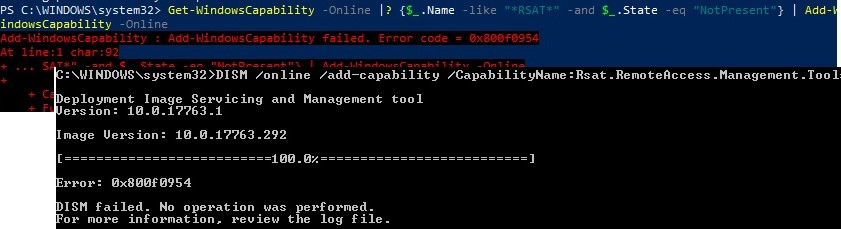
Если ваш компьютер Windows 10 с помощью групповой политики настроен на получение обновлений с локального сервера обновлений WSUS или SCCM SUP, то при установке RSAT через Add-WindowsCapability или DISM вы получите ошибку 0x800f0954.
Для корректной установки компонентов RSAT в Windows 10 вы можете временно отключить обновление со WSUS сервера в реестре (HKLMSOFTWAREPoliciesMicrosoftWindowsWindowsUpdateAU параметр UseWUServer= 0) и перезапустить службу обновления. Воспользуйтесь таким скриптом PowerShell:
$val = Get-ItemProperty -Path "HKLM:SOFTWAREPoliciesMicrosoftWindowsWindowsUpdateAU" -Name "UseWUServer" | select -ExpandProperty UseWUServer
Set-ItemProperty -Path "HKLM:SOFTWAREPoliciesMicrosoftWindowsWindowsUpdateAU" -Name "UseWUServer" -Value 0
Restart-Service wuauserv
Get-WindowsCapability -Name RSAT* -Online | Add-WindowsCapability –Online
Set-ItemProperty -Path "HKLM:SOFTWAREPoliciesMicrosoftWindowsWindowsUpdateAU" -Name "UseWUServer" -Value $val
Restart-Service wuauserv -Force
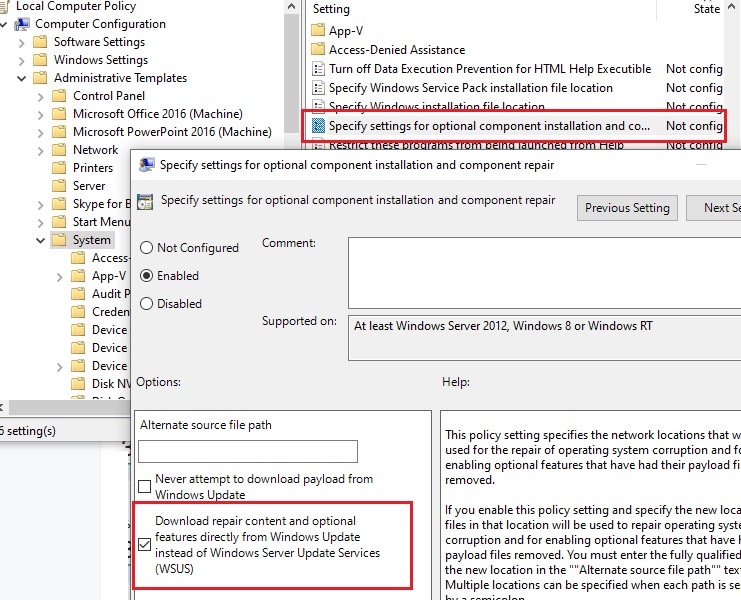
Либо вы можете настроить новый параметр GPO, который позволяет настраивать параметры установки дополнительных компонентов Windows и Feature On Demand (в том числе RSAT).
- Откройте редактор локальной GPO –
gpedit.msc
или используйте доменную консоль управления GPO –
gpmc.msc
); - Перейдите в раздел Computer Configuration -> Administrative Templates -> System;
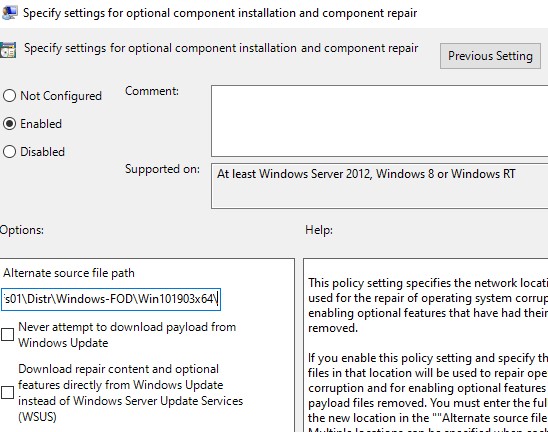
- Включите политику Specify settings for optional component installation and component repair, и включите опцию Download repair content and optional features directly from Windows Updates instead of Windows Server Updates Services (WSUS) (опция “Скачайте содержимое для восстановления и дополнительные компненты непосредственно из Центра обновления Windows вместо использования службы WSUS”);

- Сохраните изменения и обновите настройки групповых политик (
gpupdate /force
).
Теперь установка RSAT через PowerShell или Dism должна выполняться без ошибок.
Установка RSAT в Windows 10 в офлайн режиме
Если при установке RSAT вы столкнетесь с ошибкой Add-WindowsCapability failed. Error code = 0x800f0954, или в списке дополнительных компонентов вы не видите RSAT (Компоненты для установки отсутствуют), скорее всего ваш компьютер настроен на получение обновлений со внутреннего WSUS/SCCM SUP сервера. Если вы не можете открыть прямой доступ с рабочей станции к серверам Windows Update, вы можете воспользоваться офлайн установкой RSAT (рекомендуется для корпоративных сетей без прямого доступа в Интернет).

Для офлайн установки RSAT нужно скачать ISO образ диска с компонентами FoD для вашей версии Windows 10 из вашего личного кабинета на сайте лицензирования Microsoft — Volume Licensing Service Center (VLSC). Образ называется примерно так: Windows 10 Features on Demand, version 1903.
Например, для Windows 10 1903 x64 нужно скачать образ SW_DVD9_NTRL_Win_10_1903_64Bit_MultiLang_FOD_.ISO (около 5 Гб). Распакуйте образ в сетевую папку. У вас получится набор из множества *.cab файлов, среди которых есть компоненты RSAT.
Теперь для установки компонентов RSAT на десктопе Windows 10 нужно указывать путь к данному сетевому каталогу с FoD. Например:
Add-WindowsCapability -Online -Name Rsat.ActiveDirectory.DS-LDS.Tools~~~~0.0.1.0 -LimitAccess -Source \msk-fs01DistrWindows-FODWin101903x64

Также вы можете указать путь к каталогу с компонентами FoD с помощью рассмотренной выше групповой политики. Для этого в параметре Alternative source file path нужно указать UNC путь к каталогу.
Или можете задать этот параметр через реестр отдельной политикой, указав путь к каталогу в параметр LocalSourcePath (тип REG_Expand_SZ) в ветке реестра HKLMSOFTWAREMicrosoftWindowsCurrentVersionPoliciesServicing.
После этого, пользователи смогут самостоятельно устанавливать компоненты RSAT через графический интерфейс добавления компонент Windows 10.
В изолированной среде, если вы не можете получить образ FoD, можно также скачать обновление
WindowsTH-RSAT_WS2016-x64.msu
из каталога Microsoft Update , извлечь содержимое MSU файла обновления и с помощью DISM установит компонент KB2693643-x64.cab (протестировано на Windows 10 2004):
expand -f:* c:WindowsTH-RSAT_WS2016-x64.msu C:RSAT
dism.exe /online /add-package /packagepath:C:RSATWindowsTH-KB2693643-x64.cab
Частые ошибки установки Remote Server Administration Tools в Windows
- 0x8024402c, 0x80072f8f – Windows не может поучить доступ к серверам обновления Windows для получения компонентов RSAT. Проверьте доступ в интернет или установите компоненты из локального образа FoD:
Add-WindowsCapability -Online -Name Rsat.Dns.Tools~~~~0.0.1.0 -LimitAccess -Source E:RSAT - 0x800f081f – проверьте путь к каталогу с компонентами RSAT, указанному в параметре –Source;
- 0x800f0950 – ошибка аналогична 0x800f0954;
- 0x80070490 –проверьте целостность образа Windows с помощью DISM:
DISM /Online /Cleanup-Image /RestoreHealth
Although Windows Server Core is a great way of ending up with a slim and trim diet server, it can be a little bit tricky when first getting started configuring it. During my experiments running Server Core VM’s I found that there were a few tools either built into server core or available separately that can help get over this configuration “hump”.
Built-in Tools
-
SConfig.exe
SConfig.exe is a built in command line tool (with a simple command line GUI) that allows you to perform some simple configuration tasks on your core installation.

SConfig.exe
Some of the functions include:
- Renaming the computer
- Joining a domain or workgroup
- Enabling remote management (Win-RM)
- Enabling remote desktop
- Installing windows updates
- Configure network settings
- Change system date/time
- Shutdown/reboot server

Other Tools
When installing a new copy of one of the Windows Server Core versions it’s quite useful to install several additional tools that will help manage the server from a command prompt and/or PowerShell console.
-
Corefig for Windows Server 2012 Core and Hyper-V Server 2012
Corefig allows you to configure some of the main settings of a Windows Server Core installation as well as installing updates and windows features and roles.

Corefig PowerShell Application
-
Windows Update PowerShell Module
The Windows Update PowerShell module allows you to install windows updates from a PowerShell command line by executing (after installing the module onto the server):
Get-WUInstall
-
Remote Server Administration Tools PowerShell module
The Remote Server Administration Tools PowerShell module is available as an installable feature on Windows Server Core edition. It needs to be first installed by executing the following command at a PowerShell prompt:
Add-WindowsFeature -Name 'RSAT-AD-PowerShell' -IncludeAllSubFeature
-
PowerShell Community Extensions
The PowerShell Community Extensions project provides various useful PowerShell cmdlets. I always install this onto the server and copy the entire PSCX modules folder:
c:Program Files (x86)PowerShell Community ExtensionsPscx3
folder into the system modules folder:
c:Program FilesWindowsPowerShellModules
This makes the PSCX module available by the import-module command in PowerShell.

Мы уже говорили о новой консоли управления сервером Server Manager в Windows Server 2012. Мы говорили о том, что теперь прямо из консоли Server Manager, можно запускать различные консоли управления и администрирования системы Windows 2012. Кроме того, упоминался тот факт, что данный список инструментов можно модифицировать, добавляя в него собственные инструменты и утилиты. В этой статье мы рассмотрим этот процесс подробнее.
Меню Tools имеет иерархическую структуру, состоящую из контейнеров (папок) и собственно инструментов. По умолчанию меню содержит базовые системные утилиты и элементы управления. В том случае, если администратор сервера устанавливает новые роли или функции Windows Server 2012, в это меню добавляются новые инструменты управления.
Разберемся, по какому принципу наполняется данное меню и как добавить в него собственные инструменты или скрипты (PowerShell, vbs и т.д.).

Открою страшный секрет меню Tools в Server Manager это по сути все то, что находится в папкеAdministrative Tools в панели управления (Control Panel -> System and Security-> Administrative Tools). В каталоге Administrative Tools находятся ярлыки (файлы .lnk) на различные оснастки и утилиты. Консоль Server Manager считывает список этих ярлыков и наполняет ими меню Tools, копируя в том числе структуру каталогов этой папки.
Чтобы добавить собственные утилиты или элементы управления в меню Tools, просто создайте ярлыки на нужные инструменты и поместите их в каталог Administrative Tools. Кроме того ярлыки можно поместить в специально созданный каталог, который в консоли Server Manager отобразится в виде каскадного меню.
Каталоги непосредственно внутри раздела панели управления Administrative Tools создавать нельзя. Однако их можно создать в любом другом месте на диске, а затем просто перенести внутрь папки Administrative Tools. Кроме того, данный элемент панели управления Windows отображает содержимое папкиC:ProgramDataMicrosoftWindowsStart MenuProgramsAdministrative Tools, так что все операции можно выполнять непосредственно в этой папке.
Сгруппируем элементы управления AD и поместим их в отдельный каталог. Сначала создадим (перемещением) новый каталог Active Directory.

Затем переместим в него ярлыки на все необходимые инструменты. В результате, в консоли управления сервером появится новое каскадное меню Active Directory.

Точно также можно создать собственный набор скриптов, которые можно запускать непосредственно из консоли Server Manager.

Стоит отметить, что созданное меню будет отображаться для всех пользователей, имеющих доступ к консоли данного сервера, поэтому если вы не хотите, чтобы другие администраторы, видели ваш набор скриптов и инструментов, их можно скрыть. Для этого нужно в NTFS правах доступа на каталоги и оригинальные файлы скриптов или утилит (не ярлыки) прописать явный запрет для всех, кроме себя или некой группы администраторов.
Join @AdmNtsRu on Telegram