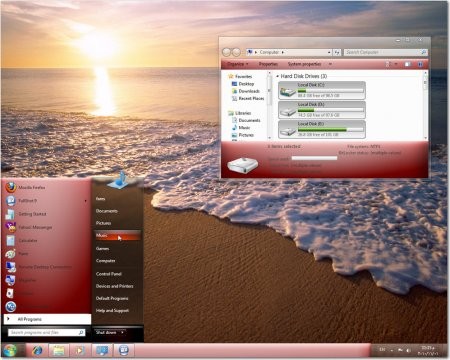
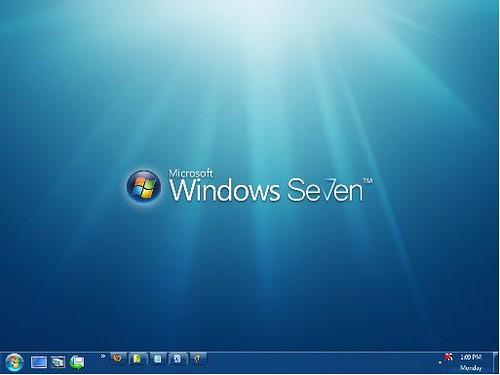
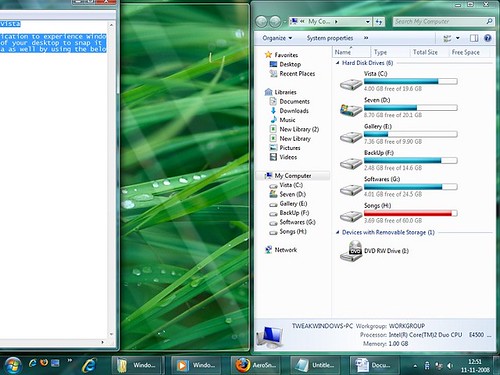
В этой статье описаны программы, с помощью которых можно изменить интерфейс Windows Vista или XP, и сделать его похожим на стиль операционной системы Windows 7:
Seven Remix – это программа, предназначенная для модификации интерфейса ОС Windows Server, Windows XP и Vista и 2008 под интерфейс последней версии Windows 7. Главным преимуществом Seven Remix можно назвать стабильную работу. В программу также включено графическое оформление и новые ресурсы системных файлов, ряд дополнительных тем для системы, вспомогательные приложения, которые реализуют боковую панель, а также интерактивное переключение между окнами активных программ и гаджеты на рабочем столе. Программа русифицирована и распространяется бесплатно.
Seven Transformation Pack — программа, модифицирующая внешний вид операционных систем Windows XP/ Vista под интерфейс новой системы Windows 7. В комплект данной программы входят обновленный экран приветствия, диалоги прогресса, новые звуковые темы, фоны рабочего стола, иконки и стили приложений, пиктограммы системной панели и еще множество элементов из RTM релиза Windows 7. Необходимо сказать о том, что пакет нужно устанавливать поверх операционных систем Windows Server 2003, XP и Vista, архитектуры x86, с установленными пакетами последних обновлений (соответственно Service Pack 3, 2 и 1), вариантов архитектуры х64. Программа русифицирована и распространяется бесплатно.
Windows 7 Style for Windows Vista SP1 — пакет программ, включающий помимо видоизмененной графической темы, подключаемой стандартными средствами Vista, еще и модифицированные файлы shell32.dll и explorer.exe, их нужно будет заменить операционной системе вручную, предварительно создав точку восстановления и сделав резервную копию исходных файлов. По завершении этих операций в системе появится полупрозрачная обновленная панель задач, на которой будет меню «Пуск», обновленные иконки приложений, соответствующие последней версии Windows 7, а также новые обои и другие существенные изменения стиля оформления. Программа не русифицирована и распространяется бесплатно.
Windows 7 включает в себя стили, которые отражают различную национальную культуру, также в состав этой операционной системы входят особые цветовые схемы Aero Glass, RSS-каналы, избранные ссылки в браузере Internet Explorer и комплект обоев для рабочего стола.
Hi guys!
UPDATE 2/9/2009
The system files now are Working on any Windows Vista version (SP0, SP1, SP2).
Taskbar buttons
Some small fixes
Windows explorer borders more like Windows 7
Fixed Start Menu Shutdown/Lock Buttons ( no more bugs!).
…plus some other small visual changes.
The Theme works now on Windows Vista Home Basic WITH Aero Transparency enable!!!!!!
Thanks to killermole23 [link]
—————————————————
Requirements:
Windows Vista x86 (32 bit) any Version
VistaGlazz 1.2 to patch your system files to use 3rd Party themes [link]
You MUST have your system Up to Date.
———————————————————
The theme works PERFECTLY on x64 systems, not the system files but ONLY the Theme.
——————————————————
…and for those who want the firefox 3.7 theme take a look here [link]
—————————————————
How to Install and Use 3rd Party Themes in Windows Vista by Vishal [link]
How to Apply 3rd Party Themes in Windows Vista and Server 2008 without Using any Software by Vishal [link]
————————————————
Looking for the best Windows 7 theme for XP? click here
[link]
————————-
See here How to Patch Windows Vista to Enable Custom Themes (Visual Styles) [link]
———————————-
Thank SalvoG92 for his great shellstyle [link]
Credits to Crystal-Coke for making this shell32.dll and imageres.dll
[link]
Also thanks to sunBeem2000 for helping me with some mods, fediaFedia for giving me some nice feed back piedelp for suggesting me some awesome ideas and zeroing for his help [link] Thanks guys.
———————————————
If you like my daviation just it.
Сделать Windows Vista похожей на Windows 7 достаточно просто. Для этого нужно знать основные различия в оформлении двух версий операционных систем от Microsoft, а также скачать и установить специальное программное обеспечение. Конечно, кардинально изменить работу Windows Vista в лучшую сторону не получится, однако внешние и стилистические различия между этими двумя версиями Windows можно свести к нулю.
Вам понадобится
- — Компьютер с выходом в интернет;
- — программное обеспечение.
Инструкция
На сайте Microsoft скачайте коллекцию бесплатных обоев для Windows 7. В папках Vista также хранится подборка картинок, однако качество обоев для «семерки» значительно выше, а содержание разнообразнее. Надо отметить, что Windows 7 имеет так называемую «привязку по регионам». Поэтому пользователь может легко найти себе фото по вкусу.
Установите крупные ярлыки на панели задач. Для этого скачайте программу Windows 7 Style на странице http://giannisgx89.deviantart.com/art/Windows-7-Style-For-Vista-102269037. Для быстроты передачи данных софт будет запакован в архив zip или rar, поэтому необходимо заранее позаботиться о том, чтобы на компьютере уже была установлена программа для чтения и распаковки архивов. Например, такая как Winrar (http://www.win-rar.ru/) или 7Zip (http://www.7-zip.org/).
После окончания работы с Windows 7 Style скачайте еще так называемый кастомайзер. Необходима программа, которая может осуществить изменение внешнего вида компьютерного стола из файла. Для этого прекрасно подойдет TuneUp Utilities, которую можно найти на сайте http://www.tune-up.com/. После правильно выполненных операций с программами и файлами панель задач станет неотличима от Windows 7.
Скачайте и установите EnhanceMyVista со страницы http://www.izone.ru/sys/tuning/enhancemyvista-free.htm. При помощи этой программы можно изменить иконки панели задач Windows Vista на Windows 7. EnhanceMyVista также является кастомайзером, то есть специальным приложением для активизации скрытых настроек операционной системы.
Начните использовать Aero-приложения в полную силу. Чтобы заставить старенькую Vista немного поработать, установите программу AeroShake (http://aero-shake.en.softonic.com/), которая отвечает за интуитивный способ сворачивания окон внизу дисплея. Постарайтесь не забыть внести ее в список автоматически загружаемых программ, чтобы ускорить процесс установки сохраненных программой профилей после перезагрузки компьютера.
Видео по теме
Войти на сайт
или
Забыли пароль?
Еще не зарегистрированы?
This site is protected by reCAPTCHA and the Google Privacy Policy and Terms of Service apply.
Everyone is looking forward to get their hands on the Windows 7 operating system, the successor to Vista. If you are not ready to get your hands on the new Windows 7 just yet or you are bored with the same old Vista look, you can transform Windows Vista into 7 easily. We recommend no Windows 7 transformation packs as they consume a significant amount of system resources so that you will end up with a slow Windows Vista.
We have tried to revamp Vista as Windows 7 using available free resources. After implementing this guide, you should be able to see the following differences in your Vista:
1. Windows 7 new Superbar (new taskbar)
2. Aero Snap feature
3. Windows 7 Aero Shake
4. Windows 7 WordPad
5. Windows 7 Explorer Pane
6. Windows 7 Calculator
7. Windows 7 icons
8. Windows 7 boot screen
9. Windows 7 explorer
10. Windows 7 logon screen
11. Windows 7 wallpapers.
Make Vista look like Windows 7
1. Windows 7 Superbar: One of the most talked changes in Windows 7 is the all-new Superbar (taskbar). Most of them have fallen in love with Superbar like me!
A. Follow our “How to Transform Vista Taskbar into Windows 7 Taskbar”
(Note: The above guide was written on October 30. As there were no Windows 7 themes for Vista, I had used Aero VG theme. Now, you can download the below theme instead to get the exact look of Windows 7 theme.)
or
B. |Download Windows 7 theme for Vista.
To install the theme follow our “How to install third-party themes in Vista“
2. Aero Snap: This is also one of the most useful features in Windows 7. Aero Snap is a feature of Windows 7 that allows you to resize, arrange or maximize your desktop windows by just drag and drop. You can achieve the same in Vista too by using the below-mentioned utility. The utility creates a fair imitation of Aero Snap feature in Vista.
|Download AERO Snap for Vista|
3. Windows 7 Aero Shake: After Aero Snap utility, it’s time to download Aero Shake for Vista. Yes, you can experience Windows 7’s Aero Shake feature in Vista now. If you are not aware of the Aero Shake feature, Aero Shake is a new feature introduced in Windows 7 operating system which allows the users to shake the window to minimize all other Windows.
Aero Shake is a small (200KB) utility, which adds the above feature in your Vista.
|Download Aero Shake for Vista|
4. Windows 7 WordPad: The major change we can see is the ribbon interface. Don’t worry! We have a solution for this too!! This free utility helps you get the Windows 7 WordPad looks (ribbon) in Vista notepad without any hassles.
Excellent is the only word I can say about this tiny, free, and beautiful notepad. This program has been designed by keeping in mind the Windows 7 notepad, which might be available by December.
|Download Windows 7 Wordpad Styled Notepad for Vista| (Update: This software is not available anymore)
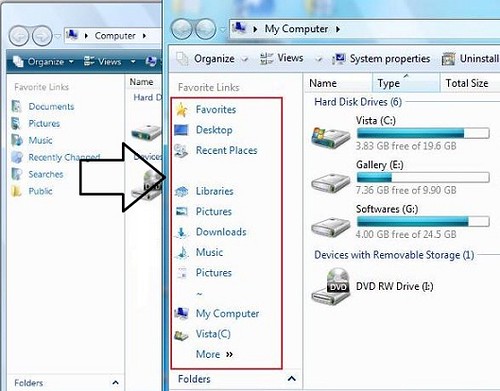
5. Windows 7 Explorer Pane: Like all other Windows 7 feature, Windows 7 explorer has a new left pane which has new options like Libraries and Recent Places by default. The left pane looks good compared to Vista. So, here I have tried to revamp Vista explorer (left) pane into Windows 7.
As this is quite a long post, please read our “How to Get Windows 7 Explorer Pane in Vista”
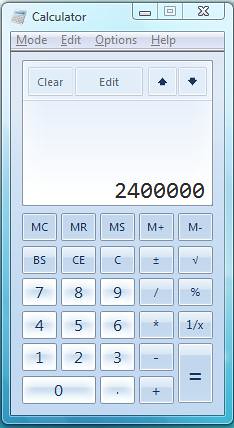
6. Windows 7 Calculator: Windows 7 calculator has some advanced features such as Unit Converter, Programmer and Statistics mode that are not available in Vista.
How to use without installing:
*Download the RAR file from here.
*Extract and run Calc.exe in Vista.
How to Install or replace old Vista calculator:
*Download the RAR files from here.
*Extract the files.
*Copy and replace Calc.exe file to WindowsSystem32 folder, and also Calc.exe.mui from en-US folder to WindowsSystem32en-USfolder.
*You are done!!
*Enjoy!
Note: You need to take the ownership of the Vista system files in order to replace it with the new file. It’s a good idea to back up the original files before using this guide.
7. Windows 7 icons: Most of the icons resemble Windows Vista. But, there are some icons like Downloads and Music files with furnished icons.
|Download Windows 7 icon pack for Vista|
8. Windows 7 Boot Screen: Probably, the best looking Windows boot screen till date. Thanks to Microsoft. Because of the Vista boot restrictions, we can’t get moving boot screen in Windows Vista.
Read our “Create your own windows 7 boot & logon screens for Vista easily”.
Or
Read “Get Windows 7 boot screen in Vista”.
9. Windows 7 Explorer: Once again, you can achieve this by applying guide (1) & (5)Note that you can’t get some features of Windows 7 features such as new view option and libraries as of now.
10. Windows 7 logon Screen: As you might have seen, there is a new logon screen in Windows 7 which looks simple.
Read our “Create & apply your own windows 7 boot & logon screens for Vista easily”.
11. Windows 7 Wallpaper: There are many good looking Windows 7 wallpapers available. We have chosen the below one.
|Download Windows 7 wallpaper|
We hope this guide will help you to get the Windows 7 fancy look in your Vista as well. If you have doubts feel free to ask by leaving a comment.
Измените ваш рабочий стол с помощью разработанного скина, позаимствовавшего основной интерфейс у «Windows Vista Aero», наделив открывшиеся окна проводника в полупрозрачную рамку, уникально выделив изменившееся окно на экране компьютера. Стандартные установленные обои в оттенки сине-зеленого цвета полюбятся каждому пользователю, благодаря своей универсальной иллюстрации. В качестве приятного бонуса, скачанная тема предоставит вам гаджеты, которые разместятся по правой области рабочего стола, где вы сможете сосредоточить важную вам информацию для быстрого доступа.
+ Vista Aero
- aero.msstyles
+ Shell
+ NormalColor
+ en-US
- shellstyle.dll.mui
- shellstyle.dll
+ Wallpaper
— img16.jpg
— img17.jpg
— img18.jpg
— img19.jpg
— img20.jpg
— img21.jpg
— img22.jpg
— img23.jpg
— img24.jpg
Windows Vista Basic.theme
Windows Vista Blue.theme
Windows Vista Default.theme
Windows Vista Frost.theme
Windows Vista Graphite.theme
Windows Vista Orange.theme
Windows Vista Pink.theme
Windows Vista Red.theme
Windows Vista Teal.theme
If you are using Windows Vista and want to transform Windows Vista into Windows 7, this tutorial will definitely help you.
Windows 7 provides lots of new features along with a newly designed interface. It looks very similar to Windows Vista but there are many GUI changes like redesigned taskbar, Explorer, new boot screen and login screen, etc.
After following this tutorial, you’ll be able to make your Windows Vista look-like Windows 7. Following is a list of things which are going to be changed after following this tutorial:
- Windows Theme or Visual Style
- Boot Screen
- Login Screen or Welcome Screen
- Taskbar
- Wallpaper
- About Windows Box
- Extras like “Aero Shake“, “Aero Snap“, “Aero Peek” and “Calculator“
- A Few Other Mods…
NOTE 1: Please create a Restore point using “System Restore” before applying anything mentioned in this tutorial so that you can restore your system back to default if you don’t like the changes.
Also take a backup of system files before modifying them, so that you can restore them if anything goes wrong or you don’t like the new change.
NOTE 2: If you get “Cannot create file” error message while saving the file, please check this tutorial.
So here we start our transformation tour:
Table of Contents
- 1. Windows Theme or Visual Style:
- 2. Boot Screen:
- 3. Login Screen or Welcome Screen:
- 4. Taskbar:
- 5. Wallpaper:
- 6. About Windows Box:
- 7. A Few Extras:
- 8. A Few Other Mods:
1. Windows Theme or Visual Style:
Windows 7 provides a new refreshing look which includes redesigned taskbar and start menu, Windows Explorer and a few other small changes.
You can get the same look by using an excellent theme created by our friend “DJ Gx“.
Download Windows 7 Theme for Windows Vista
2. Boot Screen:
Windows 7 contains a new animated boot screen which shows animated items/balls that come together to form Windows logo.
You can get a similar boot screen in Windows Vista:
Download Windows 7 Boot Screen for Windows Vista
3. Login Screen or Welcome Screen:
Windows 7 login screen looks similar to Vista login screen except the new background image and the text displayed at bottom.
Download Windows 7 Login Screen for Windows Vista
4. Taskbar:
Windows 7 taskbar has been highly redesigned. It doesn’t show opened program’s name in their taskbar buttons, instead it only shows their icons. Also the taskbar buttons are a bit large in their size.
You can get the same behavior in Vista by using following tutorial:
Get Windows 7 Iconized (Icon Only) Taskbar Feature in Windows Vista
Or you can use following small utility which can do the task automatically:
Taskbar Iconizer: Utility to Iconize Taskbar in Windows Vista
To increase the taskbar buttons size:
Get Windows 7 Like Large Taskbar Buttons in Windows Vista
You can also use following tool to get Windows 7 look-like Superbar in Vista:
ViGlance: Get Windows 7 Look-Like Superbar in Windows Vista
Windows 7 taskbar also allows you to move taskbar buttons to change their positions, you can get the same feature in Windows Vista by using “Taskbar Shuffle” utility:
Taskbar Shuffle: Move Taskbar and System Tray Buttons in Windows
And if you want to get the small “Show Desktop” rectangle at the end of Taskbar just like Windows 7, please visit following topic:
Get Windows 7 “Show Desktop” Taskbar Icon in Windows XP & Vista
5. Wallpaper:
You can get Windows 7 Desktop wallpaper using following link:
Download Wallpaper (via thevista.ru)
6. About Windows Box:
You’ll need to change the top logo in the About Windows dialog box so that it can look like Windows 7:
Download the required BITMAP files from here:
Download About BMPs
Now go to “C:WindowsBrandingBasebrd” folder and look for a file “basebrd.dll“.
Once you find the file, take its ownership using following tutorial:
Add Take Ownership Option in File / Folder Context Menu in Windows Vista
Now open this “basebrd.dll” file in Resource Hacker and then replace following BITMAPs with the downloaded BMP files:
Bitmap -> 100 -> 1033 (replace with About_Windows.bmp)
Bitmap -> 101 -> 1033 (replace with About_Windows.bmp)
Bitmap -> 110 -> 1033 (replace with About_Windows_Separator.bmp)
Bitmap -> 111 -> 1033 (replace with About_Windows_Separator.bmp)
Save the file and you have done.
Windows 7 provides 3 new features which are called “Aero Shake“, “Aero Snap” and “Aero Peek“.
“Aero Shake” is quite useful. Suppose you have more than one windows opened and you want to minimize all other windows except the window which you are working on, then you have to simply shake the current window with your mouse and all other windows will be minimized automatically. Shake it again and all minimized windows will be maximized again.
Using “Aero Snap“, you can minimize, maximize, resize windows by just dragging-dropping them to the screen corners.
“Aero Peek” has replaced the old “Show Desktop” button. It can be found as a small rectangle present at the end of Windows 7 taskbar. When you hover the mouse cursor over it, it allows you to peek behind all open windows by hiding all windows and showing only outlines of all windows.
There are several 3rd party software available to provide these features in Windows Vista. You can find them at following link:
Ultimate Collection of Free Tools to Get Windows 7’s Aero Snap, Aero Shake and Aero Peek Features in Vista
Windows 7 also contains a new redesigned Calculator which has new GUI and new options.
You can get the same calculator in Windows Vista using following link:
Get Windows 7 Calculator Working in Windows Vista
8. A Few Other Mods:
1. Windows 7 shows 2 extra options in Desktop context menu ( i.e. when you right-click on Desktop). The 2 extra options are:
- Screen resolution
- Gadgets
“Screen resolution” shows the graphics card settings page where you can change the monitor and resolution settings.
“Gadgets” opens the Add gadgets window so that you can add new gadgets to your sidebar.
You can get both these options in Vista desktop context menu:
Get Windows 7 Desktop Context Menu in Windows Vista
2. One of new redesigned features in Windows 7 is new “Window Color and Appearance” tab in Desktop Properties. When you right-click on Desktop and select “Personalize” and then go to “Window Color and Appearance” tab.
You can get the same Windows 7 “Window Color and Appearance” tab in Vista using following tutorial:
Get Windows 7 Like “Color and Appearance” Tab in Windows Vista
That’s all for now. After following all the above mentioned steps, you’ll get Windows 7 look-n-feel in Windows Vista.
UPDATE: We are pleased to announce that this tutorial has been featured in official Windows magazine.
You are here: Home » Themes and Wallpapers » Transform Windows Vista into Windows 7 without using Customization Pack
The beta version of Windows 7 was met with a warm reception when it was released nearly two months ago. Throughout January anyone could download the beta and give it a try, but Microsoft then chose to close this and continue work.
Until another development version is released, or the full version of Windows 7 hits the shelves towards the end of the year, you’ll just have to stick with good old Windows Vista. That’s no bad thing, of course.
After all, Windows Vista still works well. But if you want to get a taste of what’s coming, or need something to keep you going in the meantime, then follow our guide, which shows you how to make your Windows Vista desktop look and feel like Windows 7.
We’ve included exclusive wallpapers taken from the Windows 7 beta release – which are no longer officially available – plus Windows 7-style applications, a refreshed Startup and more. We can’t promise to make your Windows Vista PC function like Windows 7, but what we can guarantee is that you’ll get the same sort of appearance and feel. Who knows, when the time comes, you might decide to stick with Windows Vista.
1. Get spectacular Windows 7 wallpaper
Windows Vista has an amazing range of wallpapers and Windows 7 hasn’t disappointed with an even bigger, better collection. There are 18 new wallpapers, six of which have a British theme to them. If you live in the US, you get local versions, too.
To get your hands on the wallpaper, head over to www.windowsvistamagazine.com/7wallpapers and follow the download links to get your own copies. Replacing your current wallpaper with a Windows 7 one is easy.
Move the downloaded files to your Pictures folder, or if you want to be really clever, place them in the Wallpapers folder, which you can find by opening the Local Disk (usually, C: drive) and browsing to WindowsWebWallpapers.
Once they’re in, you can select the new wallpaper by right clicking your desktop, selecting PersonalizeDesktop Background, and in the Windows Wallpapers menu making your choice and clicking OK.
2. Transform your Taskbar
When you’ve chosen a wallpaper that best suits your mood, your desktop will already look much more polished, so now it’s time to start overhauling the other areas of your interface. One of the best features found in Windows 7 is the newly improved Taskbar, which now boasts large, easy-to-read icons instead of the usual tiled graphics.
You can make your Windows Vista Taskbar look almost identical with a few simple tweaks. First of all, download the Windows 7 Style for Vista theme from here. This is a RAR file, so you’ll also need to download a RAR extractor, such as WinRAR, in order to be able to open it.
Once you’ve done this, you’ll need a program that can apply the theme to your desktop. Download TuneUp Utilities 2009 from here, install and then open it. Click Customize Windows in the left hand menu. Then click Visual StyleAdd (underneath the Visual Styles heading) and select Install visual style from file.
Browse to the Windows 7 Style for Vista theme you extracted earlier, open the Theme folder, then open the Windows 7 folder and finally click the Windows 7 style file and open it. Once complete, click Apply in the main window.
Your Taskbar will now look a bit chunkier and the Start Menu button will glow when you hover over it with your mouse, just like it does in Windows 7. The Taskbar might look a little too transparent though, so we recommend right clicking the desktop, selecting PersonalizeWindows Color and Appearance and choosing the blue colour option.
3. Improved substance as well as style
Current page:
Page 1
Next Page Page 2
Sign up to get breaking news, reviews, opinion, analysis and more, plus the hottest tech deals!
Содержание
- New themes Vista / Свежая тема Vista для Windows 7 (2012)
- Тема виндовс виста для виндовс 7
- Как установить свои темы в Windows 7
- Как установить темы для Windows Vista
- Win7 Style Builder | Программа для создания тем для Windows 7
New themes Vista / Свежая тема Vista для Windows 7 (2012)
Скачайте, и пополните свою коллекцию свежую тему для украшения Windows 7 в стиле популярной операционной системы Windows Vista. Тема содержит в себе все элементы от Vista как, например иконки, курсор, окно Windows, экран загрузки, экран входа и меню пуск. Теперь с помощью темы New themes Vista вы сможете без труда и полностью перевоплотить свой Windows 7 в новенькую и стильную оформлению легендарной операционной системы Vista.
Тема полностью рабочая и протестирована на Windows 7, поддерживается как на X86 версий, так и на X64 версий операционной систем, а также тему вы сможете без труда установить с помощью инсталлятора за пару минут, и от вас нечего не потребуется тока, если пару кликов мышкой. В дальнейшем можно удалить тему деинсталлятором полностью.
Дополнительная информация:
Год выпуска: 2012
Протестирован: Windows 7
Операционная система: Windows 7
Лекарство: не нужно
Язык: ML / Многоязычный
Размер: 4.75 MB

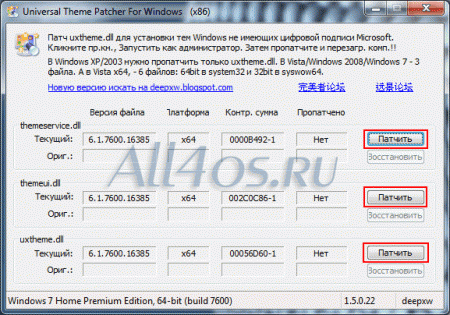
1. Перед тем как установить сторонние темы для windows 7 нужно сначала пропатчить систему с помощью утилит Theme-resource-changer, Universal Theme Patcher или универсальным патчером Uxtheme.
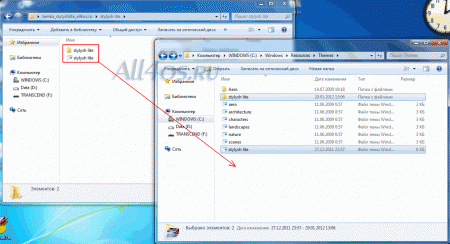
2. Извлекаем из архива файлы (формата. theme) с папкой и копируем их в C:WIndowsResourcesThemes.
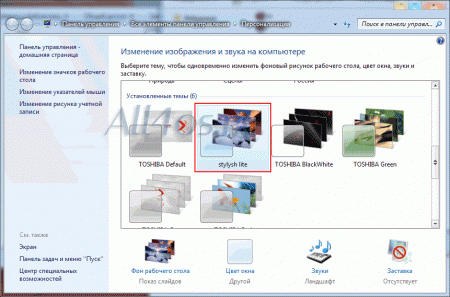
3. Заходим в персонализацию находим нашу тему и применяем.
Для замены системных файлов Explorer, ExplorerFrame и Shell32 воспользуйтесь утилитой Windows Theme Installer. Кнопку пуск можно изменить с помощью программы Windows 7 Start Orb Changer.
Что бы придать в теме эффекта прозрачность запустите утилиты Full Glass или Black Glass Enhanced
Некоторые темы на нашем сайте устанавливается автоматически без замены системных файлов и без применения 2 и 3 пункты.
Зарегистрируйтесь чтобы скачать файл по прямой ссылке, нажмите кнопку «СКАЧАТЬ С СЕРВЕРА». Вступайте в нашу группу Вконтакте чтобы не пропусти новинки! Переходя по рекламе Вы помогаете развивать сайт 🙂
Источник
Тема виндовс виста для виндовс 7

Тема Windows 7 меняет на Vista (SP1/SP2) визуальный стиль Вашего десктопа.
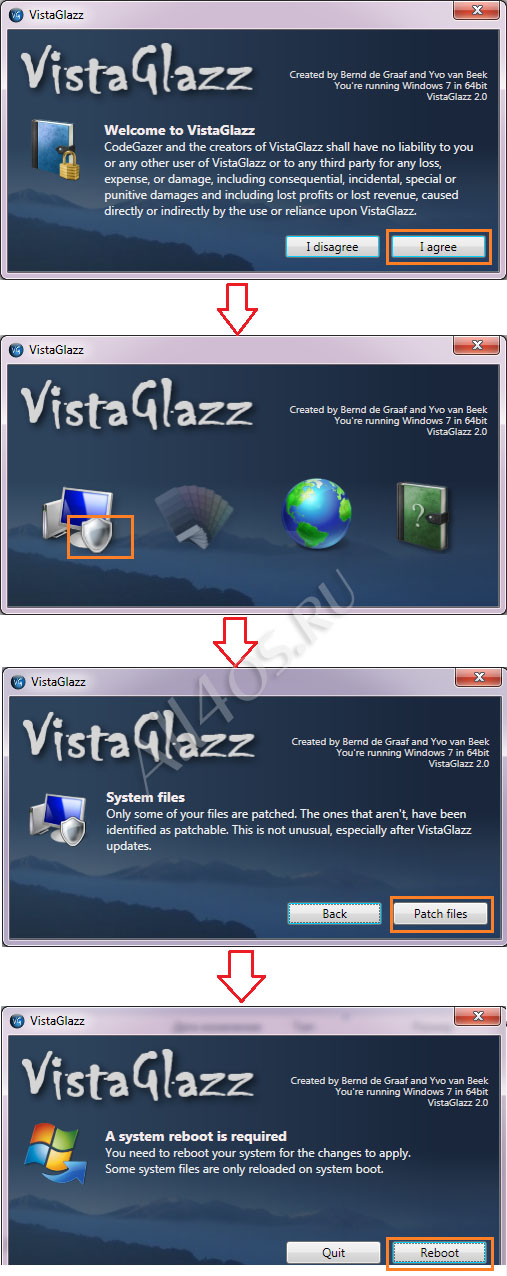
1. Установите VistaGlazzSetup.exe ( Скачайте с оф сайта www.codegazer.com )
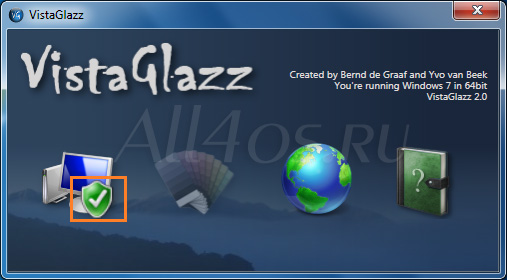
2. После установки запустите VistaGlazz и в окне программы нажмите на Иконку Компьютер, затем перезагрузите ПК нажав Reboot.
Для установки темы
Распакуйте и затем скопируйте содержимое папки в системную директорию «C:WindowsResourcesThemes» (от имени администратора)
Если же вы забыли свой пароль на форуме, то воспользуйтесь данной ссылкой для восстановления пароля.
Пуск > Выполнить > regedit > HKEY_CURRENT_USERControl PanelDesktopWindowMetrics
Создайте параметр «REG_SZ» с именем «MinWidth»
(пишется без пропусков)
Затем двойным кликом на имени «MinWidth» установите значение 56 (для Extra) или 40 (для нормальной), кликнув OK закройте реестр и перезагрузите ПК.
Сообщения: 3637
Благодарности: 1489
Сообщения: 3637
Благодарности: 1489
» width=»100%» style=»BORDER-RIGHT: #719bd9 1px solid; BORDER-LEFT: #719bd9 1px solid; BORDER-BOTTOM: #719bd9 1px solid» cellpadding=»6″ cellspacing=»0″ border=»0″> » width=»100%» style=»BORDER-RIGHT: #719bd9 1px solid; BORDER-LEFT: #719bd9 1px solid; BORDER-BOTTOM: #719bd9 1px solid» cellpadding=»6″ cellspacing=»0″ border=»0″>
Сообщения: 4
Благодарности:
Сообщения: 4
Благодарности:
Источник
Как установить свои темы в Windows 7
» width=»100%» style=»BORDER-RIGHT: #719bd9 1px solid; BORDER-LEFT: #719bd9 1px solid; BORDER-BOTTOM: #719bd9 1px solid» cellpadding=»6″ cellspacing=»0″ border=»0″>
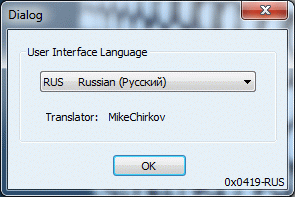
После установки, запустите программу и действуйте в соответствии со скриншотом:
С этого момента уже можно устанавливать темы, для этого откройте папку C:/Windows/Resources/Themes и перетащите сюда скаченные файлы:
Теперь просто кликаем правой кнопкой мышки на рабочем столе и заходим в «Персонализация» и выбираем закаченную тему.
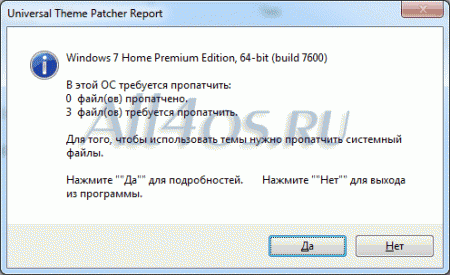
Утилита сообщит, что нам нужно сделать для того чтобы поставить новые темы, нажимаем Да.
В следующем шаге будет вот такое окно, нажимайте Патчить для всех трех файлов:
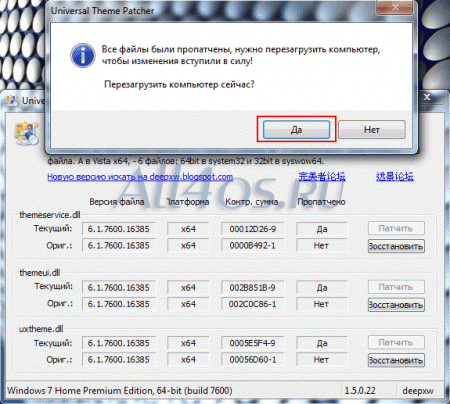
После этого программа предложит перезагрузиться, соглашаемся.
В некоторых архивах с темами можно увидеть некие системные файлы, например – ExplorerFrame.dll(обычно располагаются в папке …WindowsSystem32), их нужно заменить для полной функциональности данной темы. (это не обязательное условие, в большинстве тем будет достаточно записи файлов в C:/Windows/Resources/Themes)
Источник
Как установить темы для Windows Vista
Установка тем для Windows Vista
Один из недостатков ОС Windows Vista в том, что не возможно установить темы оформления рабочей области так же просто как и в Windows XP. Все это потому, что в Windows Vista стоит запрет на изменение системных файлов. Поэтому для установки тем, для начала воспользуйтесь программой Vista Visual Master
Данное описание расчитано на все темы, но создавалось на примере вот этой темы, но подойдет оно к любому стилю оформлению, отличие может быть в некоторых файлах, но принцип их замены один и тот же.
2. После перезагрузки копируем папку с темой а именно ту в которой находится файл с расширением .msstyles в папку C:WindowsResourcesThemes
3. Правой кнопкой нажимаем по рабочему столу, выбираем пункт Персонализация, затем Цвет и внешний вид окон и внизу выбираем Открыть свойства классического внешнего вида для выбора других возможностей там будет 2 Windows Aero, нажимаем на верхний чтобы в окошке появилась превьюшка желаемой темы, после выбора нажимаем Применить затем OK
5. Теперь из скачанного архива TakeOwnership запускаем файл InstallTakeOwnership
6. Идём в папку C:WindowsSystem32 и делаем резервные копии файлов browseui.dll и shell32.dll и сохраняем их куда-нибудь, чтобы потом если что заменить обратно на чистые
9. Тоже самое с пунка с 7 по 8 включительно делаем для файла shell32.dll и перезагружаем машину.
10. Правой кнопкой нажимаем по рабочему столу, выбираем пункт Персонализация, затем Цвет и внешний вид окон инастраиваем оттенок темы и ее прозрачность.
Источник
Win7 Style Builder | Программа для создания тем для Windows 7
Программа для создания, редактирования и конвертации тем Windows. Можно конвертировать темы из XP в Vista и из ХР и Vista в Win7.
Vista/Win7 Style Builder 1.5.0.0
Get full control over an MsStyle
Stop hex-editing files
Auto fixes alpha-channels from Photoshop
Easy image editing
Control all theme properties
Built-in documentation
No more MUI file madness
Test Visual Styles with one click
Fully edit STREAM images, seamlessly
Now with Windows 7 support
Fixed:
[Main] Memory leak when opening many themes.
[Main] Search speed enhanced.
[Main] In-memory UXTheme patcher launches correctly.
[Main] RECT properties not being able to be edited properly.
[Main] Property buttons disappearing after testing.
[Main] Edit program not saving. (Fixed in 1.5.03)
[Win7] FirstImageID set to 508 by default to prevent issues.
[Win7] Open File Dialog not opening.
[Win7] Search icon not showing.
Changed:
[Main] DPI specific images and glyph images now shown in tabs above the preview area.
[Main] Stream/Atlas generator works better for border cases resulting in smaller Streams for better system performance.
[Win7] Classes, Parts, and States finalized.
[Win7] Vista to Windows 7 theme porting finalized. *
Added:
Image dimensions show in preview area.
Basic testing mode. (Shift+Test to auto-switch to basic and test).
Color searching in RGB or HEX. Also searches for colors in images.
Window size, position, and state (Maximized/Restored) saving.
Help pane saving.
Online user-editable wiki documentation.
Auto-open last file.
Ability to change image editor by holding Shift and clicking the Edit button.
Источник

