Для полноценной работы с проектом на docker’е в WSL необходима установка WSL 2. На момент написания заметки ее использование возможно только в рамках участия в программе предварительной оценки Windows (WSL 2 доступна в сборках 18932 и выше). Так же отдельно стоит упомянуть, что необходима версия Windows 10 Pro для установки и настройки Docker Desktop.
Важно! В WSL 2 пропала острая необходимость в Docker Desktop для Windows 10. Как обходиться без него описано в пункте Про Docker в Ubuntu.
Первые шаги
После вступления в программу предварительной оценки и установки обновлений необходимо установить дистрибутив Linux (в данном примере используется Ubuntu 18.04) и Docker Desktop с WSL 2 Tech Preview:
- Docker Desktop WSL 2 Tech Preview
- Ubuntu 18.04 из Windows Store
В обоих пунктах следуем всем инструкциям по установке и настройке.
Установка дистрибутива Ubuntu 18.04
Перед запуском Ubuntu 18.04 необходимо включить Windows WSL и Windows Virtual Machine Platform посредством выполнения двух команд в PowerShell:
Enable-WindowsOptionalFeature -Online -FeatureName Microsoft-Windows-Subsystem-Linux(потребует перезагрузку компьютера)Enable-WindowsOptionalFeature -Online -FeatureName VirtualMachinePlatform
После необходимо удостовериться, что мы будем использовать WSL v2. Для этого в терминале WSL или PowerShell последовательно выполняем команды:
wsl -l -v— смотрим, какая версия установлена в данный момент. Если 1, то движемся далее по спискуwsl --set-version ubuntu 18.04 2— для обновления до версии 2wsl -s ubuntu 18.04— устанавливаем Ubuntu 18.04 в качестве дистрибутива по-умолчанию
Теперь можно запустить Ubuntu 18.04, провести настройку (указать имя пользователя и пароль).
Установка Docker Desktop
Важно! В WSL 2 пропала острая необходимость в Docker Desktop для Windows 10. Как обходиться без него описано в пункте Про Docker в Ubuntu.
В процессе установки следуем указаниям. Компьютер потребует перезапуск после установки и при первом запуске для включения Hyper-V (из-за поддержки которого и требуется версия Windows 10 Pro).
Важно! Если Docker Desktop сообщит о блокировке со стороны firewall’а, идем в настройки антивируса и вносим следующие изменения в правила сетевого экрана (в данном примере в качестве антивируса используется Kaspersky Total Security):
- Проходим в Настройки -> Защита -> Сетевой экран -> Настроить пакетные правила -> Local Service (TCP) -> Изменить
- Из списка локальных портов удаляем порт 445
- Сохранить
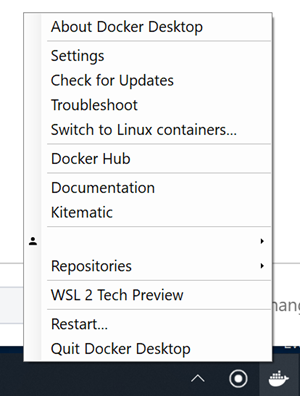
После запуска Docker Desktop в его контекстном меню выбираем пункт WSL 2 Tech Preview.
В открывшемся окне нажимаем кнопку Start.
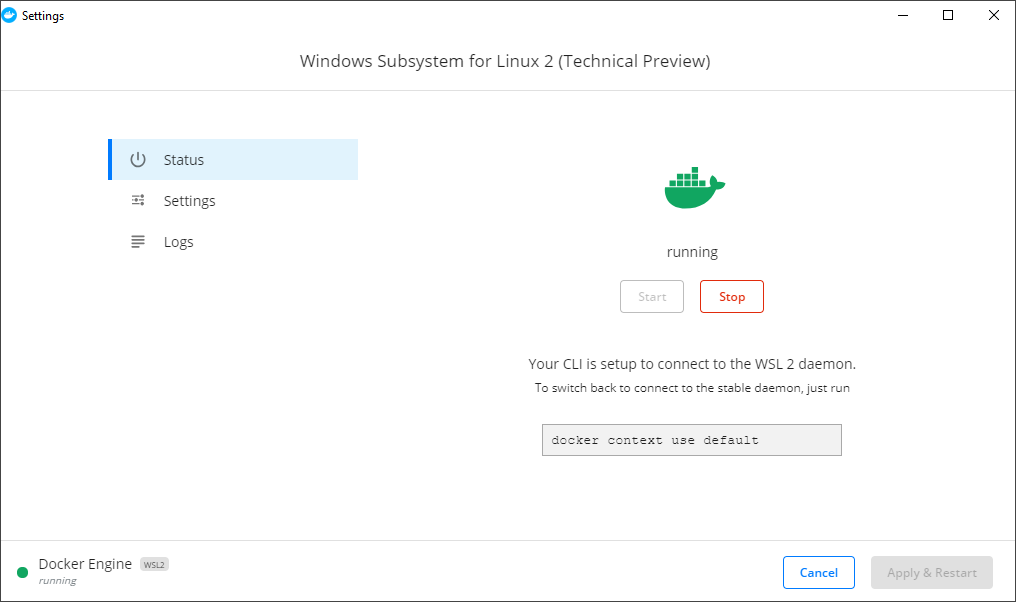
Теперь docker и docker-compose доступны внутри дистрибутива WSL.
Важно! В обновленном Docker Desktop теперь вкладка с WSL внутри окна настроек. Там включается поддержка WSL.

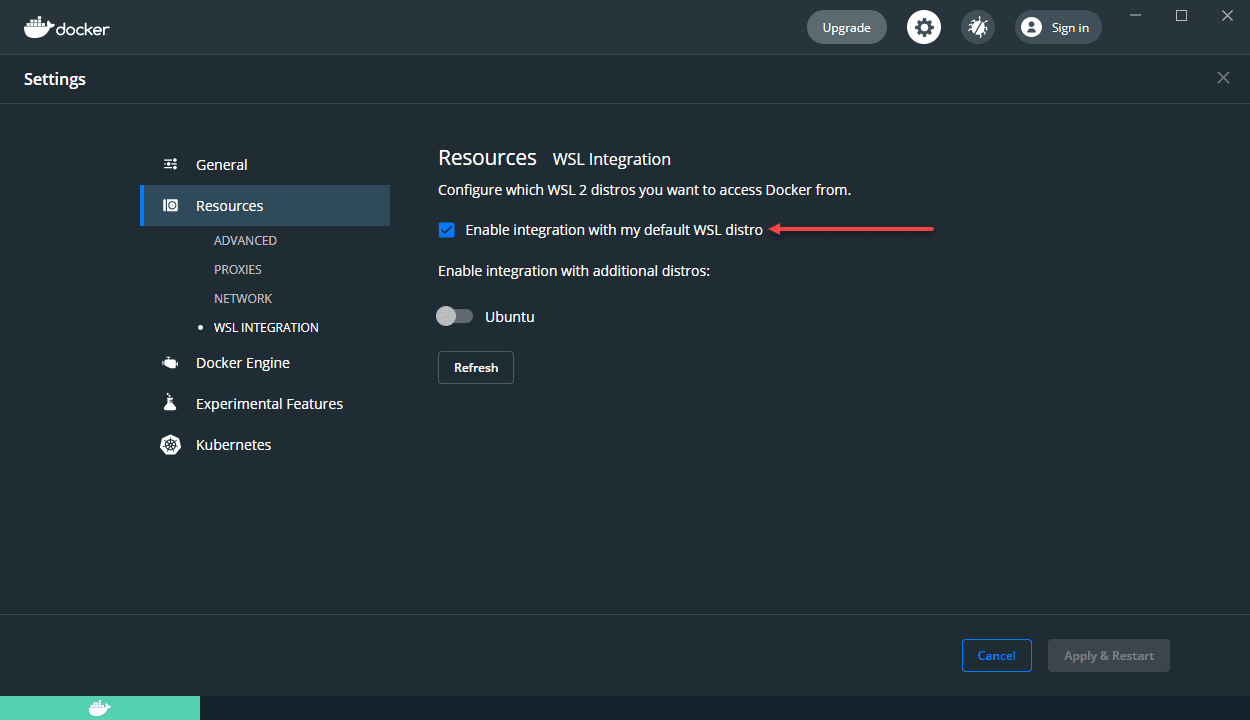
Важно! Помимо галочки активации WSL также необходимо в вкладке Resources->WSL Integration активировать Ваш WSL дистрибутив.

Запуск
Неожиданностью стали те многие проблемы, которые возникли при попытке поднять контейнеры проектов, расположенных в директории пользователя Windows.
Ошибки различного рода, связанные с запуском bash-скриптов (которые как правило стартуют при сборке контейнеров для установки необходимых библиотек и дистрибутивов) и прочих, обычных для разработки на Linux, вещей, заставили задуматься о размещении проектов непосредственно в директории пользователя Ubuntu 18.04.
.
Из решения предыдущей проблемы вытекает следующая: как работать с файлами проекта через IDE, установленную на Windows. В качестве «best practice» я нашел для себя только один вариант — работа посредством VSCode (хотя являюсь поклонником PhpStorm).
После скачивания и установки VSCode обязательно устанавливаем в расширение Remote Development extension pack.
После установки выше упомянутого расширения достаточно просто выполнить команду code . в директории проекта при запущенной VSCode.
В данном примере для обращения к контейнерам через браузер необходим nginx. Установить его через sudo apt-get install nginx оказалось не так просто. Для начала потребовалось обновить дистрибутив WSL посредством выполнения sudo apt update && sudo apt dist-upgrade, и только после этого запустить установку nginx.
Важно! Все локальные домены прописываются не в файле /etc/hosts дистрибутива Linux (его там даже нет), а в файле hosts (обычно расположенном C:WindowsSystem32driversetchosts) Windows 10.
Про Docker в Ubuntu
Как подсказали знающие пользователи в комментариях к заметке, docker внутри дистрибутива WSL 2 абсолютно работоспособен. Это позволяет не устанавливать Docker Desktop на Windows 10 и решает проблему с наличием версии Windows 10 Pro (необходимость в Pro возникает именно в связи с использованием Docker Desktop). Устанавливается согласно инструкциям с родного сайта:
- https://docs.docker.com/install/linux/docker-ce/ubuntu/
- https://docs.docker.com/install/linux/linux-postinstall/
- https://docs.docker.com/compose/install/
Если при выполнении команды docker начнет ругаться на демона, проверьте статус сервиса — в моем случае как и nginx он не запускается автоматически. Запустите его командой sudo service docker start.
Если в момент сборки вывалится ошибка «Service failed to build: cgroups: cannot find cgroup mount destination: unknown» попробуйте следующее решение (не мое, найдено мною, ссылка в источниках): sudo mkdir /sys/fs/cgroup/systemd; sudo mount -t cgroup -o none,name=systemd cgroup /sys/fs/cgroup/systemd.
Работа с проектом через PhpStorm
Чтобы обеспечить возможность работы с проектом в WSL через PhpStorm, необходимо сделать следующее:
- Запускаем командную строку Windows 10 от имени администратора;
- В командной строке Windows 10 выполняем команду
mklink /D C:project_directory \wsl$Ubuntuhomeuserproject_directory, которая создаст символьную ссылку на папку проекта.
После этого в IDE можно открыть проект по пути C:project_directory
P.S. Дмитрий Симагин, спасибо за решение.
Источники
Более подробное описание каждого шага можно найти тут:
- https://code.visualstudio.com/docs/remote/wsl
- https://docs.docker.com/docker-for-windows/wsl-tech-preview/
- https://docs.docker.com/docker-for-windows/
- https://docs.microsoft.com/ru-ru/windows/wsl/wsl2-install
- https://docs.docker.com/install/linux/docker-ce/ubuntu/
- https://docs.docker.com/install/linux/linux-postinstall/
- https://docs.docker.com/compose/install/
- https://github.com/docker/for-linux/issues/219
| description | keywords | redirect_from | title | ||
|---|---|---|---|---|---|
|
Docker Desktop WSL 2 backend |
WSL, WSL 2, Windows Subsystem for Linux, WSL 2 backend Docker, Docker Desktop |
|
Docker Desktop WSL 2 backend on Windows |
Windows Subsystem for Linux (WSL) 2 is a full Linux kernel built by Microsoft, which allows Linux distributions to run without managing virtual machines. With Docker Desktop running on WSL 2, users can leverage Linux workspaces and avoid maintaining both Linux and Windows build scripts. In addition, WSL 2 provides improvements to file system sharing and boot time.
Docker Desktop uses the dynamic memory allocation feature in WSL 2 to improve the resource consumption. This means, Docker Desktop only uses the required amount of CPU and memory resources it needs, while enabling CPU and memory-intensive tasks such as building a container, to run much faster.
Additionally, with WSL 2, the time required to start a Docker daemon after a cold start is significantly faster. It takes less than 10 seconds to start the Docker daemon compared to almost a minute in the previous version of Docker Desktop.
Prerequisites
Before you turn on the Docker Desktop WSL 2, ensure you have:
- Windows 10, version 1903 or higher, or Windows 11.
- Enabled WSL 2 feature on Windows. For detailed instructions, refer to the Microsoft documentation{:target=»blank» rel=»noopener» class=»«}.
- Downloaded and installed the Linux kernel update package{:target=»blank» rel=»noopener» class=»«}.
Turn on Docker Desktop WSL 2
-
Download Docker Desktop for Windows.
-
Follow the usual installation instructions to install Docker Desktop. If you are running a supported system, Docker Desktop prompts you to enable WSL 2 during installation. Read the information displayed on the screen and enable WSL 2 to continue.
-
Start Docker Desktop from the Windows Start menu.
-
From the Docker menu, select Settings and then General.
-
Select the Use WSL 2 based engine check box.
If you have installed Docker Desktop on a system that supports WSL 2, this option is enabled by default.
-
Select Apply & Restart.
Now docker commands work from Windows using the new WSL 2 engine.
Enabling Docker support in WSL 2 distros
WSL 2 adds support for «Linux distros» to Windows, where each distro behaves like a VM except they all run on top of a single shared Linux kernel.
Docker Desktop does not require any particular Linux distros to be installed. The docker CLI and UI all work fine from Windows without any additional Linux distros. However for the best developer experience, we recommend installing at least one additional distro and enabling Docker support by:
-
Ensure the distribution runs in WSL 2 mode. WSL can run distributions in both v1 or v2 mode.
To check the WSL mode, run:
To upgrade your existing Linux distro to v2, run:
$ wsl.exe --set-version (distro name) 2To set v2 as the default version for future installations, run:
$ wsl.exe --set-default-version 2 -
When Docker Desktop starts, go to Settings > Resources > WSL Integration.
The Docker-WSL integration is enabled on your default WSL distribution. To change your default WSL distro, run
wsl --set-default <distro name>For example, to set Ubuntu as your default WSL distro, run:
$ wsl --set-default ubuntuOptionally, select any additional distributions you would like to enable the Docker-WSL integration on.
-
Select Apply & Restart.
Note
Docker Desktop installs two special-purpose internal Linux distros
docker-desktopanddocker-desktop-data. The first (docker-desktop) is used to run the Docker engine (dockerd) while the second (docker-desktop-data) stores containers and images. Neither can be used for general development.
Best practices
-
To get the best out of the file system performance when bind-mounting files, we recommend storing source code and other data that is bind-mounted into Linux containers, for instance with
docker run -v <host-path>:<container-path>, in the Linux file system, rather than the Windows file system. You can also refer to the recommendation{:target=»blank» rel=»noopener» class=»«} from Microsoft.- Linux containers only receive file change events, «inotify events», if the
original files are stored in the Linux filesystem. For example, some web development workflows rely on inotify events for automatic reloading when files have changed. - Performance is much higher when files are bind-mounted from the Linux
filesystem, rather than remoted from the Windows host. Therefore avoid
docker run -v /mnt/c/users:/users, where/mnt/cis mounted from Windows. - Instead, from a Linux shell use a command like
docker run -v ~/my-project:/sources <my-image>
where~is expanded by the Linux shell to$HOME.
- Linux containers only receive file change events, «inotify events», if the
-
If you have concerns about the size of the docker-desktop-data VHDX, or need to change it, take a look at the WSL tooling built into Windows{:target=»blank» rel=»noopener» class=»«}.
-
If you have concerns about CPU or memory usage, you can configure limits on the memory, CPU, and swap size allocated to the WSL 2 utility VM{:target=»blank» rel=»noopener» class=»«}.
-
To avoid any potential conflicts with using WSL 2 on Docker Desktop, you must uninstall any previous versions of Docker Engine and CLI installed directly through Linux distributions before installing Docker Desktop.
Develop with Docker and WSL 2
The following section describes how to start developing your applications using Docker and WSL 2. We recommend that you have your code in your default Linux distribution for the best development experience using Docker and WSL 2. After you have enabled WSL 2 on Docker Desktop, you can start working with your code inside the Linux distro and ideally with your IDE still in Windows. This workflow is straightforward if you are using VSCode{:target=»blank» rel=»noopener» class=»«}.
-
Open VS Code and install the Remote — WSL{:target=»blank» rel=»noopener» class=»«} extension. This extension allows you to work with a remote server in the Linux distro and your IDE client still on Windows.
-
Now, you can start working in VS Code remotely. To do this, open your terminal and type:
This opens a new VS Code connected remotely to your default Linux distro which you can check in the bottom corner of the screen.
Alternatively, you can type the name of your default Linux distro in your Start menu, open it, and then run
code. -
When you are in VS Code, you can use the terminal in VS Code to pull your code and start working natively from your Windows machine.
GPU support
Starting with Docker Desktop 3.1.0, Docker Desktop supports WSL 2 GPU Paravirtualization (GPU-PV) on NVIDIA GPUs. To enable WSL 2 GPU Paravirtualization, you need:
- A machine with an NVIDIA GPU
- The latest Windows Insider version from the Dev Preview ring
- Beta drivers{:target=»blank» rel=»noopener» class=»«} from NVIDIA supporting WSL 2 GPU Paravirtualization
- Update WSL 2 Linux kernel to the latest version using
wsl --updatefrom an elevated command prompt - Make sure the WSL 2 backend is enabled in Docker Desktop
To validate that everything works as expected, run the following command to run a short benchmark on your GPU:
$ docker run --rm -it --gpus=all nvcr.io/nvidia/k8s/cuda-sample:nbody nbody -gpu -benchmark
The following displays:
Run "nbody -benchmark [-numbodies=<numBodies>]" to measure performance.
        -fullscreen       (run n-body simulation in fullscreen mode)
        -fp64             (use double precision floating point values for simulation)
        -hostmem          (stores simulation data in host memory)
        -benchmark        (run benchmark to measure performance)
        -numbodies=<N>    (number of bodies (>= 1) to run in simulation)
        -device=<d>       (where d=0,1,2.... for the CUDA device to use)
        -numdevices=<i>   (where i=(number of CUDA devices > 0) to use for simulation)
        -compare          (compares simulation results running once on the default GPU and once on the CPU)
        -cpu              (run n-body simulation on the CPU)
        -tipsy=<file.bin> (load a tipsy model file for simulation)

> NOTE: The CUDA Samples are not meant for performance measurements. Results may vary when GPU Boost is enabled.

> Windowed mode
> Simulation data stored in video memory
> Single precision floating point simulation
> 1 Devices used for simulation
MapSMtoCores for SM 7.5 is undefined.  Default to use 64 Cores/SM
GPU Device 0: "GeForce RTX 2060 with Max-Q Design" with compute capability 7.5

> Compute 7.5 CUDA device: [GeForce RTX 2060 with Max-Q Design]
30720 bodies, total time for 10 iterations: 69.280 ms
= 136.219 billion interactions per second
= 2724.379 single-precision GFLOP/s at 20 flops per interaction
Feedback
Your feedback is very important to us. Let us know your feedback by creating an issue in the Docker Desktop for Windows GitHub{:target=»blank» rel=»noopener» class=»«} repository and adding the WSL 2 label.
В этой заметке я расскажу как поставить Докер на Windows 10, но сначала я опишу установку Windows Subsystem for Linux. Работу с самим Докером я описывать не буду, сделаю это позже.
Установка WSL2 на Windows 10
Установка элементарная, главное проверьте чтобы ваш компьютер и Windows 10 отвечали минимальным требованиям.
UPD.
Для Windows 11 и Windows 10 (сборка 19041 и выше) для установки WSL достаточно одной команды (PowerShell с правами администратора):
wsl --installЭта команда включит все необходимые компоненты и установит дистрибутив Linux (по умолчанию Ubuntu), вам нужно будет только перезагрузить компьютер.
Подробный процесс установки описан на сайте Microsoft https://docs.microsoft.com/ru-ru/windows/wsl/install-win10 там же указаны минимальные требования.
Если коротко, то установка WSL2 на Windows 10 сводится к следующим шагам:
1) Запускаем PowerShell с правами администратора и включаем компонент «Подсистема Windows для Linux», для этого вводим команду:
dism.exe /online /enable-feature /featurename:VirtualMachinePlatform /all /norestart
2) Далее необходимо включить необязательный компонент «Платформа виртуальных машин», для этого в PowerShell с правами администратора выполняем команду:
dism.exe /online /enable-feature /featurename:VirtualMachinePlatform /all /norestart
Перезапускаем компьютер.
3) Скачиваем и устанавливаем пакет обновления ядра Linux https://wslstorestorage.blob.core.windows.net/wslblob/wsl_update_x64.msi
4) Выбираем WSL 2 в качестве версии по умолчанию, если этого не сделать новые дистрибутивы Linux будут установлены в WSL 1. Вновь запускаем PowerShell с правами администратора и добавляем команду:
wsl --set-default-version 2
Готово.
Далее нужно выбрать в магазине Microsoft Store нужный нам дистрибутив Linux и установить его, как обычное приложение из магазина. Я установил Ubuntu 18.04 (https://www.microsoft.com/store/apps/9N9TNGVNDL3Q)
После я запускаю установленную Убунту и задаю логин и пароль.

Все, Убунту можно закрыть.
Установка Docker на Windows 10
Теперь установим Docker Desktop WSL 2 backend, идем по ссылке https://hub.docker.com/editions/community/docker-ce-desktop-windows/ Скачиваем и устанавливаем Docker Desktop for Windows (stable).
Запускаем скачанный файл и производим обычную установку приложения Windows.
При установке убедитесь что установлена галочка на Enable WSL 2 Windows Features.

После установки следуйте инструкциям и перелогиньтесь в Windows, Докер запуститься при следующем входе в Windows, иногда в первый раз может понадобится довольно длительное время.
Когда он запустится, рекомендую в окне приветствия нажать Start и пройти небольшое обучение.

После обучающего урока у вас будет запущен ваш первый Docker контейнер.
 .
.
И теперь по адресу http://localhost/tutorial/ вы можете увидеть инструкцию по дальнейшей работе.
Теперь вы можете заниматься разработкой в Windows 10 использую Docker.
Кстати, я не хочу чтобы Докер запускался каждый раз при включении компьютера, поэтому в настройках я убрал галочку Start Docker Desktop when you log in.

WSL
Docker
Updated April 10, 2022, with current Alpine instructions, Debian/Ubuntu package signing tweaks (no more apt-key), and better guidance for handling iptables in Debian. A little more suggestion about TCP access, as well. And further emphasis on the optional nature of the
/mnt/wsl/shared-dockersocket directory.
Windows Subsystem for Linux 2 sports an actual Linux kernel, supporting real Linux containers and Docker. Docker works on WSL 2, and without requiring the robust but heavy Docker Desktop if that is undesirable. However, due to both WSL and Docker complexities, a little tender loving care is required to get Docker up and running. This article attempts to explore such a process and options along the way.
Contrary to what the length of this article might suggest, getting Docker working on WSL is fairly simple. In a nutshell:
- Instead of using an init system such as systemd to launch the Docker daemon, launch it by calling
dockerdmanually. - If sharing the Docker daemon between WSL instances is desired, configure it to use a socket stored in the shared
/mnt/wsldirectory. - If sharing and privileged access without sudo are desired, configure the
dockergroup to have the same group ID across all WSL instances - For simplicity, rather than launch a Windows-based Docker client, launch
dockerinside WSL.
Plenty more nuance and decisions below, of course. See details regarding the companion Github repo by scrolling to the bottom.
Are you sure you don’t want Docker Desktop?
Before proceeding, let’s note that Docker Desktop is amazing. If you want Docker to work on Windows and WSL 2, installing Docker Desktop is most likely the way to go. With Docker Desktop’s WSL 2 backend, Docker integrates with Windows in a fairly elegant way, and the docker client can be launched from either Powershell or Linux. Reading about what goes on under the hood is an entertaining and informative endeavor, as well. Very clever.
If you came here looking how to get Docker running easily, or if you want Windows containers (still a rarity) out of the box, then Docker Desktop is your friend, and you can go install it now.
But if you, like me, feel that all the added complexity of Docker Desktop is unnecessary, you don’t need Windows containers, or you are simply tired of that whale in the system tray taking… so… long… then perhaps you want to run the docker daemon (dockerd) in the WSL distro of your choice and be happy. You are at the right place.
Note that Docker Desktop is only free individuals or for small companies. If you are using it for work, and your company exceeds a certain size or revenue, then consider paying for a subscription. Of course, if you use Docker without Docker Desktop, as detailed in this article, then this does not apply. See more details about the Docker subscription model here.
Have you tried Podman?

Before we mosey along, though: are you aware of Podman? Podman is daemonless (no background service needed), modern (cgroups v2 out of the box), supports rootless, and serves as a drop-in replacement for Docker. Without needing to worry about sockets and ports, a lot of headaches go away.
I have written about getting Podman to work on WSL 2. Feel free to try it out. You may never look back. And, yes, VSCode can work with podman.
And yet… Sometimes, one just needs Docker to work. Maybe some tooling you use can’t handle Podman, or you just want to put WSL through its paces. If so, read on.
Make sure that WSL is version 2
Please note that these steps require WSL 2 (not version 1). WSL 2 uses an actual Linux kernel that allows Linux containers. WSL 1 was genius with running Linux on the Windows kernel, but of course lacked some of the features, such as containers. Microsoft offers a more detailed comparison in the docs.
You will most certainly need WSL 2 to run the Docker service.
Does the command wsl --set-default-version 2 work? This will set the default version to WSL 2, or fail if you are still on the first version.
Microsoft’s has step-by-step instructions on how to upgrade to WSL 2.
To run WSL 2, Windows version 1903 or higher is needed, with Build 18362 or higher. To tell what version you are running, run winver in Powershell or CMD, or just type Win key and R (⊞-r) to open the Run dialog and then enter winver. Hopefully you will see something like «Version 21H2. OS Build 19044.1586»
Install a Linux distro
If you do not yet have a running WSL instance with a distro of your choice, the next step is to pick one from the Microsoft Store. If you dislike the Windows Store, there are other options.
Custom installations are also a great option with WSL 2. For instance, install and configure Fedora, or any other distro for which you can obtain a rootfs in tar format and then wsl --import rootfs.tar.
This guide includes instructions for launching dockerd in Debian, Ubuntu, Alpine, and Fedora. If you think there is another obvious WSL distro that should be considered, feel free to let me know in the comments.
Configure a non-root user
Once you have installed the distro of your choice, launch it and set up a non-root user if you have not already. Debian and Ubuntu will configure this automatically at first launch, as should Alpine if you installed it from the Store. If the whoami command returnes «root», then you will want to add a non-root user. For Alpine or Fedora, use adduser myusername to create a new user. On Alpine, this should prompt for the new password. On Fedora, you will additionally need to passwd myusername and enter the password you want to use. (If your Fedora does not have passwd, then you will need to first dnf install passwd cracklib-dicts).
On later versions of Alpine from the Microsoft Store, while a non-root user is created as part of setup, this user is initially password-less. You can double check on any distro with:
cat /etc/shadow | grep myusername | cut -d: -f2
Enter fullscreen mode
Exit fullscreen mode
(If you are not root, you may need to su first).
If the result is «!» then that user has no password set. If the result is a random hash string, then you are good. If you need to set a password, you can use passwd myusername (of course, in all of the above, use your username in place of «myusername.»
Configure admin (sudo) access for the non-root user
If you used Debian or Ubuntu from the Windows store and set up the default user on first launch, then sudo should already be configured on behalf of the default user. You can skip this step, and proceed to updating packages and testing network connectivity, below.
When signed in as the user you set up (try su myusername if you are still root), can you sudo -v without an error?
If not, first make sure that sudo is installed. On Alpine, that’s apk add sudo and on Fedora, dnf install sudo. If this fails due to network connectivity, see below. You can follow the directions there in order to correct DNS, but of course eliminate any occurrence of sudo in those commands, as you do not have it yet, and you should still be root anyway.
Is your user a «sudoer»? Try the following to see if they are part of the sudo or wheel group:
grep -E 'sudo|wheel' /etc/group
Enter fullscreen mode
Exit fullscreen mode
On distros that have a sudo group, such as Ubuntu and Debian, you should see something like sudo:x:27:myusername and on distros that have a wheel group, such as Fedora and Alpine, you should see something like wheel:27:myusername.
If your username is missing from the group, take note of the group name (sudo or wheel) and add the user in question to that group:
- Alpine:
addgroup myusername wheel - Fedora:
usermod -aG wheel myusername - Probably not necessary, but on Ubuntu/Debian:
usermod -aG sudo myusername
Finally, as root, make sure that the admin group (whether sudo or wheel) is enabled for sudo:
grep -E '%sudo|%wheel' /etc/sudoers
Enter fullscreen mode
Exit fullscreen mode
If the line is there, but commented out with a #, then run visudo then make sure the line reads thus (use wheel or sudo as determined earlier):
%wheel ALL=(ALL) ALL
Enter fullscreen mode
Exit fullscreen mode
Then save.
Once these steps are complete, test again with:
su myusername
sudo -v
Enter fullscreen mode
Exit fullscreen mode
If you are prompted for the password, then all is well. If you instead received an error containing something like «Sorry, user myusername may not run sudo» then you may need to follow the steps again, from the beginning.
Set default user
If you obtained your Linux distro from the Store, you can likely skip this step, as the default user is already set up.
If, however, when you launch WSL, you are still root, then set your new user as the default.
Assuming you have Windows build 18980 or later: simply add a user section to /etc/wsl.conf.
Something like this will work well if you do not already have that file, or a [user] section in it:
printf "n[user]ndefault = myusernamen" | sudo tee -a /etc/wsl.conf
Enter fullscreen mode
Exit fullscreen mode
However, if on a version of Windows before build 18980, then you will instead need to edit the registry to set a default user. Before doing this, we will need two bits of information: the user id, and the name of the WSL distro. Chances are, you already know these. If not, you can obtain the user id with id -u myusername and check your list of WSL distros with (in Powershell) wsl -l
Then, use the following command in Powershell, but use your WSL distro name in place of «Alpine» and use your user id in place of «1000»:
Get-ItemProperty Registry::HKEY_CURRENT_USERSoftwareMicrosoftWindowsCurrentVersionLxss* DistributionName | Where-Object -Property DistributionName -eq Alpine | Set-ItemProperty -Name DefaultUid -Value 1000
Enter fullscreen mode
Exit fullscreen mode
Whichever method you use, test by logging out of WSL, and then log back in. Confirm that whoami yields the correct username. Success.
Update/upgrade packages and test network connectivity
Let’s make everything new and shiny with one of the following:
- Debian/Ubuntu:
sudo apt update && sudo apt upgrade - Fedora:
sudo dnf upgrade - Alpine:
sudo apk upgrade -U
Network issues?
Upgrading the packages also serves as a network test. For a variety of reasons, network connectivity issues can happen with WSL 2, and tweaking the DNS settings often resolves these problems in my experience. If the upgrade command succeeded, you can skip this section. But if the above commands fail to access the package servers, it may be something unique to your network, or your firewall or anti-malware software. I recommend the following:
echo -e "[network]ngenerateResolvConf = false" | sudo tee -a /etc/wsl.conf
sudo unlink /etc/resolv.conf
echo nameserver 1.1.1.1 | sudo tee /etc/resolv.conf
Enter fullscreen mode
Exit fullscreen mode
The first line tells WSL to cease auto-configuring the /etc/resolv.conf file. Then we remove/unlink the old file, and create a new one.
With this newly-configured DNS resolver (in this case, pointing directly to Cloudflare’s DNS server) you can try upgrading packages again. Success? Excellent.
Prepare for Docker installation
Thankfully, there are official guides for installing Docker on various Linux distributions. I have based these instructions on those, with some tweaks learned from real world testing.
Remove residue
If this is not a fresh install, and you may have experimented with docker before, then first clear out any residual docker installs:
- Fedora:
sudo dnf remove moby-engine docker docker-client docker-client-latest docker-common docker-latest docker-latest-logrotate docker-logrotate docker-selinux docker-engine-selinux docker-engine - Debian/Ubuntu:
sudo apt remove docker docker-engine docker.io containerd runc - Alpine (probably not necessary, but just in case):
sudo apk del docker-cli docker-ce docker-openrc docker-compose docker
Install dependencies
Then, install pre-requisites:
- Debian/Ubuntu:
sudo apt install --no-install-recommends apt-transport-https ca-certificates curl gnupg2 - Fedora:
sudo dnf install dnf-plugins-core - Alpine: Nothing needed. Dependencies will be installed later, automatically.
Debian: switch to legacy iptables
Docker utilizes iptables to implement network isolation. For good reason, Debian uses the more modern nftables, but this means that Docker cannot automatically tweak the Linux firewall. Given this, you probably want to configure Debian to use the legacy iptables by default:
update-alternatives --config iptables
Enter fullscreen mode
Exit fullscreen mode
And select iptables-legacy.
If you are comfortable, instead, with nftables and want to configure nftables manually for Docker, then go for it. I suspect that most, however, will want to switch to iptables legacy.
Debian/Ubuntu package repository configuration
On Debian or Ubuntu, first temporarily set some OS-specific variables:
. /etc/os-release
Enter fullscreen mode
Exit fullscreen mode
Then, make sure that apt will trust the repo:
curl -fsSL https://download.docker.com/linux/${ID}/gpg | sudo tee /etc/apt/trusted.gpg.d/docker.asc
Enter fullscreen mode
Exit fullscreen mode
ID will be either «ubuntu» or «debian», as appropriate, depending on what is in /etc/os-release.
Then add and update the repo information so that apt will use it in the future:
echo "deb [arch=amd64] https://download.docker.com/linux/${ID} ${VERSION_CODENAME} stable" | sudo tee /etc/apt/sources.list.d/docker.list
sudo apt update
Enter fullscreen mode
Exit fullscreen mode
Fedora package repository configuration
On Fedora, first add Docker’s repo:
sudo dnf config-manager --add-repo https://download.docker.com/linux/fedora/docker-ce.repo
Enter fullscreen mode
Exit fullscreen mode
Install Docker
Now we can install the official Docker Engine and client tools:
- Debian/Ubuntu:
sudo apt install docker-ce docker-ce-cli containerd.io - Fedora:
sudo dnf install docker-ce docker-ce-cli containerd.io - Alpine (install the latest from edge):
sudo apk add docker --repository=http://dl-cdn.alpinelinux.org/alpine/edge/community
Add user to docker group
The Docker daemon is a service that Docker requires to be running in the background. The service (dockerd) and client (docker) communicate over a socket and/or a network port. For communication over the socket, privileged access is required. Two ways to obtain this access:
- Run
dockeras root (i.e.sudo docker) - Through group membership, grant specific users privileged access to the Docker socket
In other words, unless you want to utilize sudo or root access every time, add your user to the Docker group, named docker:
- Fedora/Ubuntu/Debian:
sudo usermod -aG docker $USER - Alpine:
sudo addgroup $USER docker
Then close that WSL window, and launch WSL again. You should see docker when you run the command groups to list group memberships.
Sharing dockerd: choose a common ID for the docker group
If you only plan on using one WSL distro, this next step isn’t strictly necessary. However, if you would like to have the option of sharing the Docker socket system-wide, across WSL distributions, then all will need to share a common group ID for the group docker. By default, they each may have a different ID, so a new one is in order.
First, let’s pick one. It can be any group ID that is not in use. Choose a number greater than 1000 and less than 65534. To see what group IDs are already assigned that are 1000 or above:
getent group | cut -d: -f3 | grep -E '^[0-9]{4}' | sort -g
Enter fullscreen mode
Exit fullscreen mode
Can’t decide what number to use? May I suggest 36257. (Just dial DOCKR on your telephone keypad…) Not likely to be already in use, but check anyway:
getent group | grep 36257 || echo "Yes, that ID is free"
Enter fullscreen mode
Exit fullscreen mode
If the above command returns a line from /etc/group (that does not include docker), then pick another number and try again. If it returns «Yes, that ID is free» then you are good to go, with the following:
sudo sed -i -e 's/^(docker:x):[^:]+/1:36257/' /etc/group
Enter fullscreen mode
Exit fullscreen mode
Or, if groupmod is available (which it is on Fedora, Ubuntu, and Debian, but not Alpine unless you sudo apk add shadow), this is safer:
sudo groupmod -g 36257 docker
Enter fullscreen mode
Exit fullscreen mode
Once the group id has been changed, close the terminal window and re-launch your WSL distro.
Note that the above steps involving the docker group will need to be run on any WSL distribution you currently have or install in the future, if you want to give it access to the shared Docker socket.
(Optionally) prepare a shared directory
As with the last step, if you only plan on using one WSL distro, this next step isn’t strictly necessary. However, if you would like to have the option of sharing the Docker socket system-wide, across WSL distributions, then a shared directory accessible to all is needed.
Let’s first make a shared directory for the docker socket, and set permissions so that the docker group can write to it.
DOCKER_DIR=/mnt/wsl/shared-docker
mkdir -pm o=,ug=rwx "$DOCKER_DIR"
chgrp docker "$DOCKER_DIR"
Enter fullscreen mode
Exit fullscreen mode
Configure dockerd to use the shared directory
Again, this step can be skipped if you opt against using a shared directory for the docker socket. However, you may have other settings you wish to put in daemon.json, so you may appreciate some familiarity with this topic.
I suggest using the configuration file /etc/docker/daemon.json to set dockerd launch parameters. If the /etc/docker directory does not exist yet, create it with sudo mkdir /etc/docker/ so it can contain the config file. Then the following, when placed in /etc/docker/daemon.json, will set the docker host to the shared socket:
{
  "hosts": ["unix:///mnt/wsl/shared-docker/docker.sock"]
}
Enter fullscreen mode
Exit fullscreen mode
Launch dockerd
Most Linux distributions use systemd or other init system, but WSL has its own init system. Rather than twist things to use the existing init system, we just launch dockerd directly:
sudo dockerd
Enter fullscreen mode
Exit fullscreen mode
There should be several lines of info, warnings related to cgroup blkio, and the like, with something like API listen on /mnt/wsl/shared-docker/docker.sock at the end. If so, you have success.
Open another wsl terminal.
If and only if you opted to use the shared docker socket in /mnt/wsl/shared-docker as detailed above, first set the DOCKER_HOST environment variable:
export DOCKER_HOST="unix:///mnt/wsl/shared-docker/docker.sock"
Enter fullscreen mode
Exit fullscreen mode
Then, try out the docker cli:
docker run --rm hello-world
Enter fullscreen mode
Exit fullscreen mode
You should see the «Hello from Docker!» message.
Launch script for dockerd
The following lines can be placed in .bashrc or .profile if autolaunching is desired, or in a separate shell script. For instance, you may want to create a script ~/bin/docker-service so that you can run docker-service only when you want, manually.
DOCKER_DISTRO="Debian"
DOCKER_DIR=/mnt/wsl/shared-docker
DOCKER_SOCK="$DOCKER_DIR/docker.sock"
export DOCKER_HOST="unix://$DOCKER_SOCK"
if [ ! -S "$DOCKER_SOCK" ]; then
    mkdir -pm o=,ug=rwx "$DOCKER_DIR"
    chgrp docker "$DOCKER_DIR"
    /mnt/c/Windows/System32/wsl.exe -d $DOCKER_DISTRO sh -c "nohup sudo -b dockerd < /dev/null > $DOCKER_DIR/dockerd.log 2>&1"
fi
Enter fullscreen mode
Exit fullscreen mode
If you went with the default docker socket location of /var/run/docker.sock instead of the shared socket directory of /mnt/wsl/shared-docker as detailed above, then the script can be something like this:
DOCKER_DISTRO="Debian"
DOCKER_LOG_DIR=$HOME/docker_logs
mkdir -pm o=,ug=rwx "$DOCKER_LOG_DIR"
/mnt/c/Windows/System32/wsl.exe -d $DOCKER_DISTRO sh -c "nohup sudo -b dockerd < /dev/null > $DOCKER_LOG_DIR/dockerd.log 2>&1"
Enter fullscreen mode
Exit fullscreen mode
You may choose whatever location you would like for your docker logs, of course. It just needs to be in a place that has permissions so that your user can write to it.
Note that DOCKER_DISTRO should be set to the distro you want to have running dockerd. If unsure of the name, simply run wsl -l -q from Powershell to see your list of WSL distributions. Pick the right one and set it to DOCKER_DISTRO.
The script above does the following:
- Sets the environment variable
$DOCKER_HOSTto point to the shared socket. This isn’t necessary fordockerdbut it will allow runningdockerwithout needing to specify-H unix:///mnt/wsl/shared-docker/docker.sockeach time. - Checks if the
docker.sockfile already exists and is a socket. If it is present, do nothing. If not present then the script does the remaining steps, as follows. - Creates the shared docker directory for the socket and
dockerdlogs, setting permissions appropriately - Runs
dockerdfrom the specified distro. This is important, because it allows any WSL distro to launchdockerdif it isn’t already running. - When
dockerdis launched, pipe its output and errors to a shared log file. - When
dockerdis launched, it runs in the background so you don’t have to devote a terminal window to the process as we did earlier. Thesudo -bflag gives us this, and we run withnohupso that it runs independent of the terminal, with an explicit null input tonohupto avoid extra warnings. Both standard output and errors are written to the logfile, hence the2>&1redirect.
Passwordless launch of dockerd
If the above script is placed in .bashrc (most Linux distros) or .profile (distros like Alpine that have Ash/Dash as the default shell), or other shell init script, then it has an unfortunate side effect: you will likely be prompted for a password most every time a new terminal window is launched.
To work around this, you can, if you choose, tell sudo to grant passwordless access to dockerd, as long as the user is a member of the docker group. To do so, enter sudo visudo and add the following line (if your visudo uses vi or vim, then be sure to press «i» to begin editing, and hit ESC when done editing):
%docker ALL=(ALL) NOPASSWD: /usr/bin/dockerd
Enter fullscreen mode
Exit fullscreen mode
Save and exit («:wq» if the editor is vi, or Ctrl-x if it is nano), and then you can test if sudo dockerd prompts for a password or not. For peace of mind, you can double-check: something like sudo -k ls -a /root should still require a password, unless the password has been entered recently.
Make sure $DOCKER_HOST is always set
If using the script earlier to launch dockerd, then $DOCKER_HOST will be set, and future invocations of docker will not need an unwieldy -H unix:///mnt/wsl/shared-docker/docker.sock
If that script is already in your .bashrc or .profile, then the following is unnecessary. If, however, you manually invoke dockerd in some way, then the following may be desirable in your .bashrc or .profile, if you opted for the shared docker socket directory:
DOCKER_SOCK="/mnt/wsl/shared-docker/docker.sock"
test -S "$DOCKER_SOCK" && export DOCKER_HOST="unix://$DOCKER_SOCK"
Enter fullscreen mode
Exit fullscreen mode
The above checks for the docker socket in /mnt/wsl/shared-docker/docker.sock and, if present, sets the $DOCKER_HOST environment variable accordingly. If you want a more generalized «if this is wsl, then set the socket pro-actively» then you may prefer the following, which simply check for the existence of a /mnt/wsl directory and sets the docker socket if so:
[ -d /mnt/wsl ] && export DOCKER_HOST="unix:///mnt/wsl/shared-docker/docker.sock"
Enter fullscreen mode
Exit fullscreen mode
Running docker from Windows
If configured as above, I recommend always running docker from wsl. Do you want to run a container? Do so from a WSL window. (See my article on using Windows Terminal for a convenient way to use WSL and Powershell.)
This doesn’t just apply to the terminal, either. For instance, VSCode supports docker in WSL 2.
But if you want the convenience and utility of running docker in a Powershell window, I have a couple suggestions.
One is to expose dockerd over a TCP Port, or, better yet, set up an SSH server in WSL and connect that way. docker context will likely be your friend. Such methods will be explored in a later article, but I encourage you, reader, to explore. A hint: ever tried scoop.sh? After setting it up, scoop install docker docker-compose will get you some familiar tools, then an SSH server such as Dropbear or OpenSSH on the WSL side…
A simplified method I recommend: a Powershell function that calls the WSL docker, passing along any arguments. This function can be placed in your Powershell profile, usually located at ~DocumentsWindowsPowerShellMicrosoft.PowerShell_profile.ps1
$DOCKER_DISTRO = "fedora"
function docker {
    wsl -d $DOCKER_DISTRO docker -H unix:///mnt/wsl/shared-docker/docker.sock @Args
}
Enter fullscreen mode
Exit fullscreen mode
Again, try wsl -l -q to see a list of your WSL distributions if you are unsure which one to use.
Make sure the Docker daemon is running, then launch a new Powershell window, and try the hello-world container again. Success?
You could also make a batch file with the appropriate command in it. For instance, name it docker.bat and place in C:Windowssystem32 or other location included in %PATH%. The following contents will work in such a script:
@echo off
set DOCKER_DISTRO=fedora
wsl -d %DOCKER_DISTRO% docker -H unix:///mnt/wsl/shared-docker/docker.sock %*
Enter fullscreen mode
Exit fullscreen mode
You could go a step further and ensure that dockerd is running whenever you start Powershell. Assuming that the dockerd start script detailed above is saved in a file in WSL as $HOME/bin/docker-service and is executable (try chmod a+x $HOME/bin/docker-service), then the following line in your Powershell profile will launch dockerd automatically:
wsl -d $distro ~/bin/docker-service
Enter fullscreen mode
Exit fullscreen mode
Not sure where your Powershell profile is located? Try entering $profile in a powershell window.
If you don’t want to rely on a particular WSL shell script, you could implement a Powershell function to launch dockerd, such as this:
function Docker-Service {
  Param ([string]$distro)
  $DOCKER_DIR = "/mnt/wsl/shared-docker"
  $DOCKER_SOCK = "$DOCKER_DIR/docker.sock"
  wsl -d "$distro" sh -c "[ -S '$DOCKER_SOCK' ]"
  if ($LASTEXITCODE) {
    wsl -d "$distro" sh -c "mkdir -pm o=,ug=rwx $DOCKER_DIR ; chgrp docker $DOCKER_DIR"
    wsl -d "$distro" sh -c "nohup sudo -b dockerd < /dev/null > $DOCKER_DIR/dockerd.log 2>&1"
  }
}
Enter fullscreen mode
Exit fullscreen mode
This function takes one parameter: the distro name.
In all of the above, the principle is the same: you are launching Linux executables, using WSL interoperability.
A note on bind mounts: stay on the Linux filesystem
With docker, it is possible to mount a host system’s directory or files in the container. The following often works, but is not advisable when launching WSL docker from Windows:
echo "<h1>Hello, World</h1>" > index.html
docker run -p "8080:80" -v "$PWD:/usr/share/nginx/html:ro" nginx
Enter fullscreen mode
Exit fullscreen mode
Instead of doing the above haphazardly, when launching WSL docker from Powershell, two recommendations:
- For performance reasons, only bind mount from within the Linux filesystem. To get to a Linux directory while in Powershell, try something like
cd (wsl wslpath -m ~/path/to/my/dir) - Instead of
$PWDto get the current directory, try'$(wslpath -a .)'and, yeah, the single quotes are helpful for escaping.
An example:
cd (wsl wslpath -m ~)
mkdir html
cd html
echo "<h1>Hello, World</h1>" > index.html
docker run -p "8080:80" -v '$(wslpath -a .):/usr/share/nginx/html:ro' nginx
Enter fullscreen mode
Exit fullscreen mode
Then point your browser to http://localhost:8080, and happiness will result. (Depending on your network configuration, you may instead need to access this through http://[WSL IP Address]:8080 which should be obtainable with ifconfig or ip addr)
Try wsl wslpath from Powershell, or just wslpath from Linux, to see the options. This is a very useful tool, to say the least.
Example scripts
After walking through the steps in this article, you should now have a working and potentially auto-launched dockerd, shared Docker socket, and conveniently configured docker command.
Some of the code examples above have been placed in scripts in a companion Github repo. I summarize the files available here:
-
docker-service.sh is a Unix shell script to launch
dockerd -
docker-service.ps1 contains a Powershell function to launch
dockerdin WSL -
docker.bat is a Windows batch file for launching WSL
dockerfrom CMD -
docker.ps1 contains a Powershell function for launching WSL
dockerfrom Powershell, if placed in your profile
No doubt there are ways these can be tweaked to be more useful and reliable; feel free to post in the comments.
Interested in further tinkering with WSL 2?
Other articles I have written on WSL:
- Using podman instead of Docker
- You Probably Don’t Need systemd on WSL
- Install Fedora on WSL
- How to Upgrade from Fedora 32 to Fedora 33
Docker is a platform for creating and deploying applications in self-sufficient containers. The installation of Docker is pretty easy in Linux, but this is usually not the case with Windows. In this post, I will show you how to install Docker in Windows 10 or Windows 11 in multiple ways. You’ll learn there is indeed a way that makes the Docker Desktop installation in Windows as simple as in Linux.
Contents
- Prerequisites
- Docker with WSL2 backend
- Docker with Hyper-V backend
- Install Docker using the GUI
- Install Docker using winget
- Install Docker using PowerShell
- Author
- Recent Posts

Surender Kumar has more than twelve years of experience in server and network administration. His fields of interest are Windows Servers, Active Directory, PowerShell, web servers, networking, Linux, virtualization, and penetration testing. He loves writing for his blog.
Latest posts by Surender Kumar (see all)
- Extending LVM space in Ubuntu — Thu, Feb 2 2023
- Backup in Proxmox VE — Thu, Jan 26 2023
- Snapshots in Proxmox VE — Wed, Jan 25 2023
Prerequisites
You might already be aware that Docker relies on virtualization technology. On Windows, Docker can use either the Windows Subsystem for Linux (WSL) 2 or Hyper-V as a backend.
Docker with WSL2 backend
The current version of Docker Desktop only works on the 64-bit edition of Windows, whether you’re running Windows 10 or Windows 11. To run Docker with the WSL2 backend, your system must meet the following prerequisites:
- Windows 10: Home/Pro 21H1 (build 19043) or higher, or Enterprise/Education 20H2 (build 19042) or higher
- Windows 11: Home/Pro version 21H2 or higher, or Enterprise/Education version 21H2 or higher
- WSL2 feature enabled
- Linux kernel update package for WSL2
- For WSL2, the following are the hardware requirements:
- 64-bit CPU with second-level address translation (SLAT)
- Hardware virtualization support, which must be enabled in BIOS/UEFI
- 4 GB RAM
Docker with Hyper-V backend
To be able to run Docker with a Hyper-V backend and Windows containers, your system must meet the following prerequisites:
- Windows 10: Pro 21H1 (build 19043) or higher, or Enterprise/Education 20H2 (build 19042) or higher
- Windows 11: Pro/Enterprise/Education version 21H2 or higher
- Optional Windows features for Hyper-V and Containers must be enabled

Enable Hyper V and Containers windows features for Docker

For Hyper-V, following are the hardware requirements:
- 64-bit CPU with second-level address translation (SLAT)
- Hardware virtualization support, which must be enabled in BIOS/UEFI
- 4 GB RAM
In addition to the aforementioned requirements, if you want to run Docker in a Hyper-V guest VM, you need to enable nested virtualization by running this PowerShell command on the Hyper-V host:
Set-VMProcessor -VMName <VMName> -ExposeVirtualizationExtensions $True

Enable nested virtualization for a VM on Hyper V host using PowerShell
Make sure your VM is powered off before running this command. Without nested virtualization support, Docker will not work in a VM, and you will receive the error message shown below.

Docker desktop cannot start An unexpected error occurred
Install Docker using the GUI
To install Docker Desktop in Windows using the GUI, follow these steps:
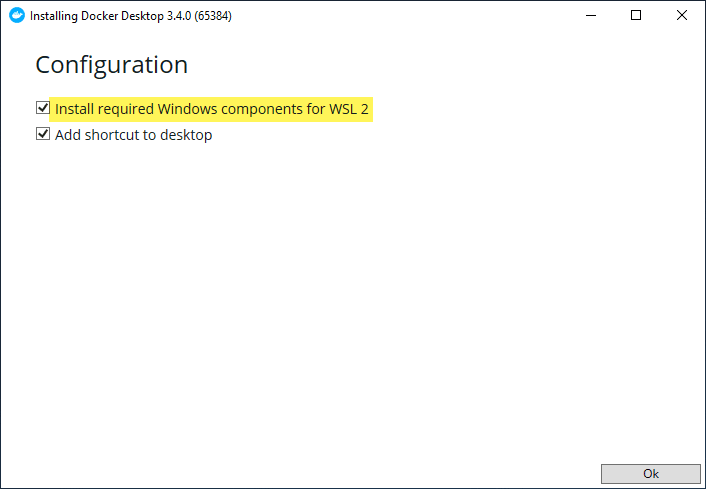
Download Docker Desktop. You will see a configuration screen, as shown in the screenshot:

Docker desktop configuration Use WSL 2 instead of Hyper V recommended
To use Docker with the WSL 2 backend, check the box that says Use WSL 2 instead of Hyper-V (recommended). If you want to use Hyper-V instead, uncheck this option and click OK.
When the installation is complete, click the Close and Restart button to restart your computer.

Close Docker installer and restart the computer to complete installation
After restarting, you will be able to run Docker Desktop using either a shortcut or a command prompt. If you did not install WSL 2 before installing Docker, you will receive the WSL 2 installation is incomplete error when you try to start Docker.

Docker desktop error WSL 2 installation is incomplete
To fix this error, run the wsl —update command in an elevated PowerShell console, and restart your computer.

Installing WSL2 kernel updates to fix the WSL 2 installation is incomplete error
Install Docker using winget
Winget is a command-line package manager for modern versions of Windows, which works just like apt or DNF in Linux. If you have a little experience with package installation in Linux, you probably know that you usually just have to type a command and the package is ready for use. Well, winget does the exact same thing in Windows. All you need is Windows 10 1809 (build 17763) or Windows 11. To install Docker in Windows using winget, follow these steps:
Launch an elevated command prompt or PowerShell console, and type the following command:
winget install --exact --id Docker.DockerDesktop --accept-source-agreements --accept-package-agreements

Installing docker desktop in windows using winget
The —exact (or -e in short) parameter tells winget to find the package using an exact match. The installation can take a while, but it is pretty much automatic, so there is nothing you need to do but wait.
When the command is finished, open a new command prompt (or PowerShell console) and run the docker —version command.
If you try to run docker —version in the same command prompt, you will likely see The term ‘docker’ is not recognized as the name of a cmdlet, function, script file, or operable program error, as shown in the screenshot.

The term docker is not recognized as the name of a cmdlet function script file or operable program
This error occurs because your current command session (cmd or PowerShell) is still using the old environment variables. To be able to recognize the newly added Docker variable, you must reload the environment variables. Launching a new command session is the easiest way to load new variables.
Install Docker using PowerShell
To install Docker Desktop using PowerShell, follow these steps:
Download Docker Desktop.
Once the installer package is downloaded, open an elevated PowerShell console or Windows Terminal, and type the following command to start Docker installation:
Start-Process "D:Docker Desktop Installer.exe" -Wait -NoNewWindow "install --quiet --accept-license"

Installing Docker silently using PowerShell
Make sure you adjust the installer path. The -Wait parameter causes the Start-Process cmdlet to wait for the new process to finish, and the -NoNewWindow parameter prevents the new process from opening in a new window. The —quiet switch is offered by Docker’s install command and suppresses the installation information. To see the information, skip this switch. Since we are using PowerShell, notice how —quiet and other flags are enclosed in quotes along with the install command—this is very important to avoid errors. By default, Docker will use the WSL 2 backend, but you could include the —backend=hyper-v flag to use the Hyper-V backend instead.
Once the above command is finished, you will see a shortcut for Docker Desktop on your desktop. Double-click the shortcut to launch Docker.
All of these installation methods are self-sufficient, so there is nothing additional you need to do. But you may still get an error message that says Docker Desktop – Access denied. You are not allowed to use Docker. You must be in the «docker-users» group.
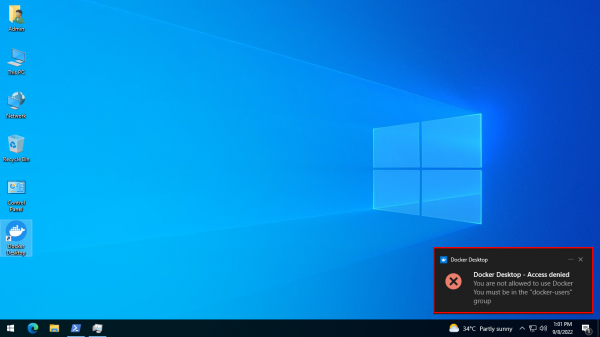
Docker Desktop – Access denied. You are not allowed to use Docker. You must be in the docker users group
If you get this error, run the following command in an elevated PowerShell console:
Add-LocalGroupMember -Group "docker-users" -Member $env:UserName -Verbose

Adding the current user to the docker users group using PowerShell
Don’t forget to log off and log on again after running this command. If you want to delegate another user to run Docker Desktop, you can specify that username with the -Member parameter instead of $env:UserName.
Subscribe to 4sysops newsletter!
That was all for this guide. You just learned how to install Docker in Windows using the GUI, winget, and PowerShell. I am curious to know which method you prefer, and why.
In this post, I describe how to install WSL 2 to serve as the backend for Docker Desktop for Windows. Previously I’ve always worked with Linux in a Virtual Machine using something like VMWare or Virtual Box, but I decided to give Docker Desktop a try, and was pleasantly surprised by the experience!
I’ll start by describing how to install WSL 2 based on the install documents, then show how to install Docker Desktop. Finally, I show the the experience of running a container and how it looks in Docker Desktop.
Installing WSL2
The Windows Subsystem for Linux (WSL) is a way to run a full Linux environment on your Windows machine, without having to install a «heavier» virtual machine, such as Virtual Box, VM Ware, or Hyper-V. WSL 2 also provides a mechanism for running Docker (with Linux containers) on your Windows machine. We’ll install it as a prerequisite for Docker Desktop for Windows.
If you’re running Windows Home, WSL 2 is the only way to run Docker Desktop. On Windows Pro, you can also use Hyper-V, but that is deprecated now, so WSL 2 is the way to go in all cases.
1. Install WSL 1
We’ll start by installing WSL 1 by enabling the WSL feature.
Open PowerShell as Administrator (I hit the Start key, type powershell and hit ctrl+shift+enter to open an elevated command prompt). Run the following, to enable WSL 1
dism.exe /online /enable-feature /featurename:Microsoft-Windows-Subsystem-Linux /all /norestart
You should see the following:
> dism.exe /online /enable-feature /featurename:Microsoft-Windows-Subsystem-Linux /all /norestart

Deployment Image Servicing and Management tool
Version: 10.0.19041.746

Image Version: 10.0.19042.804

Enabling feature(s)
[==========================100.0%==========================]
The operation completed successfully.
That enables WSL, but we’re going to enable the newer WSL 2 version, which Docker Desktop can use to run the VM it needs to run containers.
2. Enable the Virtual Machine feature
WSL 2 uses a lightweight VM, so you need to enable the Virtual Machine feature available in Windows 10 version 1903 and higher. In the same, elevated command prompt, run:
dism.exe /online /enable-feature /featurename:VirtualMachinePlatform /all /norestart
You should see something like the following:
> dism.exe /online /enable-feature /featurename:VirtualMachinePlatform /all /norestart
Deployment Image Servicing and Management tool
Version: 10.0.19041.746

Image Version: 10.0.19042.804

Enabling feature(s)
[==========================100.0%==========================]
The operation completed successfully.
3. Restart
Time to restart your machine to ensure everything is registered correctly.
4. Install the WSL 2 update
Download the WSL2 Linux kernel update package for x64 machines and install it.
Note, if you see the following error when running the update, make sure you’ve restarted your machine afer installing the WSL 1 and VM features:
The installer runs very quickly, and hopefully you’ll see a confirmation screen, something like the following:
5. Set WSL 2 as your default version
This is an easy step, just run wsl --set-default-version 2 in any PowerShell window:
>wsl --set-default-version 2
For information on key differences with WSL 2 please visit https://aka.ms/wsl2
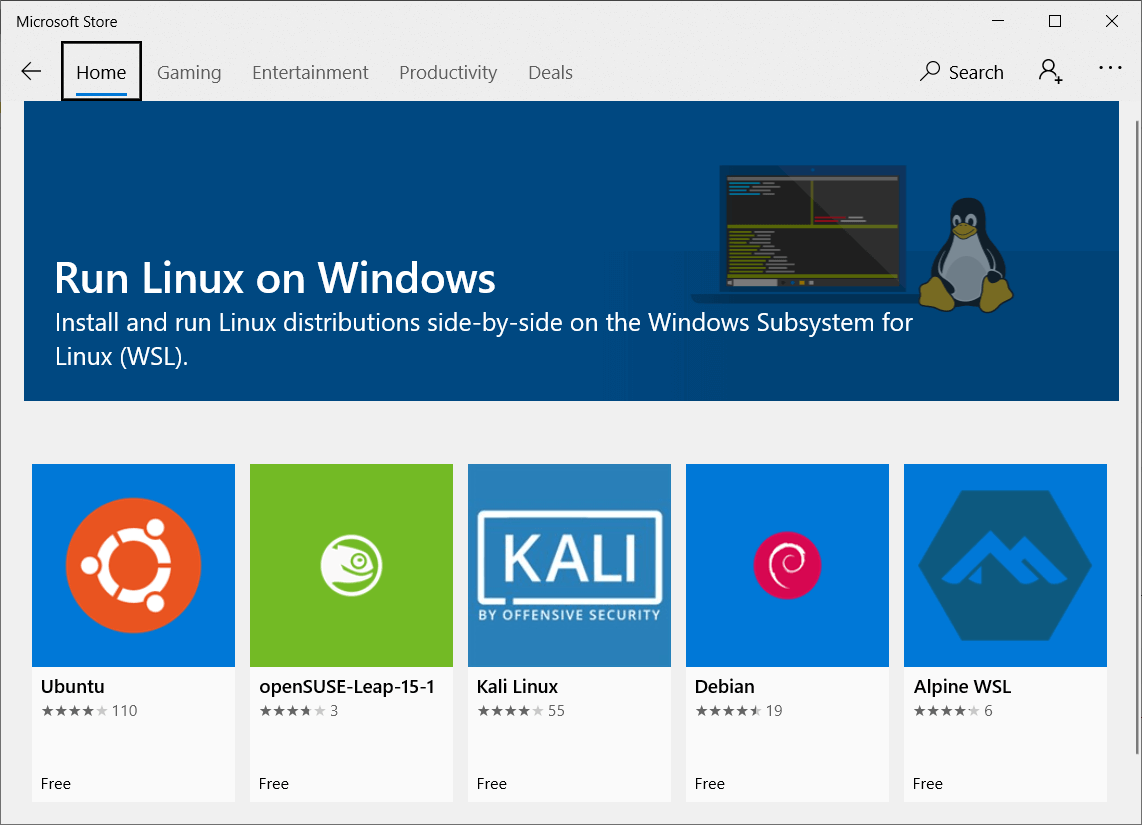
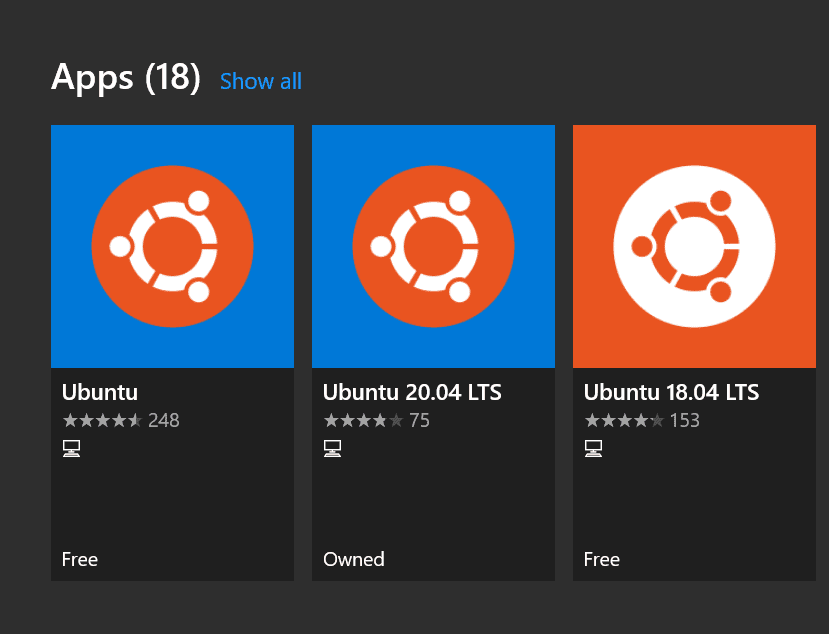
6. (Optional) Install a Linux distribution
We actually don’t need to install a Linux distribution to use Docker Desktop, but if you want to shell into Linux directly, you’ll need to install one. You can install a distribution directly from the Microsoft Store.
The first time you launch the distribution, the distribution will extract and install, and you’ll need to set a username and password.
7. (Optional) Add to Windows Terminal
If you’re using Windows Terminal (you should be!) you can configure it to open your WSL distribution. The easiest way to do this is to open up the settings.json file and reset it. You can do this by deleting the contents of the file—Terminal will automatically repopulate it with the defaults, which will include a tab for WSL.
Obviously you won’t want to lose your setting customisations, so make sure to backup the contents of the file first!
You’re looking for WSL in the profiles list—add that to you profile list, and you’ll be able to quickly open up your WSL instance from Windows Terminal!
That’s the prerequisite starter for Docker Desktop covered, so now lets get to the main course!
1. Download and Install
Head to the Docker Desktop website and download the Installer for Windows.. This is a hefty ~500MB, but once it’s finished, run the installer.
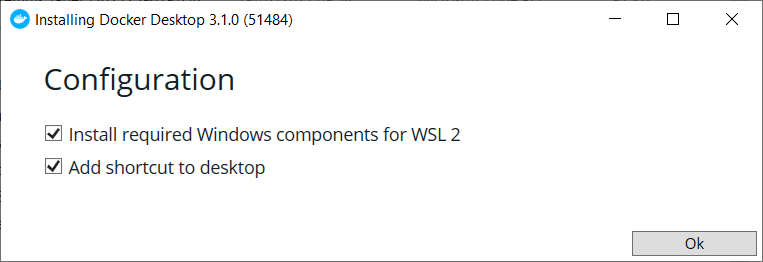
On the first screen, ensure you keep «Install required components for WSL 2» checked:
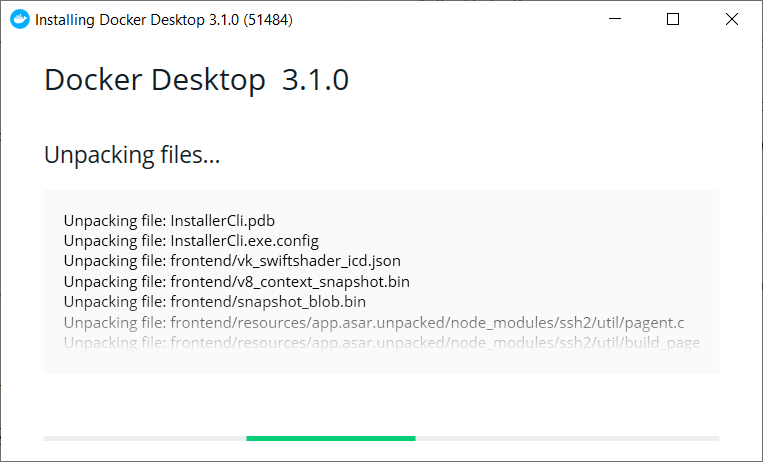
After clicking OK, the installer will unpack a whole load of files:
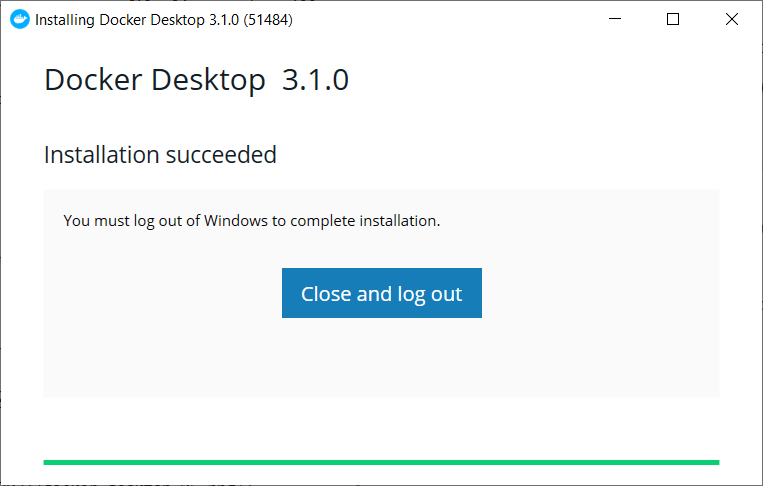
Before finally prompting you to log out of your Windows account to complete the installation:
2. Logout and back in
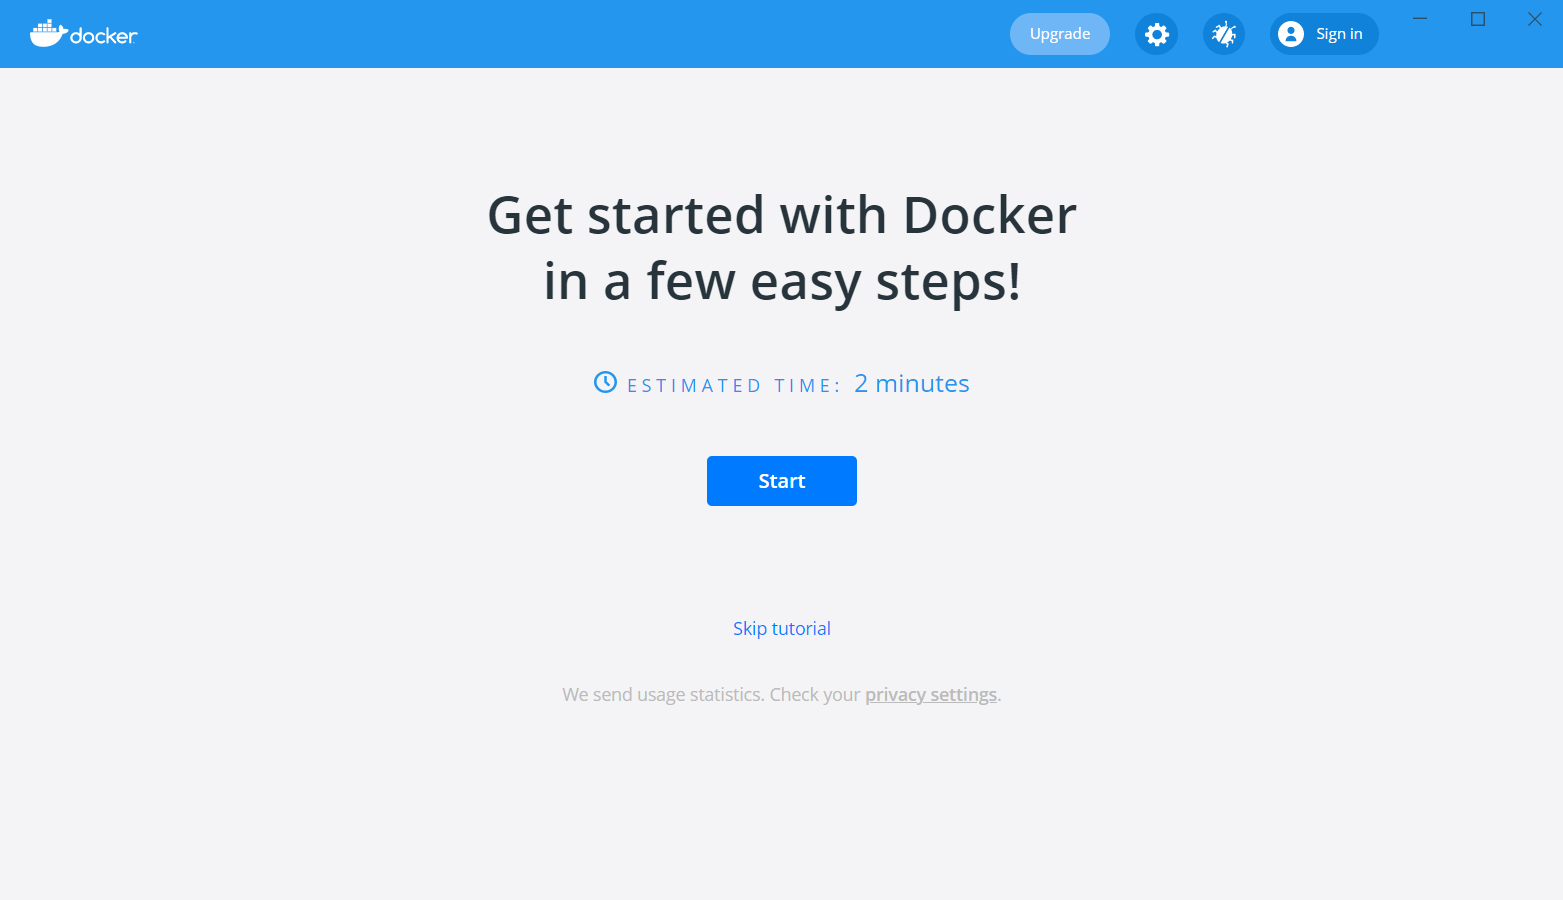
The Docker Desktop installer will automatically log you out of your Windows account on completion. When you sign back in, you’ll get a notification that Docker is starting the Linux Containers WSL 2 backend. Eventually, the main Docker Desktop window will pop up, and offer you a tutorial
3. Give it a try!
With Docker Desktop installed, you now have the docker command available in your command prompt:
> docker

Usage:  docker [OPTIONS] COMMAND

A self-sufficient runtime for containers

Options:
...
Now it’s installed, let’s take it for a spin!
Trying out Docker Desktop for Windows
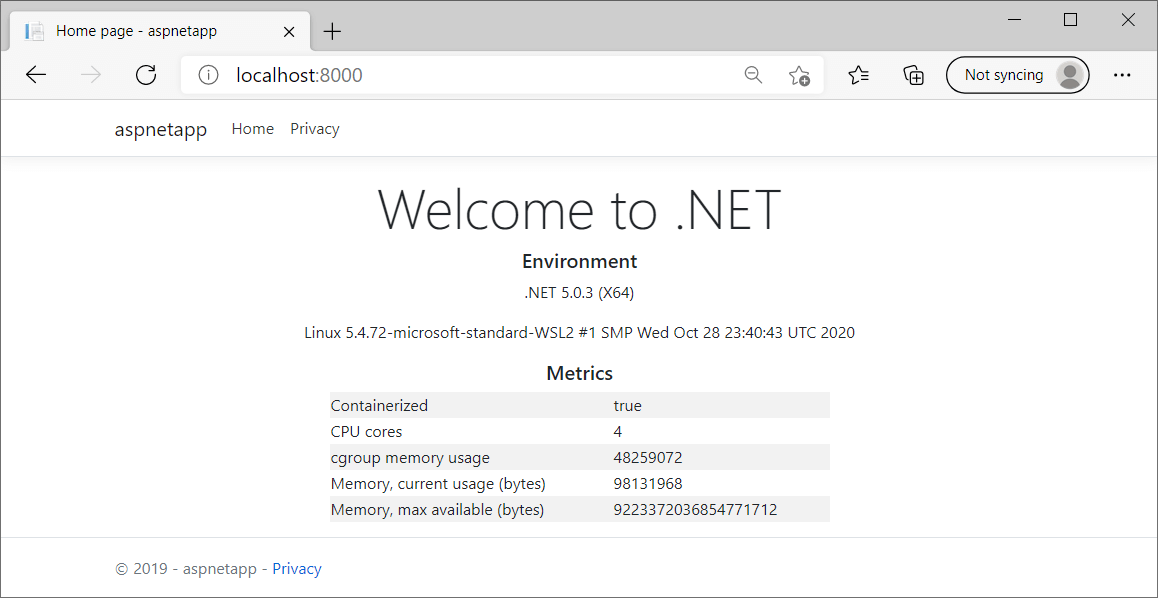
For simplicity, we’ll run one of the .NET 5.0 sample apps available on DockerHub:
docker run -it --rm `
    -p 8000:80 `
    --name my-sample `
    mcr.microsoft.com/dotnet/samples:aspnetapp
This is a simple Razor Pages app, packaged in a Docker image, and ready to run. You can see the Dockerfile for the app here. When you run the above command Docker will pull the image, run it and start listening:
Unable to find image 'mcr.microsoft.com/dotnet/samples:aspnetapp' locally
aspnetapp: Pulling from dotnet/samples
45b42c59be33: Extracting [=========================>                         ]  13.57MB/27.1MB
752dcc4c3a04: Download complete
5ccb476d6b8b: Download complete
513626bd05cb: Downloading [======================>                            ]  472.8kB/1.
...
Status: Downloaded newer image for mcr.microsoft.com/dotnet/samples:aspnetapp
info: Microsoft.Hosting.Lifetime[0]
      Now listening on: http://[::]:80
If you navigate to http://localhost:8000/, you’ll see the app running there—a Linux container, running on Windows 🤯
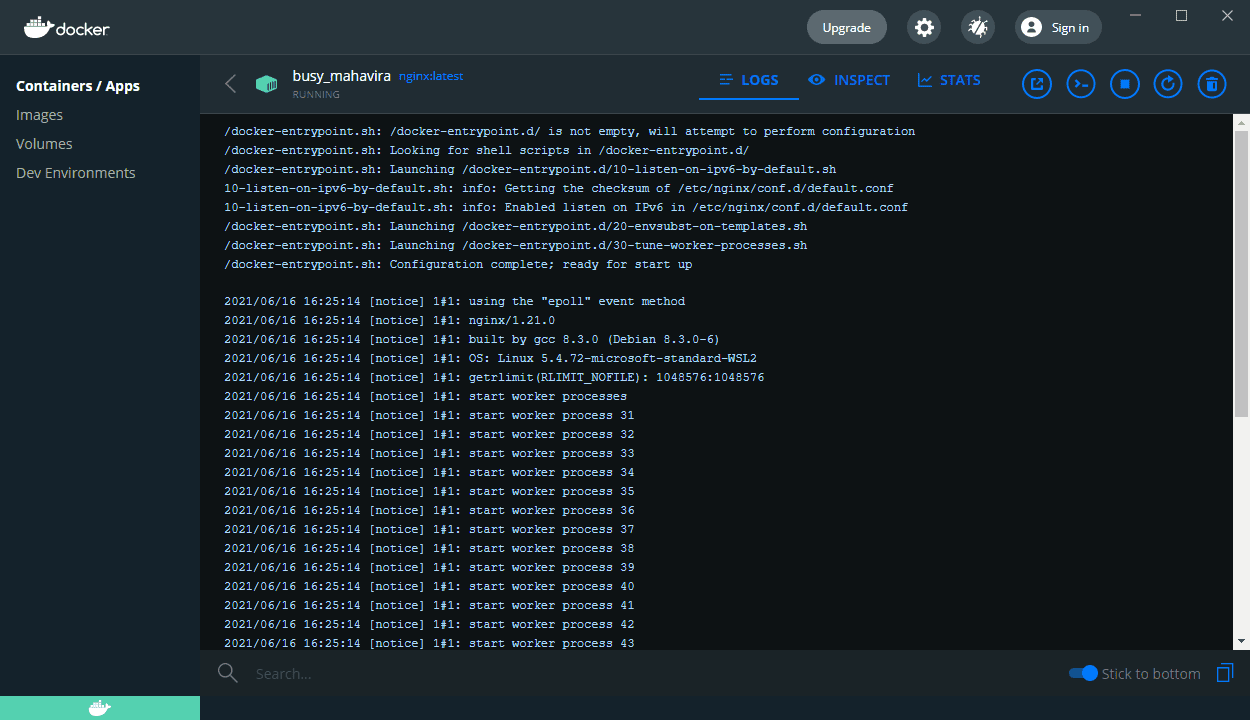
The interesting thing, which I didn’t realise until I installed it, is that Docker Desktop for Windows installs a very nice UI for managing your containers!
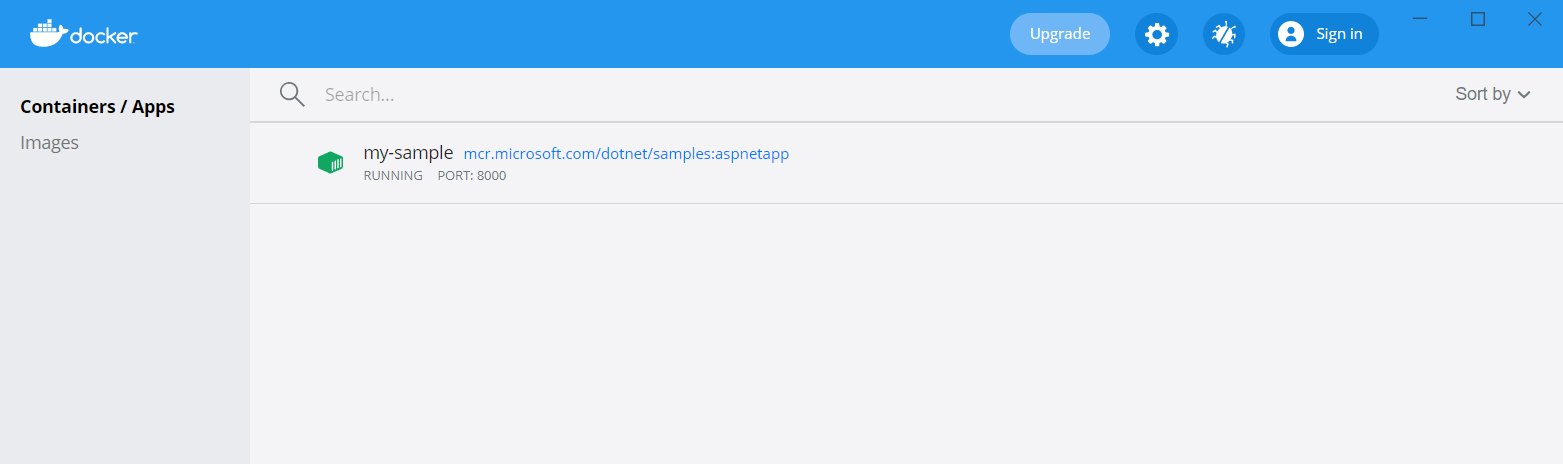
If you click on the my-sample container row, you’ll see the logs for the container:

You can also inspect the environment variables, view stats about the container, or click CLI to open a shell inside (exec into) the container! You can do all these things from the command line obviously, and if you’re automating things, that’s definitely the right option. For casual or local development, personally I find you can’t beat a nice GUI!
Summary
In this post I described how to Install WSL, upgrade it to WSL 2, and how to install Docker Desktop. This requires a restart of Windows and a logout which is a bit annoying, but otherwise it went very smoothly. The Docker Desktop UI also looks very handy, in particular the ability to exec into a container—I’m always getting the CLI command wrong, so that will be very unseful!

Windows Subsystem for Linux (WSL) is a great tool to have access to all your NIX tools and even run more Linux native solutions on the Windows platform. WSL 2 is the updated version of WSL with more features and represents the more recent implementation of the WSL solution. WSL and WSL 2 is a great tool for developers and DevOps pros alike to be able to natively have these tools on their Windows Workstations without having to run a separate development VM for this purpose. One of the tools you probably want to install and run in WSL is Docker. Docker is of course the container platform of choice for most organizations and provides a great platform for running containers in testing, development, and production environments. How do you get Docker running in WSL 2? Let’s step through the process Install Docker on Windows Subsystem for Linux WSL 2 in Windows 10 and see what if any hurdles are encountered getting up and running with containers in WSL 2.
The first step of course if we are going to run Docker containers inside of Windows Subsystem for Linux WSL 2 is to actually install WSL 2. The steps to that are straightforward and well-documented in the official KB from Microsoft. However, below are screenshots of walking through that documented process to get up and running with WSL 2.
- Install Windows Subsystem for Linux
- Install the Virtual Machine Platform on Windows 10
- Reboot
- Download and install the Linux Kernel update package
- Set the default version to WSL 2
1. Install Windows Subsystem for Linux
This can easily be done through a PowerShell prompt with the following command:
dism.exe /online /enable-feature /featurename:Microsoft-Windows-Subsystem-Linux /all /norestart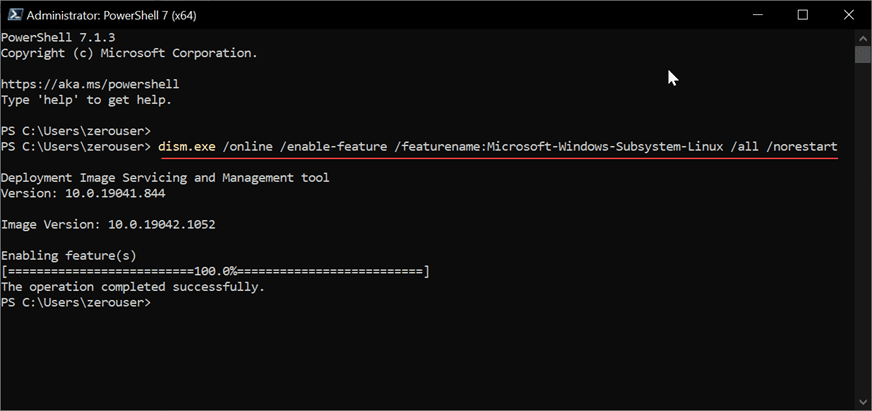
2. Install the Virtual Machine Platform on Windows 10
The next step is to install the Virtual Machine Platform on Windows 10. Again, in a PowerShell prompt, run the following command:

dism.exe /online /enable-feature /featurename:VirtualMachinePlatform /all /norestart
3. Reboot
Reboot your Windows 10 workstation to instantiate the components correctly. You will see “Windows Updates” applying after making the changes.
4. Download and install the Linux Kernel update package
Do this here:
- WSL 2 Linux kernel update package for x64 machines

5. Set the default version to WSL 2
The next step is to set the default WSL version to WSL 2. This is easily done with the command below:
wsl --set-default-version 2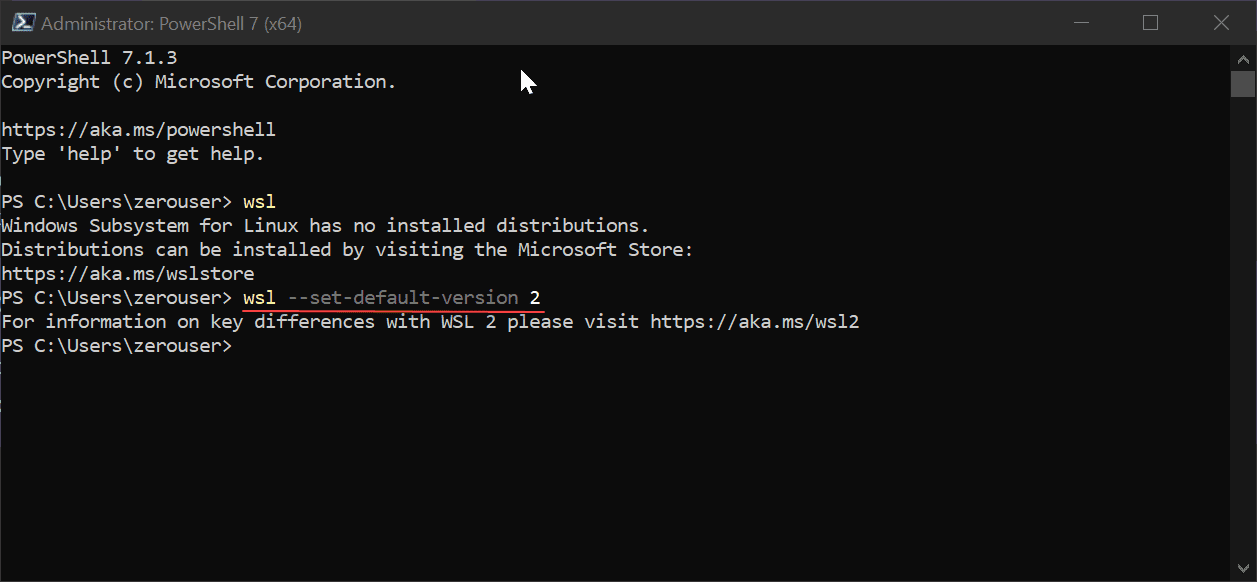
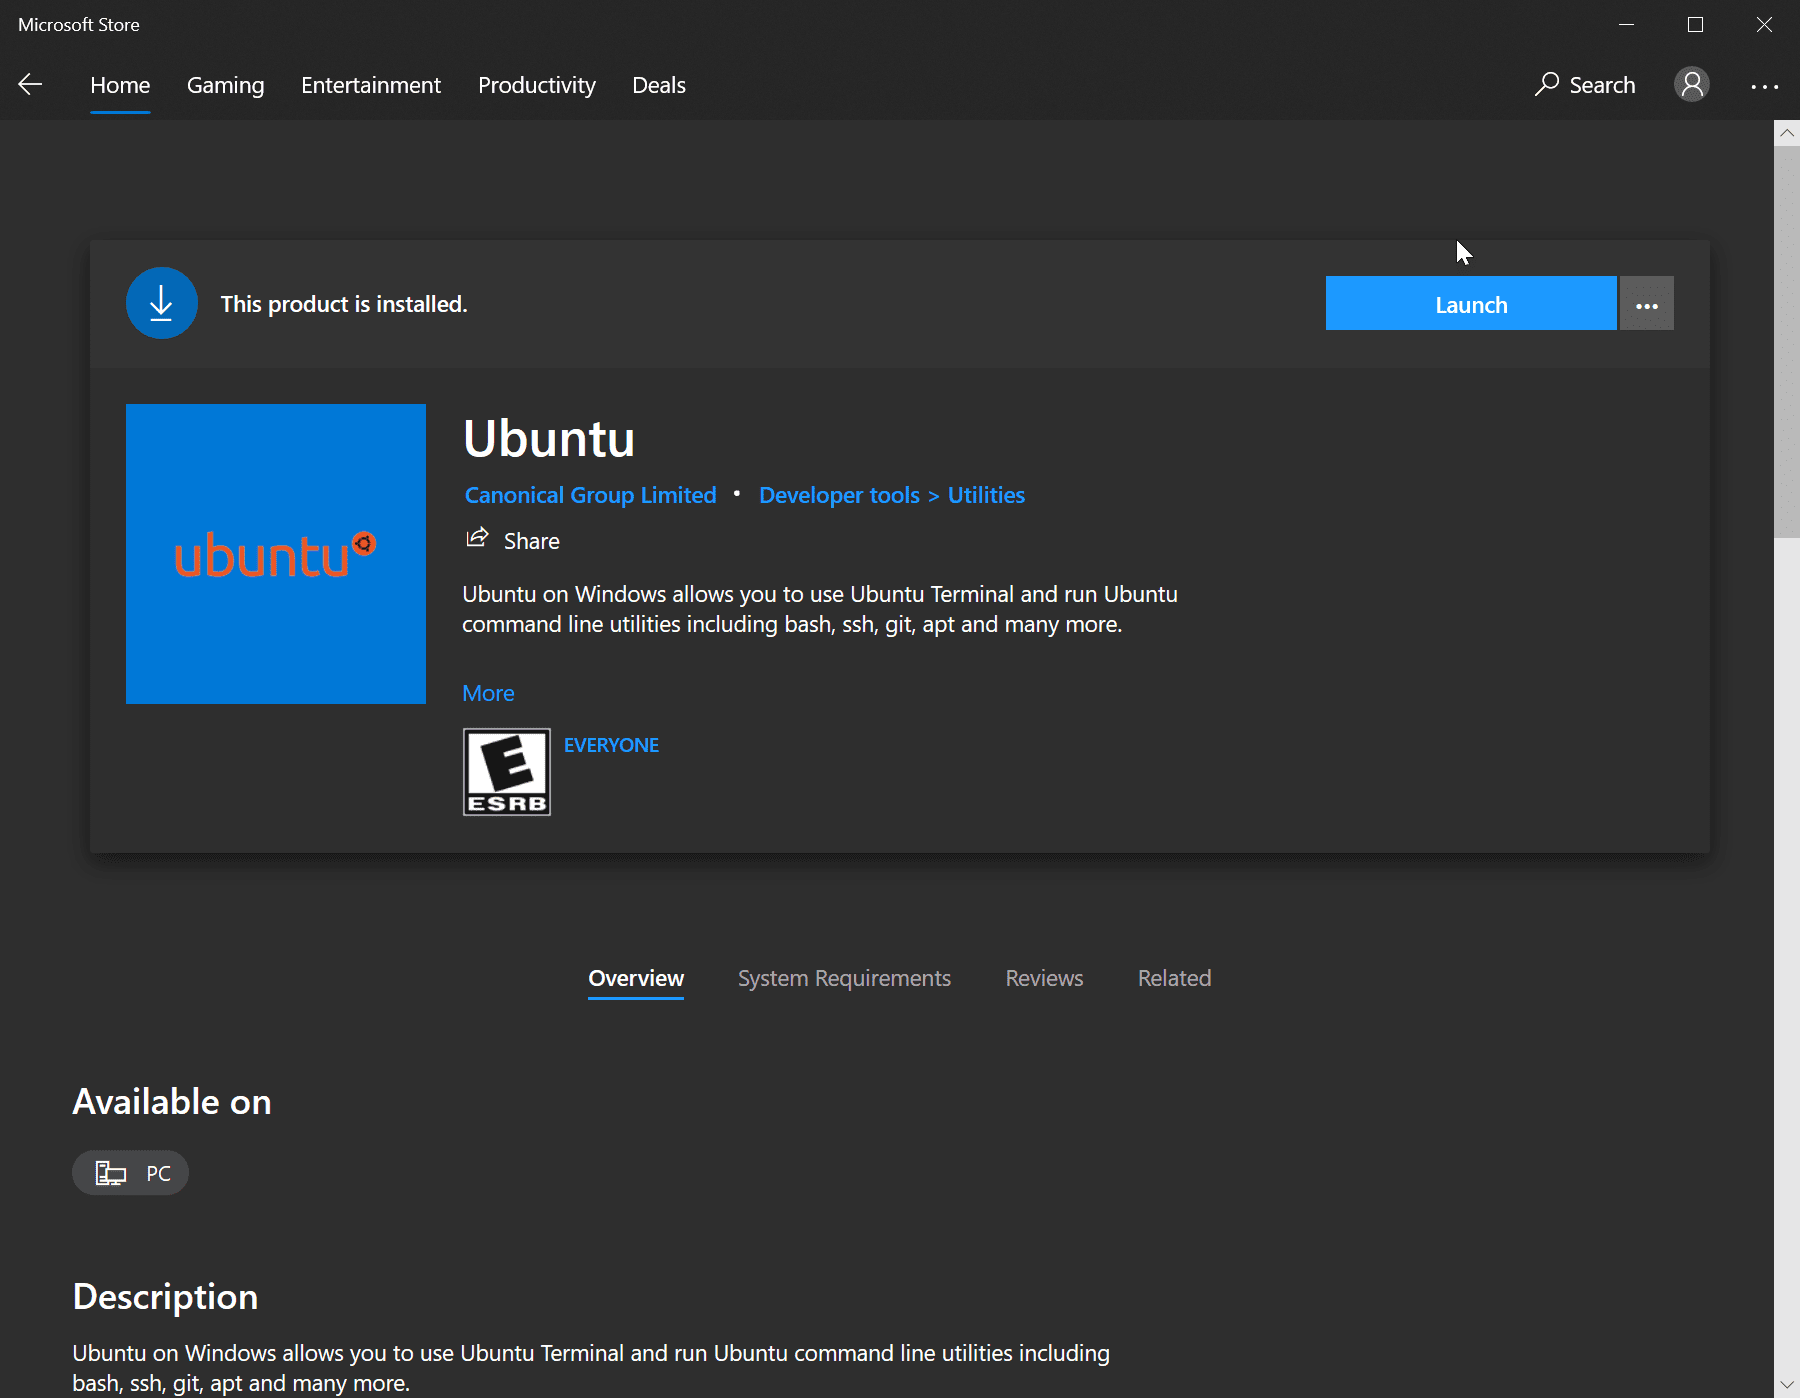
Download and install the Ubuntu App
There are several flavors of Linux found in the Microsoft Store for running in WSL 2. For this walkthrough, I will be using the Ubuntu App. You will see several options here. In the Microsoft Store, you will see specific versions of Ubuntu listed which you can download. You can also choose the Ubuntu app. This installs the latest version available in the store and then will update when a new version is available.
After installing the Ubuntu app, launch the app to perform the initial setup of your WSL 2 environment – setting user password, etc.
Install Docker on Windows Subsystem for Linux WSL 2 Windows 10
Now for the part we have been waiting for, installing Docker. Just like any Ubuntu distribution, you can install Docker from the command line.
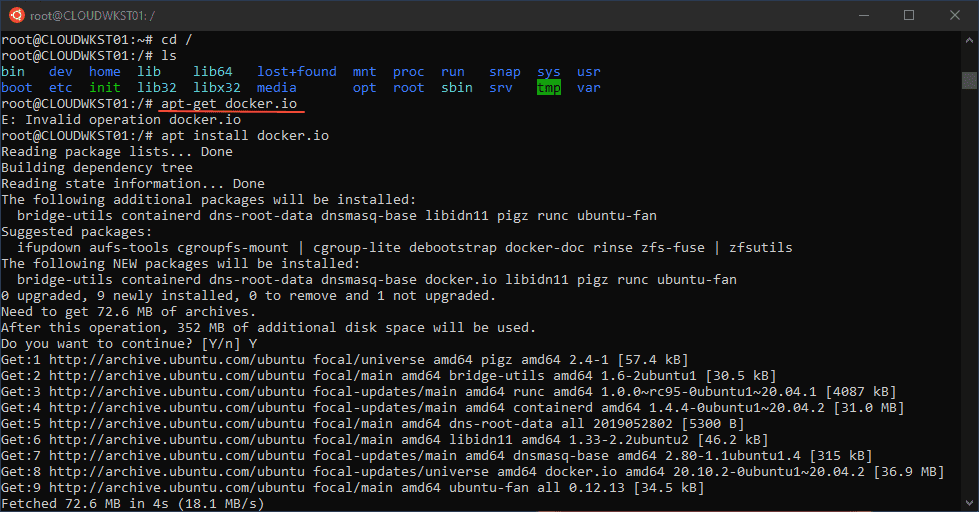
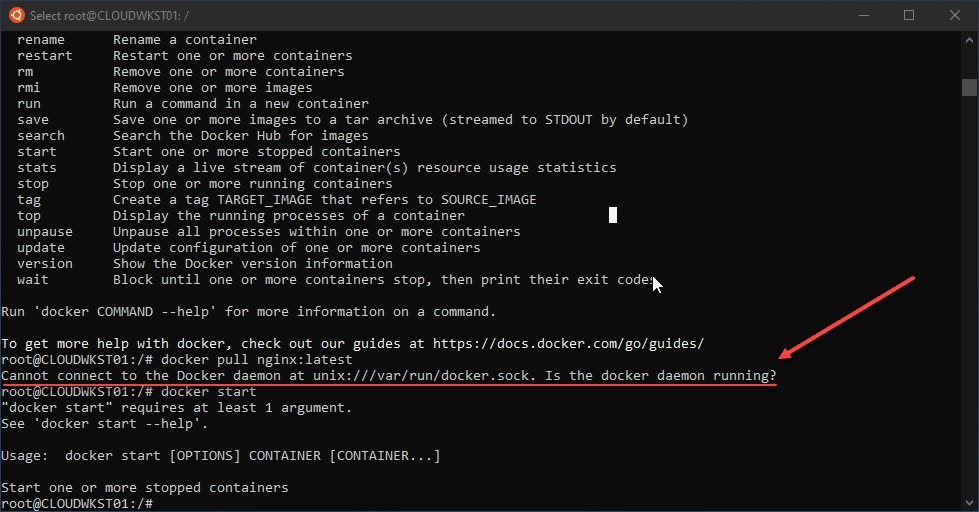
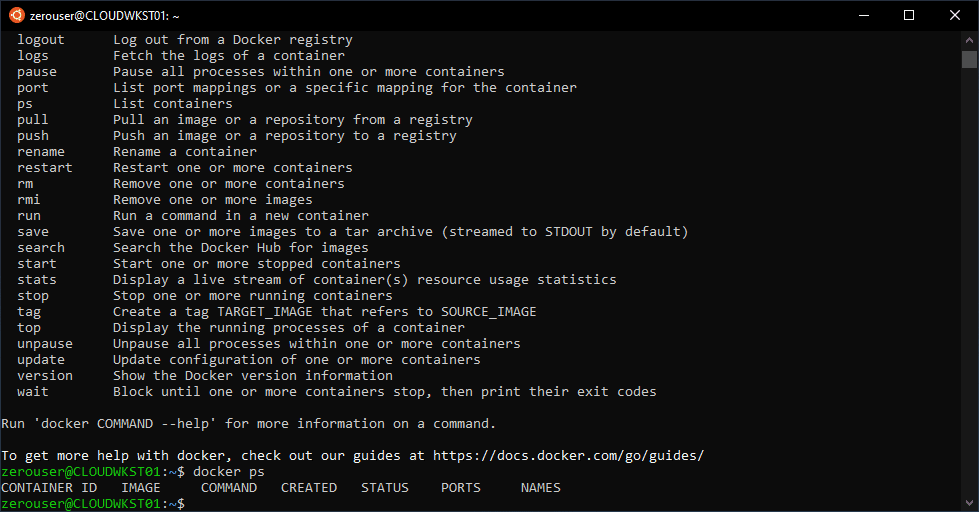
However, if you attempt to run any Docker commands outside of simply running the “docker” command to display the parameters, you will see the error below:
Cannot connect to the Docker daemon at unix:///var/run/docker.sock. Is the docker daemon running?
Installing Docker Desktop for WSL 2 integration
In order to get Docker running correctly inside your WSL 2 environment, you need to install Docker Desktop along with the required Windows components for WSL 2. Download Docker Desktop for Windows here:
- Docker Desktop for Mac and Windows | Docker
After you install Docker Desktop, you can verify the integration with your default WSL distro is enabled under the Settings > Resources > WSL Integration section.
Running Docker Containers in WSL 2
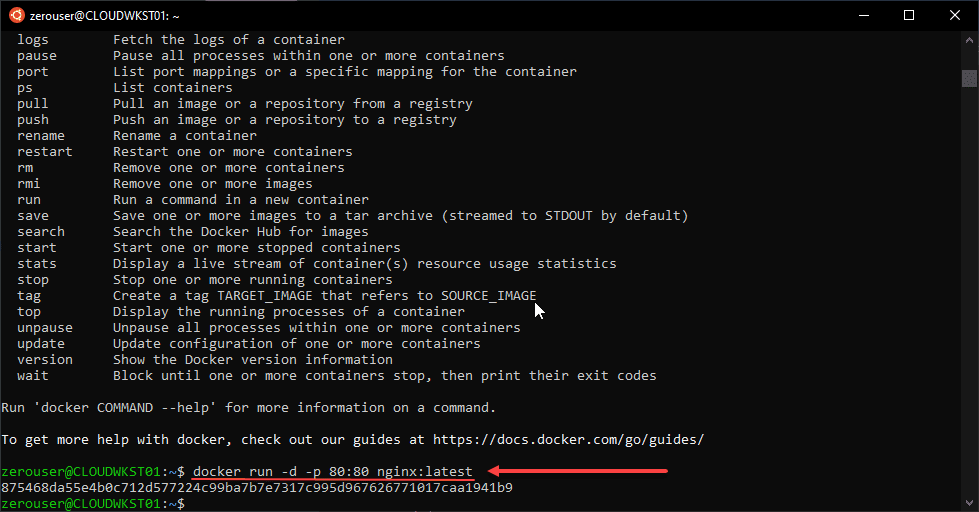
Now, when you run Docker commands from your WSL environment, they will be successful. Having the Docker Desktop integration configured allows successfully running Docker command line tools.
As you can see below, you can now spin up Docker containers from WSL 2.
It also provides the added benefit of additional tooling to work with your Docker containers via the Docker Desktop.
Wrapping Up
The process to install Docker on Windows Subsystem for Linux WSL 2 Windows 10 is a process that involves getting WSL 2 installed and installing Docker Desktop for Windows along with the WSL 2 integration. Once you have the integration installed, Docker commands will work natively inside the WSL 2 environment.