I had the exact same problem and it was driving me crazy. Other answers provide a solution, but they don’t explain why you and I are having this problem.
I will try to explain why this is happening and then provide some solutions.
You can go to the end to see the TL;DR.
1)What’s going on? Why is this error happening?
I’ll try to make a step-by-step answer so everything is explained clearly.
If you think it’s too basic at the beginning, go to the end of this «article».
I’ll first start with common things like running the python shell from the terminal or running pip. You’ll see why you can do that from the terminal and we’ll end up on why and how you can run the jupyter notebook from the terminal as well.
Ready? Let’s start!
Have you ever wondered why you can type python in the terminal (command prompt) and suddenly start the Python interpreter?
Microsoft Windows [Version 10.0.18363.1440]
(c) 2019 Microsoft Corporation. All rights reserved.

C:UsersYOUR-USERNAME>python
Python 3.9.1 (tags/v3.9.1:1e5d33e, Dec  7 2020, 17:08:21) [MSC v.1927 64 bit (AMD64)] on win32
Type "help", "copyright", "credits" or "license" for more information.
>>>
You probably already know (but maybe don’t) that this is because Python was added to the Windows PATH environment variable. You probably did it at installation time or afterwards.
But, what is this PATH environment variable?
It basically allows you to run any executables, that are located inside
the paths specified in the variable, at the command prompt without
having to give the full path to the executable.
You can check the content of that PATH variable with:
>>> import sys
>>> for path in sys.path:
        print(path)

C:UsersYOUR-USERNAMEAppDataLocalProgramsPythonPython39python39.zip
C:UsersYOUR-USERNAMEAppDataLocalProgramsPythonPython39DLLs
C:UsersYOUR-USERNAMEAppDataLocalProgramsPythonPython39lib
C:UsersYOUR-USERNAMEAppDataLocalProgramsPythonPython39
C:UsersYOUR-USERNAMEAppDataLocalProgramsPythonPython39libsite-packages
... (some other paths were taken out for clarity)
You can see this folder: C:UsersYOUR-USERNAMEAppDataLocalProgramsPythonPython39. This is the place where Python version 3.9 is installed. Let’s check its content:
<DIR>   DLLs
<DIR>   Doc
<DIR>   etc
<DIR>   include
<DIR>   Lib
<DIR>   libs
<DIR>   Scripts
<DIR>   share
<DIR>   tcl
<DIR>   Tools
        LICENSE.txt
        NEWS.txt
        python.exe
        python3.dll
        python39.dll
        pythonw.exe
        vcruntime140.dll
        vcruntime140_1.dll
Voilà! We have the python.exe file (an executable). We have a Python executable file in the PATH, that’s why you can start the Python interpreter from the terminal with just typing python. If this wasn’t the case you would have to type the full path to the executable file in the terminal:
C:UsersYOUR-USERNAME> C:UsersYOUR-USERNAMEAppDataLocalProgramsPythonPython39python)
Instead of just:
C:UsersYOUR-USERNAME> python
And what about when you use pip?
It’s the same principle. You can run pip from the terminal because there is a pip executable file in the PATH variable.
If you go to C:UsersYOUR-USERNAMEAppDataLocalProgramsPythonPython39Scripts (which is in the PATH showed above) you’ll see many executables files. One of them is pip. Actually I have three versions: pip, pip3.9 and pip3.
The Scripts folder allows exectuable files to be run from the terminal. Like pip or other libraries that you intend to run directly from the terminal. The Scripts folder:
…is not intended for you, it’s for scripts that are installed as
components of modules that you install. For example, pip is a module,
but it also has a wrapper script by the same name, pip, which will be
installed in that directory.If you put something there and it is properly in your PATH, then it
should be executable
That wrapper script would be the pip executable file. When this executable file is run, it locates the pip folder in the Python installation folder and runs pip.
But you could also run pip directly from the installation folder (C:UsersYOUR-USERNAMEAppDataLocalProgramsPythonPython39Libsite-packages), without needing the executable pip file.
But, how can you do it?
I’m glad you ask. There is a Python way to run modules as the main module (without the need to import it).
python -m pip
When you run a module directly its name becomes __main__. What -m does is:
Search
sys.pathfor the named module and execute its contents as the__main__module.
What is __main__?
'__main__'is the name of the scope in which top-level code executes.A module’s
__name__is set equal to'__main__'when read from standard
input, a script, or from an interactive prompt.
…
I guess that the pip executable does something similar, or at least, has the same effect: to start pip.
2)What does this have to do with the Jupyter Notebook?!
Think of the Jupyter Notebook as the same as pip. If you want to run jupyter in the terminal, you need an executable that it’s on the PATH.
We have already seen that the executables of modules like pip or jupyter are located here C:UsersYOUR-USERNAMEAppDataLocalProgramsPythonPython39Scripts.
If I check the content of the folder I see this:
easy_install-3.9.exe
easy_install.exe
f2py.exe
jsonschema.exe
jupyter-bundlerextension.exe
jupyter-console.exe
jupyter-nbconvert.exe
jupyter-nbextension.exe
jupyter-notebook.exe
jupyter-qtconsole.exe
jupyter-serverextension.exe
jupyter-trust.exe
pip.exe
pip3.9.exe
pip3.exe
I see the already mentioned pip, pip3.9 and pip3. But I don’t see jupyter (the word «jupyter» alone).
If I type jupyter in the terminal I get the error that started all:
'jupyter' is not recognized as an internal or external command, operable program or batch file.
Finally we’ve reached an answer to your question!!!
‘jupyter’ is not recognized as a command because there is no executable file in the Scripts folder called jupyter.
So, let’s try a different executable. What about jupyter-notebook?
BINGO! The notebook is running!
Serving notebooks from local directory:
C:UsersYOUR-USERNAMEAppDataLocalProgramsPythonPython39Scripts
Jupyter Notebook 6.3.0 is running at:
http://localhost:8888/?token=... (edited)
or http://127.0.0.1:8888/?token=... (edited)
Use Control-C to stop this server and shut down all kernels (twice to skip confirmation).
I don’t know why I don’t have a jupyter executable called ‘jupyter’. The official documentation says to use jupyter notebook on the terminal, but it seems that in some cases it doesn’t work. And I think it has to do with what I mentioned above: there is no jupyter exectuable in the Scripts folder.
If you remember, I told you that you can run pip as the main module using python -m pip.
It happens that you can do the same with jupyter.We just need to know how to call it. As in with pip, we have to check the folder where 3rd party libraries are installed: C:UsersYOUR-USERNAMEAppDataLocalProgramsPythonPython39Libsite-packages.
You’ll see jupyter_console, but this just creates an interactive notebook in the terminal, not exactly what you were looking for. You’re also going to find folders ending with .dist.info, like jupyter_console-6.4.0.dist-info. This is just metadata of the Wheel Binary Package builder. You’ll also see a folder like jupyterlab_pygments, but that’s for JupyterLab. We want to use the classic Jupyter notebook.
What we want is to run notebook. How do we know this?
You’ll see in the folder site-packages the folder (package) notebook. Inside there is a file called __main__.py:
#__main__.py
if __name__ == '__main__':
    from notebook import notebookapp as app
    app.launch_new_instance()
It’s calling notebookapp.py which is a «A tornado based Jupyter notebook server.» Yes, this is what we need.
We can see that launch_new_instance in the notebookapp calls launch_instance(), which «launches an instance of a Jupyter Application«.
Perfect! We are in the correct folder. To run the jupyter notebook from the Python interactive shell we have to run the notebook package with:
python -m notebook
3)*** SUMMARY: SOLUTION ***
tl;dr:
I have explained and showed why this error is happening.
Now let’s summarize the solutions:
-
To know the name of the
jupyterexecutable (in theScriptsfolder), so you can run directly from the terminal (Command Prompt) as:jupyter notebook
or as:
jupyter-notebook
Or whatever name you have.
-
Run the notebook as the main module from Python:
python -m notebook
I hope this helps you as much as it helped me. I’m open to your comments and suggestions.
I cannot get jupyter running from my Command line using:
jupyter notebook
jupyter is not recognised as an internal or external command, operable
program or batch file’
But I can get it running from pycharm (slick but with issues). When I take the kernel’s IP and Port from pycharm and paste it into my browser I can get it running from there.
I cannot use anaconda because of Arcpy, and I have dug around the jupyter files for some hints.
I’m assuming I need to add something to my path?
![]()
Vini.g.fer
11.4k16 gold badges58 silver badges88 bronze badges
asked Feb 1, 2016 at 15:28
![]()
3
Open cmd and type:
where jupyter
The output should be a link to Jupyter.
If where jupyter doesn’t give a link that means the PATH doesn’t contain its location.
Add the link of Jupyter to PATH & it would work.
Also if you have ipython & have upgraded, try ipython notebook on cmd.
Refer: Running the Jupyter Notebook
answered May 7, 2016 at 10:23
![]()
Ani MenonAni Menon
26.5k16 gold badges101 silver badges122 bronze badges
Try to open it using the Anaconda Prompt. Just type jupyter notebook and press Enter.
Anaconda Prompt has existed for a long time and is the correct way of using Anaconda. May be you have a broken installation somehow.
Try this, if the above doesn’t work-
In the Command Prompt type,
pip3 install jupyterif you’re using Python3Else, if you are using Python2.7 then type
pip install jupyter.
…Some installation should happen…
Now retry typing
jupyter notebookin the CMD, it should work now.
![]()
answered Jan 26, 2018 at 20:49
![]()
1
This is an old question, but try using
python -m notebook
This was the only way I was able to get jupyter to start after installing it on the windows 10 command line using pip. I didn’t try touching the path.
answered Apr 4, 2020 at 3:44
![]()
bigboibigboi
631 silver badge5 bronze badges
For future reference: the first hurdle of starting with Python is to install it. I downloaded the Anaconda 4.4 for Windows, Python 3.6 64-bit installer.
After sorting the first hurdle of updating the «path» Environmental Variable, and running (at the Python prompt) «import pip», all the instructions I found to install the IPython Notebook generated errors. Submitting the commands «ipython notebook» or «jupyther notebook» from the Windows Command Prompt or the Python prompt generated error messages.
Then I found that the Anaconda installation consists of a host of applications, on of them being the «Jupyter Notebook» application accessible from the Start menu. This application launch (first a shell, then) a browser page.
The application points to a shortcut in , a directory set during the Anaconda installation. The shortcut itself refers to a few locations.
Ready for next hurdle.
answered Jun 16, 2017 at 21:29
![]()
If you use Python 3, try running the command from your virtual environment and or Anaconda command instead of your computer’s OS CMD.
![]()
double-beep
4,84916 gold badges32 silver badges41 bronze badges
answered Jan 26, 2020 at 10:15
![]()
PaschalPaschal
6871 gold badge9 silver badges17 bronze badges
To add Jupyter as the windows CLI Command.
You need to add the «C:UsersuserAppDataRoamingPythonPython38Scripts» into your environment path. This was to solve for me.
answered Jan 3, 2021 at 17:45
![]()
Go to Anaconda Command Prompt and type jupyter notebook and wait for 30 seconds. You can see that your local host site will automatically open.
answered Apr 5, 2018 at 4:52
![]()
Go to Scripts in your python directory (C:Python27Scripts) and check whether there is jupyter application. If so, you have a successfully installed version of jupyter.
Try adding the path to python scripts. It should work.
eg: C:Python27Scripts to
Path environment variables
answered Sep 17, 2019 at 16:27
![]()
How to: Как установить Jupyter Notebook.
Introduction
Jupyter Notebook — это веб-приложение с открытым исходным кодом, позволяющее создавать документы, содержащие интерактивный код, уравнения, визуализации, текст и обмениваться ими. Используется для очистки и преобразования данных, численного моделирования, статистического моделирования, визуализации данных, машинного обучения и многого другого.

Requirements
Операционная система: Windows, Mac, Linux.
Python 3.3 или выше.
Installation
Для начала нам нужен Python.
Идем на сайт https://www.python.org/downloads/ и скачиваем последнюю версию для своей операционной системы.

Далее на примере Windows 10 pro запускаем установочный файл и перезапускаем компьютер.

Теперь нам надо убедиться, что у вас установлен python версии 3.3 и выше. На Mac и во многих дистрибутивах Linux python уже установлен по умолчанию. В Windows же его нужно устанавливать дополнительно.
Для этого открываем командную строку или cmd.

Вводим тескт python и нажимаем Enter.

Теперь, надо запустить Jupyter Notebook.
Для этого мы переоткрываем командную строку, и вводим python -m pip install jupyter и нажимаем Enter.
После этого начнется загрузка jupyter notebook.

Начало работы
Для начала работы, опять перезаходим в командную строку, печатаем jupyter-notebook и нажимаем Enter.

Это запустит сервер, а браузер откроет новую вкладку со следующим URL: https://localhost:8888/tree

В этой вкладке мы и будем работать. Вкладка cmd должна быть открыта на протяжении всей вашей работы с Jupyter Notebook.
This tutorial guides you on how to run Jupyter Notebook on Windows from command line. I have installed Python 3.x on Windows 10 and tried to run jupyter notebook from Windows command line. But it failed with the following error : No module named notebook.
> python -m notebook
C:Users990AppDataLocalProgramsPythonPython38-32python.exe: No module named notebook
From the above error it is evident that jupyter is not installed on your windows machine.
Therefore, first you need to install Jupyter on Windows 10 using the following pip install command.
> pip install jupyter
Collecting jupyter
  Downloading jupyter-1.0.0-py2.py3-none-any.whl (2.7 kB)
Collecting notebook
  Downloading notebook-6.3.0-py3-none-any.whl (9.5 MB)
     |████████████████████████████████| 9.5 MB 547 kB/s
Collecting jupyter-console
  Downloading jupyter_console-6.4.0-py3-none-any.whl (22 kB)
Collecting qtconsole
  Downloading qtconsole-5.0.3-py3-none-any.whl (119 kB)
     |████████████████████████████████| 119 kB 467 kB/s
Collecting ipykernel
  Downloading ipykernel-5.5.3-py3-none-any.whl (120 kB)
     |████████████████████████████████| 120 kB 1.7 MB/s
Collecting ipywidgets
  Downloading ipywidgets-7.6.3-py2.py3-none-any.whl (121 kB)
     |████████████████████████████████| 121 kB 1.3 MB/s
Collecting nbconvert
  Downloading nbconvert-6.0.7-py3-none-any.whl (552 kB)
     |████████████████████████████████| 552 kB 159 kB/s
Collecting prometheus-client
  Downloading prometheus_client-0.10.1-py2.py3-none-any.whl (55 kB)
-----------
----------
--------
Using legacy setup.py install for pandocfilters, since package 'wheel' is not installed.
Using legacy setup.py install for pywinpty, since package 'wheel' is not installed.
Using legacy setup.py install for pyrsistent, since package 'wheel' is not installed.
Installing collected packages: prometheus-client, ipython-genutils, traitlets, pywin32, jupyter-core, pywinpty, tornado, terminado, Send2Trash, mistune, pygments, jupyterlab-pygments, entrypoints, MarkupSafe, jinja2, testpath, pyparsing, packaging, six, webencodings, bleach, defusedxml, async-generator, pyzmq, python-dateutil, jupyter-client, attrs, pyrsistent, jsonschema, nbformat, nest-asyncio, nbclient, pandocfilters, nbconvert, pycparser, cffi, argon2-cffi, parso, jedi, wcwidth, prompt-toolkit, pickleshare, colorama, decorator, backcall, ipython, ipykernel, notebook, jupyter-console, qtpy, qtconsole, widgetsnbextension, jupyterlab-widgets, ipywidgets, jupyter
    Running setup.py install for pywinpty ... done
    Running setup.py install for pyrsistent ... done
    Running setup.py install for pandocfilters ... done
Successfully installed MarkupSafe-1.1.1 Send2Trash-1.5.0 argon2-cffi-20.1.0 async-generator-1.10 attrs-20.3.0 backcall-0.2.0 bleach-3.3.0 cffi-1.14.5 colorama-0.4.4 decorator-5.0.7 defusedxml-0.7.1 entrypoints-0.3 ipykernel-5.5.3 ipython-7.22.0 ipython-genutils-0.2.0 ipywidgets-7.6.3 jedi-0.18.0 jinja2-2.11.3 jsonschema-3.2.0 jupyter-1.0.0 jupyter-client-6.1.12 jupyter-console-6.4.0 jupyter-core-4.7.1 jupyterlab-pygments-0.1.2 jupyterlab-widgets-1.0.0 mistune-0.8.4 nbclient-0.5.3 nbconvert-6.0.7 nbformat-5.1.3 nest-asyncio-1.5.1 notebook-6.3.0 packaging-20.9 pandocfilters-1.4.3 parso-0.8.2 pickleshare-0.7.5 prometheus-client-0.10.1 prompt-toolkit-3.0.18 pycparser-2.20 pygments-2.8.1 pyparsing-2.4.7 pyrsistent-0.17.3 python-dateutil-2.8.1 pywin32-300 pywinpty-0.5.7 pyzmq-22.0.3 qtconsole-5.0.3 qtpy-1.9.0 six-1.15.0 terminado-0.9.4 testpath-0.4.4 tornado-6.1 traitlets-5.0.5 wcwidth-0.2.5 webencodings-0.5.1 widgetsnbextension-3.5.1
WARNING: You are using pip version 20.1.1; however, version 21.0.1 is available.
You should consider upgrading via the 'c:users990appdatalocalprogramspythonpython38-32python.exe -m pip install --upgrade pip' command.
Congratulations! you had installed Jupyter Notebook on Windows 10. To run the Jupyter Notebook, run the following command at the Command Prompt.
> python -m notebook

[I 12:10:56.381 NotebookApp] Writing notebook server cookie secret to C:Users990AppDataRoamingjupyterruntimenotebook_cookie_secret
[W 12:10:57.016 NotebookApp] Terminals not available (error was No module named 'winpty.cywinpty')
[I 12:10:57.016 NotebookApp] Serving notebooks from local directory: C:Users990DocumentssneppetsWorkspacesPythonExamples
[I 12:10:57.017 NotebookApp] Jupyter Notebook 6.3.0 is running at:
[I 12:10:57.017 NotebookApp] http://localhost:8888/?token=2ad96578b2fddf1825107039bae731e076d7d8620967bfc3
[I 12:10:57.017 NotebookApp]  or http://127.0.0.1:8888/?token=2ad96578b2fddf1825107039bae731e076d7d8620967bfc3
[I 12:10:57.017 NotebookApp] Use Control-C to stop this server and shut down all kernels (twice to skip confirmation).
[C 12:10:57.070 NotebookApp]

    To access the notebook, open this file in a browser:
        file:///C:/Users/91990/AppData/Roaming/jupyter/runtime/nbserver-13252-open.html
    Or copy and paste one of these URLs:
        http://localhost:8888/?token=2ad96578b2fddf1825107039bae731e076d7d8620967bfc3
     or http://127.0.0.1:8888/?token=2ad96578b2fddf1825107039bae731e076d7d8620967bfc3
Notebook server has been started from the command line. You should see notebook open in a browser as shown below. Note, it will open your default web browser to that URL as shown below.
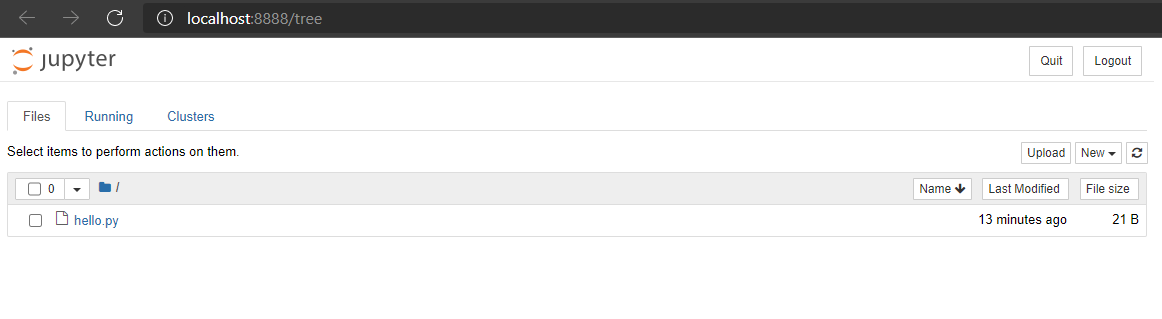 After notebook opens in the default browser, you will see the Notebook Dashboard which will show list of notebooks, files and other subdirectories in the directory where the notebook server has started. Please note, I have only hello.py in the Jypyter folder path from where I started notebook server. Therefore you only see hello.py file.
That’s it. You had learnt how to install jupyter notebook on Windows 10. Also, learnt how to run jupyter notebook on Windows from command line.
Hope it helped 🙂
You’ll also like:
- Run a Jupyter Notebook .ipynb file from terminal or cmd prompt
- Amazon Linux AMI : apt-get command not found
- Linux: sudo: apt-get: command not found
- How to Start Stop Restart MariaDB on Linux OS ?
- Putty Fatal Error No supported authentication methods available
- How to find which users belongs to a specific group in linux
- Give write permissions for specific user or group for specific folder in linux
- How to unzip a zip file from Terminal (Google Cloud Shell)
- Build a Docker Image with a Dockerfile and Cloud Build in GCP?
- How to create GCP project on Google Cloud Platform
- MariaDB – How to set max_connections permanently ?
- How to create GCP project on Google Cloud Platform
- Is it possible to change Google Cloud Platform Project ID ?
- Create non-root SSH user account and provide access to specific folders
- MySQL : How to grant all privileges to the user on database ?
- How to install OpenJDK 11 in Ubuntu Machine ?
References
- jupyter
- Github
3.1. Launching Jupyter Notebook App
The Jupyter Notebook App can be launched by clicking on the Jupyter Notebook
icon installed by Anaconda in the start menu (Windows) or by typing in
a terminal (cmd on Windows):
This will launch a new browser window (or a new tab) showing the
Notebook Dashboard, a sort of control panel that allows (among other things)
to select which notebook to open.
When started, the Jupyter Notebook App can access only files within its start-up folder
(including any sub-folder). No configuration is necessary if you place your notebooks
in your home folder or subfolders.
Otherwise, you need to choose a Jupyter Notebook App start-up folder which will contain
all the notebooks.
See below for platform-specific instructions on how to start
Jupyter Notebook App in a specific folder.
3.1.1. Change Jupyter Notebook startup folder (Windows)
- Copy the Jupyter Notebook launcher from the menu to the desktop.
- Right click on the new launcher and change the Target field, change %USERPROFILE% to
the full path of the folder which will contain all the notebooks. - Double-click on the Jupyter Notebook desktop launcher (icon shows [IPy]) to start the
Jupyter Notebook App. The notebook interface will appear in a new browser window or tab.
A secondary terminal window (used only for error logging and
for shut down) will be also opened.
3.1.2. Change Jupyter Notebook startup folder (Mac OS)
To launch Jupyter Notebook App:
- Click on spotlight, type
terminalto open a terminal window. - Enter the startup folder by typing
cd /some_folder_name. - Type
jupyter notebookto launch the Jupyter Notebook App
The notebook interface will appear in a new browser window or tab.
3.2. Shut down the Jupyter Notebook App
Closing the browser (or the tab) will not close the
Jupyter Notebook App. To completely shut it down you need to
close the associated terminal.
In more detail,
the Jupyter Notebook App is a server that appears in your browser
at a default address (http://localhost:8888).
Closing the browser will not shut down the server.
You can reopen the previous address
and the Jupyter Notebook App will be redisplayed.
You can run many copies of the Jupyter Notebook App and they will show
up at a similar address (only the number after “:”, which is the port,
will increment for each new copy).
Since with a single Jupyter Notebook App you can already open many notebooks,
we do not recommend running multiple copies of Jupyter Notebook App.
3.3. Close a notebook: kernel shut down
When a notebook is opened, its “computational engine” (called the kernel)
is automatically started.
Closing the notebook browser tab, will not shut down the kernel,
instead the kernel will keep running until is explicitly shut down.
To shut down a kernel, go to the associated notebook
and click on menu File -> Close and Halt. Alternatively, the Notebook Dashboard
has a tab named Running that shows all the running notebooks (i.e. kernels)
and allows shutting them down (by clicking on a Shutdown button).
3.4. Executing a notebook
Download the notebook you want to execute and put it in your
notebook folder (or a sub-folder of it).
Then follow these steps:
- Launch the Jupyter Notebook App (see previous section).
- In the Notebook Dashboard navigate to find the notebook:
clicking on its name will open it in a new browser tab. - Click on the menu Help -> User Interface Tour for an overview
of the Jupyter Notebook App user interface. - You can run the notebook document step-by-step (one cell a time) by pressing
shift + enter. - You can run the whole notebook in a single step by clicking on the menu
Cell -> Run All. - To restart the kernel (i.e. the computational engine), click on the menu
Kernel -> Restart. This can be useful to start over a computation from
scratch (e.g. variables are deleted, open files are closed, etc…).
More information on editing a notebook:
- Notebook Basics
(or alternate link)
Note
Save notebooks: modifications to the notebooks are automatically saved every
few minutes. To avoid modifying the original notebook, make a
copy of the notebook document (menu File -> Make a copy …) and
save the modifications on the copy.
Warning
Pay attention to not open the same notebook document
on many tabs: edits on different tabs can overwrite each other!
To be safe, make sure you open each notebook document in only one tab.
If you accidentally open a notebook twice in two different tabs, just
close one of the tabs.
More info on the Jupyter Notebook App environment see References.